


Spring的扫描逻辑
Spring的扫描逻辑指的是它能够自动扫描指定的包,找到其中带有特定注解的类,并将其实例化为Spring的Bean对象。这种扫描机制使得开发人员无需手动配置每个Bean,而可以通过注解的方式进行自动化配置。
前篇文章点这里:
详解-如何手写Spring框架(1)-基本准备
扫描注解的方式
在Spring中,用于指定被扫描的包和组件的注解一般是@ComponentScan。该注解可以用在配置类(配置文件)上,指定需要扫描的包的路径。
ConponentScan注解创建示例:
@Retention(RetentionPolicy.RUNTIME)
@Target(ElementType.TYPE)
public @interface Conponent {
    String value()default "";//定义属性,让用户new属性来指定扫描路径
}
扫描包示例:
@ConponentScan("com.lpl.service")
public class AppConfig {//配置文件类
}
上述示例中,指定了com.lpl.service包中的类将会被扫描。
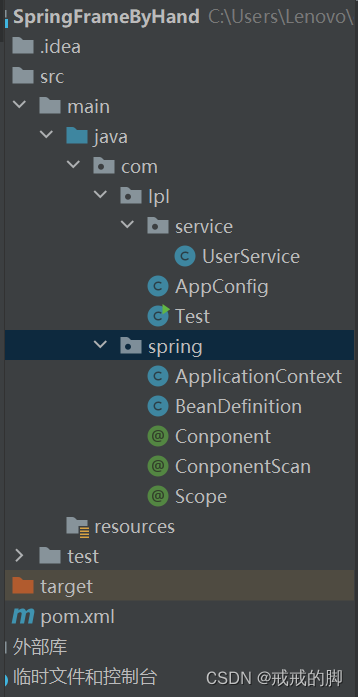
本文的文件目录
扫描过程
扫描前的准备
创建一个createBean方法以创建Bean对象
    public Object createBean(BeanDefinition beanDefinition) throws NoSuchMethodException, InvocationTargetException, InstantiationException, IllegalAccessException {
        Class clazz=beanDefinition.getClazz();
        Object instance=clazz.getDeclaredConstructor().newInstance();
        return instance;
    }
创建一个Scope注解以传入Bean类型(单例、原型等)
@Retention(RetentionPolicy.RUNTIME)
@Target(ElementType.TYPE)
public @interface Scope {
    String value();
}
---------------开始扫描流程---------------
- Spring容器在初始化时,读取配置类(如上述的AppConfig)并进入扫描方法。
- 在Test中读入AppConfig配置文件
public class Test {//测试书写的spring源码是否正确
    public static void main(String[] args) throws ClassNotFoundException, InvocationTargetException, NoSuchMethodException, InstantiationException, IllegalAccessException {
        ApplicationContext applicationContext =new ApplicationContext(AppConfig.class);//传入配置文件
    }
}
- 读取配置文件并调用scan方法对该文件中的注解进行扫描
    public ApplicationContext(Class configClass) throws ClassNotFoundException, InvocationTargetException, NoSuchMethodException, InstantiationException, IllegalAccessException {//容器类构造函数,创建对应配置文件的Spring对象
        //拿到配置类
        this.configClass=configClass;
        scan(configClass);//扫描bean
        }
    }
- 创建@Component注解对象以获取注解中的路径
private void scan(Class configClass) {
        ComponentScan componentScan=(ComponentScan) configClass.getDeclaredAnnotation(ComponentScan.class);
        //获取注解对象之后获取注解中的路径
        String path=componentScan.value();
        path=path.replace(".","/");//拿到扫描路径
        System.out.println(path);//打印扫描路径com.lpl.service
        ....
    }
- 根据@ComponentScan注解中指定的包路径,使用类加载器加载对应的包。
以下代码在scan方法中
//根据包名得到包下的所有的类
        //类加载器:每个类加载器都有对应的路径
        // Bootstrap--->jre/lib
        // Ext--—------>jre/ext/lib
        // App--------->classpath---->//应用对应的路径
        ClassLoader classLoader=ApplicationContext.class.getClassLoader();//获取应用类加载器的classload对象
- 遍历包中的每个类文件,判断是否带有@Component及其他扫描注解(如@Service、@Repository等)。
PS:loadClass(className)中的className应该为类的全限定名,因此还需要将通过file.getAbsolutePath()得到的类绝对路径经过处理变成全限定名
以下代码在scan方法中
URL resource=classLoader.getResource("com/lpl/service");//通过应用类加载器对象获取指定资源的目录或者文件
        File file=new File(resource.getFile());
        if(file.isDirectory()){
            File[] files=file.listFiles();//扫描目录下所有的文件存在files
            for (File f : files) {
                System.out.println(f);//打印编译后的class文件在磁盘中的路径
                System.out.println(f.getName());//只打印class文件名
                System.out.println(f.getAbsolutePath());//打印编译后的class文件在磁盘中的路径
                //将获取的路径转换成类的全限定名:
                //1.获取绝对路径
                String fileName=f.getAbsolutePath();
                //只有当文件末尾为".class"时才进行处理
                if(fileName.endsWith(".class")){
                //2.截取com和.class之间的字符串
                String className = fileName.substring(fileName.indexOf("com"),fileName.indexOf(".class"));
                //3.将"\"转换为"."
                className=className.replace("\\",".");
                //抛出异常
                try{
                System.out.println(className);

                //此时可以通过类加载器对象加载类,得到类对象
                //有了类对象可以判断当前从包下找到的类上面是不是有component注解
                //如果存在component注解,进行进一步处理
                Class<?> clazz=classLoader.loadClass(className);
                //loadClass()中的字符串应该是类的全限定名,
                //需要将System.out.println(f)中打印出来的路径进行处理
				}catch(ClassNotFoundException e){
                    e.printStackTrace();
                }
            }}
        }
- 如果找到带有扫描注解的类,Spring会创建相应的BeanDefinition对象,并将其存储在Bean定义的Map中。
- 创建BeanDfinition类
public class BeanDefinition {
    private Class clazz;
    private String scope;
    public Class getClazz() {
        return clazz;
    }
    public void setClazz(Class clazz) {
        this.clazz = clazz;
    }
    public String getScope() {
        return scope;
    }
    public void setScope(String scope) {
        this.scope = scope;
    }
}
以下代码在try代码块中
               if(clazz.isAnnotationPresent(Component.class)){
                    //有component注解,说明当前类是一个bean,可以进行一系列操作
                    //解析类生成BeanDefinition对象,判断当前bean的类型(单例、原型等)
                    Component componentAnnotation=clazz.getDeclaredAnnotation(Component.class);
                    String beanName=componentAnnotation.value();
                    //解析出bean的定义
                    BeanDefinition beanDefinition=new BeanDefinition();
                    //设置类定义所在类
                    beanDefinition.setClazz(clazz);
                    if(clazz.isAnnotationPresent(Scope.class)){
                        //找到Scope,将bean定义为Scope中的信息
                        Scope scopeAnnotation=clazz.getDeclaredAnnotation(Scope.class);
                        beanDefinition.setScope(scopeAnnotation.value());

                    }else{
                        //没有找到Scope,默认置为单例对象
                        beanDefinition.setScope("singleton");
                    }
                //扫描目的:得到beanDefinition对象,放到beanDefinitionMap里去
                beanDefinitionMap.put(beanName,beanDefinition);
                }
得到Bean对象
- 当需要获取某个Bean时,Spring会先检查Bean定义的Map中是否存在该Bean的定义信息。
public Object getBean(String beanName) throws InvocationTargetException, NoSuchMethodException, InstantiationException, IllegalAccessException {//getBean方法,传入BeanName
        //根据传入的字符串找到目标类
        //判断beanDefinitionMap中是不是有传进来的bean类,如果没有就是不存在这个bean
        if(beanDefinitionMap.containsKey(beanName)){
            BeanDefinition beanDefinition=beanDefinitionMap.get(beanName);
            .......
            }else{
            throw new NullPointerException();
       	 }
    }
- 如果存在,根据Bean定义信息判断其作用域(单例、原型等)。
-
对于单例作用域的Bean,从单例池中获取已经实例化的对象。
-
对于原型作用域的Bean,通过反射等方式创建新的对象。
以下代码位置:if(beanDefinitionMap.containsKey(beanName))
if(beanDefinition.getScope().equals("singleton")) {
                //如果是单例的,就从单例池里拿bean
                Object o = singletonObjects.get(beanName);
                return o;
            }else{
                //如果是原型的,应该每一次都要创建bean对象
                Object bean=createBean(beanDefinition);
                return bean;
            }
- 返回对应的Bean对象。
测试
此时userService上注解为原型
//没有加Scope注解,默认是单例
@Scope("prototype")//原型bean
@Component("userService")//用户定义的bean的名字,说明UserService是个bean
public class UserService {
}
public class Test {//测试书写的spring源码是否正确
    public static void main(String[] args) throws ClassNotFoundException, InvocationTargetException, NoSuchMethodException, InstantiationException, IllegalAccessException {
        ApplicationContext applicationContext =new ApplicationContext(AppConfig.class);//传入配置文件
        //map <beanName,bean> 单例池
        //Object userService=applicationContext.getBean("userService");//传入BeanName获取指定的Bean的对象
        //Object userService=applicationContext.getBean("userService");//如果是单例bean,getbean得到的是同一个,原型bean不是同一个
        System.out.println(applicationContext.getBean("userService"));
        System.out.println(applicationContext.getBean("userService"));
    }
}
打印结果:(原型bean,每次创建不一样的实例;单例的@后面的都一样)

总结
通过扫描逻辑,Spring能够根据注解自动创建和管理Bean对象。开发人员只需在需要的类上添加相应的扫描注解,而无需手动配置每个Bean。这样大大简化了配置工作,并提高了代码的可维护性和可扩展性。


 1296
1296


 被折叠的 条评论
为什么被折叠?
被折叠的 条评论
为什么被折叠?
 到【灌水乐园】发言


