


组件的概念对于前端开发人员来说还是很至关重要的。一个组件在项目里诞生开始可能就在不断的提高前端项目的开发效率。其次也降低了维护成本。对于vue3来说一个组件的封装有很多种方法去实现。
不管我们选择什么样的写法,在开始写SVG组件之前,先要知道svg的语法。
<svg width="100%" height="100%" viewbox="x, y, width, height" xmlns="http://www.w3.org/2000/svg">
    ...
</svg>
svg里面有很多种标签,可以百度直接搜索svg 菜鸟教程查看。里面很详细。这里我主要是以path路径为例。
<path d="M150 0 L75 200 L225 200 Z" fill="red" />根据svg的基本语法我可以确定组件需要接受的参数为width、height来决定显示的大小,d来显示path的内容,还有一个fill决定svg的颜色。
文件提供了tsx的几种写法。主要以手写渲染函数的方式。jsx也就是一个意思。vue文件的形式就不讲解了,比较简单,大家应该都会。
为什么选择手写渲染函数的方式。Vue 模板会被预编译成虚拟 DOM 渲染函数。Vue 也提供了 API 使我们可以不使用模板编译,直接手写渲染函数。在处理高度动态的逻辑时,渲染函数相比于模板更加灵活,因为你可以完全地使用 JavaScript 来构造你想要的 vnode。(来着vue3官方文档)
一、tsx写法 1️⃣
这里我们不使用render函数(h),而是使用createVNode。因为createVNode()函数的功能比h()函数要多且做了性能优化,渲染节点的速度也更快。下面是组件的封装以及使用。
import { createElementVNode, createVNode, openBlock } from "vue";

type Props = {
    d:String
    height: String
    width: String
    fill: String
}

const renderDom = (props: Props, content:any) => {
    return (openBlock(), createElementVNode('svg', {
                xmlns: 'http://www.w3.org/2000/svg',
                viewBox: '0 0 1024 1024',
                height: props.height || 60,
                width: props.width || 60,
            }, [createVNode('path', {
                fill: props.fill || 'currentColor',
                d: props.d
            }, null, -1)])
    )
}

export default renderDom
<template>
<div style="height: 100vh;width: 100%;display: flex;justify-content: center;align-items: center;">
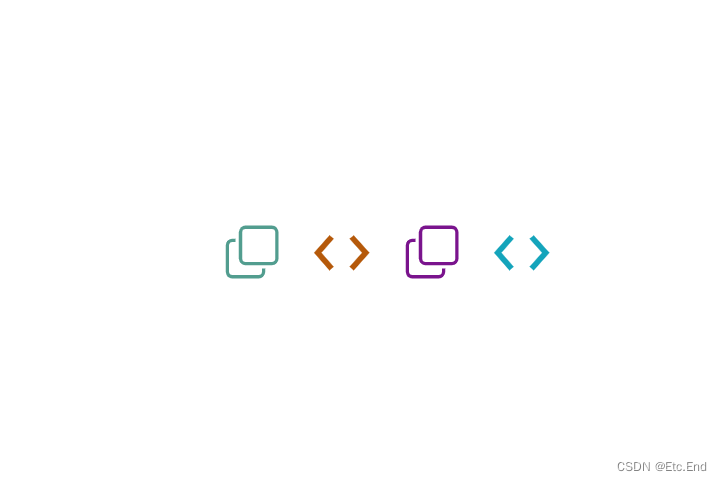
<ts-svg :d="d1" fill="#529d8f" />
<ts-svg :d="d2" fill="#b5590a" />
<ts-svg :d="d1" fill="#7a148d" />
<ts-svg :d="d2" fill="#14a4bb" />
</div>
</template>
<script lang="ts">
import tsSvg from '@/components/ts-svg'
export default defineComponent({
components: {
tsSvg
},
setup() {
const d1 = ref<string>('M851.025513 737.324862 400.356301 737.324862c-62.219566 0-112.666535-50.444902-112.666535-112.662943L287.689766 174.012196c0-62.217017 50.446969-112.662943 112.666535-112.662943l450.670235 0c62.219566 0 112.666535 50.444902 112.666535 112.662943l0 450.650747C963.692048 686.879959 913.245079 737.324862 851.025513 737.324862zM907.35878 174.012196c0-31.108508-25.223485-56.33096-56.333268-56.33096L400.356301 117.681236c-31.109783 0-56.334291 25.222451-56.334291 56.33096l0 450.650747c0 31.108508 25.223485 56.331983 56.334291 56.331983l450.670235 0c31.10876 0 56.333268-25.222451 56.333268-56.331983L907.359804 174.012196zM118.687916 399.337057 118.687916 849.988828c0 31.107485 25.223485 56.33096 56.333268 56.33096l450.669212 0c31.109783 0 56.334291-25.222451 56.334291-56.33096l0-56.331983 56.333268 0 0 56.331983c0 62.217017-50.446969 112.660896-112.667559 112.660896L175.021184 962.649723c-62.219566 0-112.667559-50.443879-112.667559-112.660896L62.353625 399.337057c0-62.217017 50.446969-112.662943 112.667559-112.662943l56.334291 0 0 56.33096-56.334291 0C143.9114 343.005075 118.687916 368.228549 118.687916 399.337057z')
const d2 = ref<string>('M300.224 224L32 525.76l268.224 301.76 71.776-63.776-211.552-237.984 211.552-237.984zM711.744 224L640 287.776l211.552 237.984L640 763.744l71.744 63.776 268.256-301.76z')
return {
d1,
d2
}
}
})
</script>
<style lang="scss">
svg {
& + & {
margin-left: 30px;
}
}
</style>
二、tsx写法 2️⃣
同意使用createVNode函数。同时结合defineComponent函数。封装后的代码如下。使用的话还是和上面一模一样的。
import { createBlock, createVNode } from "vue";

export default defineComponent({
    name: 'TsSvg',
    props: {
        d: {
            type: String,
            required: true,
        },
        height: {
            type: String,
            required: true,
        },
        width: {
            type: String,
            required: true,
        },
        fill: {
            type: String,
            required: true,
        },
    },
    setup(props) {
        return () => {
            return createBlock('svg', {
                xmlns: 'http://www.w3.org/2000/svg',
                viewBox: '0 0 1024 1024',
                height: props.height || 60,
                width: props.width || 60,
            }, [createVNode("path", {
                fill: props.fill || "currentColor",
                d: props.d
            }, null, -1)])
        }
    }
})
三、tsx写法 3️⃣
这种写法就和React很像很像了。个人认为就是api的差别。
export default defineComponent({
    name: 'TsSvg',
    props: {
        d: {
            type: String,
            required: true,
        },
        height: {
            type: String,
            required: true,
        },
        width: {
            type: String,
            required: true,
        },
        fill: {
            type: String,
            required: true,
        },
    },
    setup(props) {
        return () => (
            <>
                <svg height={props.height || 60} width={props.width || 60} xmlns='http://www.w3.org/2000/svg' viewBox='0 0 1024 1024'>
                    <path fill={props.fill || 'currentColor'} d={props.d}></path>
                </svg>
            </>
        )
    }
})
四、tsx写法 4️⃣
下面使用h函数,其实不管使用哪种方法,都是大同小异。选择自己舒服的写法就行。
export default defineComponent({
    name: 'TsSvg',
    props: {
        d: {
            type: String,
            required: true,
        },
        height: {
            type: String,
            required: true,
        },
        width: {
            type: String,
            required: true,
        },
        fill: {
            type: String,
            required: true,
        },
    },
    setup(props) {
        return () => (
            h('svg', {
                xmlns: 'http://www.w3.org/2000/svg',
                viewBox: '0 0 1024 1024',
                height: props.height || 60,
                width: props.width || 60
            }, [h('path', {fill: props.fill || "currentColor",
            d: props.d}, null)]
            )
        )
    }
})
我是Etc.End。如果文章对你有所帮助,能否帮我点个免费的赞和收藏😍。

👇 👇 👇 👇 👇 👇 👇 👇 👇 👇 👇 👇


 5941
5941


 被折叠的 条评论
为什么被折叠?
被折叠的 条评论
为什么被折叠?
 到【灌水乐园】发言


