


整体思路:
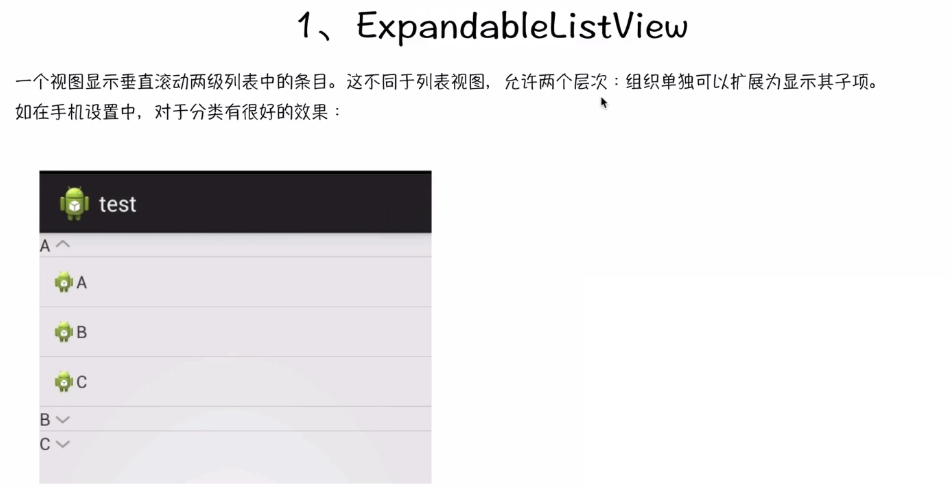
1.要给ExpandableListView 设置适配器,那么必须先设置数据源
2.数据源,就是此处的适配品类ExpandaBleAdapter,此方法继承了BaseExpandableListAdapter ,这是ExpandableListView的子类,需要重写里面的多个方法,
数据源中,用到了自定义的View布局此时根据自己的需求,来设置线和子项的布局样式 ,
getChildView() 和 getGroupView() 方法设置自定义布局
数据源设置好,直接给ExpandableListView.setAdapter()即可实现此收缩功能
1.main_layout
<ExpandableListView
        android:layout_width="match_parent"
        android:layout_height="match_parent"
        android:id="@+id/expandableListView"
        android:layout_alignParentTop="true"
        android:layout_alignParentStart="true"
  />

2.gruop_layout.xml child_layout也一样
<?xml version="1.0" encoding="utf-8"?>
<LinearLayout xmlns:android="http://schemas.android.com/apk/res/android"
    android:layout_width="match_parent"
    android:layout_height="wrap_content"
    android:gravity="center_vertical"
    >
    <ImageView
        android:layout_width="wrap_content"
        android:layout_height="wrap_content"
        android:id="@+id/icon"
        android:src="@mipmap/ic_launcher"
        android:maxWidth="64dp"
        android:maxHeight="64dp"
        android:adjustViewBounds="true"
        />

    <TextView
        android:layout_width="wrap_content"
        android:layout_height="wrap_content"
        android:id="@+id/title"
        android:text="not data"
        />
</LinearLayout>

3.核心代码:
public class MainActivity extends Activity {
    private ExpandableListView listView;

    //组名称
    private String[] groups = {"好友","学校"};

    //每一组中的内容
    private String[][] childs = {{"猪猪","淡淡","默认"},{"老师","到头","呵呵"}};


    @Override
    protected void onCreate(Bundle savedInstanceState) {
        super.onCreate(savedInstanceState);
        setContentView(R.layout.activity_main);

      listView = (ExpandableListView)findViewById(R.id.expandableListView);

      listView.setAdapter(new MyExpandableAdapter());


       //单击事件
      listView.setOnChildClickListener(new ExpandableListView.OnChildClickListener() {
          @Override
          public boolean onChildClick(ExpandableListView parent, View v, int groupPosition, int childPosition, long id) {

              Toast.makeText(MainActivity.this,childs[groupPosition][childPosition],Toast.LENGTH_SHORT).show();
              return  true;

          }
      });

    }


    //适配器
    class  MyExpandableAdapter extends BaseExpandableListAdapter{


        @Override
        public int getGroupCount() {
            return groups.length;
        }

        @Override
        public int getChildrenCount(int groupPosition) {
            return childs[groupPosition].length;
        }

        @Override
        public Object getGroup(int groupPosition) {
            return groups[groupPosition];
        }

        @Override
        public Object getChild(int groupPosition, int childPosition) {
            return childs[groupPosition][childPosition];
        }

        @Override
        public long getGroupId(int groupPosition) {
            return groupPosition;
        }

        @Override
        public long getChildId(int groupPosition, int childPosition) {
            return childPosition;
        }

        @Override
        public boolean hasStableIds() {
            return false;
        }

        @Override
        public View getGroupView(int groupPosition, boolean isExpanded, View convertView, ViewGroup parent) {
           if(convertView == null){
              convertView =  getLayoutInflater().inflate(R.layout.group_layout,null);
           }

            ImageView icon = (ImageView) convertView.findViewById(R.id.icon);

            TextView title = (TextView) convertView.findViewById(R.id.title);

            title.setText(groups[groupPosition]);
           // icon.setImageResource();


            return convertView;
        }

        @Override
        public View getChildView(int groupPosition, int childPosition, boolean isLastChild, View convertView, ViewGroup parent) {


            if(convertView == null){
                convertView = getLayoutInflater().inflate(R.layout.child_layout,null);
            }

            ImageView icon = (ImageView) convertView.findViewById(R.id.icon);

            TextView title = (TextView) convertView.findViewById(R.id.title);

            title.setText(childs[groupPosition][childPosition]);


            return convertView;
        }


        //组下的成员是否可以选中
        @Override
        public boolean isChildSelectable(int groupPosition, int childPosition) {
            return true;
        }
    }


}
ImageSwitcher是Android中控制图片展示效果的一个控件,如幻灯片效果
ImageSwitcher粗略的理解就是ImageView的选择器
ImageSwither的原理:ImageSwitcher有两个子View:ImageView,当左右滑动的时候,就在这两个ImageView之间来回切换来显示图片
既然有两个子ImageView,那么我们要创建两个ImageView给ImageSwitcher。创建ImageSwitcher是通过工厂来实现的 ViewFactory
ImageSwitcher:切换图片 和文本切换一样
1.创建ImageSwitcher组件
2.将图片放于mipmap中
3.核心代码:
public class Switch extends Activity  implements ViewSwitcher.ViewFactory,View.OnTouchListener{

    private ImageSwitcher imageSwitcher;


    //图片数据
    private  int[] images = {R.mipmap.a,R.mipmap.b,R.mipmap.c,R.mipmap.d,R.mipmap.e,R.mipmap.f};

    private  int index;

    @Override
    protected void onCreate(Bundle savedInstanceState) {
        super.onCreate(savedInstanceState);
        setContentView(R.layout.activity_imge_switchers);

     imageSwitcher = (ImageSwitcher)findViewById(R.id.imageSwitcher2);

     imageSwitcher.setOnTouchListener(this);

     imageSwitcher.setFactory(this);
    }

//每一张图片视图
    @Override
    public View makeView() {
        ImageView iv = new ImageView(this);
        iv.setImageResource(images[0]);
        return iv;
    }


    float startX = 0.0f;
    float endX = 0.0f;
    //触屏事件
    @Override
    public boolean onTouch(View v, MotionEvent event) {

        int action = event.getAction();//获取当前的事件动作

        if(action == MotionEvent.ACTION_DOWN){
            startX = event.getX();

            imageSwitcher.setInAnimation(this,android.R.anim.fade_in);//图片进的动画
            imageSwitcher.setInAnimation(this,android.R.anim.fade_out);//图片出的动画
            return true;
        }

        if(action == MotionEvent.ACTION_UP){
            endX = event.getX();

            if(startX - endX>20){//下一张
                index = index +1 <images.length?++index:0;

                imageSwitcher.setInAnimation(this,android.R.anim.fade_in);//图片进的动画
                imageSwitcher.setInAnimation(this,android.R.anim.fade_out);//图片出的动画
            }else if(endX -startX >20){//上一张
                index = index - 1>=0?--index:images.length-1;

                imageSwitcher.setInAnimation(this,android.R.anim.fade_in);//图片进的动画
                imageSwitcher.setInAnimation(this,android.R.anim.fade_out);//图片出的动画
            }

            imageSwitcher.setImageResource(images[index]);
        }


        return true;
    }
}

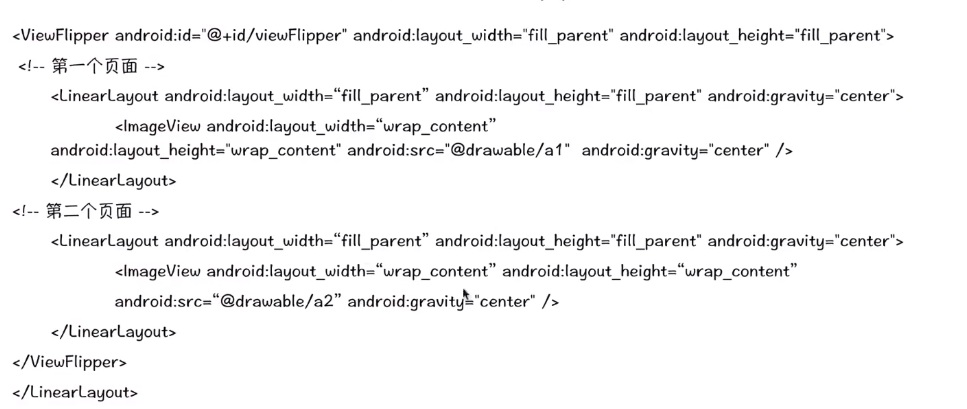
flipper.xml:
<ViewFlipper
android:layout_width="match_parent"
android:layout_height="match_parent"
android:id="@+id/viewFlipper"
android:layout_alignParentTop="true"
android:layout_alignParentStart="true"
/>
//第一页
<LinearLayout
android:layout_width="match_parent"
android:layout_height="match_parent">
<ImageView
android:layout_width="match_parent"
android:layout_height="match_parent"
android:scaleType="centerCrop"
android:src="@mipmap/a" />
</LinearLayout>
//第二页
<LinearLayout
android:layout_width="match_parent"
android:layout_height="match_parent">
<ImageView
android:layout_width="match_parent"
android:layout_height="match_parent"
android:scaleType="centerCrop"
android:src="@mipmap/b" />
</LinearLayout>
//第三页
<LinearLayout
android:layout_width="match_parent"
android:layout_height="match_parent">
<ImageView
android:layout_width="match_parent"
android:layout_height="match_parent"
android:scaleType="centerCrop"
android:src="@mipmap/c"/>
</LinearLayout>
2.核心代码
public class flipper extends Activity {
private ViewFlipper viewFlipper;
@Override
protected void onCreate(Bundle savedInstanceState) {
super.onCreate(savedInstanceState);
setContentView(R.layout.activity_flipper);
viewFlipper = (ViewFlipper) findViewById(R.id.viewFlipper);
}
float startX,endX;
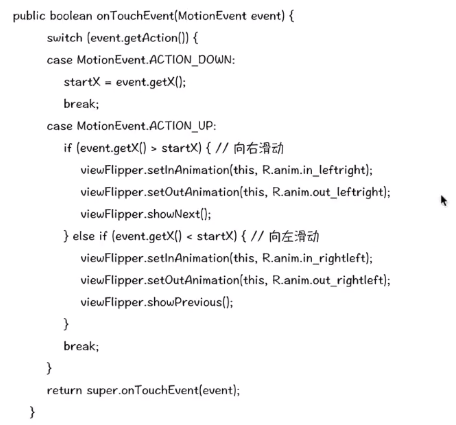
@Override
public boolean onTouchEvent(MotionEvent event) {
int action = event.getAction();
if(action == MotionEvent.ACTION_DOWN){
startX = event.getX();
}else if(action == MotionEvent.ACTION_UP){
if(event.getX()>startX){//向右滑动
viewFlipper.setInAnimation(this,R.anim.in_leftright);
viewFlipper.setOutAnimation(this,R.anim.out_leftright);
viewFlipper.showNext();
}else if(event.getX()<startX){//向左滑动
viewFlipper.setInAnimation(this,R.anim.in_leftright);
viewFlipper.setOutAnimation(this,R.anim.out_leftright);
viewFlipper.showPrevious();
}
}
return super.onTouchEvent(event);
}
}


 134
134

 被折叠的 条评论
为什么被折叠?
被折叠的 条评论
为什么被折叠?
 到【灌水乐园】发言


