


Android的对话框有两种:PopupWindow和AlertDialog ,它们的不同点在于AlertDialog的位置固定,而PopupWindow的位置可以随意
PopupWindow的位置可以分偏移和无偏移两种;
相对于某个控件(anchor 锚) 和相对于父控件
showAsDropDown(View anchor):相对某个控件的位置(正左下方),无偏移
showAsDropDown(View anchor,int xoff,int yoff) :相对于某个控件的位置,有偏移;
showAsDropDown(View znchor,int gravity,int x,int y):相对于父控件位置,(例如:正中央Gravity.CENTER,下方Gravity.BOTTOM等),可以设置偏移或元偏移

activit.xml:
<Button
android:layout_width="wrap_content"
android:layout_height="wrap_content"
android:text="PopupWindow"
android:id="@+id/button"
android:layout_alignParentTop="true"
android:layout_alignParentStart="true"
android:onClick="show"
/>
//要弹出内容的布局
<?xml version="1.0" encoding="utf-8"?>
<LinearLayout xmlns:android="http://schemas.android.com/apk/res/android"
android:layout_width="match_parent"
android:layout_height="match_parent"
android:orientation="horizontal"
>
<Button
android:id="@+id/button2"
android:layout_width="wrap_content"
android:layout_height="wrap_content"
android:layout_weight="1"
android:text="编辑"
/>
<Button
android:id="@+id/button3"
android:layout_width="wrap_content"
android:layout_height="wrap_content"
android:layout_weight="1"
android:text="删除" />
</LinearLayout>
2.核心代码:
public class MainActivity extends AppCompatActivity {
private PopupWindow popupWindow;
private Button button;
@Override
protected void onCreate(Bundle savedInstanceState) {
super.onCreate(savedInstanceState);
setContentView(R.layout.activity_main);
button = (Button) findViewById(R.id.button);
}
public void show(View v){
//R.layout.pop_windwo:作为要弹出的内容布局文件
View view = getLayoutInflater().inflate(R.layout.pop_windwo,null);
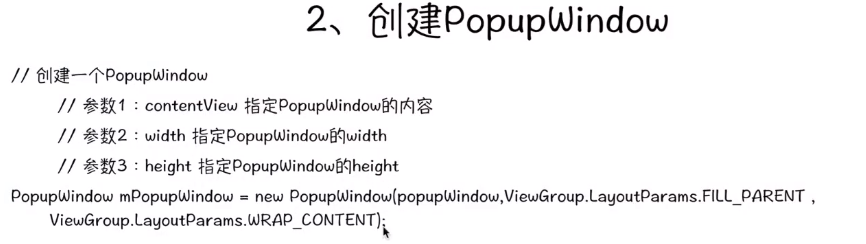
/**
* 创建PopupWindow(窗体的视图,宽,高)
*
*
* */
popupWindow = new PopupWindow(view, ViewGroup.LayoutParams.MATCH_PARENT,ViewGroup.LayoutParams.WRAP_CONTENT);
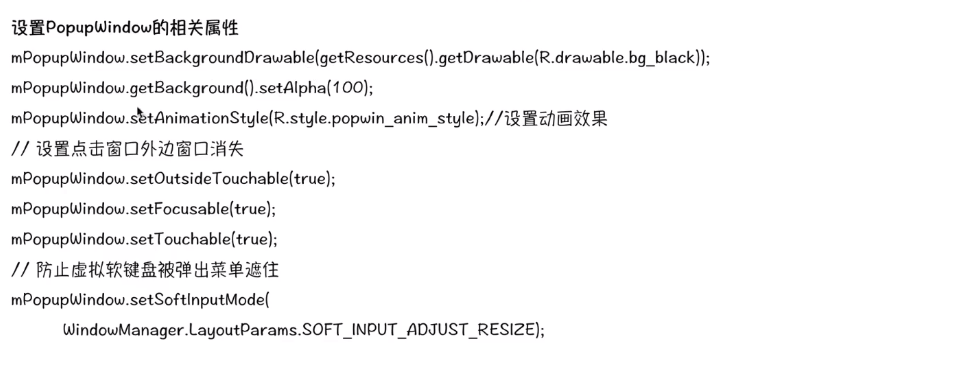
//设置背影图
popupWindow.setBackgroundDrawable(getResources().getDrawable(android.R.drawable.btn_plus));
//设置背景透明度
popupWindow.getBackground().setAlpha(100);
//点击窗口外边 窗口消失
popupWindow.setOutsideTouchable(true);
//获取焦点
popupWindow.setFocusable(true);
//可以被触摸
popupWindow.setTouchable(true);
//动画:从右则滑入
popupWindow.setAnimationStyle(android.R.style.Animation_Translucent);
//防止虚拟键盘弹出被遮住
popupWindow.setSoftInputMode(WindowManager.LayoutParams.SOFT_INPUT_ADJUST_RESIZE);
//显示的位置:当前按扭的下方
popupWindow.showAtLocation(v, Gravity.BOTTOM,0,0);
}
}
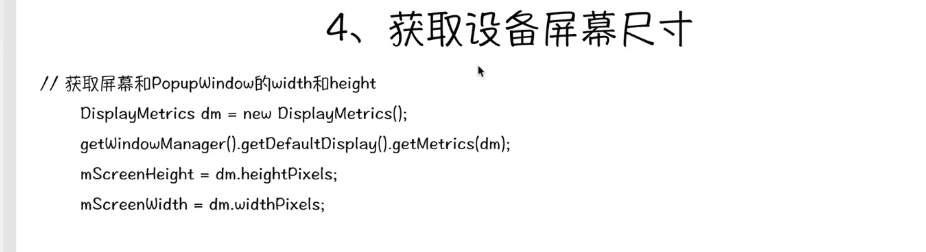
//获取屏幕尺寸
DisplayMetrics md = new DisplayMetrics();
getWindowManager().getDefaultDisplay().getMetrics(md);
//宽度和高度
int width = md.widthPixels;
int height = md.heightPixels;
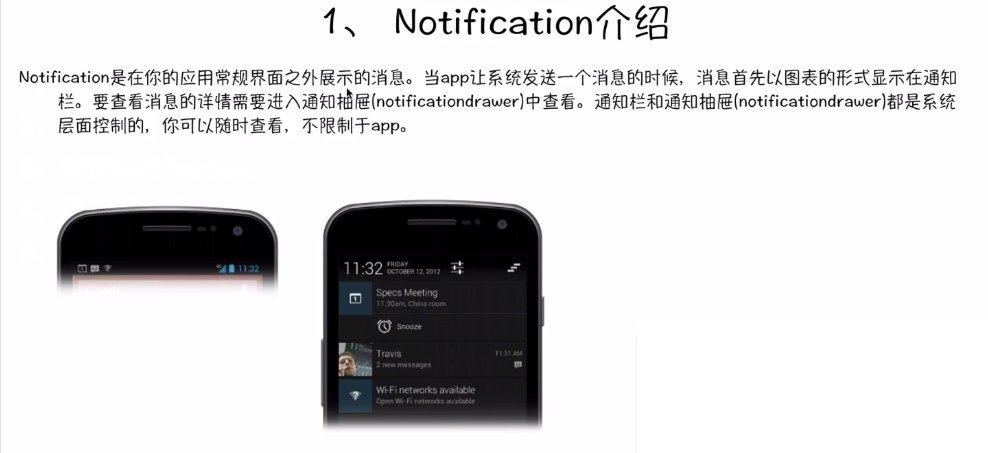
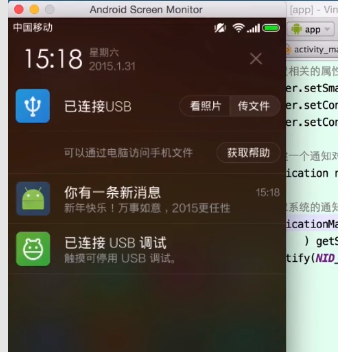
Notification(通知)
activity.xml
  <Button
        android:layout_width="match_parent"
        android:layout_height="wrap_content"
        android:text="发送一个普通的通知"
        android:id="@+id/button_normal"
        android:layout_centerHorizontal="true"

        android:onClick="Notifi1"

        />


public class MainActivity extends AppCompatActivity {

    private  static final  int N_ID = 1;


    @Override
    protected void onCreate(Bundle savedInstanceState) {
        super.onCreate(savedInstanceState);
        setContentView(R.layout.activity_main);
    }


    public void Notifi1(View v){

        //老版本 Notification n = new Notification()
        // 兼容版本,和新版本的功能一样:NotificationCompat.Builder b = new NotificationCompat.Builder(this);

        //新版本11以后
        Notification.Builder bulid = new Notification.Builder(this);

        //设置相关的属性
        bulid.setSmallIcon(R.mipmap.ic_launcher); //设置图标
        bulid.setContentTitle("你有一条新的消息"); //标题
        bulid.setContentText("你好,大家新年好!");//正文

        Notification n = bulid.build();//创建通知对象

        //获取系统的通知管理器,然后发送通知
        NotificationManager nm = (NotificationManager) getSystemService(Context.NOTIFICATION_SERVICE);

        //通知
        nm.notify(N_ID,n);
    }

    public void Notifi2(View v){

    }


}
通知信息在另一个avtivity中打开,并显示通知栏中的内容
新建一个activity
1。另一个activity类:
public class Main2Activity extends AppCompatActivity {
@Override
protected void onCreate(Bundle savedInstanceState) {
super.onCreate(savedInstanceState);
setContentView(R.layout.activity_main2);
String msg = getIntent().getStringExtra("msg");
TextView tx = (TextView) findViewById(R.id.t_msg);
tx.setText(msg.toString());
//打开界面后取消指定ID通知,在同一app中得到的通知都是同一个,所以在这也可以取消
NotificationManager nm = (NotificationManager) getSystemService(NOTIFICATION_SERVICE);
nm.cancel(MainActivity.N_ID);
}
}
通知activity类:
public class MainActivity extends AppCompatActivity {
static final int N_ID = 1;
@Override
protected void onCreate(Bundle savedInstanceState) {
super.onCreate(savedInstanceState);
setContentView(R.layout.activity_main);
}
public void Notifi1(View v){
//老版本 Notification n = new Notification()
// 兼容版本,和新版本的功能一样:NotificationCompat.Builder b = new NotificationCompat.Builder(this);
//新版本11以后
Notification.Builder bulid = new Notification.Builder(this);
//设置相关的属性
bulid.setSmallIcon(R.mipmap.ic_launcher); //设置图标
bulid.setContentTitle("你有一条新的消息"); //标题
bulid.setContentText("你好,大家新年好!");//正文
// bulid.setAutoCancel(true);//自动清除,这个选项相当于手动设置的通知取消
// bulid.setOngoing(true);//常驻通知
bulid.setNumber(10); //新闻条数
bulid.setTicker("新消息");
bulid.setDefaults(Notification.DEFAULT_SOUND);//响铃
Intent intent = new Intent(this,Main2Activity.class);
intent.putExtra("msg","你好,大家新年好!");//也可以传递数据
//定义意图,当点击通知时要打开一个界面(Activity)
/**
* 参数:上下文,请求编码,意图,创建PendingIntent的方式
*
* PendingIntent.FLAG_CANCEL_CURRENT;如果有的话,先取消当前的pi,创建新的
PendingIntent.FLAG_NO_CREATE; 如果有就使用,没有不创建
PendingIntent.FLAG_ONE_SHOT; 只使用一次
PendingIntent.FLAG_UPDATE_CURRENT; 如果有,更新Intent ,再使用,没有,则创建
*
* */
PendingIntent pi = PendingIntent.getActivity(this,0,intent,PendingIntent.FLAG_UPDATE_CURRENT);;
//通知的事件,例如:可以打开通知
bulid.setContentIntent(pi);
Notification n = bulid.build();//创建通知对象
//获取系统的通知管理器,然后发送通知
NotificationManager nm = (NotificationManager) getSystemService(Context.NOTIFICATION_SERVICE);
//通知
nm.notify(N_ID,n);
}
public void Notifi2(View v){
}
}
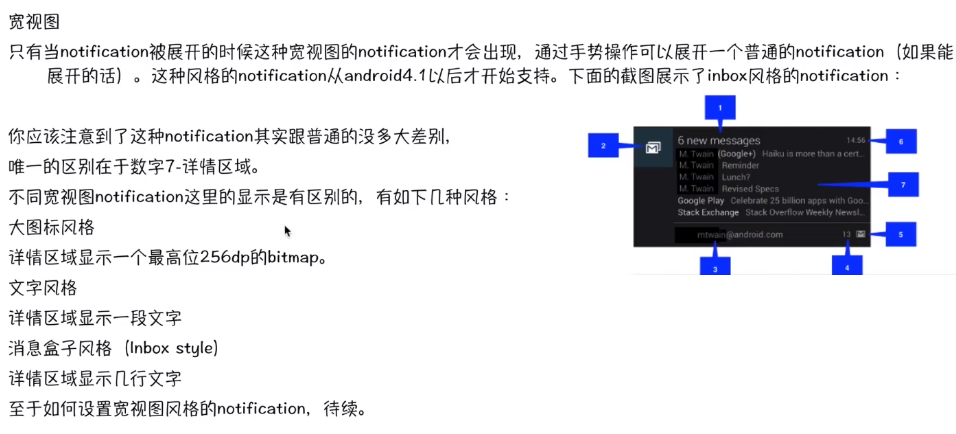
     public void Notifi2(View v){

        NotificationCompat.Builder bulid = new NotificationCompat.Builder(this);

        bulid.setSmallIcon(R.mipmap.ic_launcher); //设置图标
        bulid.setContentTitle("大视图消息"); //标题
        bulid.setContentText("你好,这是大视图的消息通知!");//正文


        //设置大视图样式
        NotificationCompat.InboxStyle style = new NotificationCompat.InboxStyle();
        style.setBigContentTitle("飞飞");
        style.addLine("长亭外");
        style.addLine("古道边");
        style.addLine("一行白鹭上青天");

        style.setSummaryText("作者:啊");//提示信息

        bulid.setStyle(style);

        bulid.setNumber(5);

        Notification n = bulid.build();
        NotificationManager nm = (NotificationManager) getSystemService(Context.NOTIFICATION_SERVICE);
        nm.notify(N_ID2,n);

    }
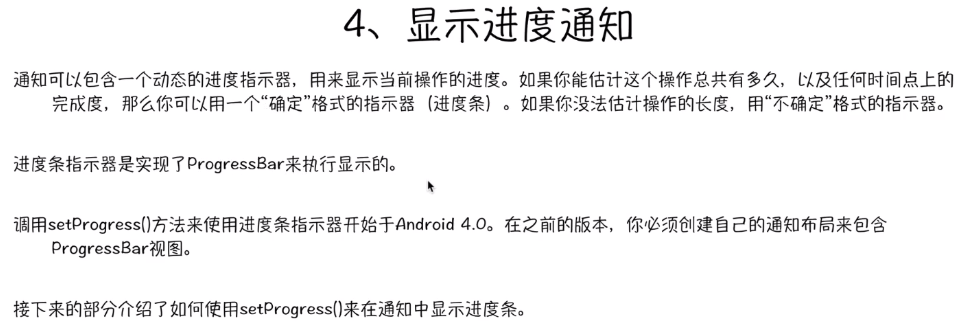
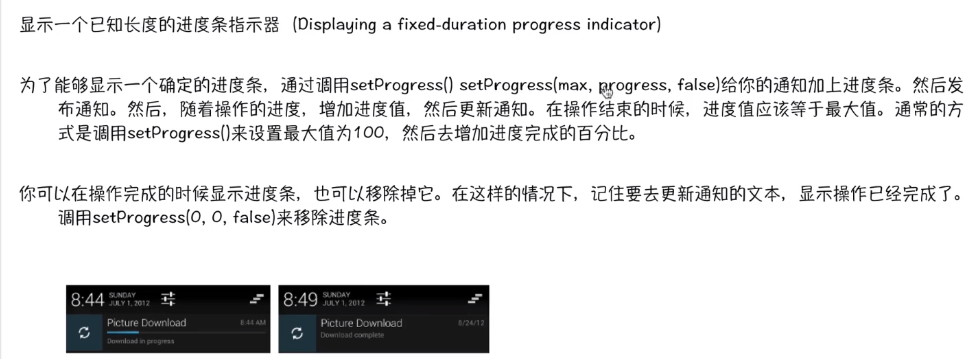
    public void update(View v) {

        final NotificationCompat.Builder builder = new NotificationCompat.Builder(this);

        builder.setSmallIcon(R.mipmap.ic_launcher);
        builder.setContentTitle("更新中……");
        builder.setContentText("正在由更新数据中");

        builder.setProgress(100, 23, false);


       final NotificationManager nm = (NotificationManager) getSystemService(Context.NOTIFICATION_SERVICE);
        nm.notify(NID3,builder.build());


        //模拟更新数据的线程
        new Thread(new Runnable() {
            @Override
            public void run() {

               for (int progress = 0;progress<=100;progress+=5) {
                   builder.setProgress(100, progress, false);//false:表示确定进度,true:表示不确定进度,可以用于安装时的进度
                   nm.notify(NID3, builder.build());

                   try {
                       Thread.sleep(500);
                   } catch (InterruptedException e) {
                       e.printStackTrace();
                   }
               }

                //更新完后,重新发送进度
                builder.setProgress(0,0,false);
                builder.setContentText("更新完成");
                nm.notify(NID3,builder.build());
            }
        }).start();
    }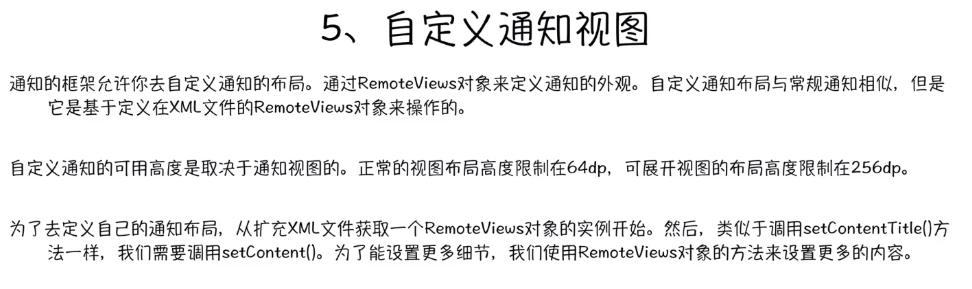
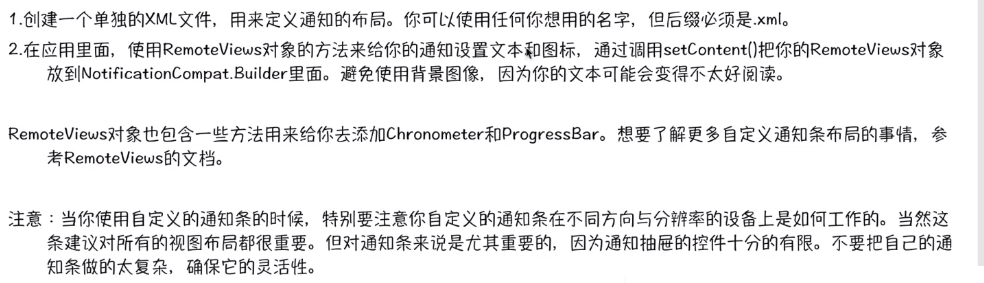
1.自定义要在通知栏显示的视图布局
<?xml version="1.0" encoding="utf-8"?>
<LinearLayout xmlns:android="http://schemas.android.com/apk/res/android"
    android:layout_width="match_parent" android:layout_height="wrap_content"
    android:orientation="horizontal"
    >

    <ImageView
        android:layout_width="wrap_content"
        android:layout_height="wrap_content"
        android:id="@+id/imageView"

        android:layout_gravity="center_vertical"

        android:src="@mipmap/ic_launcher"

        android:maxHeight="64dp"
        android:maxWidth="64dp"
        />

    <TextView
        android:layout_width="wrap_content"
        android:layout_height="wrap_content"
        android:text="歌曲名称……"
        android:id="@+id/textView_song"
        android:layout_weight="1"

        />

    <Button
        android:layout_width="80dp"
        android:layout_height="wrap_content"
        android:text="播放"
        android:id="@+id/button_play"

        android:textColor="#000fff"

        />

    <Button
        android:layout_width="80dp"
        android:layout_height="wrap_content"
        android:text="下一首"
        android:id="@+id/button2_next"
        android:textColor="#000fff"
        />
</LinearLayout>


2.自定义视代码:模仿音乐播发器在通知栏中的效果
 public void  button4(View v){

        final NotificationCompat.Builder builder = new NotificationCompat.Builder(this);

        builder.setSmallIcon(R.mipmap.ic_launcher); //设置图标
        builder.setOngoing(true);

        //创建一个远程的视图,加载自定义的视图
        RemoteViews view = new RemoteViews(getPackageName(),R.layout.custom_layout);

        //更改文本
        view.setTextViewText(R.id.textView_song,"第一滴泪");

     //   view.setImageViewResource(); 更新图片

        //更改播放按扭上的文本
        view.setTextViewText(R.id.button_play,"暂停");

        //view.setOnClickPendingIntent(); 设置按扭的单击事件,通过调用服务来响应事件

        builder.setContent(view);

        builder.setTicker("合合音乐");

        final NotificationManager nm = (NotificationManager) getSystemService(Context.NOTIFICATION_SERVICE);
        nm.notify(NID4, builder.build());

    }


 4360
4360


 被折叠的 条评论
为什么被折叠?
被折叠的 条评论
为什么被折叠?
 到【灌水乐园】发言


