


一、Config基础
1、架构:

(1)Config Server:配置中心,负责去 配置仓库拉取配置
(2)Config Client:客户端启动时从 配置中心获取相应配置
2、优势
- 集中管理配置
- 配置分不同环境
- 动态获取,无需重启服务
二、Config使用
1、服务端配置
- 增加相应的依赖
<dependency>
            <groupId>org.springframework.cloud</groupId>
            <artifactId>spring-cloud-config-server</artifactId>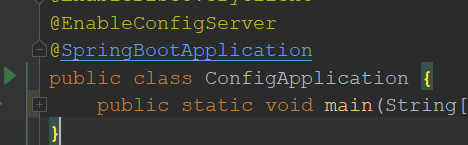
</dependency>- 项目启动类添加注解 @EnableConfigServer
- 增加配置
spring:
  cloud:
    config:
      server:
        git:
          uri: https://github.com/linzhuzai/Lin-start-main.git
          search-paths:
            - Lin-start-main  # 得放仓库根目录,不能有文件夹
      label: master
2、客户端配置
- 增加客户端依赖
<dependency>
            <groupId>org.springframework.cloud</groupId>
            <artifactId>spring-cloud-config-server</artifactId>
</dependency>- 项目启动类添加注解 @EnableConfigServer
- 增加 bootstrap.yml配置(bootstrap.yml 优先级比 application.yml 高)
spring:
application:
name: start-main-gateway #影响 github上的文件名
cloud:
config:
uri: http://localhost:9001 #config服务中心地址
profile: dev
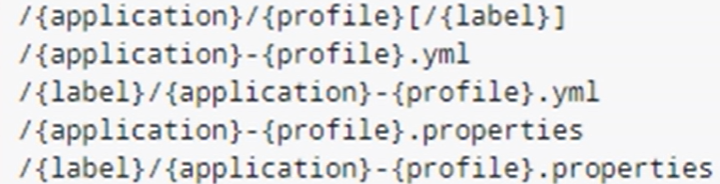
label: master3、配置规则
4、动态刷新
(1)客户端引入依赖 actuator
(2)增加 yml配置
management:
endpoints:
web:
exposure:
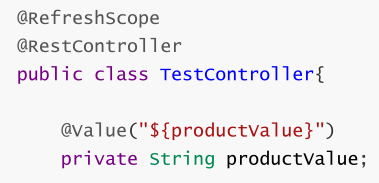
include: *(3)指定 Controller 加上 @RefreshScope
(4)post 请求该服务:http://localhost:9002/actuator/refresh
三、Bus
1、架构:

消息总线:各个微服务实例对其进行监听和消费
四、Bus & Config 动态刷新
注:基于 rabbitmq,所以需先装好
1、Config服务端配置
- 增加相应的依赖
<dependency>
            <groupId>org.springframework.cloud</groupId>
            <artifactId>spring-cloud-config-server</artifactId>
        </dependency>
        <dependency>
            <groupId>org.springframework.boot</groupId>
            <artifactId>spring-boot-starter-actuator</artifactId>
        </dependency>
        <dependency>
            <groupId>org.springframework.cloud</groupId>
            <artifactId>spring-cloud-starter-bus-amqp</artifactId>
</dependency>- 增加配置
spring:
  rabbitmq:
    host: 127.0.0.1
    port: 5672
    username: guest
    password: guest

management:
  endpoints:
     web:
      exposure:
       include: bus-refresh
2、Config客户端配置
- 增加客户端依赖
<dependency>
            <groupId>org.springframework.cloud</groupId>
            <artifactId>spring-cloud-config-server</artifactId>
        </dependency>
        <dependency>
            <groupId>org.springframework.boot</groupId>
            <artifactId>spring-boot-starter-actuator</artifactId>
        </dependency>
        <dependency>
            <groupId>org.springframework.cloud</groupId>
            <artifactId>spring-cloud-starter-bus-amqp</artifactId>
</dependency>- 增加 bootstrap.yml配置
spring:
  rabbitmq:
    host: 127.0.0.1
    port: 5672
    username: guest
    password: guest
3、刷新服务
post 请求 Config服务端:http://localhost:9002/actuator/bus-refresh
4、指定刷新服务(请求中带上要刷新的服务名)
post 请求 Config服务端:http://localhost:9002/actuator/bus-refresh/<service-name>


 237
237


 被折叠的 条评论
为什么被折叠?
被折叠的 条评论
为什么被折叠?
 到【灌水乐园】发言


