


 本文详细解释了如何使用yolov5的detect.py脚本进行物体检测,包括参数如模型权重路径、输入源、图像尺寸、置信度阈值、NMS设置等,并展示了不同参数组合下的检测结果和输出格式。
直接运行yolov5-6.0/detect.py,输出如下:
image 1/2 C:\Users\dun\Downloads\yolov5-6.0\data\images\bus.jpg: 640x480 4 persons, 1 bus, Done. (0.216s)
image 2/2 C:\Users\dun\Downloads\yolov5-6.0\data\images\zidane.jpg: 384x640 2 persons, 2 ties, Done. (0.166s)
Speed: 1.5ms pre-process, 191.0ms inference, 1.5ms NMS per image at shape (1, 3, 640, 640)
Results saved to runs\detect\exp3
待检测的图像保存在yolov5-6.0\data\images 目录下,bus.jpg 和zidane.jpg 是项目自带的图像,检测结果保存在runs\detect\exp3 目录下,检测结果如下:


检测涉及到的参数如下,后面会逐一解释和测试:
def parse_opt():
    parser = argparse.ArgumentParser()
    parser.add_argument('--weights', nargs='+', type=str, default=ROOT / 'yolov5s.pt', help='model path(s)')
    parser.add_argument('--source', type=str, default=ROOT / 'data/images', help='file/dir/URL/glob, 0 for webcam')
    parser.add_argument('--imgsz', '--img', '--img-size', nargs='+', type=int, default=[640], help='inference size h,w')
    parser.add_argument('--conf-thres', type=float, default=0.25, help='confidence threshold')
    parser.add_argument('--iou-thres', type=float, default=0.45, help='NMS IoU threshold')
    parser.add_argument('--max-det', type=int, default=1000, help='maximum detections per image')
    parser.add_argument('--device', default='', help='cuda device, i.e. 0 or 0,1,2,3 or cpu')
    parser.add_argument('--view-img', action='store_true', help='show results')
    parser.add_argument('--save-txt', action='store_true', help='save results to *.txt')
    parser.add_argument('--save-conf', action='store_true', help='save confidences in --save-txt labels')
    parser.add_argument('--save-crop', action='store_true', help='save cropped prediction boxes')
    parser.add_argument('--nosave', action='store_true', help='do not save images/videos')
    parser.add_argument('--classes', nargs='+', type=int, help='filter by class: --classes 0, or --classes 0 2 3')
    parser.add_argument('--agnostic-nms', action='store_true', help='class-agnostic NMS')
    parser.add_argument('--augment', action='store_true', help='augmented inference')
    parser.add_argument('--visualize', action='store_true', help='visualize features')
    parser.add_argument('--update', action='store_true', help='update all models')
    parser.add_argument('--project', default=ROOT / 'runs/detect', help='save results to project/name')
    parser.add_argument('--name', default='exp', help='save results to project/name')
    parser.add_argument('--exist-ok', action='store_true', help='existing project/name ok, do not increment')
    parser.add_argument('--line-thickness', default=3, type=int, help='bounding box thickness (pixels)')
    parser.add_argument('--hide-labels', default=False, action='store_true', help='hide labels')
    parser.add_argument('--hide-conf', default=False, action='store_true', help='hide confidences')
    parser.add_argument('--half', action='store_true', help='use FP16 half-precision inference')
    parser.add_argument('--dnn', action='store_true', help='use OpenCV DNN for ONNX inference')
    opt = parser.parse_args()
    opt.imgsz *= 2 if len(opt.imgsz) == 1 else 1  # expand
    print_args(FILE.stem, opt)
    return opt
- weights:
type=str表示参数类型为字符串;default=ROOT / 'yolov5s.pt'表示默认值为ROOT / 'yolov5s.pt';根据help='model path(s)'可知,该参数表示模型权重文件的路径。
parser.add_argument('--weights', nargs='+', type=str, default=ROOT / 'yolov5s.pt', help='model path(s)')
- source:指定输入的路径,默认值为
ROOT / 'data/images'。
parser.add_argument('--source', type=str, default=ROOT / 'data/images', help='file/dir/URL/glob, 0 for webcam')
如执行python detect.py --source data/images/bus.jpg 只会检测bus.jpg 。
- imgsz:模型在detect前,会把图像resize成640×640再进行检测,该尺寸需要和训练模型时使用的尺寸保持一致。在640×640的尺寸上得到检测框以后,再将640×640的图像连同检测框一起变换回原来的尺寸。
parser.add_argument('--imgsz', '--img', '--img-size', nargs='+', type=int, default=[640], help='inference size h,w')
- conf-thres:置信度阈值,只有置信度大于该阈值时,我们才认为这是一个物体。
parser.add_argument('--conf-thres', type=float, default=0.25, help='confidence threshold')
执行python detect.py --conf-thres 0.25 ,检测结果如下。注意右边的tie 的置信度为0.26。

执行python detect.py --conf-thres 0.27 ,检测结果如下,右边的tie已经没有了。

- iou-thres:iou阈值,若两个检测框的iou大于该阈值,则根据NMS简化为一个框。
parser.add_argument('--iou-thres', type=float, default=0.45, help='NMS IoU threshold')
IoU即Intersection over Union,其计算公式如下:

执行python detect.py --iou-thres 0.45 ,结果如下:

执行python detect.py --iou-thres 1 ,结果如下,可以看到同一个人对应了多个检测框。

执行python detect.py --iou-thres 0 ,结果如下:

关于NMS算法,这篇文章中的图解很清晰:機器/深度學習: 物件偵測 Non-Maximum Suppression (NMS),我在这里把图贴出来,不做过多分析。

第一個例子,有兩隻狗,我們怎麼用NMS將偵測到的物件框將把兩隻狗框出來。我們假設這張圖我們捉到5個BBox(如上圖),每個BBox帶有一個socre,代表他是foreground的信心度。

實際流程如下圖:

步骤1.「確定是物件集合」= {空集合}
步骤2.Run 1: 先將BBox依照信心程度排序,信心程度最高的BBox (紅色) 會被選入「確定是物件集合」內,其他BBox會看這步驟選出最高的BBox進行IoU計算,如果粉紅色的IoU為0.6大於我們設定的0.5,所以將粉紅色的BBox信心度設置為0。「確定是物件集合」= {紅色BBox }
步骤3.Run 2: 不考慮信心度為0和已經在「確定是物件集合」的BBox,剩下來的物件繼續選出最大信心程度的BBox,將此BBox(黃色)丟入「確定是物件集合」,剩下的BBox和Run2選出的最大信心程度的BBox計算IoU,其他BBox都大於0.5,所以其他的BBox信心度設置為0。「確定是物件集合」= {紅色BBox; 黃色BBox}
步骤4.因為沒有物件信心度>0,所以結束NMS。
「確定是物件集合」= {紅色BBox; 黃色BBox}。
這邊衍生一個問題,為什麼IoU設定是0.5,不能在高一點嗎?
剛剛的例子我這邊舉一個IoU閾值是0.7的例子(下圖),看會發生什麼問題?

由此可以知道,如果IoU閾值設定太高,可能會造成物件重複偵測的問題。
第二個例子,有1隻狗1隻貓,我們怎麼用NMS將偵測到的物件框將把貓和狗框出來。

前面的範例一是標準的NMS程序,這邊要搭配一下分類來看,範例二和標準NSM作法一樣,先將「確定是物件集合」選出來,此例是NMS選出的BBox是{紫色BBox ; 紅色BBox}。
這時候在搭配一下分類的機率,就可以把每個NMS選出的BBox做類別判斷了(如下圖,每個BBox都會帶有一組機率)。

這邊附上實際做法,還會先用一個閾值先初步去掉一些候選的BBox,不然假設一張圖預選出一萬個BBox,後面用CPU計算NMS會很花時間,所以會依據BBox的confidence score先去掉一些沒用的BBox,然後再做NMS,如下圖。

- max-det:检测到的物体的最大数量。
parser.add_argument('--max-det', type=int, default=1000, help='maximum detections per image')
执行python detect.py --max-det 4 ,结果如下:

执行python detect.py --max-det 3 ,结果如下:

执行python detect.py --max-det 2 ,结果如下:

- view-img:设置该参数时,将会自动显示结果图像。
parser.add_argument('--view-img', action='store_true', help='show results')
执行python detect.py --view-img ,将自动显示结果图像。
- save-txt
- save-conf
- save-crop
parser.add_argument('--save-txt', action='store_true', help='save results to *.txt')
parser.add_argument('--save-conf', action='store_true', help='save confidences in --save-txt labels')
parser.add_argument('--save-crop', action='store_true', help='save cropped prediction boxes')
执行python detect.py --save-txt --save-conf --save-crop ,结果如下:

runs/detect/exp29/zidane.jpg 内容如下:

runs/detect/exp29/labels/zidane.txt 内容如下:
27 0.782812 0.506944 0.0359375 0.141667 0.261517
0 0.327344 0.634028 0.4625 0.731944 0.666693
27 0.366797 0.796528 0.0429688 0.379167 0.675119
0 0.736328 0.533333 0.311719 0.933333 0.879861
The *.txt file specifications are:
- One row per object
- Each row is class x_center y_center width height format.
- Box coordinates must be in normalized xywh format (from 0 to 1). If your boxes are in pixels, divide x_center and width by image width, and y_center and height by image height.
- Class numbers are zero-indexed (start from 0).

The label file corresponding to the above image contains 2 persons (class 0) and a tie (class 27):

runs/detect/exp29/crops/person/zidane.jpg
runs/detect/exp29/crops/person/zidane2.jpg
runs/detect/exp29/crops/tie/zidane.jpg
runs/detect/exp29/crops/tie/zidane2.jpg
内容分别如下:


- nosave:若设置该参数,表示不保存结果图像。
parser.add_argument('--nosave', action='store_true', help='do not save images/videos')
- classes
parser.add_argument('--classes', nargs='+', type=int, help='filter by class: --classes 0, or --classes 0 2 3')
执行python detect.py --classes 27 ,27表示tie,结果如下:

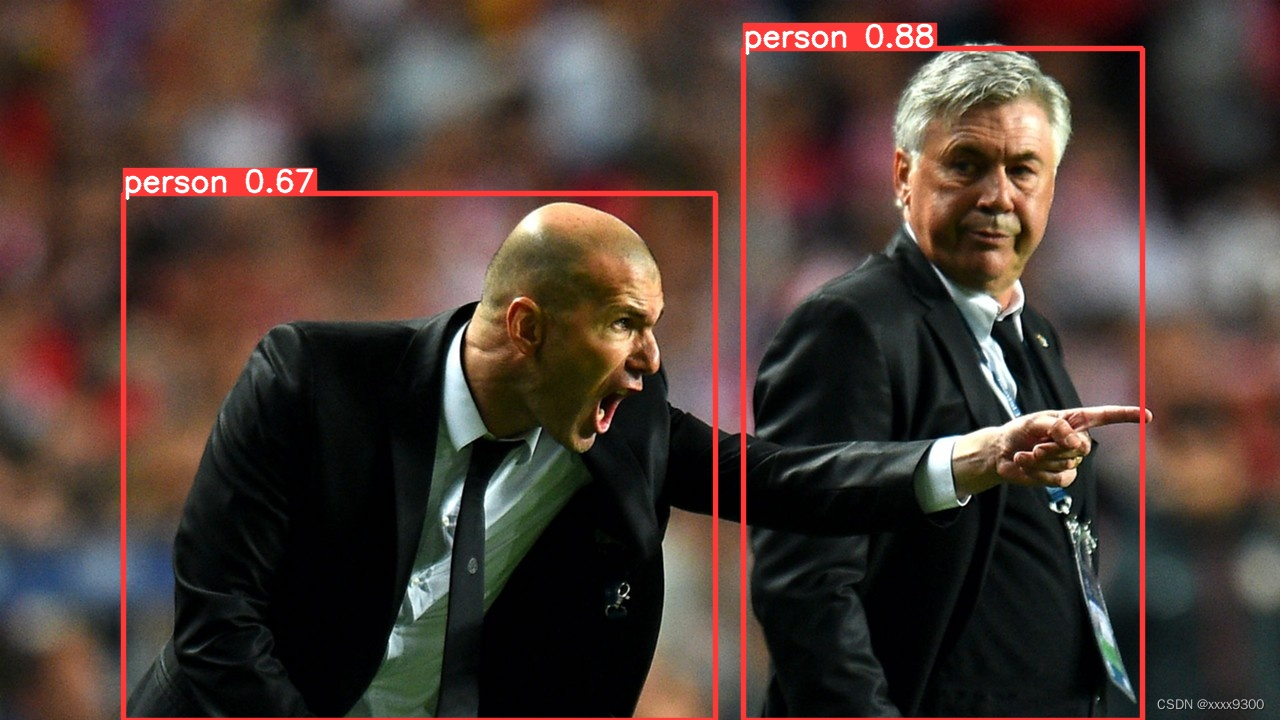
执行python detect.py --classes 0 ,0表示person,结果如下:
- project
- name
- exist-ok
parser.add_argument('--project', default=ROOT / 'runs/detect', help='save results to project/name')
parser.add_argument('--name', default='exp', help='save results to project/name')
parser.add_argument('--exist-ok', action='store_true', help='existing project/name ok, do not increment')
- line-thickness
- hide-labels
- hide-conf
parser.add_argument('--line-thickness', default=3, type=int, help='bounding box thickness (pixels)')
parser.add_argument('--hide-labels', default=False, action='store_true', help='hide labels')
parser.add_argument('--hide-conf', default=False, action='store_true', help='hide confidences')
执行python detect.py --line-thickness 12 --hide-labels --hide-conf ,结果如下:


 9296
9296


 被折叠的 条评论
为什么被折叠?
被折叠的 条评论
为什么被折叠?
 到【灌水乐园】发言


