


Spring 框架本身有四大原则:
1)使用POJO 进行轻量级和最小侵入式开发。
2)通过依赖注入和基于接口编程实现松耦合。
3)通过AOP 和默认习惯进行声明式编程。
4)使用AOP 和模版(template)减少模式化代码。
Spring 所有功能的设计和实现都是基于此四大原则的。
一、依赖注入
1、简介
我们经常说的控制翻转(Inversion of Control-IOC)和依赖注入(dependency injection-DI)在Spring 环境下使等同的概念,控制翻转是通过依赖注入实现的。所谓依赖注入指的是容器负责创建对象和维护对象间的依赖关系,而不是通过对象本身负责自己的创建和解决自己的依赖。
依赖注入的主要目的是为了解耦,体现了一种“组合”的理念。如果你希望你的类具备某项功能的时候,是继承自一个具有此功能的父类好呢?还是组合另外一个具有这个功能的类好呢?答案是不言而喻的,继承一个父类,子类将于父类 耦合,组合另外一个类则使耦合度大大降低。
Spring IoC容器(ApplicationContext)负责创建Bean,并通过容器将功能类Bean 注入到你需要的Bean 中。Spring 提供使用xml、注释、Java 配置、groovy 配置实现Bean 的创建和注入。
无论是xml 配置、注释配置还是Java 配置,都被称为配置元数据,所谓元数据即描述数据的数据。元数据本身不具备任何可执行能力,只能通过外界代码来对这些元数据进行解析后进行一些有意义的操作。Spring 容器解析这些配置元数据进行Bean 初始化、配置和管理依赖。
声明Bean 的注释:
- @Component 组件,没有明确的角色。
- @Service 在业务逻辑层(service 层)使用。
- @Repository 在数据访问层(dao 层)使用。
- @Controller 在展现层(MVC->Spring MVC)使用。
注入Bean 的注释,一般情况下通用。
- @Autowired:Spring 提供的注释。
- @Inject:JSR-330 提供的注释。
- @Resource:JSR-250 提供的注释。
@Autowired、@Inject、@Resource 可注解在set 方法上或者属性上,本人习惯注释在属性上,优点是代码更少、层次更清晰。
在本节演示基本注释Bean 的初始化和依赖注入,Spring 容器类选用AnnotationConfigApplicationContext。
2、示例
(1)编写功能类的Bean。
package com.wisely.highlight_spring4.ch1.di;
import org.springframework.stereotype.Service;
@Service //1
public class FunctionService {
    public String sayHello(String word){
        return "Hello " + word +" !";
    }
}
代码解释
① 使用@Service 注解声明当前FunctionService 类是Spring 管理的一个Bean。其中,使用@Component、@Service、@Repository 和@Controller 是等效的,可根据需要选用。
(2)使用功能类的Bean。
package com.wisely.highlight_spring4.ch1.di;
import org.springframework.beans.factory.annotation.Autowired;
import org.springframework.stereotype.Service;
@Service //1
public class UseFunctionService {
    @Autowired //2
    FunctionService functionService;
    public String SayHello(String word){
        return functionService.sayHello(word);
    }
}
代码解释
① 使用@Service 注解声明当前UseFunctionService 类是Spring 管理的一个Bean。
② 使用@Autowired 将FunctionService 的实体Bean 注入到UseFunctionService 中,让UseFunctionService 具备FunctionService 的功能,此处使用JSR-330 的@Inject 注解或者JSR-250 的@Resource 注解是等效的。
(3)配置类
package com.wisely.highlight_spring4.ch1.di;
import org.springframework.context.annotation.ComponentScan;
import org.springframework.context.annotation.Configuration;
@Configuration //1
@ComponentScan("com.wisely.highlight_spring4.ch1.di") //2
public class DiConfig {
}
① @Configuration 声明当前类是一个配置类,在下一节的Java 配置中有更详细的说明;
② 使用@ComponentScan,自动扫描包名下所有使用@Service、@Component、@Repository 和@Controller 的类,并注册为Bean。
(4)运行
package com.wisely.highlight_spring4.ch1.di;
import org.springframework.context.annotation.AnnotationConfigApplicationContext;
public class Main {
public static void main(String[] args) {
AnnotationConfigApplicationContext context =
new AnnotationConfigApplicationContext(DiConfig.class); //1
UseFunctionService useFunctionService = context.getBean(UseFunctionService.class); //2
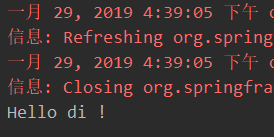
System.out.println(useFunctionService.SayHello("di"));
context.close();
}
}代码解释
① 使用AnnotationConfigApplicationContext 作为Spring 容器,接受输入一个配置类作为参数;
② 获得声明配置的UseFunctionService 的Bean。
结果如下图所示:
二、Java 配置
1、简介
Java 配置是Spring 4.x 推荐的配置方式,可以完全替代xml 配置;Java 配置也是Spring Boot 推荐的配置方式。
Java 配置是通过@Configuration 和@Bean 来实现的。
- @Configuration 声明当前类是一个配置类,相当于一个Spring 配置的xml 文件。
- @Bean 注释的方法上,什么当前方法的返回值为一个Bean。
本教程通篇使用Java 配置和注释混合配置。何时使用Java 配置或者注释配置呢?我们主要的原则是:全局配置使用Java 配置(如数据库相关配置、MVC 相关配置),业务Bean 的配置使用注释配置(@Service、@Component、@Repository、@Controller)。
本节只演示简单的Java 配置,全教程各个章节都会有大量的Java 配置的内容。
2、示例
(1)编写功能类的Bean。
package com.wisely.highlight_spring4.ch1.javaconfig;
//1
public class FunctionService {
    public String sayHello(String word){
        return "Hello " + word +" !";
    }
}
代码解释
① 此处没有使用@Service 声明Bean。
(2)使用功能类Bean。
package com.wisely.highlight_spring4.ch1.javaconfig;
import com.wisely.highlight_spring4.ch1.javaconfig.FunctionService;
//1
public class UseFunctionService {
    //2
    FunctionService functionService;
    public void setFunctionService(FunctionService functionService) {
        this.functionService = functionService;
    }
    public String SayHello(String word){
        return functionService.sayHello(word);
    }
}
代码解释
① 此处没有使用@Service 声明Bean。
② 此处没有使用@Autowired 注解注入Bean。
(3)配置类
package com.wisely.highlight_spring4.ch1.javaconfig;
import org.springframework.context.annotation.Bean;
import org.springframework.context.annotation.Configuration;
@Configuration //1
public class JavaConfig {
    @Bean //2
    public FunctionService functionService(){
        return new FunctionService();
    }
    @Bean
    public UseFunctionService useFunctionService(){
        UseFunctionService useFunctionService = new UseFunctionService();
        useFunctionService.setFunctionService(functionService());//3
        return useFunctionService;
    }
//  @Bean
//  public UseFunctionService useFunctionService(FunctionService functionService){ //4
//      UseFunctionService useFunctionService = new UseFunctionService();
//      useFunctionService.setFunctionService(functionService);
//      return useFunctionService;
//  }
}
代码解释
① 使用@Configuration 注解表明当前类是一个配置类,这意味着这个类里可能有0个或者多个@Bean 注解,此处没有使用包扫描,是因为所有的Bean 都在此类中定义了。
② 使用@Bean 注解声明当前方法FunctionService 的返回值是一个Bean,Bean 的名称是方法名。
③ 注入FunctionService 的Bean 时候直接调用functionService()。
④ 另外一种注入的方式,直接将FunctionService 作为参数给useFunctionService(),这也是Spring 容器提供的极好的功能。在Spring 容器中,只要容器中存在某个Bean,就可以在另外一个Bean 的声明方法的参数中写入。
(4)运行
package com.wisely.highlight_spring4.ch1.javaconfig;
import org.springframework.context.annotation.AnnotationConfigApplicationContext;
public class Main {
public static void main(String[] args) {
AnnotationConfigApplicationContext context =
new AnnotationConfigApplicationContext(JavaConfig.class);
UseFunctionService useFunctionService = context.getBean(UseFunctionService.class);
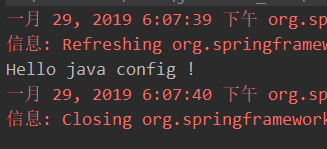
System.out.println(useFunctionService.SayHello("java config"));
context.close();
}
}结果如下图所示:
三、AOP
1、简介
AOP:面向切面编程,相对于OOP面向对象编程。
Spring 的AOP 的存在目的是为了解耦。AOP 可以让一组类共享相同的行为。在OOP 中只能通过继承类和实现接口,来使代码的耦合度增强,且类继承只能为单继承,阻碍更多行为添加到一组类上,AOP 弥补了OOP 的不足。
Spring 支持AspectJ 的注解式切面编程。
(1)使用@Aspect 声明式一个切面。
(2)使用@After、@Before、@Around 定义建言(advice),可直接将拦截规则(切点)作为参数。
(3)使用@After、@Before、@Around 参数的拦截规则为切点(PointCut),为了使切点复用,可使用@PointCut 专门定义拦截规则,然后在@After、@Before、@Around 的参数中调用。
(4)其中符合条件的每一个被拦截处为连接点(JoinPoint)。
本节示例将演示基于注解拦截和基于方法规则拦截两种方式,演示一种模拟记录操作的日志系统的实现。其中注解式拦截能够很好地控制要拦截的粒度和获得更丰富的信息,Spring 本身在事务处理(@Transcational)和数据缓存(@Cacheable 等)上面都使用此种形式的拦截。
2、示例
(1)添加spring aop 支持及AspectJ 依赖。
<!-- spring aop支持 -->
<dependency>
    <groupId>org.springframework</groupId>
    <artifactId>spring-aop</artifactId>
    <version>${spring-framework.version}</version>
</dependency>
<!-- aspectj支持 -->
<dependency>
    <groupId>org.aspectj</groupId>
    <artifactId>aspectjrt</artifactId>
    <version>1.8.6</version>
</dependency>
<dependency>
    <groupId>org.aspectj</groupId>
    <artifactId>aspectjweaver</artifactId>
    <version>1.8.5</version>
</dependency>
(2)编写拦截规则的注解。
package com.wisely.highlight_spring4.ch1.aop;

import java.lang.annotation.Documented;
import java.lang.annotation.ElementType;
import java.lang.annotation.Retention;
import java.lang.annotation.RetentionPolicy;
import java.lang.annotation.Target;

@Target(ElementType.METHOD)
@Retention(RetentionPolicy.RUNTIME)
@Documented
public @interface Action {
    String name();
}
代码解释
这里讲下注解,注解本身是没有功能的,就和xml 一样。注解和xml 都是一种元数据,元数据即解释数据的数据,这就是所谓的配置。
注解的功能来自用这个注解的地方。
(3)编写使用注解的被拦截类。
package com.wisely.highlight_spring4.ch1.aop;
import org.springframework.stereotype.Service;
@Service
public class DemoAnnotationService {
    @Action(name="注解式拦截的add操作")
    public void add(){}
}
(4)编写使用方法规则被拦截类。
package com.wisely.highlight_spring4.ch1.aop;
import org.springframework.stereotype.Service;
@Service
public class DemoMethodService {
    public void add(){}
}
(5)编写切面。
package com.wisely.highlight_spring4.ch1.aop;
import java.lang.reflect.Method;
import org.aspectj.lang.JoinPoint;
import org.aspectj.lang.annotation.After;
import org.aspectj.lang.annotation.Aspect;
import org.aspectj.lang.annotation.Before;
import org.aspectj.lang.annotation.Pointcut;
import org.aspectj.lang.reflect.MethodSignature;
import org.springframework.stereotype.Component;
@Aspect //1
@Component //2
public class LogAspect {
@Pointcut("@annotation(com.wisely.highlight_spring4.ch1.aop.Action)") //3
public void annotationPointCut(){};
@After("annotationPointCut()") //4
public void after(JoinPoint joinPoint) {
MethodSignature signature = (MethodSignature) joinPoint.getSignature();
Method method = signature.getMethod();
Action action = method.getAnnotation(Action.class);
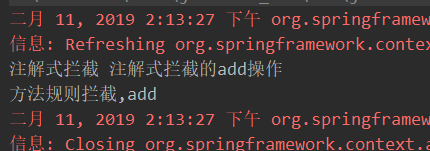
System.out.println("注解式拦截 " + action.name()); //5
}
@Before("execution(* com.wisely.highlight_spring4.ch1.aop.DemoMethodService.*(..))") //6
public void before(JoinPoint joinPoint){
MethodSignature signature = (MethodSignature) joinPoint.getSignature();
Method method = signature.getMethod();
System.out.println("方法规则式拦截,"+method.getName());
}
}代码解释
① 通过@Aspect 注解声明一个切面。
② 通过@Component 让此切面成为Spring 容器管理的Bean。
③ 通过@PointCut 注解声明切点。
④ 通过@After 注解声明一个建言,并使用@PointCut 定义的切点。
⑤ 通过反射可获得注解上的属性,然后做日志记录相关的操作,下面的相同。
⑥ 通过@Before 注解声明一个建言,此建言直接使用拦截规则作为参数。
(6)配置类
package com.wisely.highlight_spring4.ch1.aop;
import org.springframework.context.annotation.ComponentScan;
import org.springframework.context.annotation.Configuration;
import org.springframework.context.annotation.EnableAspectJAutoProxy;
@Configuration
@ComponentScan("com.wisely.highlight_spring4.ch1.aop")
@EnableAspectJAutoProxy //1
public class AopConfig {
}
代码解释
① 使用@EnableAspectJAutoProxy 注解开启Spring 对AspectJ 代理的支持。
(7)运行。
package com.wisely.highlight_spring4.ch1.aop;
import org.springframework.context.annotation.AnnotationConfigApplicationContext;
public class Main {
    public static void main(String[] args) {
         AnnotationConfigApplicationContext context =
                    new AnnotationConfigApplicationContext(AopConfig.class); //1
         DemoAnnotationService demoAnnotationService = context.getBean(DemoAnnotationService.class);
         DemoMethodService demoMethodService = context.getBean(DemoMethodService.class);
         demoAnnotationService.add();
         demoMethodService.add();
         context.close();
    }
}
结果如下图所示:


 4245
4245


 被折叠的 条评论
为什么被折叠?
被折叠的 条评论
为什么被折叠?
 到【灌水乐园】发言


