


环境
centos8
ip:看个人是公网还是其他
docker-ce
修改主机名和时间同步
		[root@harbor ~]# vim  chrony.sh
		[root@harbor ~]# chmod a+x  chrony.sh
		[root@harbor ~]# ./chrony.sh
		[root@harbor ~]# cat  chrony.sh
		#!/bin/bash
		hostnamectl  set-hostname   harbor
		bash
		yum install  chrony  -y
		systemctl  enable  chronyd.service
		systemctl  start  chronyd.service
		timedatectl set-timezone Asia/Shanghai
		chronyc   sources
关闭防火墙和关闭selinux
		[root@harbor ~]# vim  firewall.sh
		[root@harbor ~]# chmod  a+x firewall.sh
		[root@harbor ~]# ./firewall.sh
		Removed symlink /etc/systemd/system/multi-user.target.wants/firewalld.service.
		Removed symlink /etc/systemd/system/dbus-org.fedoraproject.FirewallD1.service.
		[root@harbor ~]# cat firewall.sh
		#!/bin/bash
		systemctl stop firewalld
		systemctl disable firewalld
		setenforce 0
		sed -i '/SELINUX/s/enforcing/disabled/' /etc/selinux/config
centos8替换源
   1.更换之前确保自己安装wget
	yum list wget
	2.若没有安装:
	yum -y install wget
	3.首先备份原版/etc/yum.repos.d/CentOS-Base.repo
	cd /etc/yum.repos.d
	sudo mv CentOS-Base.repo CentOS-Base.repo.bak
	4.下载阿里的yum源配置文件,放入/etc/yum.repos.d/CentOS-Base.repo
	sudo wget -O CentOS-Base.repo http://mirrors.aliyun.com/repo/Centos-7.repo
	5.运行yum makecache生成缓存
	yum clean all
	yum makecache
	第四步改一下就可以替换centos8的源:
	wget -O /etc/yum.repos.d/CentOS-Base.repo http://mirrors.aliyun.com/repo/Centos-8.repo
安装docker-ce
切记要检查更新哦 : yum -y updata
			1. 下载docker-ce的repo

			curl https://download.docker.com/linux/centos/docker-ce.repo -o /etc/yum.repos.d/docker-ce.repo
			2. 安装依赖(这是相比centos7的关键步骤)
			yum install https://download.docker.com/linux/fedora/30/x86_64/stable/Packages/containerd.io-1.2.6-3.3.fc30.x86_64.rpm
			3. 安装docker-ce
			yum install docker-ce
			4. 启动docker
			systemctl start docker
脚本安装:
			[root@harbor ~]# cat docker.sh
			#!/bin/bash
			yum install python-devel libffi-devel gcc openssl-devel libselinux-python  -y
			yum  install  yum-utils  lvm2 device-mapper-persistent-data  -y
			yum-config-manager --add-repo \
			https://mirrors.aliyun.com/docker-ce/linux/centos/docker-ce.repo
			yum  repolist
			yum install docker-ce docker-ce-cli containerd.io -y
			systemctl  enable docker.service
			systemctl   start  docker.service
			tee /etc/docker/daemon.json <<-'EOF'
			{
			   "registry-mirrors": ["http://hub-mirror.c.163.com"]
			}
			EOF
			systemctl  restart  docker.service
			[root@harbor ~]# chmod  a+x  docker.sh
			[root@harbor ~]# ./docker.sh

			 查看版本
			[root@harbor ~]# docker --version
			Docker version 19.03.9, build 9d988398e7
安装docker-compose
			[root@harbor ~]# wget -c  https://github.com/docker/compose/releases/download/1.25.5/docker-compose-Linux-x86_64
			[root@harbor ~]# mv docker-compose-Linux-x86_64  /usr/bin/docker
			docker        dockerd       docker-init   docker-proxy
			[root@harbor ~]# mv docker-compose-Linux-x86_64  /usr/bin/docker-compose
			[root@harbor ~]# chmod  a+x /usr/bin/docker-compose
			[root@harbor ~]# docker-compose  --version
			docker-compose version 1.25.5, build 8a1c60f6
harbor下载和解压
[root@harbor ~]# wget -c https://github.com/goharbor/harbor/releases/download/v2.0.0/harbor-offline-installer-v2.0.0.tgz
[root@harbor ~]# tar -xf harbor-offline-installer-v2.0.0.tgz


	配置Harbor以https启动
	cd /harbor/#进入到harbor目录
	vim harbor.yml #编辑harbor的配置文件
如果使用http协议访问,以下的配置可以忽略
	配置https
		##创建 https 证书
		#创建证书目录,并赋予权限
		[root@harbor ~]# mkdir  /https/ca  -p
		[root@harbor ~]# chmod  -R 777 /https/ca/
		[root@harbor ~]# cd /https/ca/
		#生成私钥,需要设置密码:1234
		[root@harbor ca]# openssl genrsa -des3 -out harbor.key 2048
		Generating RSA private key, 2048 bit long modulus
		.........+++
		..................................+++
		e is 65537 (0x10001)
		Enter pass phrase for harbor.key:
		Verifying - Enter pass phrase for harbor.key:
		#生成CA证书,需要输入密码1234
		[root@harbor ca]# openssl req -sha512 -new \
		>     -subj "/C=CN/ST=JS/L=WX/O=zwx/OU=jhmy/CN=10.0.0.28" \
		>     -key harbor.key \
		>     -out harbor.csr
		Enter pass phrase for harbor.key:1234
		#备份证书
		[root@harbor ca]# cp harbor.key  harbor.key.org
		#退掉私钥密码,以便docker访问(也可以参考官方进行双向认证)
		[root@harbor ca]# openssl rsa -in harbor.key.org -out harbor.key
		Enter pass phrase for harbor.key.org:
		writing RSA key
		#使用证书进行签名
		[root@harbor ca]# openssl x509 -req -days 100000  -in harbor.csr -signkey harbor.key -out harbor.crt
		Signature ok
		subject=/C=CN/ST=JS/L=WX/O=zwx/OU=jhmy/CN=10.0.0.28
		Getting Private key
harbor安装
–with-clair参数是启用漏洞扫描功能
	[root@harbor harbor]# ./install.sh  --with-clair
	[Step 0]: checking if docker is installed ...
	Note: docker version: 19.03.9
	[Step 1]: checking docker-compose is installed ...
	Note: docker-compose version: 1.25.5
	[Step 2]: loading Harbor images ...
	Loaded image: goharbor/notary-signer-photon:v2.0.0
	Loaded image: goharbor/clair-adapter-photon:v2.0.0
	Loaded image: goharbor/chartmuseum-photon:v2.0.0
	Loaded image: goharbor/harbor-log:v2.0.0
	Loaded image: goharbor/harbor-registryctl:v2.0.0
	Loaded image: goharbor/registry-photon:v2.0.0
	Loaded image: goharbor/clair-photon:v2.0.0
	Loaded image: goharbor/notary-server-photon:v2.0.0
	Loaded image: goharbor/redis-photon:v2.0.0
	Loaded image: goharbor/nginx-photon:v2.0.0
	Loaded image: goharbor/harbor-core:v2.0.0
	Loaded image: goharbor/harbor-db:v2.0.0
	Loaded image: goharbor/harbor-jobservice:v2.0.0
	Loaded image: goharbor/trivy-adapter-photon:v2.0.0
	Loaded image: goharbor/prepare:v2.0.0
	Loaded image: goharbor/harbor-portal:v2.0.0
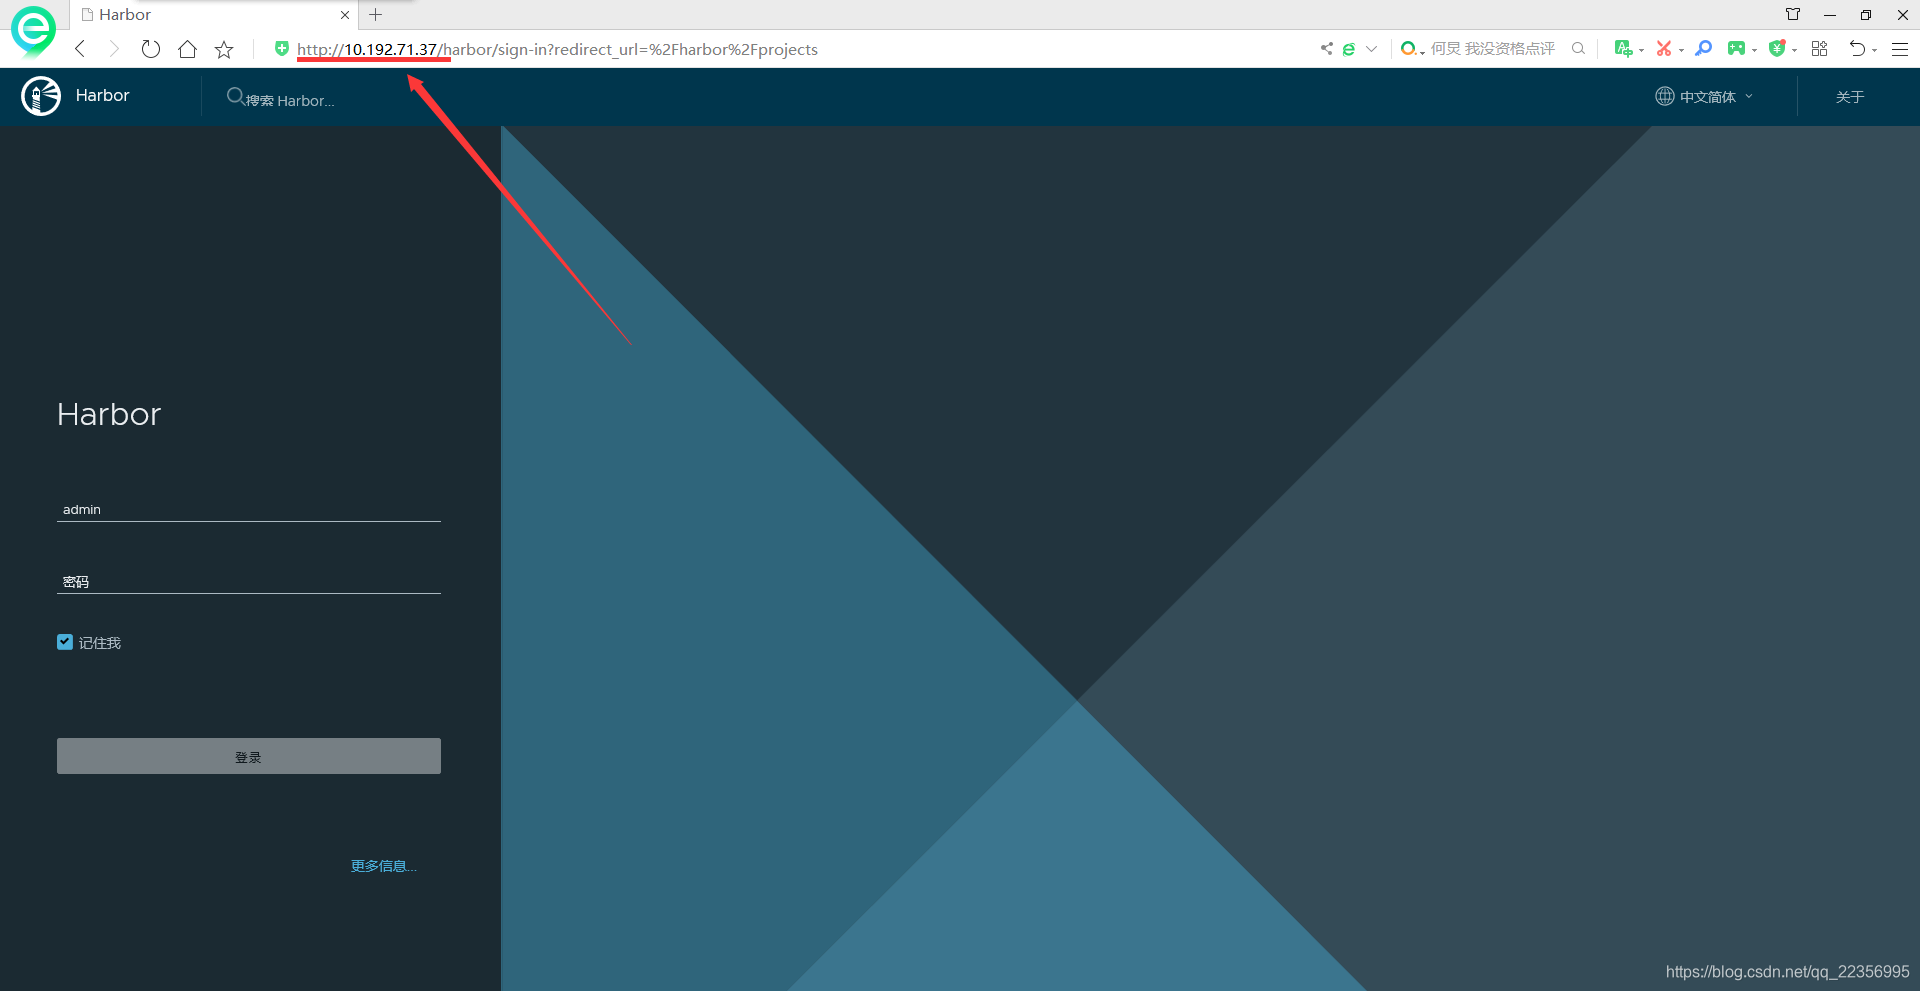
测试访问
	访问:10.192.71.37
	默认端口为80,需要修改端口请修改docker-compose.yaml对应服务的映射
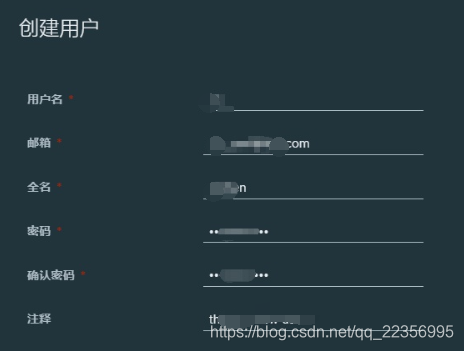
配置私有仓库
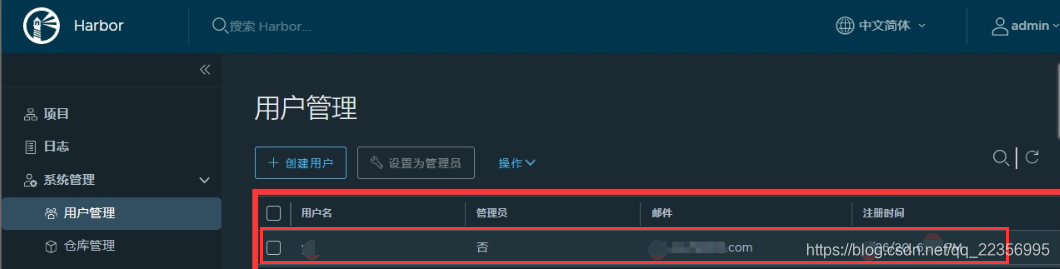
创建用户
点击系统管理>>用户管理>>创建用户
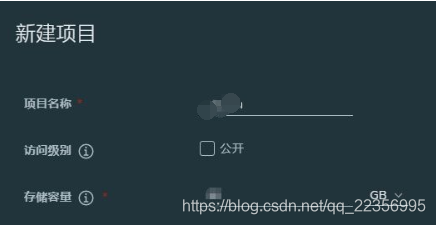
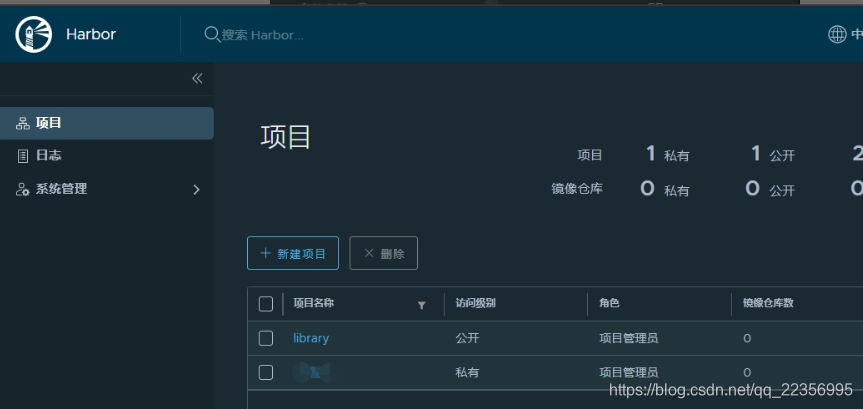
5.2.创建项目
点击项目>>新建项目
查看拉取镜像命令
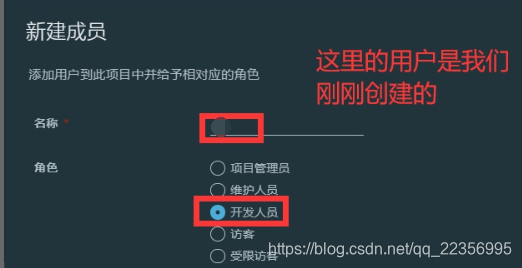
在项目里面,添加成员 ,角色为开发人员,具有推送拉取镜像的权限
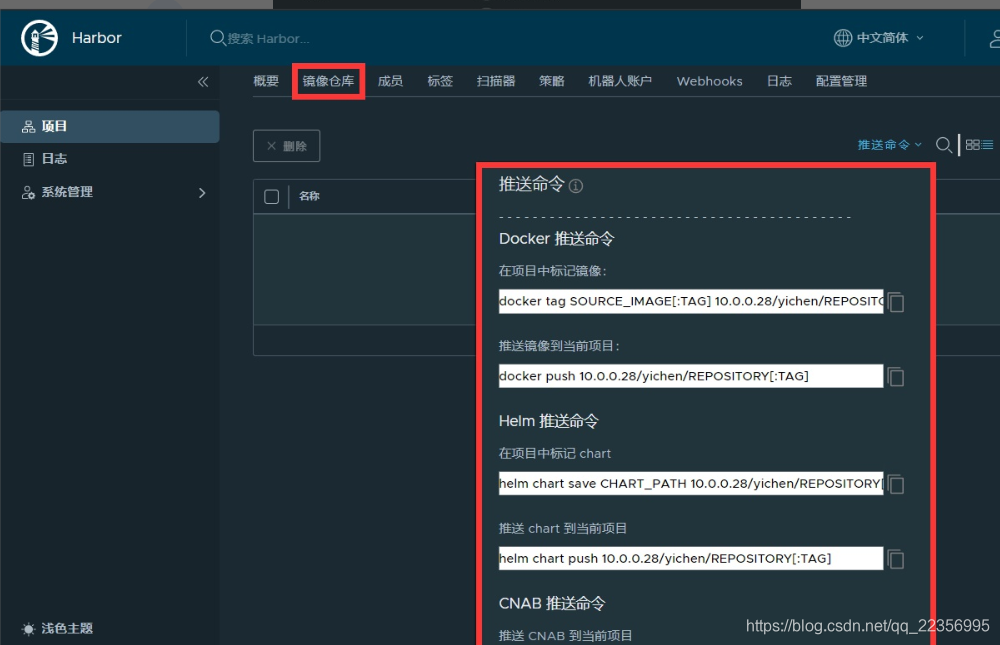
.拉取镜像,并打标上传到我的私有仓库
#客户端配置免https,配置配置镜像仓库地址并重启docker和harbor服务
#如果不配置,客户端使用时候会报错: Error response from daemon:
Get https:// 10.192.71.37:5000/v1/_ping: http: server gave HTTP response to HTTPS clien
[root@harbor ~]# cat /etc/docker/daemon.json
{
"registry-mirrors": ["https://7bc3o1s2.mirror.aliyuncs.com"],
"insecure-registries": ["http://10.0.0.28:8080"]
}
#拉取Nginx镜像作为测试使用
[root@harbor ~]# docker pull nginx:1.16
#给镜像打上标签
- 镜像仓库地址/项目名称/标签信息
[root@harbor ~]# docker image tag nginx:1.16.0 10.192.71.37:80/01/nginx:1.16.1
#登录仓库
[root@harbor ~]# docker login http://10.192.71.37:80
Username: yc
Password:
WARNING! Your password will be stored unencrypted in /root/.docker/config.json.
Configure a credential helper to remove this warning. See
https://docs.docker.com/engine/reference/commandline/login/#credentials-store
Login Succeeded
[root@harbor ~]# docker push 10.192.71.37:80/01/nginx:1.16.1
The push refers to repository [10.192.71.37:80/01/nginx]
0cf13b8a00f5: Pushed
aed8cc46f92f: Pushed
6f338879a1ed: Pushed
2128e66a9b5a: Pushed
d041fdc398d8: Pushed
92177924583e: Pushed
6fec07606ed4: Pushed
790be8671d28: Pushed
bc09170fcda4: Pushed
20b846dd4d87: Pushed
89b00f8d475b: Pushed
5ce9028f7a02: Pushed
15862b2d78f3: Pushed
b047677013ff: Pushed
74eba46650c4: Pushed
bf73eb7db5db: Pushed
d4933e6f78f4: Pushed
edf3aa290fb3: Pushed
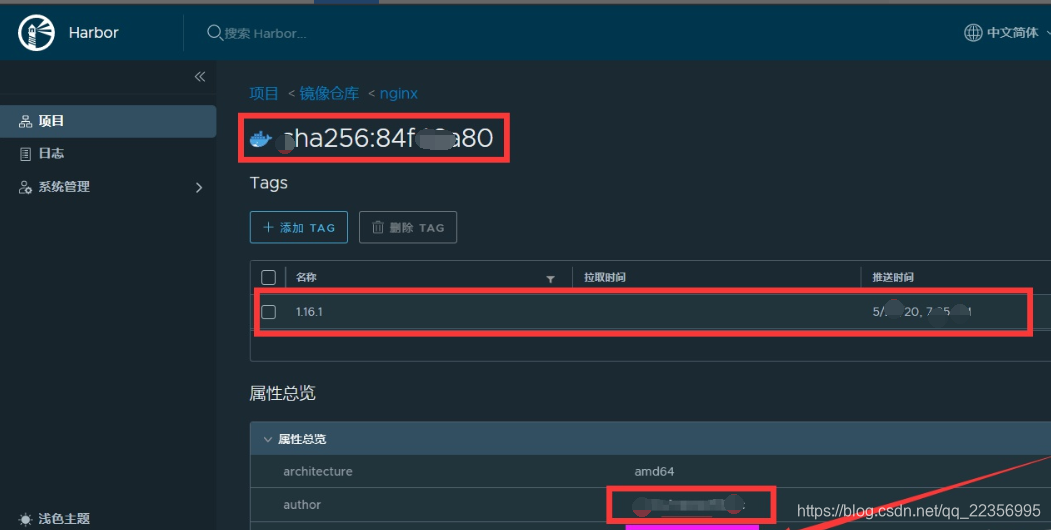
1.16.1: digest: sha256:84f46a80263e7adb96459b3cfcd5ed8db35b8fb93aad8a423bcfeecd4f759980 size: 4056


 880
880


 被折叠的 条评论
为什么被折叠?
被折叠的 条评论
为什么被折叠?
 到【灌水乐园】发言


