


具体步骤如下
1
申请Bintray账号 地址:Bintray(可用github账户登录)
登录后点击Edit
点击左侧菜单栏最后一项API Key
复制这串密文,上传的时候需要这个的权限认证
2
在project的build.gradle(也就是项目的配置文件)的dependencies中新添加如下依赖
classpath 'com.jfrog.bintray.gradle:gradle-bintray-plugin:1.6'
classpath 'com.github.dcendents:android-maven-gradle-plugin:1.4.1'
如果Gradle的Version>2.1
plugins {
    id "com.jfrog.bintray" version "1.6"
}
3
module 的build.gradle中顶部添加
apply plugin: 'com.github.dcendents.android-maven'
apply plugin: 'com.jfrog.bintray'

// 这个version是library的版本,更新后也需要更改这个值
version = "0.0.1"
android 和 dependencies 代码块不增加东西。
在文件最后添加
def siteUrl = 'https://github.com/nebulae-pan/OkHttpDownloadManager'   // 项目的主页
def gitUrl = 'https://github.com/nebulae-pan/OkHttpDownloadManager.git'   // Git仓库的url
group = "nebulae.library.wheel"            // Maven Group ID for the artifact,
install {
    repositories.mavenInstaller {
        // This generates POM.xml with proper parameters
        pom {
            project {
                packaging 'aar'
                // Add your description here
                name 'A simple file download manager support by okHttp'     //项目的描述 你可以多写一点
                url siteUrl
                // Set your license
                licenses {
                    license {
                        name 'The Apache Software License, Version 2.0'
                        url 'http://www.apache.org/licenses/LICENSE-2.0.txt'
                    }
                }
                developers {
                    developer {
                        id 'nebulae-pan'        //填写的一些基本信息
                        name 'Xinghai Pan'
                        email 'pxhjlu0929@gmail.com'
                    }
                }
                scm {
                    connection gitUrl
                    developerConnection gitUrl
                    url siteUrl
                }
            }
        }
    }
}
task sourcesJar(type: Jar) {
    from android.sourceSets.main.java.srcDirs
    classifier = 'sources'
}
task javadoc(type: Javadoc) {
    source = android.sourceSets.main.java.srcDirs
    classpath += project.files(android.getBootClasspath().join(File.pathSeparator))
}
task javadocJar(type: Jar, dependsOn: javadoc) {
    classifier = 'javadoc'
    from javadoc.destinationDir
}
artifacts {
    archives javadocJar
    archives sourcesJar
}
Properties properties = new Properties()
//读取properties的配置信息,当然直接把信息写到代码里也是可以的
properties.load(project.rootProject.file('local.properties').newDataInputStream())
bintray {
    user = properties.getProperty("bintray.user")
    key = properties.getProperty("bintray.apikey")
    configurations = ['archives']
    pkg {
        repo = "maven"          //这个应该是传到maven的仓库的
        name = "okhttpDownloadManager"    //发布的项目名字
        websiteUrl = siteUrl
        vcsUrl = gitUrl
        licenses = ["Apache-2.0"]
        publish = true
    }
}
4
如果按照从文件读取的方法
那么就在local.propeties文件中增加如下两行
bintray.user=user_name  //这个是你的账户名
bintray.apikey=user_key //api key填到这里
检查一下.gitignore文件,如果没有如下的语句,添加上,防止这个文件也被传到仓库中
/local.properties当然,不用文件配置的话,也可以直接把信息写到gradle里,就不需要读取文件的语句了。
user = "bintray_user"
key = "bintray_api_key"
5
在AS的terminal里依次运行
gradlew install
gradlew  bintrayUpload
如果你代码风格极好(不写注释,或者全英文注释),那么运行成功,就可去Bintary首页找你的仓库,因为是传到maven仓库,所以可以申请传到JCenter仓库
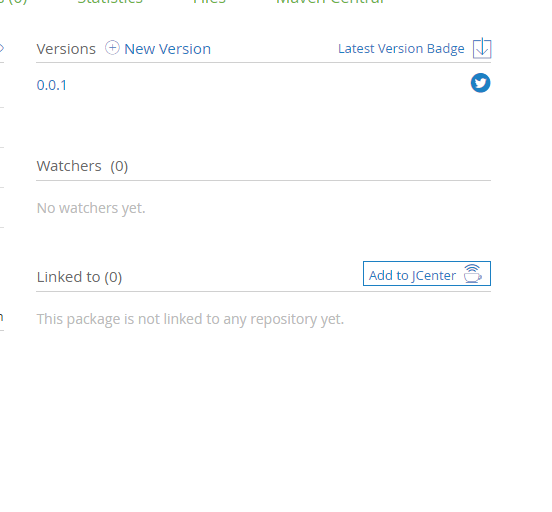
点击右下角的Add to JCenter,填上comment,Send即可。回复后就添加到JCenter了。
这时候就可以使用了,路径在仓库页面也有显示,Maven,Gradle,lvy都有。
<!--Maven-->
<dependency>
  <groupId>nebulae.library.wheel</groupId>
  <artifactId>downloadmanager</artifactId>
  <version>0.0.1</version>
  <type>pom</type>
</dependency>
//gradle
compile 'nebulae.library.wheel:downloadmanager:0.0.1'<!--lvy-->
<dependency org='nebulae.library.wheel' name='downloadmanager' rev='0.0.1'>
<artifact name='$AID' ext='pom'></artifact>
</dependency>通过gradle使用路径就可以直接把library的arr包打包到需要的项目中了。
6 但是
我相信绝大多数人都会遇到BUILD FAILED 的情况的。
打包过程遇到的错误大致总结一下就是
Javadoc generation failed. Generated Javadoc options file (useful for troubleshooting): ‘路径’
- 错误: 编码GBK的不可映射字符 ——注释不要用中文,或者修改项目的字符编码
- 错误: 找不到符号——删除javadoc里所有的html标签
Could not create package ‘路径’: HTTP/1.1 401 Unauthorized [message:This resource requires authentication]
- 你一定是用户名或者APIKey填错了。
修改完错误上传成功之后,就可以方便的使用compile了。以上。


 1882
1882


 被折叠的 条评论
为什么被折叠?
被折叠的 条评论
为什么被折叠?
 到【灌水乐园】发言


