


android自定义桌面应用
这篇文章主要讲下自定义桌面应用.
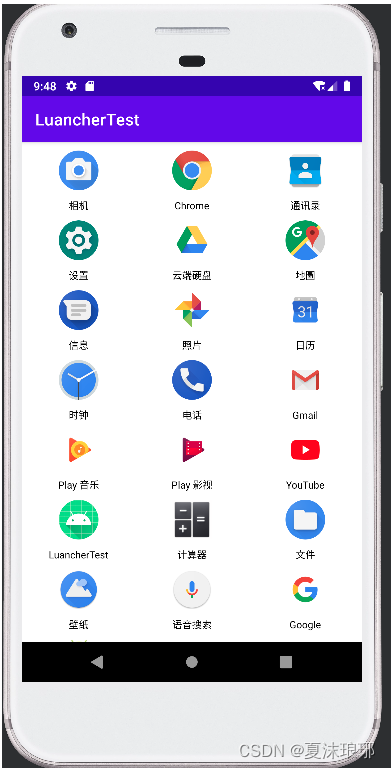
效果主要是调用packageManager来获取当前所有的程序,并在自定义桌面程序中展示,并支持跳转.
主要的代码如下:
1.manifest声明
“android.intent.category.HOME” 是Android中的一个Intent过滤器类别,用于指定一个Activity作为设备的主屏幕。
当用户按下设备的Home键时,系统会启动具有该过滤器的Activity,并将其设置为设备的主屏幕。
   <activity android:name=".MainActivity">
            <intent-filter>
                <action android:name="android.intent.action.MAIN" />
                <category android:name="android.intent.category.HOME" />
                <category android:name="android.intent.category.DEFAULT" />
                <category android:name="android.intent.category.LAUNCHER" />
            </intent-filter>
        </activity>
2: 创建adapter
package com.test.luanchertest;

import android.content.Context;
import android.content.Intent;
import android.content.pm.PackageManager;
import android.content.pm.ResolveInfo;
import android.util.Log;
import android.view.LayoutInflater;
import android.view.View;
import android.view.ViewGroup;
import android.widget.BaseAdapter;
import android.widget.ImageView;
import android.widget.TextView;

import java.util.List;

/**
 * @Author: zh
 * @Time: 23-11-27.
 * @Email:
 * @Describe:
 */
public class LauncherAdapter extends BaseAdapter {
    private List<ResolveInfo> mApps;
    private PackageManager mPackageManager;
    private Context context;

    public LauncherAdapter(Context context) {
        this.context = context;
        mPackageManager = context.getPackageManager();
        Intent mainIntent = new Intent(Intent.ACTION_MAIN, null);
        mainIntent.addCategory(Intent.CATEGORY_LAUNCHER);
        mApps = mPackageManager.queryIntentActivities(mainIntent, 0);
    }

    @Override
    public int getCount() {
        return mApps.size();
    }

    @Override
    public Object getItem(int i) {
        return mApps.get(i);
    }

    @Override
    public long getItemId(int i) {
        return i;
    }

    @Override
    public View getView(int i, View view, ViewGroup viewGroup) {
        if (view == null) {
            view = LayoutInflater.from(context).inflate(R.layout.item_launcher, viewGroup, false);
        }
        ResolveInfo info = mApps.get(i);
        ImageView icon = (ImageView) view.findViewById(R.id.item_icon);
        TextView label = (TextView) view.findViewById(R.id.item_label);
        icon.setImageDrawable(info.loadIcon(mPackageManager));
        label.setText(info.loadLabel(mPackageManager));
        String packageName = info.activityInfo.packageName;
        Log.e("xxxxxxx", "getView: "+packageName );
        Intent launchIntent = mPackageManager.getLaunchIntentForPackage(packageName);
        icon.setOnClickListener(v -> context.startActivity(launchIntent));
        label.setOnClickListener(v -> context.startActivity(launchIntent));
        return view;
    }
}
ResolveInfo类的主要属性包括:
activityInfo:表示应用程序组件的Activity信息,包括包名、类名等。
serviceInfo:表示应用程序组件的Service信息,包括包名、类名等。
providerInfo:表示应用程序组件的Content Provider信息,包括包名、类名等。
filter:表示应用程序组件的Intent过滤器信息,包括Action、Category、Data等。
icon:表示应用程序组件的图标。
labelRes:表示应用程序组件的标签资源ID。
packageName:表示应用程序组件所属的包名。
通过getLaunchIntentForPackage(),可以获取到启动指定应用程序的Intent对象,
然后可以使用该Intent对象进行应用程序的启动操作.
3: 创建item布局
<?xml version="1.0" encoding="utf-8"?>
<LinearLayout xmlns:android="http://schemas.android.com/apk/res/android"
    android:layout_width="match_parent"
    android:layout_height="wrap_content"
    android:orientation="vertical"
    xmlns:app="http://schemas.android.com/apk/res-auto">
    <ImageView
        android:id="@+id/item_icon"
        android:layout_width="48dp"
        android:layout_height="48dp"
        android:scaleType="centerCrop"
        android:layout_gravity="center_horizontal"
        android:layout_margin="10dp"
        />
    <TextView
        android:id="@+id/item_label"
        android:layout_width="wrap_content"
        android:layout_height="wrap_content"
        android:textSize="12sp"
        android:textColor="#000000"
        android:text="xxxx"
        android:layout_gravity="center_horizontal"
        />
</LinearLayout>
4: mainAcitivty处理
public class MainActivity extends AppCompatActivity {
    private GridView gridView;
    @Override
    protected void onCreate(Bundle savedInstanceState) {
        super.onCreate(savedInstanceState);
        setContentView(R.layout.activity_main);
        gridView =findViewById(R.id.launcher_grid);
        gridView.setAdapter(new LauncherAdapter(this));
    }
}
主布局:
<?xml version="1.0" encoding="utf-8"?>
<androidx.constraintlayout.widget.ConstraintLayout xmlns:android="http://schemas.android.com/apk/res/android"
    xmlns:app="http://schemas.android.com/apk/res-auto"
    xmlns:tools="http://schemas.android.com/tools"
    android:layout_width="match_parent"
    android:layout_height="match_parent"
    tools:context=".MainActivity">

    <GridView
        android:layout_width="match_parent"
        android:layout_height="match_parent"
        app:layout_constraintStart_toStartOf="parent"
        app:layout_constraintTop_toTopOf="parent"
        android:id="@+id/launcher_grid"
        android:numColumns="3"
        />
</androidx.constraintlayout.widget.ConstraintLayout>
运行效果如下:
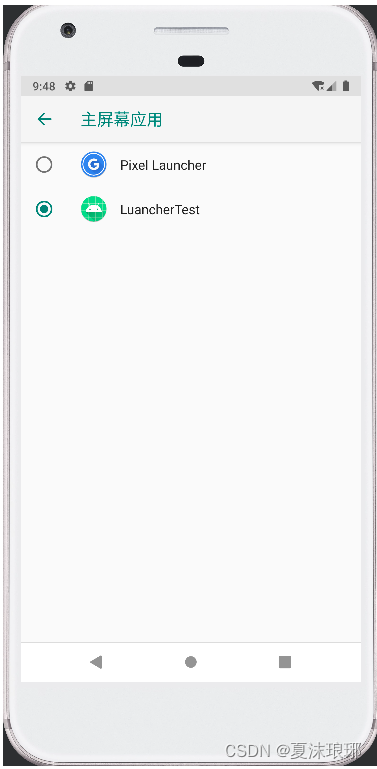
在设置中可以查找默认桌面应用:


 463
463

 被折叠的 条评论
为什么被折叠?
被折叠的 条评论
为什么被折叠?
 到【灌水乐园】发言


