


第1节 SpringBoot概述
1.1Spring的优点分析
Spring是Java企业版(Java Enterprise Edition,JEE,也称J2EE)的轻量级代替品。无需开发重量级的Enterprise JavaBean(EJB),Spring为企业级Java开发提供了一种相对简单的方法,通过依赖注入和面向切面编程,用简单的Java对象(Plain Old Java Object,POJO)实现了EJB的功能。
1.2Spring的缺点分析
虽然Spring的组件代码是轻量级的,但它的配置却是重量级的。一开始,Spring用XML配置,而且是很多XML配 置。Spring 2.5引入了基于注解的组件扫描,这消除了大量针对应用程序自身组件的显式XML配置。Spring 3.0引入了基于Java的配置,这是一种类型安全的可重构配置方式,可以代替XML。
所有这些配置都代表了开发时的损耗。因为在思考Spring特性配置和解决业务问题之间需要进行思维切换,所以编 写配置挤占了编写应用程序逻辑的时间。和所有框架一样,Spring实用,但与此同时它要求的回报也不少。
除此之外,项目的依赖管理也是一件耗时耗力的事情。在环境搭建时,需要分析要导入哪些库的坐标,而且还需要 分析导入与之有依赖关系的其他库的坐标,一旦选错了依赖的版本,随之而来的不兼容问题就会严重阻碍项目的开发进度。
1.3SpringBoot解决上述Spring的缺点
SpringBoot对上述Spring的缺点进行的改善和优化,基于约定优于配置的思想,可以让开发人员不必在配置与逻辑业务之间进行思维的切换,全身心的投入到逻辑业务的代码编写中,从而大大提高了开发的效率,一定程度上缩短了项目周期。
SpringBoot的特点
为基于Spring的开发提供更快的入门体验
开箱即用,没有代码生成,也无需XML配置。同时也可以修改默认值来满足特定的需求
提供了一些大型项目中常见的非功能性特性,如嵌入式服务器、安全、指标,健康检测、外部配置等
SpringBoot不是对Spring功能上的增强,而是提供了一种快速使用Spring的方式
SpringBoot的核心功能
起步依赖
起步依赖本质上是一个Maven项目对象模型(Project Object Model,POM),定义了对其他库的传递依赖,这些东西加在一起即支持某项功能。
简单的说,起步依赖就是将具备某种功能的坐标打包到一起,并提供一些默认的功能。
自动配置
Spring Boot的自动配置是一个运行时(更准确地说,是应用程序启动时)的过程,考虑了众多因素,才决定Spring配置应该用哪个,不该用哪个。该过程是Spring自动完成的。
第2节 SpringBoot入门案列
2.1代码实现
在idea工具中使用Spring Initalizr快速创建一个web项目


选择依赖

自动生成引导类
要通过SpringBoot提供的引导类起步SpringBoot才可以进行访问
2.1.1编写Controller
在引导类MySpringBootApplication同级包或者子级包中创建Controller
@Controller
public class MyController {


    @RequestMapping("/test")
    @ResponseBody
    public String testSpringBoot() {
        return "testSpringBoot success!";
    }
}
2.1.2测试
执行SpringBoot起步类的主方法,控制台打印日志如下:

通过日志发现,Tomcat started on port(s): 8080 (http) with context path ‘’ tomcat已经起步,端口监听8080,web应用的虚拟工程名称为空

2.2快速入门解析
2.2.1SpringBoot代码解析
@SpringBootApplication:标注SpringBoot的启动类,该注解具备多种功能(后面详细剖析)
SpringApplication.run(MySpringBootApplication.class) 代表运行SpringBoot的启动类,参数为SpringBoot 启动类的字节码对象
2.2.2SpringBoot工程热部署
我们在开发中反复修改类、页面等资源,每次修改后都是需要重新启动才生效,这样每次启动都很麻烦,浪费了大 量的时间,我们可以在修改代码后不重启就能生效,在 pom.xml 中添加如下配置就可以实现这样的功能,我们称 之为热部署。
<!--热部署配置-->
<dependency>
<groupId>org.springframework.boot</groupId>
<artifactId>spring-boot-devtools</artifactId>
</dependency>
注意:IDEA进行SpringBoot热部署失败原因
出现这种情况,并不是热部署配置问题,其根本原因是因为Intellij IEDA默认情况下不会自动编译,需要对IDEA进行自动编译的设置,如下:

然后 Shift+Ctrl+Alt+/,选择Registry

第3节 SpringBoot原理分析
3.1起步依赖原理分析
3.1.1分析spring-boot-starter-parent
按住Ctrl点击pom.xml中的spring-boot-starter-parent,跳转到了spring-boot-starter-parent的pom.xml,xml配 置如下(只摘抄了部分重点配置):
<parent>
  <groupId>org.springframework.boot</groupId>
  <artifactId>spring-boot-dependencies</artifactId>
  <version>2.4.0</version>
</parent>
按住Ctrl点击pom.xml中的spring-boot-starter-dependencies,跳转到了spring-boot-starter-dependencies的
pom.xml,xml配置如下(只摘抄了部分重点配置):
<properties>
  <activemq.version>5.16.0</activemq.version>
  <antlr2.version>2.7.7</antlr2.version>
  <appengine-sdk.version>1.9.83</appengine-sdk.version>
  <artemis.version>2.15.0</artemis.version>
  <aspectj.version>1.9.6</aspectj.version>
  <assertj.version>3.18.1</assertj.version>
  <atomikos.version>4.0.6</atomikos.version>
  <awaitility.version>4.0.3</awaitility.version>
  <bitronix.version>2.1.4</bitronix.version>
  <build-helper-maven-plugin.version>3.2.0</build-helper-maven-plugin.version>
  <byte-buddy.version>1.10.18</byte-buddy.version>
  <caffeine.version>2.8.6</caffeine.version>
……
<dependencyManagement>
  <dependencies>
    <dependency>
      <groupId>org.apache.activemq</groupId>
      <artifactId>activemq-amqp</artifactId>
      <version>${activemq.version}</version>
    </dependency>
    <dependency>
      <groupId>org.apache.activemq</groupId>
      <artifactId>activemq-blueprint</artifactId>
      <version>${activemq.version}</version>
    </dependency>
    <dependency>
      <groupId>org.apache.activemq</groupId>
      <artifactId>activemq-broker</artifactId>
      <version>${activemq.version}</version>
    </dependency>
从上面的spring-boot-starter-dependencies的pom.xml中我们可以发现,一部分坐标的版本、依赖管理、插件管理已经定义好,所以我们的SpringBoot工程继承spring-boot-starter-parent后已经具备版本锁定等配置了。所以起步依赖的作用就是进行依赖的传递。
总结:
starter-parent主要功能归纳为:
1.添加对spring-boot-dependencies的依赖
2.指定工程的编码格式
3.指定工程依赖的JDK版本
4.自动化打包与插件配置
5.资源过滤配置
dependencies的依赖文件列举的属性properties里展示了各种依赖包的版本,使用<dependencyManagement>进行版本依赖管理,我们在开发的时候才不必添加版本,就可以下载到相应的依赖。
3.1.2分析spring-boot-starter-web
按住Ctrl点击pom.xml中的spring-boot-starter-web,跳转到了spring-boot-starter-web的pom.xml,xml配置如下(只摘抄了部分重点配置):
<?xml version="1.0" encoding="UTF-8"?>
<project xsi:schemaLocation="http://maven.apache.org/POM/4.0.0 http://maven.apache.org/xsd/maven-4.0.0.xsd" xmlns="http://maven.apache.org/POM/4.0.0"
    xmlns:xsi="http://www.w3.org/2001/XMLSchema-instance">
  <!-- This module was also published with a richer model, Gradle metadata,  -->
  <!-- which should be used instead. Do not delete the following line which  -->
  <!-- is to indicate to Gradle or any Gradle module metadata file consumer  -->
  <!-- that they should prefer consuming it instead. -->
  <!-- do_not_remove: published-with-gradle-metadata -->
  <modelVersion>4.0.0</modelVersion>
  <groupId>org.springframework.boot</groupId>
  <artifactId>spring-boot-starter-web</artifactId>
  <version>2.4.0</version>
  <name>spring-boot-starter-web</name>
  <description>Starter for building web, including RESTful, applications using Spring MVC. Uses Tomcat as the default embedded container</description>
  <url>https://spring.io/projects/spring-boot</url>
  <organization>
    <name>Pivotal Software, Inc.</name>
    <url>https://spring.io</url>
  </organization>
  <licenses>
    <license>
      <name>Apache License, Version 2.0</name>
      <url>https://www.apache.org/licenses/LICENSE-2.0</url>
    </license>
  </licenses>
  <developers>
    <developer>
      <name>Pivotal</name>
      <email>info@pivotal.io</email>
      <organization>Pivotal Software, Inc.</organization>
      <organizationUrl>https://www.spring.io</organizationUrl>
    </developer>
  </developers>
  <scm>
    <connection>scm:git:git://github.com/spring-projects/spring-boot.git</connection>
    <developerConnection>scm:git:ssh://git@github.com/spring-projects/spring-boot.git</developerConnection>
    <url>https://github.com/spring-projects/spring-boot</url>
  </scm>
  <issueManagement>
    <system>GitHub</system>
    <url>https://github.com/spring-projects/spring-boot/issues</url>
  </issueManagement>
  <dependencies>
    <dependency>
      <groupId>org.springframework.boot</groupId>
      <artifactId>spring-boot-starter</artifactId>
      <version>2.4.0</version>
      <scope>compile</scope>
    </dependency>
    <dependency>
      <groupId>org.springframework.boot</groupId>
      <artifactId>spring-boot-starter-json</artifactId>
      <version>2.4.0</version>
      <scope>compile</scope>
    </dependency>
    <dependency>
      <groupId>org.springframework.boot</groupId>
      <artifactId>spring-boot-starter-tomcat</artifactId>
      <version>2.4.0</version>
      <scope>compile</scope>
    </dependency>
    <dependency>
      <groupId>org.springframework</groupId>
      <artifactId>spring-web</artifactId>
      <version>5.3.1</version>
      <scope>compile</scope>
    </dependency>
    <dependency>
      <groupId>org.springframework</groupId>
      <artifactId>spring-webmvc</artifactId>
      <version>5.3.1</version>
      <scope>compile</scope>
    </dependency>
  </dependencies>
</project>
从上面的spring-boot-starter-web的pom.xml中我们可以发现,spring-boot-starter-web就是将web开发要使用的spring-web、spring-webmvc等坐标进行了“打包”,这样我们的工程只要引入spring-boot-starter-web起步依赖的坐标就可以进行web开发了,同样体现了依赖传递的作用。
3.1.3使用自选版本的Tomcat
只需在spring-boot-starter-web起步依赖中排除tomcat依赖,并在项目pom文件中添加tomcat依赖
<dependencies>
        <dependency>
            <groupId>org.springframework.boot</groupId>
            <artifactId>spring-boot-starter-web</artifactId>
            <exclusions>
             <exclusion>
                    <groupId>org.springframework.boot</groupId>
                    <artifactId>spring-boot-starter-tomcat</artifactId>
                </exclusion>
            </exclusions>
        </dependency>


        <dependency>
            <groupId>org.apache.tomcat.embed</groupId>
            <artifactId>tomcat-embed-core</artifactId>
            <version>9.0.30</version>
        </dependency>
        <dependency>
            <groupId>org.apache.tomcat.embed</groupId>
            <artifactId>tomcat-embed-el</artifactId>
            <version>9.0.30</version>
        </dependency>
        <dependency>
            <groupId>org.apache.tomcat.embed</groupId>
            <artifactId>tomcat-embed-websocket</artifactId>
            <version>9.0.30</version>
        </dependency>
    </dependencies>
3.2自动配置原理解析
按住Ctrl点击查看启动类MySpringBootApplication上的注解@SpringBootApplication
@SpringBootApplication
public class SpringbootDemo1Application {

    public static void main(String[] args) {
        SpringApplication.run(SpringbootDemo1Application.class, args);
    }

}
注解@SpringBootApplication的源码
@Target({ElementType.TYPE})
@Retention(RetentionPolicy.RUNTIME)
@Documented
@Inherited
@SpringBootConfiguration
@EnableAutoConfiguration
@ComponentScan(
    excludeFilters = {@Filter(
    type = FilterType.CUSTOM,
    classes = {TypeExcludeFilter.class}
), @Filter(
    type = FilterType.CUSTOM,
    classes = {AutoConfigurationExcludeFilter.class}
)}
)
public @interface SpringBootApplication {
    @AliasFor(
        annotation = EnableAutoConfiguration.class
    )
    Class<?>[] exclude() default {};
……
其中,
@SpringBootConfiguration:等同与@Configuration,既标注该类是Spring的一个配置类@EnableAutoConfiguration:SpringBoot自动配置功能开启
按住Ctrl点击查看注解@EnableAutoConfiguration
@Target({ElementType.TYPE})
@Retention(RetentionPolicy.RUNTIME)
@Documented
@Inherited
@AutoConfigurationPackage
@Import({AutoConfigurationImportSelector.class})
public @interface EnableAutoConfiguration {
    String ENABLED_OVERRIDE_PROPERTY = "spring.boot.enableautoconfiguration";

   .
}
其中,@Import(AutoConfigurationImportSelector.class) 导入了AutoConfigurationImportSelector类按住Ctrl点击查看AutoConfigurationImportSelector源码
public String[] selectImports(AnnotationMetadata annotationMetadata) {
    if (!this.isEnabled(annotationMetadata)) {
        return NO_IMPORTS;
    } else {
        AutoConfigurationImportSelector.AutoConfigurationEntry autoConfigurationEntry = this.getAutoConfigurationEntry(annotationMetadata);
        return StringUtils.toStringArray(autoConfigurationEntry.getConfigurations());
    }
}

protected AutoConfigurationImportSelector.AutoConfigurationEntry getAutoConfigurationEntry(AnnotationMetadata annotationMetadata) {
    if (!this.isEnabled(annotationMetadata)) {
        return EMPTY_ENTRY;
    } else {
        AnnotationAttributes attributes = this.getAttributes(annotationMetadata);
        List<String> configurations = this.getCandidateConfigurations(annotationMetadata, attributes);
        configurations = this.removeDuplicates(configurations);
        Set<String> exclusions = this.getExclusions(annotationMetadata, attributes);
        this.checkExcludedClasses(configurations, exclusions);
        configurations.removeAll(exclusions);
        configurations = this.getConfigurationClassFilter().filter(configurations);
        this.fireAutoConfigurationImportEvents(configurations, exclusions);
        return new AutoConfigurationImportSelector.AutoConfigurationEntry(configurations, exclusions);
    }
}

public static List<String> loadFactoryNames(Class<?> factoryType, @Nullable ClassLoader classLoader) {
    ClassLoader classLoaderToUse = classLoader;
    if (classLoader == null) {
        classLoaderToUse = SpringFactoriesLoader.class.getClassLoader();
    }

    String factoryTypeName = factoryType.getName();
    return (List)loadSpringFactories(classLoaderToUse).getOrDefault(factoryTypeName, Collections.emptyList());
}

private static Map<String, List<String>> loadSpringFactories(ClassLoader classLoader) {
    Map<String, List<String>> result = (Map)cache.get(classLoader);
    if (result != null) {
        return result;
    } else {
        HashMap result = new HashMap();

        try {
            Enumeration urls = classLoader.getResources("META-INF/spring.factories");
其中,SpringFactoriesLoader.loadFactoryNames 方法的作用就是从META-INF/spring.factories文件中读取指定类对应的类名称列表

spring.factories 文件中有关自动配置的配置信息如下:
……
# AutoConfigureWebMvc auto-configuration imports
org.springframework.boot.test.autoconfigure.web.servlet.AutoConfigureWebMvc=\
org.springframework.boot.autoconfigure.context.MessageSourceAutoConfiguration,\
org.springframework.boot.autoconfigure.data.web.SpringDataWebAutoConfiguration,\
org.springframework.boot.autoconfigure.freemarker.FreeMarkerAutoConfiguration,\
org.springframework.boot.autoconfigure.groovy.template.GroovyTemplateAutoConfiguration,\
org.springframework.boot.autoconfigure.gson.GsonAutoConfiguration,\
org.springframework.boot.autoconfigure.hateoas.HypermediaAutoConfiguration,\
org.springframework.boot.autoconfigure.http.HttpMessageConvertersAutoConfiguration,\
org.springframework.boot.autoconfigure.jackson.JacksonAutoConfiguration,\
org.springframework.boot.autoconfigure.jsonb.JsonbAutoConfiguration,\
org.springframework.boot.autoconfigure.mustache.MustacheAutoConfiguration,\
org.springframework.boot.autoconfigure.task.TaskExecutionAutoConfiguration,\
org.springframework.boot.autoconfigure.thymeleaf.ThymeleafAutoConfiguration,\
org.springframework.boot.autoconfigure.validation.ValidationAutoConfiguration,\
org.springframework.boot.autoconfigure.web.servlet.error.ErrorMvcAutoConfiguration,\
org.springframework.boot.autoconfigure.web.servlet.HttpEncodingAutoConfiguration,\
org.springframework.boot.autoconfigure.web.servlet.WebMvcAutoConfiguration
……
上面配置文件存在大量的以Configuration为结尾的类名称,这些类就是存有自动配置信息的类,而SpringApplication在获取这些类名后再加载
自动配置的核心: 条件注解
@Conditional 依赖的条件
@ConditionalOnBean 在某个Bean存在的条件下
@ConditionalOnMissingBean 在某个Bean不存在的条件下
@ConditionalOnClass 在某个Class存在的条件下
@ConditionalOnMissingClass 在某个Class不存在的条件下
@ConditionalOnSingleCandidate表示当指定Bean在容器中只有一个
我们以RedisAutoConfiguration为例来分析源码:
@Configuration(
    proxyBeanMethods = false
)
@ConditionalOnClass({RedisOperations.class})
@EnableConfigurationProperties({RedisProperties.class})
@Import({LettuceConnectionConfiguration.class, JedisConnectionConfiguration.class})
public class RedisAutoConfiguration {
    public RedisAutoConfiguration() {
    }

    @Bean
    @ConditionalOnMissingBean(
        name = {"redisTemplate"}
    )
    @ConditionalOnSingleCandidate(RedisConnectionFactory.class)
    public RedisTemplate<Object, Object> redisTemplate(RedisConnectionFactory redisConnectionFactory) {
        RedisTemplate<Object, Object> template = new RedisTemplate();
        template.setConnectionFactory(redisConnectionFactory);
        return template;
    }

    @Bean
    @ConditionalOnMissingBean
    @ConditionalOnSingleCandidate(RedisConnectionFactory.class)
    public StringRedisTemplate stringRedisTemplate(RedisConnectionFactory redisConnectionFactory) {
        StringRedisTemplate template = new StringRedisTemplate();
        template.setConnectionFactory(redisConnectionFactory);
        return template;
    }
}
Spring Boot关于Spring Data Redis的自动配置类, @ConditionalOnClass({RedisOperations.class})的作用是检测到spring-boot-starter-data-redis包被使用时才应用。
RedisAutoConfiguration自身主要的作用是确保以下bean存在于容器中 :
RedisTemplate redisTemplate – 基于容器中的redisConnectionFactory bean
StringRedisTemplate stringRedisTemplate – 基于容器中的redisConnectionFactory bean
所以我们只需在项目pom文件中添加redis依赖
<dependency>
  <groupId>org.springframework.boot</groupId>
  <artifactId>spring-boot-starter-data-redis</artifactId>
  <version>2.4.0</version>
</dependency>
項目启动时就会启用RedisAutoConfiguration自动配置类,条件化的创建RedisTemplate和SringRedisTemplate对象,并注入到spring容器中,我们可以在代码中通过@Autowire注解拿到RedisTemplate和SringRedisTemplate对象。
第4节 SpringBoot配置文件
4.1SpringBoot配置文件类型
4.1.1SpringBoot配置文件类型和作用
SpringBoot是基于约定的,所以很多配置都有默认值,但如果想使用自己的配置替换默认配置的话,就可以使用application.properties或者application.yml(application.yaml)进行配置。
SpringBoot默认会从Resources目录下加载application.properties或application.yml(application.yaml)文件
其中,application.properties文件是键值对类型的文件,之前一直在使用,所以此处不在对properties文件的格式进行阐述。除了properties文件外,SpringBoot还可以使用yml文件进行配置,下面对yml文件进行讲解。
4.1.2application.yml配置文件
4.1.2.1yml配置文件简介
YML文件格式是YAML (YAML Aint Markup Language)编写的文件格式,YAML是一种直观的能够被电脑识别的的数据数据序列化格式,并且容易被人类阅读,容易和脚本语言交互的,可以被支持YAML库的不同的编程语言程序导 入,比如: C/C++, Ruby, Python, Java, Perl, C#, PHP等。YML文件是以数据为核心的,比传统的xml方式更加简洁。
YML文件的扩展名可以使用.yml或者.yaml。
4.1.2.2yml配置文件的语法
4.1.2.2.1配置普通数据
语法: key: value
示例代码:
name: haohao
注意:value之前有一个空格
4.1.3SpringBoot配置信息的查询
上面提及过,SpringBoot的配置文件,主要的目的就是对配置信息进行修改的,但在配置时的key从哪里去查询 呢?我们可以查阅SpringBoot的官方文档
文档URL:https://docs.spring.io/spring-boot/docs/2.4.0/reference/htmlsingle/#core-properties
常用的配置摘抄如下:
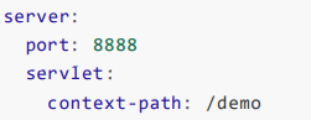
我们可以通过配置application.poperties 或者 application.yml 来修改SpringBoot的默认配置例如:
application.properties文件
1server.port=8888
2server.servlet.context-path=demo
application.yml文件
4.2配置文件与配置类的属性映射方式
4.2.1使用注解@Value映射
我们可以通过@Value注解将配置文件中的值映射到一个Spring管理的Bean的字段上 例如:
application.properties配置如下:
person.lastName=zhansan
person.age=18
或者,application.yml配置如下:
person:
  name: zhangsan
  age: 18
实体Bean代码如下:
@Component
public class Person {
@Value("${person.lastName}")
private String lastName;
@Value("${person.age}")
private Integer age;
private Boolean boss;
private Date birth;
private Map<String, Object> maps;
private List<Object> lists;

@Override
public String toString() {
    return "Person [lastName=" + lastName + ", age=" + age + ", boss="
            + boss + ", birth=" + birth + ", maps=" + maps + ", lists="
            + lists + "]";
}
测试代码如下:
@SpringBootTest
class SpringbootDemo1ApplicationTests {
    @Autowired
    Person person;

    @Test
    void contextLoads() {
        System.out.println(person);
    }

}
4.2.2使用注解@ConfigurationProperties映射
通过注解@ConfigurationProperties(prefix=“配置文件中的key的前缀”)可以将配置文件中的配置自动与实体进行映射
application.properties配置如下:
application.properties配置如下:
person.lastName=zhansan
person.age=18
或者,application.yml配置如下:
person:
  name: zhangsan
  age: 18
实体Bean代码如下:
@Component
@ConfigurationProperties(prefix = "person")
public class Person {
    private String lastName;
    private Integer age;
    private Boolean boss;
    private Date birth;
    private Map<String, Object> maps;
    private List<Object> lists;

    @Override
    public String toString() {
        return "Person [lastName=" + lastName + ", age=" + age + ", boss="
                + boss + ", birth=" + birth + ", maps=" + maps + ", lists="
                + lists + "]";
    }
测试代码如下:
@SpringBootTest
class SpringbootDemo1ApplicationTests {
    @Autowired
    Person person;

    @Test
    void contextLoads() {
        System.out.println(person);
    }

}
注意:使用@ConfigurationProperties方式可以进行配置文件与实体字段的自动映射,但需要字段必须提供set方 法才可以,而使用@Value注解修饰的字段不需要提供set方法
第5节 SpringBoot与整合其他技术
5.1SpringBoot整合Mybatis
5.1.1添加Mybatis的起步依赖
<!-- mybatis start -->
<dependency>
    <groupId>org.mybatis.spring.boot</groupId>
    <artifactId>mybatis-spring-boot-starter</artifactId>
    <version>2.1.4</version>
</dependency>
5.1.2添加数据库驱动坐标
<dependency>
    <groupId>mysql</groupId>
    <artifactId>mysql-connector-java</artifactId>
</dependency>
5.1.3添加数据库连接信息
在application.properties中添加数据量的连接信息
#DB Configuration:
spring.datasource.driver-class-name=com.mysql.cj.jdbc.Driver
spring.datasource.url=jdbc:mysql://127.0.0.1:3306/test?serverTimezone=UTC
spring.datasource.username=root
spring.datasource.password=123456
5.1.4创建user表
在test数据库中创建user表
-- ----------------------------
-- Table structure for `user`
-- ---------------------------- DROP TABLE IF EXISTS `user`;
CREATE TABLE `user` (
`id` int(11) NOT NULL AUTO_INCREMENT,
`username` varchar(50) DEFAULT NULL,
`password` varchar(50) DEFAULT NULL,
`name` varchar(50) DEFAULT NULL, PRIMARY KEY (`id`)
) ENGINE=InnoDB AUTO_INCREMENT=10 DEFAULT CHARSET=utf8;
-- ----------------------------
-- Records of user
-- ----------------------------
INSERT INTO `user` VALUES ('1', 'zhangsan', '123', '张三'); INSERT INTO `user` VALUES ('2', 'lisi', '123', '李四');
5.1.5创建实体Bean
public class User {
    private Long id;
    private String username;
    private String password;
    private String name;

……省略了getter和setter方法
Override
    public String toString() {
        return "User{" +
                "id=" + id +
                ", username='" + username + '\'' +
                ", password='" + password + '\'' +
                ", name='" + name + '\'' +
                '}';
    }
}
5.1.6编写Mapper
@Mapper
public interface UserMapper {

    public List<User> queryUserList();
}
注意:@Mapper标记该类是一个mybatis的mapper接口,可以被springboot自动扫描到spring上下文中
5.1.7配置Mapper映射文件
在src\main\resources\mapper路径下加入UserMapper.xml配置文件"
<?xml version="1.0" encoding="utf-8" ?>
<!DOCTYPE mapper PUBLIC "-//mybatis.org//DTD Mapper 3.0//EN"
        "http://mybatis.org/dtd/mybatis-3-mapper.dtd" >
<mapper namespace="cn.yiliedu.mapper.UserMapper">
    <select id="queryUserList" resultType="user">
       select * from user
       </select>
</mapper>
5.1.8在application.properties中添加mybatis的信息
#spring集成Mybatis环境
#pojo别名扫描包
mybatis.type-aliases-package=cn.yiliedu.domain
#加载Mybatis映射文件
mybatis.mapper-locations=classpath:mapper/*Mapper.xml
5.1.9编写测试Controller
@Controller
public class MapperController {
    @Autowired
    private UserMapper userMapper;

    @RequestMapping("/queryUser")
    @ResponseBody
    public List<User> queryUser() {
        List<User> users = userMapper.queryUserList();
        return users;
    }
}
5.1.10测试

Mybatis(代理对象方法):
1.添加起步依赖和mysql的驱动依赖;
2.建立数据库;
3.在application.properties里添加数据库的连接信息;
4.创建pojo实体类;
5.创建实体类的Mapper接口,里面定义查询方法;
6.创建Mapper接口的xml配置文件,定义和Mapper接口有相同名字的id方法和namespace=Mapper接口的相对路径;
7.创建Mapper测试类,注入Mapper,并使用mapper对象的查询方法;
5.1.11集成Druid连接池
先添加依赖
<!-- druid -->
<dependency>
    <groupId>com.alibaba</groupId>
    <artifactId>druid-spring-boot-starter</artifactId>
    <version>1.1.10</version>
</dependency>
在application.properties中添加配置信息
###  数据源类别
spring.datasource.type=com.alibaba.druid.pool.DruidDataSource
### 初始化大小,最小,最大
spring.datasource.initialSize=5
spring.datasource.minIdle=5
spring.datasource.maxActive=20
### 配置获取连接等待超时的时间,单位是毫秒
spring.datasource.maxWait=60000
### 配置间隔多久才进行一次检测,检测需要关闭的空闲连接,单位是毫秒
spring.datasource.timeBetweenEvictionRunsMillis=60000
### 配置一个连接在池中最小生存的时间,单位是毫秒
spring.datasource.minEvictableIdleTimeMillis=300000
spring.datasource.validationQuery=SELECT 1 FROM DUAL
spring.datasource.testWhileIdle=true
spring.datasource.testOnBorrow=false
spring.datasource.testOnReturn=false
### 打开PSCache,并且指定每个连接上PSCache的大小
spring.datasource.poolPreparedStatements=true
spring.datasource.maxPoolPreparedStatementPerConnectionSize=20
### 配置监控统计拦截的filters,去掉后监控界面sql无法统计,'wall'用于防火墙
spring.datasource.filters=stat,wall,log4j
### 通过connectProperties属性来打开mergeSql功能;慢SQL记录
spring.datasource.connectionProperties=druid.stat.mergeSql=true;druid.stat.slowSqlMillis=5000
# 合并多个DruidDataSource的监控数据
#spring.datasource.useGlobalDataSourceStat=true
5.2SpringBoot整合Junit
5.2.1添加Junit的起步依赖
 <!--测试的起步依赖-->
        <dependency>
        <groupId>org.springframework.boot</groupId>
        <artifactId>spring-boot-starter-test</artifactId>
        <scope>test</scope>
        </dependency>
5.2.2编写测试类
@RunWith(SpringRunner.class)
@SpringBootTest
public class MyTest {

    @Autowired
    Person person;

    @Test
    public void contextLoads() {
        System.out.println(person);
    }

}
使用@SpringBootTest后,Spring将加载所有被管理的bean,基本等同于启动了整个服务,此时便可以开始功能测试
标准测试类里是要有@RunWith的,作用是告诉java你这个类通过用什么运行环境运行,例如启动和创建spring的应用上下文。否则你需要为此在启动时写一堆的环境配置代码。你在IDEA里去掉@RunWith仍然能跑是因为在IDEA里识别为一个JUNIT的运行环境,相当于就是一个自识别的RUNWITH环境配置。但在其他IDE里并没有。所以,为了你的代码能在其他IDE里边正常跑,建议还是加@RunWith
5.2.3控制台打印信息
Person [lastName=zhansan, age=18, boss=null, birth=null, maps=null, lists=null]
5.2.4Mock
所谓的mock就是创建一个类的虚假的对象,在测试环境中,用来替换掉真实的对象,以达到两大目的:
1、验证这个对象的某些方法的调用情况,调用了多少次,参数是什么等等
2、指定这个对象的某些方法的行为,返回特定的值,或者是执行特定的动作
代码示例:
不使用mock的情况下:
@RunWith(SpringRunner.class)
@SpringBootTest
public class MyMockTest {

    @Autowired
    UserMapper userMapper;

    @Test
    public void queryUser() {
        List<User> users = userMapper.queryUserList();
        for(User user:users){
            System.out.println(user);
        }
    }
}
控制台打印内容:
User{id=1, username=‘zhangsan’, password=‘123’, name=‘张三’}
User{id=2, username=‘lisi’, password=‘123’, name=‘李四’}
使用mock的情况
@RunWith(SpringRunner.class)
@SpringBootTest
public class MyMockTest {

    @Mock
    UserMapper userMapper;

    @Test
    public void queryUser() {
        User user1=new User();
        user1.setId(10L);
        user1.setName("mockuser1");
        List<User> userList=new ArrayList<>();
        userList.add(user1);
        //对我们模拟的假对象进行假设
        Mockito.when(userMapper.queryUserList()).thenReturn(userList);
        List<User> users = userMapper.queryUserList();
        for(User user:users){
            System.out.println(user);
        }
    }
}
返回:User{id=10, username=‘null’, password=‘null’, name=‘mockuser1’}
结论:使用@Mock注解,我们调用mock的对象的方法时,会走我们假设的逻辑。
5.2.5MockMvc
MockMvc是由spring-test包提供,实现了对Http请求的模拟,能够直接使用网络的形式,转换到Controller的调用,使得测试速度快、不依赖网络环境。同时提供了一套验证的工具,结果的验证十分方便。
@RunWith(SpringRunner.class)
@SpringBootTest
public class HelloWorldTest {

        private MockMvc mockMvc;

        @Autowired
        private WebApplicationContext webApplicationContext;

        @Before
        public void setup() {
            mockMvc = MockMvcBuilders.webAppContextSetup(webApplicationContext).build();
        }

        @Test
        public void testHello() throws Exception {

            /*
             * 1、mockMvc.perform执行一个请求。
             * 2、MockMvcRequestBuilders.get("XXX")构造一个请求。
             * 3、ResultActions.param添加请求传值
             * 4、ResultActions.accept(MediaType.TEXT_HTML_VALUE))设置返回类型
             * 5、ResultActions.andExpect添加执行完成后的断言。
             * 6、ResultActions.andDo添加一个结果处理器,表示要对结果做点什么事情
             *   比如此处使用MockMvcResultHandlers.print()输出整个响应结果信息。
             * 7、ResultActions.andReturn表示执行完成后返回相应的结果。
             */
            mockMvc.perform(MockMvcRequestBuilders
                    .get("/test")
                    .accept(MediaType.APPLICATION_JSON_VALUE)
                    .param("name", "Tom"))
                    .andExpect(MockMvcResultMatchers.status().isOk())
                    .andExpect(MockMvcResultMatchers.content().string("testSpringBoot Successful!"))
                    .andDo(MockMvcResultHandlers.print());
        }
    }
5.3SpringBoot整合Redis
5.3.1添加redis的起步依赖
<!-- 配置使用redis启动器 -->
<dependency>
    <groupId>org.springframework.boot</groupId>
    <artifactId>spring-boot-starter-data-redis</artifactId>
</dependency>
5.3.2配置redis的连接信息
#Redis
spring.redis.host=127.0.0.1
spring.redis.port=6379
5.3.3注入RedisTemplate测试redis操作
@RunWith(SpringRunner.class)
@SpringBootTest
public class RedisTest {
    @Autowired
    private UserMapper userMapper;

    @Autowired
    private RedisTemplate<String, String> redisTemplate;

    @Test
    public void test() throws JsonProcessingException {
        //从redis缓存中获得指定的数据
        String userListData = redisTemplate.boundValueOps("user. queryUserList ").get();
        //如果redis中没有数据的话
        if (null == userListData) {
            //查询数据库获得数据
            List<User> all = userMapper.queryUserList();
            //转换成json格式字符串
            ObjectMapper om = new ObjectMapper();
            userListData = om.writeValueAsString(all);
            //将数据存储到redis中,下次在查询直接从redis中获得数据,不用在查询数据库
            redisTemplate.boundValueOps("user. queryUserList ").set(userListData);
            System.out.println("===============从数据库获得数据===============");
        } else {
            System.out.println("===============从redis缓存中获得数据===============");

        }
    }
}
5.4SpringBoot事务支持
5.4.1spring事务介绍
详见spring框架的学习内容
5.4.2SpringBoot事务的使用
SpringBoot中已经默认对JDBC、Mybatis开启了事务,引入这些依赖的时候,事务就默认开启,只需一个@Transactional就可以了。
无需显示的开启使用@EnableTransactionManagement,因为DataSourceTransactionManagerAutoConfiguration开启了对声明式事务的支持。
测试类:
@Service
public class MyService {
    @Autowired
    UserMapper userMapper;

    @Transactional
    public Integer insertUser(){
        User user1=new User();
        user1.setId(10L);
        user1.setName("YZJ");
     Integer i=userMapper.insertUser(user1);
     int e=10/0;
     return i;
    }
}
测试类:
@RunWith(SpringRunner.class)
@SpringBootTest
public class MyTransacationalTest {
    @Autowired
    MyService myService;

    @Test
    public void queryUser(){

       Integer i=myService.insertUser();
       System.out.println(i);
    }
}
5.5SpringBoot 日志
Slf4j是一个日志接口,自己没有具体实现日志系统,
springboot项目,默认日志组件为logback,且已经整合对应的logback包,因此不再需要通过pom.xm引入logback的jar。
5.5.1使用@Slf4j注解
1、添加lombok依赖以及idea安装lombok插件
<dependency>
    <groupId>org.projectlombok</groupId>
    <artifactId>lombok</artifactId>
    <optional>true</optional>
</dependency>
true表示依赖不传递,如B项目依赖本项目,不会把该依赖传递给B。
2、添加@Slf4j注解并在代码中写出日志打印语句
@Service
@Slf4j
public class MyService {

    @Autowired
    UserMapper userMapper;

    public List<User> queryUser() {
        log.info("MyService.queryUser方法执行了");
        log.debug("MyService.queryUser方法执行了");
        log.error("MyService.queryUser方法执行了");
        List<User> users = userMapper.queryUserList();
        return users;
    }
设置日志级别
日志优先级从高到低分别是ERROR、WARN、INFO、DEBUG
#日志
#logging.level.root=info
#logging.level.root=debug
#logging.level.root=error
5.5.2使用slf4j包中的类
@Controller
//@Slf4j
public class MyController {
    public Logger logger= LoggerFactory.getLogger(MyController.class);

    @Autowired
    RedisTemplate redisTemplate;


    @RequestMapping("/test")
    @ResponseBody
    public String testSpringBoot() {
//        System.out.println(redisTemplate);
        logger.info("testSpringBoot success!");
        logger.debug("testSpringBoot success!");
        logger.error("testSpringBoot success!");
        return "testSpringBoot success!";
    }
5.5.3日志打印到文件
添加logback-spring.xml
使用@Slf4j注解方式或logger方式打印日志
5.6SpringBoot Async异步
“异步”对应的是“同步”,同步指程序按照定义顺序依次执行,每一行程序都必须等待上一行程序执行完成之后才能执行;异步调用指程序在顺序执行时,不用等待同步调用的语句返回结果就执行后面的程序。
5.6.1 异步任务使用的方法
1、启动类里面使用@EnableAsync注解开启功能,自动扫描
@SpringBootApplication
@EnableScheduling
@EnableAsync
public class SpringbootDemo1Application {
2、定义异步任务类并使用@Component标记组件被容器扫描,异步方法加上@Async
@Component
@Async //可放在类上,也可在方法上
public class AsyncTask {

    public void task1() throws InterruptedException{
        long begin = System.currentTimeMillis();
        Thread.sleep(1000L);
        long end = System.currentTimeMillis();
        System.out.println("任务1耗时="+(end-begin));
    }
异步就是开启一个线程去执行比较耗时的操作,并立即返回响应给客户端
5.6.2SpringBoot对Future模式的支持
我们在实际项目中有些复杂运算、耗时操作,就可以利用多线程来充分利用CPU,提高系统吞吐量。SpringBoot对多线程支持非常好,对我们的开发非常便捷。
Future模式是多线程开发中非常常见的一种设计模式。核心思想是异步调用。当我们执行一个方法时,方法中有多个耗时任务需要同时去做,而且又不着急等待这个结果时可以让客户端立即返回然后,后台慢慢去计算任务。
当我们做一件事的时候需要等待,那么我们就可以在这个等待时间内来去做其它事情,这样就可以充分利用时间。比如我们点外卖,需要一段时间,那么我们在等外卖的时间里可以看点书,看个电影。这就是典型的Future模式。如果是普通模式的话,就是等外卖的时候就等外卖,外卖到了后再去看书,极大的浪费时间。
Future的相关方法
1.boolean cancel(boolean mayInterruptIfRunning);
//可以在任务执行过程中取消任务
2.boolean isCancelled();
//判断Future任务是否取消
3.boolean isDone();
//判断任务是否完成
4.V get();//获取任务最终结果,这是一个阻塞方法,会等待任务执行好才会执行后面的代码
5.V get(long timeout, TimeUnit unit);
//有等待时常的get方法,等待时间到了后仍然没有计算完成,则抛异常
SpringBoot对Future模式支持非常好,只需要简单的代码就能实现
public Future<String> task4() throws InterruptedException{
    long begin = System.currentTimeMillis();
    Thread.sleep(2000L);
    long end = System.currentTimeMillis();
    System.out.println("任务4耗时="+(end-begin));
    return new AsyncResult<String>("任务4");
}
注意点:
1)要把异步任务封装到类里面,不能直接写到Controller
2)增加Future 返回结果 AsyncResult(“task执行完成”);
3)如果需要拿到结果 需要判断全部的 task.isDone()
过程:
在主类上添加@EnableAsync,测试类上添加@Async
在Controller里调用测试类的方法,即可。
5.7SpringBoot 定时任务
5.7.1案列
在日常的项目开发中,往往会涉及到一些需要做到定时执行的代码,例如自动将超过24小时的未付款的单改为取消状态,自动将超过14天客户未签收的订单改为已签收状态等等,那么为了在Spring Boot中实现此类需求,我们要怎么做呢。
Spring Boot早已考虑到了这类情况,只需要在主启动类加上这个注解 @EnableScheduling:
@SpringBootApplication
@EnableScheduling
public class SpringbootDemo1Application {


    public static void main(String[] args)
    {
        SpringApplication.run(SpringbootDemo1Application.class, args);
    }


}
然后编写定时任务类:
@Component
public class MyScheduledTask {
    private Logger logger = LoggerFactory.getLogger(getClass());

    private int fixedDelayCount = 1;
    private int fixedRateCount = 1;
    private int initialDelayCount = 1;
    private int cronCount = 1;

    @Scheduled(fixedDelay = 5000)        //fixedDelay = 5000表示当前方法执行完毕5000ms后,Spring scheduling会再次调用该方法
    public void testFixDelay() {
        logger.info("===fixedDelay: 第{}次执行方法", fixedDelayCount++);
    }

    @Scheduled(fixedRate = 5000)        //fixedRate = 5000表示当前方法开始执行5000ms后,Spring scheduling会再次调用该方法
    public void testFixedRate() {
        logger.info("===fixedRate: 第{}次执行方法", fixedRateCount++);
    }

    @Scheduled(initialDelay = 1000, fixedRate = 5000)   //initialDelay = 1000表示延迟1000ms执行第一次任务
    public void testInitialDelay() {
        logger.info("===initialDelay: 第{}次执行方法", initialDelayCount++);
    }

    @Scheduled(cron = "0 0/1 * * * ?")  //cron接受cron表达式,根据cron表达式确定定时规则
    public void testCron() {
        logger.info("===initialDelay: 第{}次执行方法", cronCount++);
    }

}
5.7.2@Scheduled中的参数说明:
@Scheduled(fixedRate=2000):上一次开始执行时间点后2秒再次执行;
@Scheduled(fixedDelay=2000):上一次执行完毕时间点后2秒再次执行;
@Scheduled(initialDelay=1000, fixedDelay=2000):第一次延迟1秒执行,然后在上一次执行完毕时间点后2秒再次执行;
@Scheduled(cron="* * * * * ?"):按cron规则执行。
Cron表达式
corn从左到右(用空格隔开):秒 分 小时 月份中的日期 月份 星期中的日期 年份

(1):表示匹配该域的任意值。假如在Minutes域使用, 即表示每分钟都会触发事件。
(2)?:只能用在DayofMonth和DayofWeek两个域。它也匹配域的任意值,但实际不会。因为DayofMonth和DayofWeek会相互影响。例如想在每月的20日触发调度,不管20日到底是星期几,则只能使用如下写法: 13 13 15 20 * ?, 其中最后一位只能用?,而不能使用*,如果使用*表示不管星期几都会触发,实际上并不是这样。
(3)-:表示范围。例如在Minutes域使用5-20,表示从5分到20分钟每分钟触发一次
(4)/:表示起始时间开始触发,然后每隔固定时间触发一次。例如在Minutes域使用5/20,则意味着5分钟触发一次,而25,45等分别触发一次.
常用表达式例子
(1)0 0 2 1 * ? * 表示在每月的1日的凌晨2点调整任务
(2)0 15 10 ? * MON-FRI 表示周一到周五每天上午10:15执行作业
(3)0 15 10 ? 6L 2002-2006 表示2002-2006年的每个月的最后一个星期五上午10:15执行作
(4)0 0 10,14,16 * * ? 每天上午10点,下午2点,4点
(5)0 0/30 9-17 * * ? 朝九晚五工作时间内每半小时
(6)0 0 12 ? * WED 表示每个星期三中午12点
(7)0 0 12 * * ? 每天中午12点触发
(8)0 15 10 ? * * 每天上午10:15触发
(9)0 15 10 * * ? 每天上午10:15触发
(10)0 15 10 * * ? * 每天上午10:15触发
(11)0 15 10 * * ? 2005 2005年的每天上午10:15触发
(12)0 * 14 * * ? 在每天下午2点到下午2:59期间的每1分钟触发
(13)0 0/5 14 * * ? 在每天下午2点到下午2:55期间的每5分钟触发
(14)0 0/5 14,18 * * ? 在每天下午2点到2:55期间和下午6点到6:55期间的每5分钟触发
(15)0 0-5 14 * * ? 在每天下午2点到下午2:05期间的每1分钟触发
(16)0 10,44 14 ? 3 WED 每年三月的星期三的下午2:10和2:44触发
(17)0 15 10 ? * MON-FRI 周一至周五的上午10:15触发
(18)0 15 10 15 * ? 每月15日上午10:15触发
(19)0 15 10 L * ? 每月最后一日的上午10:15触发
(20)0 15 10 ? * 6L 每月的最后一个星期五上午10:15触发
(21)0 15 10 ? * 6L 2002-2005 2002年至2005年的每月的最后一个星期五上午10:15触发
(22)0 15 10 ? * 6#3 每月的第三个星期五上午10:15触发
5.7.3默认情况下多个定时任务是串行执行的
看到控制台输出的结果,所有的定时任务都是通过一个线程来处理的,是因为在springboot中,默认情况下,定时任务的配置中设定了一SingleThreadScheduledExecutor,是一个可以周期性执行任务的单线程线程池。
5.7.4引入线程池
我们要做的仅仅是实现SchedulingConfigurer接口,重写configureTasks方法,注册一个自定义的线程池。
@Configuration
//所有的定时任务都放在一个线程池中,定时任务启动时使用不同的线程。
public class ScheduleConfig implements SchedulingConfigurer {
    @Override
    public void configureTasks(ScheduledTaskRegistrar taskRegistrar) {
        //设定一个长度10的定时任务线程池
        taskRegistrar.setScheduler(Executors.newScheduledThreadPool(10));
    }
}
注意:配置了多线程的线程池之后,只会让不同的定时任务运行在不同线程里。但是对同一个定时任务还是会串行执行的,即该任务的前一次执行会阻塞后一次执行。
5.7.5异步定时任务
我们可以使用 @Async 注解实现异步(异步方法使用注解@Async的返回值只能为void或者Future),把@Async加在类或者方法上面,然后还需要一个 @EnableAsync来开启异步。
@EnableAsync可以加在启动类上面这样可以直接开启所有的异步,也可以单独加在每个类上面。
@Async
@Scheduled(cron = "0/1 * * * * ?")  //cron接受cron表达式,根据cron表达式确定定时规则
public void testCron() {
    try {
        Thread.sleep(15000);
    } catch (InterruptedException e) {
        e.printStackTrace();
    }
    logger.info("===cron: 第{}次执行方法", cronCount++);
}
注意:
1、没有配置自己的线程池时,会默认使用SimpleAsyncTaskExecutor()。在Springboot2.4.0中,该线程池默认最大线程数为8个。
2、如果项目中只配置了一个线程池,那么不需要显式指定使用这个线程池,Spring也会自动使用用户配置的线程池,但是如果配置了多个就必须显式指定,否则还是会使用默认的。
3、如果想要指定使用哪个线程池,可以使用@Async(“executor2”)显式指定。
5.8SpringBoot Retry重试机制
当我们调用一个方法时,可能由于各种原因造成第一次失败,再去尝试就成功了,这就是重试机制。
重试,在项目需求中是非常常见的,例如遇到网络波动等,要求某个接口或者是方法可以最多/最少调用几次;
Retry重试框架,支持AOP切入的方式使用,而且能使用注解;想想,重试次数、重试延迟、重试触发条件、重试的回调方法等等我们都能很轻松结合注解以一种类似配置参数的方式去实现,优雅无疑。
那么,我们接下来就来一起使用Springboot整合这个Retry重试框架:
1、引入响应jar
<dependency>
    <groupId>org.springframework.retry</groupId>
    <artifactId>spring-retry</artifactId>
</dependency>
<dependency>
    <groupId>org.aspectj</groupId>
    <artifactId>aspectjweaver</artifactId>
    <version>1.6.11</version>
</dependency>
2、启动类加注解@EnableRetry
@SpringBootApplication
@EnableScheduling
@EnableAsync
@EnableRetry
public class SpringbootDemo1Application {


    public static void main(String[] args)
    {
        SpringApplication.run(SpringbootDemo1Application.class, args);
    }


}
3、要重试的Servcie 方法上加@Retryable注解
@Service
public class RetryServiceImpl implements RetryService {
		public   int count = 0;
		public long t = 0;

	@Override
	@Retryable(value = RetryException.class, maxAttempts = 3, backoff = @Backoff(delay = 1000 * 2, multiplier = 1.5))
	public void TestRetryMethod(String name) {
		// TODO Auto-generated method stub
		count++;
		Long s  = System.currentTimeMillis();
		t = s;
		if(name == null) {
			System.err.println("第"+count+"次尝试"+System.currentTimeMillis());
			throw new RetryException("retry");
		}
	}
}
Spring Retry 注解属性详解
1、@EnableRetry 作用于SpringbootApplication启动类,开启spring retry。
proxyTargetClass:默认值为false,设置为true时为CGLIB代理。
2、@Retryable 作用于需要进行重试的方法
value:指定处理的异常类,默认为空
include:指定处理的异常类,默认为空,当include和exclude为空时,默认所有异常
exclude:指定哪些异常不处理,默认空
maxAttempts:最大重试次数。默认3次
backoff: 重试补偿策略。默认使用@Backoff注解
3、@Backoff 作用于backoff中的补偿策略
delay:指定等待时间,没有设置的话默认为1000ms
maxDelay:最大重试时间,没有设置默认为3000ms
multiplier:下一次调用时间的乘数
random:随机等待时间,默认值为false
4、@Recover 用于对retry方法的异常抛出的特殊处理,可做熔断、降级、日志等操作。入参必须和retry对应方法所抛出的异常类型相同。
5.9SpringBoot 全局异常处理
SpringBoot已经做了全局异常处理,我们也可以自定义全局异常处理。
自定义全局异常处理 @ControllerAdvice + @ExceptionHandler
注意:进入Controller层的错误才会由@ControllerAdvice处理,拦截器抛出的错误以及访问错误地址的情况@ControllerAdvice处理不了,由SpringBoot默认的异常处理机制处理。
/**
 * 描述:统一业务异常处理类
 * @author lilong
 * @date   2020/12/11
 */
@ControllerAdvice(basePackages={"cn.yiliedu.springboot_demo1",})
public class GlobalBusinessExceptionHandler {

    @ExceptionHandler({BusinessException.class})
    @ResponseBody
    public ErrorInfo defaultErrorHandler(HttpServletRequest req, Exception e) throws Exception {
        ErrorInfo errorInfo = new ErrorInfo();
        errorInfo.setMessage(e.getMessage());
        errorInfo.setUrl(req.getRequestURI());
        errorInfo.setCode(ErrorInfo.SUCCESS);
        return errorInfo;
    }
}
**
 * 描述:业务异常
 * @author lilong
 * @date   2020/12/11
 */
public class BusinessException extends RuntimeException{

    public BusinessException(){}

    public BusinessException(String message) {
        super(message);
    }
}
**
 * 描述:错误信息类
 * @author lilong
 * @date   2020/12/11
 */
public class ErrorInfo<T> {

    public static final Integer SUCCESS = 200;
    public static final Integer ERROR = 100;
    //错误码
    private Integer code;
    //错误信息
    private String message;
    private String url;
    private T data;

    public Integer getCode() {
        return code;
    }

    public void setCode(Integer code) {
        this.code = code;
    }

    public String getMessage() {
        return message;
    }

    public void setMessage(String message) {
        this.message = message;
    }

    public String getUrl() {
        return url;
    }

    public void setUrl(String url) {
        this.url = url;
    }

    public T getData() {
        return data;
    }

    public void setData(T data) {
        this.data = data;
    }
}
/**
 * 描述:测试业务异常
 * @author lilong
 * @date   2020/12/11
 */
@Controller
public class RetryController {

    @Autowired
    RetryService retryService;


    @RequestMapping("/testRetry")
    @ResponseBody
    public String testRetry(String name) {

        retryService.testRetryMethod(name);
        return "testasync success!";
    }
}


 786
786


 被折叠的 条评论
为什么被折叠?
被折叠的 条评论
为什么被折叠?
 到【灌水乐园】发言


