android自定义控件的简单实现
自定义控件对于我这种菜鸟级选手,一向是一件非常神秘的事情。看到github上那些炫酷的轮子,除了对大神们的无限崇拜之外,还有对实现的好奇。于是乎,最近尝试着自己动手去实现一下…
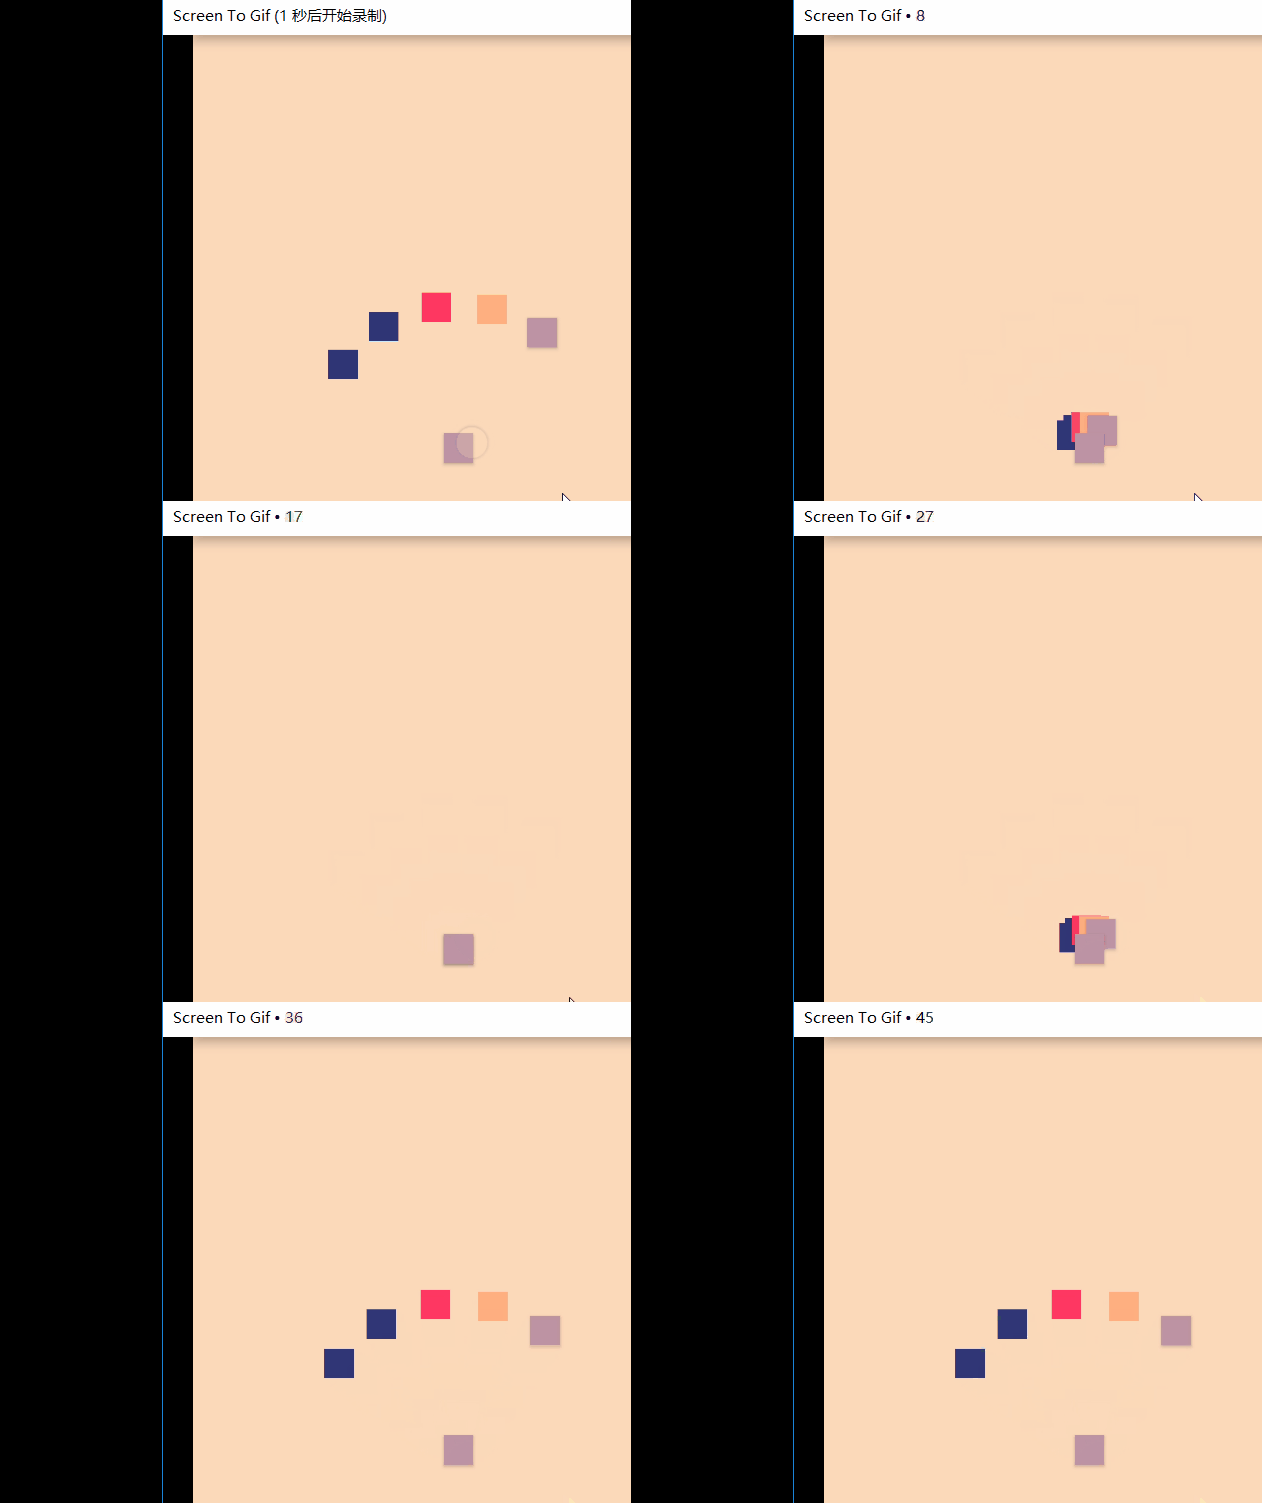
控件效果如下,我知道网上有相关开源,但是我并没有去看别人的实现。而是自己亲自动手去尝试着做..
少废话,按照国际惯例,我们自定义控件一般是继承自View,但是考虑到我们控件中包含有子控件,自然而然的想到去继承ViewGroup。但是继承ViewGroup的话需要自己去测量比较麻烦,于是贪便宜就继承自FrameLayout吧。
public class CustomArc extends FrameLayout {
    private double radius;//半径
    private int childSize;//子view的个数
    private float rate;//需要传入多少倍pi,既旋转角度
    private static final float DEFULT_RATE = 0.5f;//默认pi的倍数
    private boolean expanded = true;//控制展开还是收缩
    private CustomAnimation animation;

    public CustomArc(Context context) {
        this(context, null);
    }

    public CustomArc(Context context, AttributeSet attrs) {
        this(context, attrs, 0);
    }

    public CustomArc(Context context, AttributeSet attrs, int defStyleAttr) {
        super(context, attrs, defStyleAttr);
        TypedArray attributes = context.obtainStyledAttributes(attrs, R.styleable.CustomArcDeclare, 0, 0);
        radius = attributes.getDimension(R.styleable.CustomArcDeclare_arc_radius, 1000);
        rate = attributes.getFloat(R.styleable.CustomArcDeclare_arc_rate, DEFULT_RATE);
        attributes.recycle();//释放资源
    }
}
先别去管字段的含义,这几个构造函数的含义就不多解释了,我们统一在第三个构造函数中处理,这里需要获取我们自定义的属性。
然后我们在 onLayout();中获取一下我们控件的子view个数,并且在没有接到点击事件之前隐藏掉这些子view,因为初始化之后这些子view挤在屏幕左上角
 @Override
    protected void onLayout(boolean changed, int left, int top, int right, int bottom) {
        super.onLayout(changed, left, top, right, bottom);
        childSize = getChildCount();
        if (childSize == 0) {
            new IllegalArgumentException("CustomArc child is null, please set child");
        }
        disappear(false);
    }
    private void disappear(boolean isGone) {
        for (int i = 0; i < childSize; i++) {
            if (isGone) {
                getChildAt(i).setVisibility(View.VISIBLE);
            } else {
                getChildAt(i).setVisibility(View.INVISIBLE);//(这里使用GONE会导致控件再也出不来了)
            }
        }
    }
由于看上去是慢慢向外伸展出去的,所以这里肯定需要用到动画。这里我们自定义一个动画,原理就是继承动画并且实现applyTransformation方法。applyTransformation方法有一个参数表示速率的参数(我暂时是这么理解的),interpolatedTime这个参数会根据你设置的动画时间算出一个速率慢慢从[0,1]这么一个过程,在这个过程中,我们改变子控件的位置,并且让它的终点保持在一个圆弧上。这里不得不用到我们的一个数学知识,就是算出每个子控件在圆弧上的位置
x = r * cos(θ) θ表示角度
y = r * sin(θ)
所以我们需要算出的是这个角度。
//算出子view需要偏转的角度
    private double Angle(int chlidId) {
        return Math.PI * 0.5 * chlidId * (1.0 / (childSize - 1)) + Math.PI * rate;
    }
Math.PI * 0.5表示在子view将落在四分之一圆上,可修改倍数改变最后展开是半圆还是别的。chlidId * (1.0 / (childSize - 1))在算所占的总份额,最后加上需要旋转的角度,因为目前在第四象限,对android屏幕熟悉的应该看得出来,原理就是这样。下面看动画的实现
 private class CustomAnimation extends Animation {
        private float startX;
        private float startY;

        public CustomAnimation(float startX, float startY) {
            this.startX = startX;
            this.startY = startY;
        }

        @Override
        protected void applyTransformation(float interpolatedTime, Transformation t) {
            if (expanded) {
                interpolatedTime = 1 - interpolatedTime;
            }
            for (int i = 0; i < childSize; i++) {
                View view = getChildAt(i);
                view.setX((float) (radius * interpolatedTime * Math.cos(Angle(i))) + startX);
                view.setY((float) (radius * interpolatedTime * Math.sin(Angle(i))) + startY);
            }
        }
    }
最后是外部的一个调用
public void onClickArc(View view) {
        if (animation == null) {
            animation = new CustomAnimation(view.getX(), view.getY());
            animation.setDuration(1000);
            disappear(true);
        }
        expanded = !expanded;
        view.startAnimation(animation);
    }
atts.xml
<?xml version="1.0" encoding="utf-8"?>
<resources>
<declare-styleable name="CustomArcDeclare">
<attr name="arc_radius" format="dimension" />//传入你的半径
<attr name="arc_rate" format="float" />//你需要将象限旋转多少倍pi
</declare-styleable>
</resources><?xml version="1.0" encoding="utf-8"?>
<RelativeLayout xmlns:android="http://schemas.android.com/apk/res/android"
xmlns:lxg="http://schemas.android.com/apk/res-auto"
android:layout_width="match_parent"
android:layout_height="match_parent">
<com.example.lxg.animation.CustomArc
android:id="@+id/test"
android:layout_width="match_parent"
android:layout_height="match_parent"
android:layout_centerInParent="true"
lxg:arc_radius="100dp"
lxg:arc_rate="1.2">
<TextView
android:layout_width="20dp"
android:layout_height="20dp"
android:background="@color/colorPrimaryDark" />
<TextView
android:layout_width="20dp"
android:layout_height="20dp"
android:background="@color/colorPrimaryDark" />
<TextView
android:layout_width="20dp"
android:layout_height="20dp"
android:background="@color/colorAccent" />
<TextView
android:layout_width="20dp"
android:layout_height="20dp"
android:background="#FFCCAA" />
<Button
android:id="@+id/test_tv"
android:layout_width="20dp"
android:layout_height="20dp"
android:background="#CCACDC" />
</com.example.lxg.animation.CustomArc>
<Button
android:id="@+id/button1"
android:layout_width="20dp"
android:layout_height="20dp"
android:layout_centerInParent="true"
android:layout_gravity="center"
android:background="#BBAADD" />
</RelativeLayout>
    //MainActivity中调用
 customArc = (CustomArc) findViewById(R.id.test);
 findViewById(R.id.button1).setOnClickListener(new View.OnClickListener() {
            @Override
            public void onClick(View v) {
                customArc.onClickArc(v);
            }
        });


 295
295

 被折叠的 条评论
为什么被折叠?


