


目录
C++11多线程
1 概述
1.1 多线程
传统的C++(C++11标准之前)中并没有引入线程这个概念,在C++11出来之前,如果我们想要在C++中实现多线程,需要借助操作系统平台提供的API,比如Linux的<pthread.h>,或者windows下的<windows.h> 。
C++11提供了语言层面上的多线程,包含在头文件中。它解决了跨平台的问题,提供了管理线程、保护共享数据、线程间同步操作、原子操作等类。
1.2 多进程与多线程
- 进程:运行中的程序
- 线程:进程中的进程
多进程并发
使用多进程并发是将一个应用程序划分为多个独立的进程(每个进程只有一个线程),这些独立的进程间可以互相通信,共同完成任务。由于操作系统对进程提供了大量的保护机制,以避免一个进程修改了另一个进程的数据,使用多进程比使用多线程更容易写出相对安全的代码。但是这也造就了多进程并发的两个缺点:
- 在进程间的通信,无论是使用信号、套接字,还是文件、管道等方式,其使用要么比较复杂,要么就是速度较慢或者两者兼而有之。
- 运行多个线程的开销很大,操作系统要分配很多的资源来对这些进程进行管理。
当多个进程并发完成同一个任务时,不可避免的是:操作同一个数据和进程间的相互通信,上述的两个缺点也就决定了多进程的并发并不是一个好的选择。所以就引入了多线程的并发。
多线程并发
多线程并发指的是在同一个进程中执行多个线程。
-
优点:有操作系统相关知识的应该知道,线程是轻量级的进程,每个线程可以独立的运行不同的指令序列,但是线程不独立的拥有资源,依赖于创建它的进程而存在。也就是说,同一进程中的多个线程共享相同的地址空间,可以访问进程中的大部分数据,指针和引用可以在线程间进行传递。这样,同一进程内的多个线程能够很方便的进行数据共享以及通信,也就比进程更适用于并发操作。
-
缺点:由于缺少操作系统提供的保护机制,在多线程共享数据及通信时,就需要程序员做更多的工作以保证对共享数据段的操作是以预想的操作顺序进行的,并且要极力的避免死锁(deadlock)。
为什么要使用多线程?
- 任务分解:耗时的操作,分解任务,实时响应
- 数据分解:充分利用多核心CPU处理数据
- 数据流分解:读写分离,解耦合设计
2 多线程中的几个函数
测试案例:
void Print(){	cout << "hello babe" << endl;}
int main()
{
	thread th(Print);
	return 0;
}
直接报错
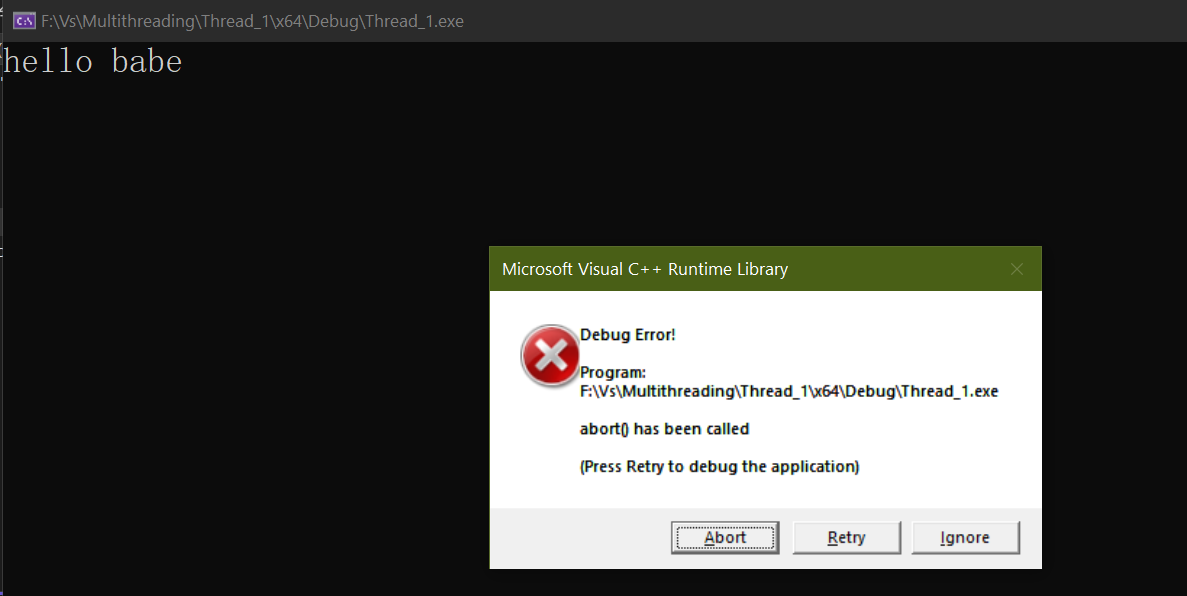
因为主程序不会关心线程是否执行完毕,只要线程开始执行主程序也继续执行,可能导致主程序已经执行到return,而线程才打印出hello b、hello bab等其他所有情况
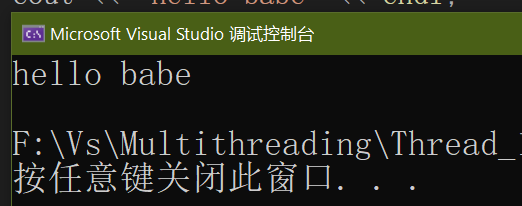
2.1 join函数
th.join()
//主程序等待线程执行完毕,而不会在线程还在执行时主程序继续向下执行到return
执行时为线程对象加上join()函数
int main()
{
	thread th(Print);
	th.join();
	return 0;
}
正常运行
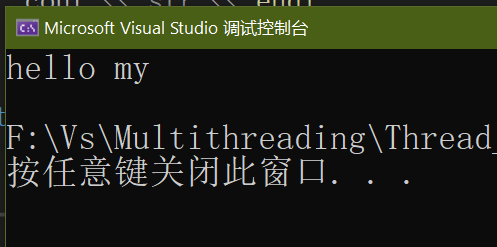
2.1.1 给线程函数传递参数
void Print2(string str){	cout << str << endl;}
int main()
{
	thread th2(Print2,"hello my");	//后面跟着参数
	th2.join();
	return 0;
}
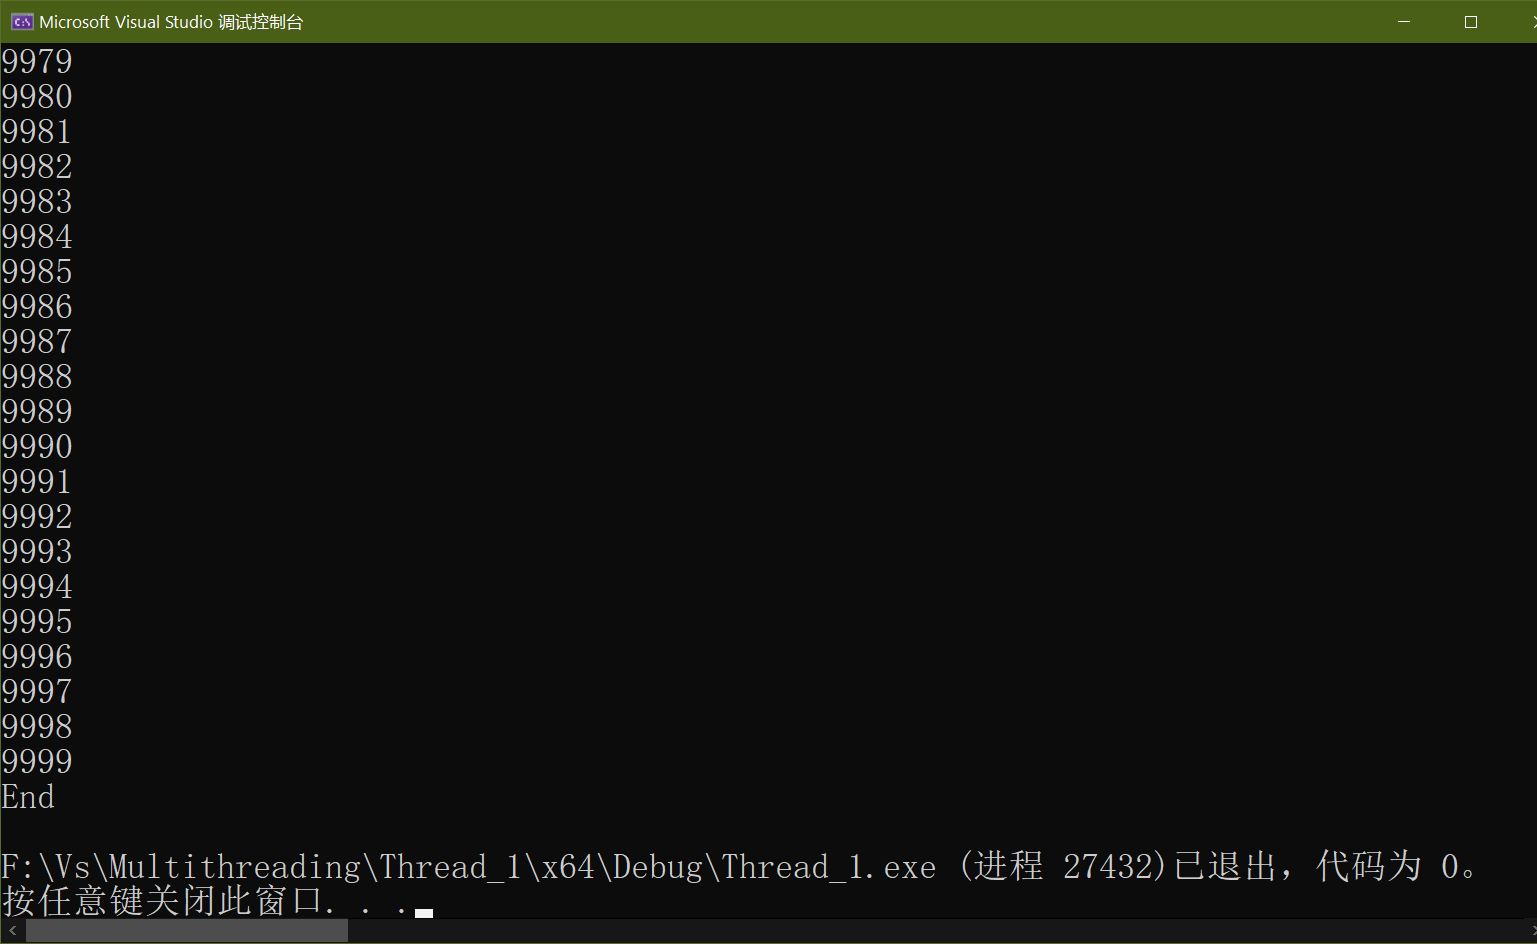
2.1.2 join的阻塞
注意:join()是阻塞的,线程在join而未执行完时,将阻塞在此,直至线程结束主程序才会继续走
void Print3()
{
for (int i = 0; i < 10000; i++) cout << i << endl;
}
int main()
{
thread th3(Print3);
bool is_join = th3.joinable();
if (is_join){ th3.join();}
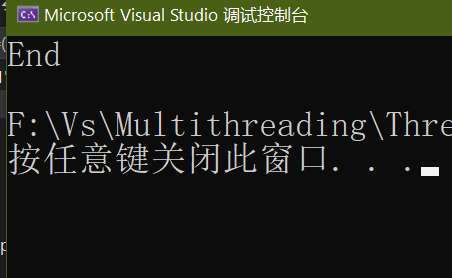
cout << "End" << endl;
return 0;
}
2.2 detach()分离线程
th.detach()
//主线程结束后,子线程仍在后台执行
例:
void Print2(string str){	cout << str << endl;}
int main()
{
	thread th2(Print2,"hello my");
	th2.detach();
	return 0;
}
程序直接return,此时仍未打印出字符串,且不报错,线程在后台执行,因此不显示任何东西
2.3 joinable()
th.joinable()
//返回一个bool值,判断函数是否可以调用join()或detach()
int main()
{
	thread th2(Print2,"hello my");
	bool is_join = th2.joinable();	//使用bool值接收
	if (is_join){		th2.join();}
	return 0;
}
3 线程函数中的数据未定义错误
3.1 引用类型的统一
例:函数里接收引用参数
void fun(int& x){	x+=1;}
int main()
{
	int a = 1;
	cout << a << endl;
	thread th(fun,a);
	th.join();
	cout << a << endl;
	return 0;
}
直接报错,因为线程并不知道接收的是引用

将变量使用ref() 标识是一个引用即可
int main()
{
	int a = 1;
	cout << a << endl;
	thread th(fun, ref(a));
	th.join();
	cout << a << endl;
	return 0;
}
3.2 传递指针或引用指向局部变量的问题
例:
thread th;
void fun(int& x)	{x+=1;}
void test()
{
	int a = 1;
	th = thread(fun, ref(a));
}
int main()
{
	test();
	th.join();
	return 0;
}
由于a是局部变量,test函数执行完毕,a就被释放掉,因此在th的fun线程中无法取到a的引用,
解决:将a设为全局变量
thread th;
int a = 1;	//全局
void fun(int& x) { x += 1; }
void test(){	th = thread(fun, ref(a));}
int main()
{
	test();
	cout << a << endl;
	th.join();
	cout << a << endl;
	return 0;
}
3.3 传递指针或引用指向已释放的空间的问题
例:
void fun(int* x) {
	*x += 1;
	cout << *x << endl;
}
int main()
{
	int* p = new int(1);
	thread th(fun, p);
	delete p;
	th.join();
	return 0;
}
线程还在执行时,主程序继续执行,这时执行到了delete p,将p释放,而线程中的p就已经被释放,无法访问到,成为野指针
3.4 类成员函数作为入口函数,类对象被提前释放
和2.3基本相同,只不过释放的对象为类对象
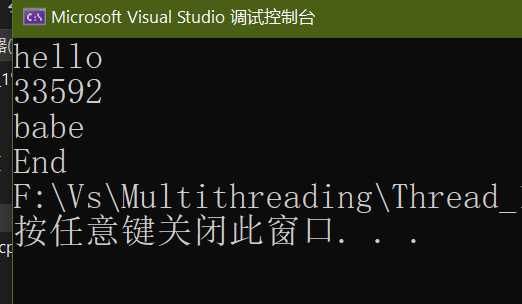
class MyClass
{
public:
	void func()
	{
		cout << "hello" << endl;
		cout << this_thread::get_id() << endl;
		cout << "babe" << endl;
	}
	~MyClass() { cout << "End"; }
};
int main()
{
	MyClass mc;
	thread th(&MyClass::func, &mc);
	mc.~MyClass();
	th.join();
	return 0;
}
解决:
使用智能指针:会在需要释放时自动释放
int main()
{
	shared_ptr< MyClass> mc = make_shared< MyClass>();
	thread th(&MyClass::func, mc);
	th.join();
	return 0;
}
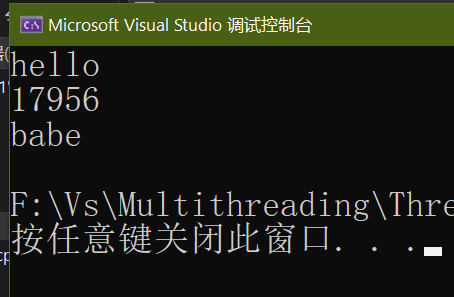
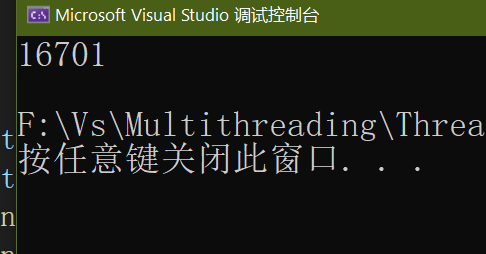
3.5 入口函数类的私有成员函数
当类中某成员函数为private且想要访问时,无法直接访问,可以通过设置函数为友元解决
class MyClass
{
private:
	friend void func2();//将函数作为友元
	void func()
	{
		cout << "hello" << endl;
		cout << this_thread::get_id() << endl;
		cout << "babe" << endl;
	}
};
void func2()
{
	shared_ptr< MyClass> mc = make_shared< MyClass>();
	thread th(&MyClass::func, mc);	//此时可以访问类中的func函数
	th.join();
}
int main()
{
	func2();
	return 0;
}
4 互斥量解决多线程数据共享问题
在多个线程中共享数据时,需要注意线程安全问题。如果多个线程同时访问同一个变量,并且其中至少有一个线程对该变量进行了写操作,那么就会出现数据竞争问题。数据竞争可能会导致程序崩溃、产生未定义的结果,或者得到错误的结果。
为了避免数据竞争问题,需要使用同步机制来确保多个线程之间对共享数据的访问是安全的。常见的同步机制包括互斥量、条件变量、原子操作等。
例:
int a = 0;
void add()
{
	for (int i = 0; i < 10000; i++) { a += 1; }
}
int main()
{
	thread th1(add);
	thread th2(add);
	th1.join();
	th2.join();
	cout << a << endl;
	return 0;
}
理论上,结果应该是20000,但是每次运行结果都不同,也未达到20000


使用互斥锁解决:
头文件:
#include<mutex>
常用函数
mtx.lock()
//加锁操作,加锁后其他线程将无法访问,除非解锁

mtx.unlock()
//解锁操作
例:
#include<mutex>
int a = 0;
mutex mtx;
void add()
{
	for (int i = 0; i < 100000; i++) {
		mtx.lock();
		a += 1;	//写操作前加锁,写完数据解锁
		mtx.unlock();
	}
}
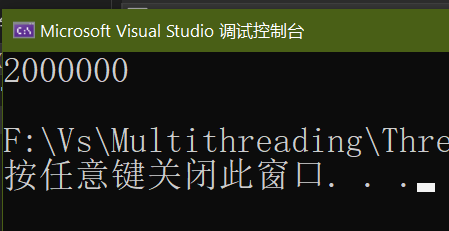
数据扩大到1000000,仍然没有任何错误
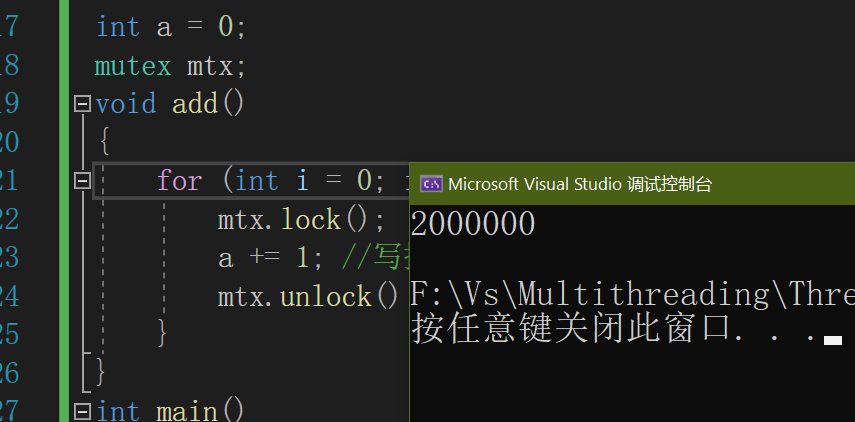
线程安全:多线程程序每次运行结果与单线程运行结果始终相同
5 互斥量死锁
两个线程互相等待对方释放互斥量,导致死锁
例:
mutex m1, m2;
void Func_1()
{
	m1.lock();
	m2.lock();
	m1.unlock();
	m2.unlock();
}
void Func_2()
{
	m2.lock();
	m1.lock();
	m2.unlock();
	m1.unlock();
}
int main()
{
	thread th1(Func_1);
	thread th2(Func_2);
	th1.join();
	th2.join();
	cout << "End" << endl;
	return 0;
}
fun_1与fun_2并行,fun_1对m1加锁,fun_2对m2加锁,这时fun_1需要对m2加锁,而m2已经被fun_2加锁,且同时fun_2需要对m1加锁,而m_1已经被fun_1加锁,两个线程互相等待对方释放互斥量,导致死锁
解决:
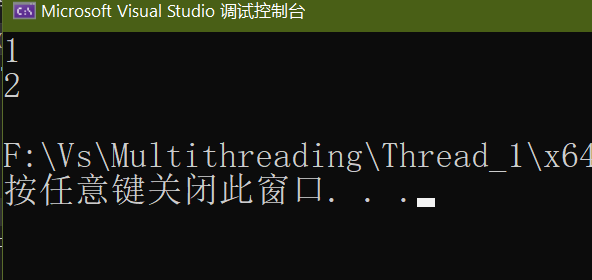
修改fun_1与fun_2,将加减锁顺序改为相同,此时m1已经被fun_1加锁,则fun_2会被阻塞,因此需要等fun_1继续对m2加锁且对m1、m2解锁后才能执行fun_2的m1加锁
void Func_1()
{
	m1.lock();
	m2.lock();
	m1.unlock();
	m2.unlock();
}
void Func_2()
{
	m1.lock();
	m2.lock();
	m1.unlock();
	m2.unlock();
}
6 lock_guard 与 unique_lock
6.1 lock_guard
lock_guard 是 C++ 标准库中的一种互斥量封装类,用于保护共享数据,防止多个线程同时访问同一资源而导致的数据竞争问题。
lock_guard 的特点如下:
- 当构造函数被调用时,该互斥量会被自动锁定。
- 当析构函数被调用时,该互斥量会被自动解锁。
lock_guard对象不能复制或移动,因此它只能在局部作用域中使用。
例:
int a = 0;
mutex mtx;
void add()
{
	for (int i = 0; i < 1000000; i++) {
		lock_guard<mutex>lg(mtx);
		a += 1;	//写操作前加锁,写完数据解锁
	}
}
int main()
{
	thread th1(add);
	thread th2(add);
	th1.join();
	th2.join();
	cout << a << endl;
	return 0;
}
不用自己加锁或解锁
6.2 unique_lock
unique_lock 是 C++ 标准库中提供的一个互斥量封装类,用于在多线程程序中对互斥量进行加锁和解锁操作。它的主要特点是可以对互斥量进行更加灵活的管理,包括延迟加锁、条件变量、超时等。
unique_lock 提供了以下几个成员函数:
lock()	//尝试对互斥量进行加锁操作,如果当前互斥量已经被其他线程持有,则当前线程会被阻塞,直到互斥量被成功加锁。
try_lock()	//尝试对互斥量进行加锁操作,如果当前互斥量已经被其他线程持有,则函数立即返回 `false`,否则返回 `true`。

try_lock_for(const chrono::duration<Rep, Period>& rel_time)	//尝试对互斥量进行加锁操作,如果当前互斥量已经被其他线程持有,则当前线程会被阻塞,直到互斥量被成功加锁,或者超过了指定的时间。

try_lock_until(const chrono::time_point<Clock, Duration>& abs_time)	//尝试对互斥量进行加锁操作,如果当前互斥量已经被其他线程持有,则当前线程会被阻塞,直到互斥量被成功加锁,或者超过了指定的时间点。

unlock()	//对互斥量进行解锁操作。
除了上述成员函数外,unique_lock 还提供了以下几个构造函数:
unique_lock() noexcept = default	//默认构造函数,创建一个未关联任何互斥量的 unique_lock 对象。

explicit unique_lock(mutex_type& m)	//构造函数,使用给定的互斥量 m 进行初始化,并对该互斥量进行加锁操作。

unique_lock(mutex_type& m, defer_lock_t)	//noexcept构造函数,使用给定的互斥量 m 进行初始化,但不对该互斥量进行加锁操作。

unique_lock(mutex_type& m, try_to_lock_t) //noexcept构造函数,使用给定的互斥量 m 进行初始化,并尝试对该互斥量进行加锁操作。如果加锁失败,则创建的 unique_lock 对象不与任何互斥量关联。

unique_lock(mutex_type& m, adopt_lock_t) 	//noexcept构造函数,使用给定的互斥量 m 进行初始化,并假设该互斥量已经被当前线程成功加锁。
例:实现自动加解锁
int a = 0;
mutex mtx;
void add()
{
	for (int i = 0; i < 1000000; i++) {
		unique_lock<mutex>lg(mtx);	//自动加解锁
		a += 1;	//写操作前加锁,写完数据解锁
	}
}
int main()
{
	thread th1(add);
	thread th2(add);
	th1.join();
	th2.join();
	cout << a << endl;
	return 0;
}
使其不进行自动加锁
void add()
{
	for (int i = 0; i < 1000000; i++) {
		unique_lock<mutex>lg(mtx,defer_lock);	//加上defer_lock,此时需要手动加锁,否则出错
		a += 1;	//写操作前加锁,写完数据解锁
	}
}
延迟加锁
int a = 0;
timed_mutex mtx;	//时间类型的mutex
void add()
{
	for (int i = 0; i < 2; i++) {
		unique_lock<timed_mutex>lg(mtx, defer_lock);
		if (lg.try_lock_for(chrono::seconds(2)))	//等待2秒,如果仍未加锁,返回false,否则返回true
		{
			this_thread::sleep_for(chrono::seconds(1));//休眠1s,会导致第二个线程多等待1s,若超过2s,则第2个线程将不执行下面操作
			a += 1;
		}
	}
}
int main()
{
	thread th1(add);
	thread th2(add);
	th1.join();
	th2.join();
	cout << a << endl;
	return 0;
}
7 call_once与其使用场景
call_once 是 C++11 标准库中的一个函数,用于确保某个函数只会被调用一次。其函数原型如下:
template<class Callable, class... Args>

void call_once(once_flag& flag, Callable&& func, Args&&... args);
其中,flag 是一个 once_flag 类型的对象,用于标记函数是否已经被调用;func 是需要被调用的函数或可调用对象;args 是函数或可调用对象的参数。
call_once 的作用是,确保在多个线程中同时调用 call_once 时,只有一个线程能够成功执行 func 函数,而其他线程则会等待该函数执行完成。
使用 call_once 的过程中,需要注意以下几点:
-
flag参数必须是一个once_flag类型的对象,并且在多次调用call_once函数时需要使用同一个flag对象。 -
func参数是需要被调用的函数或可调用对象。该函数只会被调用一次,因此应该确保该函数是幂等的。 -
args参数是func函数或可调用对象的参数。如果func函数没有参数,则该参数可以省略。 -
call_once函数会抛出system_error异常,如果在调用func函数时发生了异常,则该异常会被传递给调用者。
使用 call_once 可以在多线程环境中实现一次性初始化,避免了多个线程同时初始化的问题。例如,在单例模式中,可以使用 call_once 来保证单例实例只会被创建一次。
单例设计模式是一种常见的设计模式,用于确保某个类只能创建一个实例。由于单例实例是全局唯一的,因此在多线程环境中使用单例模式时,需要考虑线程安全的问题。
7.1 单例模式
例:单例模式:只有一个Log类
class Log
{
public:
	Log() {};
	Log(const Log& log) = delete;
	Log& operator=(const Log& log) = delete;
	static Log& GetInstance()
	{
		static Log* log = NULL;
		if (!log)
			log = new Log;
		return *log;
	}
	void PrintLog(string msg)
	{
		cout << __TIME__ << ' ' << msg << endl;
	}
};
int main()
{
	Log::GetInstance().PrintLog("error");
	return 0;
}
在这个单例类中,我们使用了一个静态成员函数 getInstance() 来获取单例实例,该函数使用了一个静态局部变量 log 来存储单例实例。由于静态局部变量只会被初始化一次,因此该实现可以确保单例实例只会被创建一次。
但是,该实现并不是线程安全的。如果多个线程同时调用 getInstance() 函数,可能会导致多个对象被创建,从而违反了单例模式的要求。此外,如果多个线程同时调用 setData() 函数来修改单例对象的数据成员 m_data,可能会导致数据不一致或不正确的结果。
使用call_once
static once_flag once;
static Log* log1;
class Log
{
public:
	Log() {};
	Log(const Log& log) = delete;
	Log& operator=(const Log& log) = delete;

	static Log& GetInstance()
	{
		if (!log1)	log1 = new Log;
		call_once(once, init);	//call_once确保只被调用一次,即便有多个线程
		return *log1;
	}
	static void init()
	{
		if (!log1)	log1 = new Log;
	}
	void PrintLog(string msg)
	{
		cout << __TIME__ << ' ' << msg << endl;
	}
};
void Print()
{
	Log::GetInstance().PrintLog("error");
}
int main()
{
	thread th1(Print);	//多线程同时执行,只有一个会执行init
	thread th2(Print);
	th1.join();
	th2.join();
	return 0;
}
使用 call_once 可以确保单例实例只会被创建一次,从而避免了多个对象被创建的问题。
7.2 饿汉模式与懒汉模式
单例中懒汉和饿汉的本质区别在于以下几点:
- 饿汉式是线程安全的,在类创建的同时就已经创建好一个静态的对象供系统使用,以后不在改变。懒汉式如果在创建实例对象时不加上synchronized则会导致对对象的访问不是线程安全的。
- 从实现方式来讲他们最大的区别就是懒汉式是延时加载,他是在需要的时候才创建对象,而饿汉式在虚拟机启动的时候就会创建,饿汉式无需关注多线程问题、写法简单明了、能用则用。但是它是加载类时创建实例(上面有个朋友写错了)、所以如果是一个工厂模式、缓存了很多实例、那么就得考虑效率问题,因为这个类一加载则把所有实例不管用不用一块创建。
8 condition_variable 与其使用场景
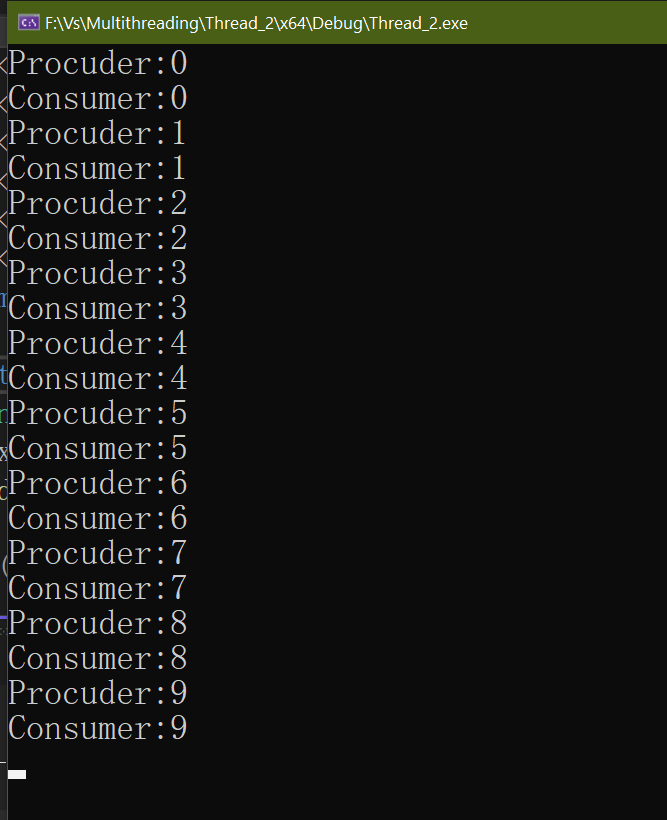
生产者消费者模型
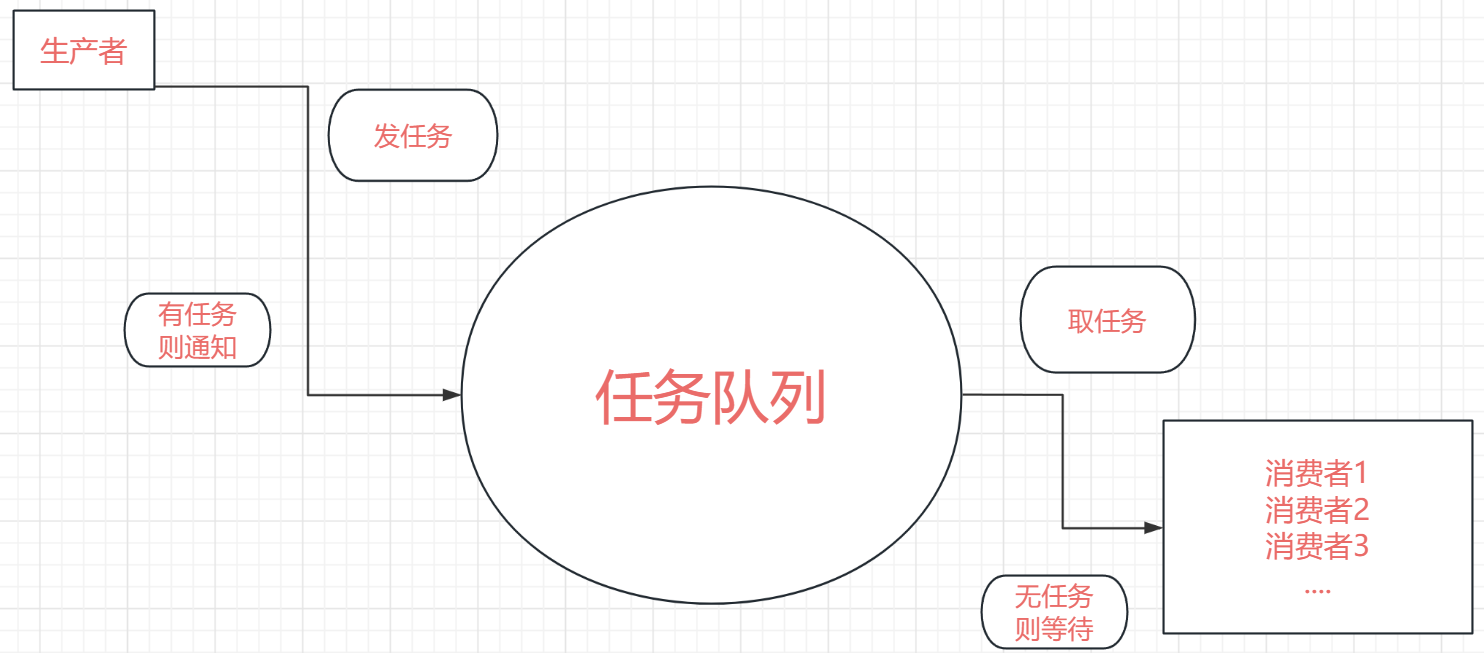
生产者发出任务,消费者取任务;当任务列表为空时,消费者等待任务,如果有新的任务,生产者发出任务,可以发一个,也可以发多个
例:一个任务队列,生产者每次生产一个任务并通知,消费者取出任务
#include<iostream>
#include<thread>
#include<mutex>
#include<string>
#include<condition_variable>
#include<queue>
using namespace std;

queue<int> task_queue;	//任务列表
condition_variable task_cv;
mutex mtx;
void Producer()
{
	for (int i = 0; i < 10; i++)
	{
		{	//注意有{}
			unique_lock<mutex> lock(mtx);
			task_queue.push(i);
			task_cv.notify_one();//通知一次任务
			cout << "Procuder:" << i << endl;
		} //注意有{}
		this_thread::sleep_for(chrono::milliseconds(100));
	}
}
void Consumer()
{
	while (1)
	{
		unique_lock<mutex> lock(mtx);
		//bool is_empty = task_queue.empty();
		task_cv.wait(lock, []() { return !task_queue.empty(); });
		int val = task_queue.front();
		task_queue.pop();//取任务
		cout << "Consumer:" << val << endl;
	}
}
int main()
{
	thread th1(Producer);
	thread th2(Consumer);
	th1.join();
	th2.join();
	return 0;
}
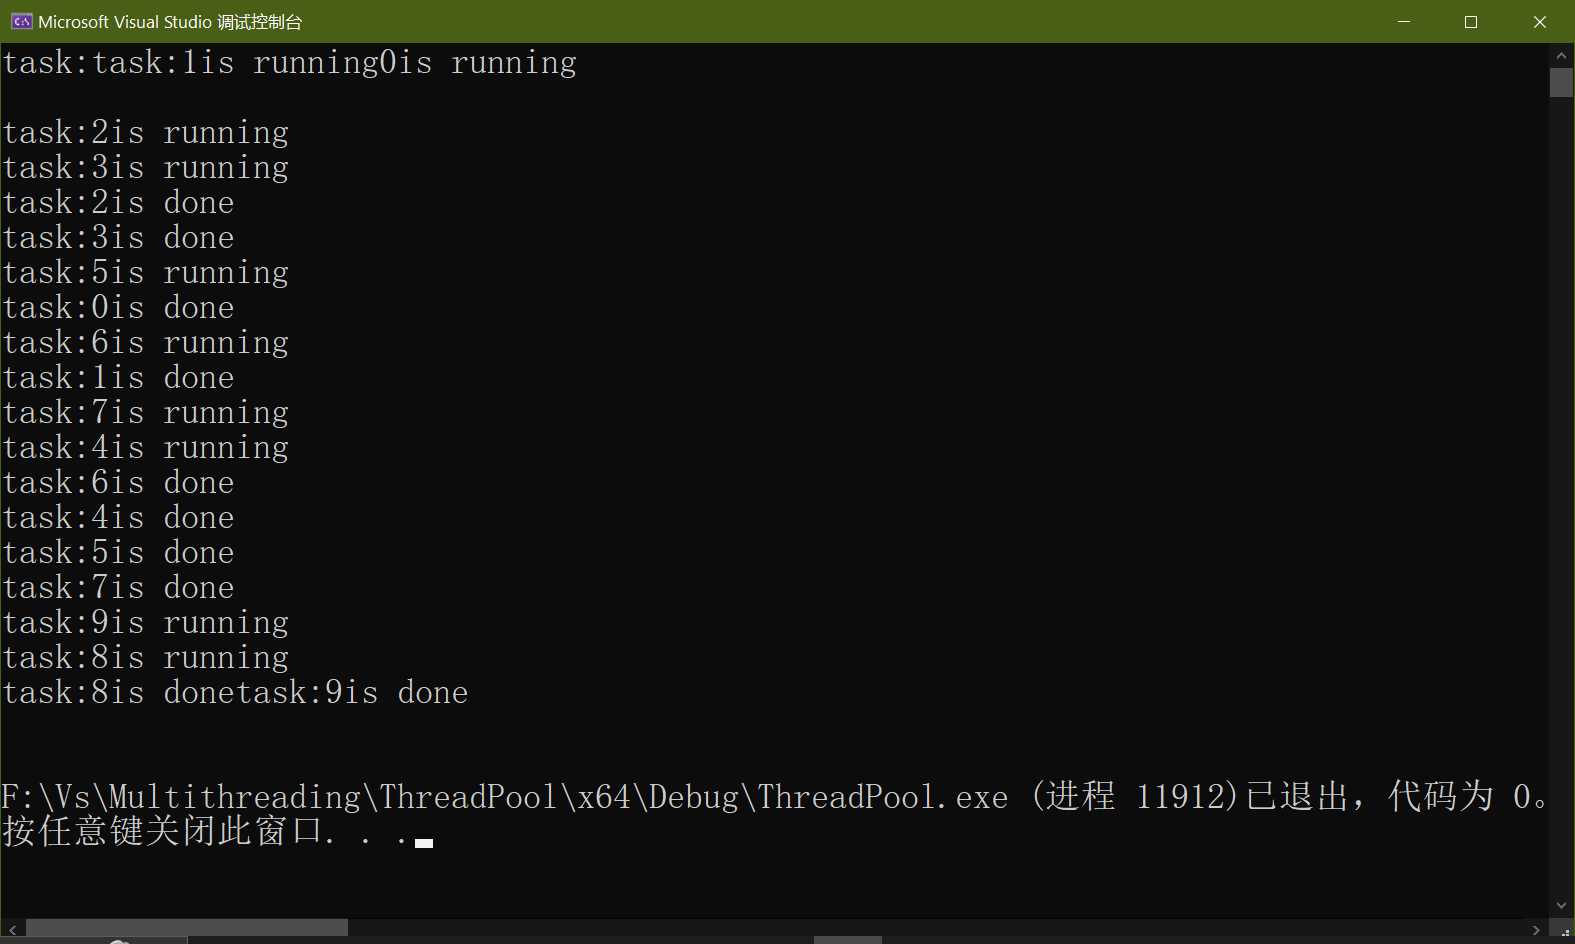
9 C++11 跨平台线程池
例:基于上述各个内容的线程池创建
using namespace std;
#include<iostream>
#include<thread>
#include<vector>
#include<queue>
#include<condition_variable>
#include<functional>
#include<mutex>
#include<string>

class ThreadPool
{
public:
	//构造函数
	ThreadPool(int num_of_thread_pool) :stop(false)	//参数为起始线程个数
	{
		for (int i = 0; i < num_of_thread_pool; i++)//创建所需的线程数
		{
			threads.emplace_back([this] {
				while (1)
				{
					unique_lock<mutex>lock(mtx);
					condition.wait(lock, [this] {
						return !tasks.empty() || stop; });	//队列不为空,直接取任务

					if (stop && tasks.empty())	return;		//队列终止或为空,直接return

					//队列有任务且未终止
					function<void()> task(move(tasks.front()));	//move移动语句,左值改为右值
					tasks.pop();	//取走任务
					lock.unlock();	//解锁,让其他线程取任务
					task();			//进行任务
				}
			});
		}
	}

	~ThreadPool()	//析构
	{
		{
			unique_lock<mutex>lock(mtx);
			stop = true;	//线程停止
		}
		condition.notify_all();	//通知所有线程取出所有任务
		for (auto& t : threads)	//将所有线程并行
		{	//auto自动判断数组中的变量的类型
			t.join();
		}
	}

	//任务接口
	template<class F,class... Args>//函数参数不确定,使用模板
	void AddTaskQueue(F&& f, Args&&... args)	//添加任务
	{			//&&右值引用,
		function<void()> task = bind(forward<F>(f), forward<Args>(args)...);
		{
			unique_lock<mutex>lock(mtx);	//操作共享变量,加锁
			tasks.emplace(move(task));	//move将左值转成右值
		}
		condition.notify_one();	//有任务则通知线程
	}
private:
	vector<thread> threads;	//线程数组
	queue < function<void()>> tasks;//任务列表

	mutex mtx;
	condition_variable condition;
	bool stop;
};
int main()
{
	ThreadPool pool(4);
	for (int i = 0; i < 10; i++)
	{
		pool.AddTaskQueue([i]
		{
			cout << "task:" << i << "is running" << endl;
			this_thread::sleep_for(chrono::seconds(1));
			cout << "task:" << i << "is done" << endl;
		});
	}
	return 0;
}
常用语法
move	//移动语句,左值改为右值
auto	//自动判断数组中的变量的类型
&&		//右值引用。在函数模板中是万能引用,如果你是右值引用,它将取出右值引用,否则取出左值引用
&			//左值引用
bind	//函数适配器,将函数与参数绑定
forward //完美转发。如果你是右值引用,它将其转换成右值引用,否则转换成左值引用
chrono//时间库
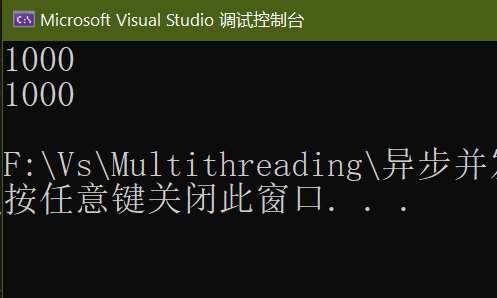
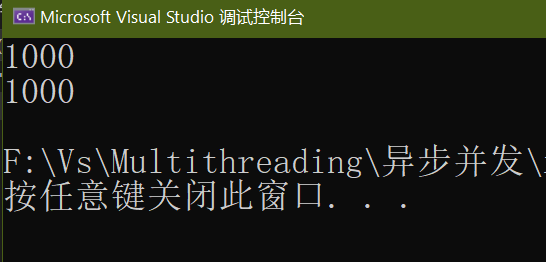
10 异步并发 async future packaged_task promise
10.1 async future
是C++11引入的一个函数模板,用于异步执行一个函数,并返回一个future对象,表示异步操作的结果。使用async可以方便地进行异步编程,避免了手动创建线程和管理线程的麻烦。
例:
#include<iostream>
#include<future>
using namespace std;
int func()
{
	int i = 0;
	for (i; i < 1000; i++);
	return i;
}
int main()
{
	future<int>future_result = async(launch::async, func);
							//func()传给async,直接后台执行,结果存于future_result
	cout << func() << endl;
	cout << future_result.get() << endl;	//取出func中的结果,get()
	return 0;
}
相当于2个线程同时执行
10.2 packaged_task
在C++中,packaged_task是一个类模板,用于将一个可调用对象 (如函数、函数对象或lambda表达式)封装成一个异步操作,并返回一个future对象,表示异步操作的结果。packaged_task可以方便地将一个函数或可调用对象转换成一个异步操作,供其他线程使用。
例:
#include<iostream>
#include<future>
using namespace std;
int func()
{
	int i = 0;
	for (i; i < 1000; i++);
	return i;
}
int main1()
{
	future<int>future_result = async(launch::async, func);
							//func()传给async,直接后台执行,结果存于future_result
	cout << func() << endl;
	cout << future_result.get() << endl;	//取出func中的结果,get()
	return 0;
}
int main()
{
	packaged_task<int()> task(func);	//将task封装到packaged_task中
	auto future_result = task.get_future();	//通过packaged_task获取一个future对象

	thread th1(move(task));	//开启task的线程
	th1.join();

	cout << func() << endl;	//主线程执行func函数
	cout << future_result.get() << endl;	//获取线程task执行结果future_result的数据
	return 0;
}
10.3 promise
在C++中,promise是一个类模板,用于在一个线程中产生一个值,并在另一个线程中获取这个值。promise通常与future和async一起使用,用于实现异步编程
例:
void func2(promise<int> &val)	//防止被拷贝,使用引用
{
	val.set_value(50);
}
int main()
{
	promise<int>val;
	auto future_result = val.get_future();
	thread th1(func2,ref(val));
	th1.join();
	cout << future_result.get() << endl;

	return 0;
}
11 原子操作 atomic
atomic 是 C++11 标准库中的一个模板类,用于实现多线程环境下的原子操作。它提供了一种线程安全的方式来访问和修改共享变量,可以避免多线程环境中的数据竞争问题。
atomic 的使用方式类似于普通的 C++ 变量,但是它的操作是原子性的。也就是说,在多线程环境下,多个线程同时对同一个 atomic 变量进行操作时,不会出现数据竞争问题。
以下是一些常用的 atomic 操作:
load()	//将 atomic 变量的值加载到当前线程的本地缓存中,并返回这个值。

store(val)//将 val 的值存储到 atomic 变量中,并保证这个操作是原子性的。

exchange(val)	//将 val 的值存储到 atomic 变量中,并返回原先的值。

compare_exchange_weak(expected, val)	和 compare_exchange_strong(expected, val)	//比较 atomic 变量的值和 expected 的值是否相同,如果相同,则将 val 的值存储到 atomic 变量中,并返回 true;否则,将 atomic 变量的值存储到 expected 中,并返回 false。
例:
在 3 互斥量解决多线程数据共享问题 时,我们为了避免2个线程出现数据共享问题使用互斥量解决
int a = 0;
mutex mtx;
void add()
{
	for (int i = 0; i < 100000; i++) {
		mtx.lock();		//加锁
		a += 1;
		mtx.unlock();	//解锁
	}
}
int main()
{
	thread th1(add);
	thread th2(add);
	th1.join();
	th2.join();
	cout << a << endl;
	return 0;
}
接下来,我们使用atomic解决:修改add函数与变量a
atomic<int> a = 0;
void add()
{
	for (int i = 0; i < 100000; i++) { a += 1;}
}
效果相同
但是,原子操作的效率高,代码所用时间更短
atomic 的使用方式类似于普通的 C++ 变量,但是它的操作是原子性的。也就是说,在多线程环境下,多个线程同时对同一个 atomic 变量进行操作时,不会出现数据竞争问题。
以下是一些常用的 atomic 操作:
load()	//将 atomic 变量的值加载到当前线程的本地缓存中,并返回这个值。

store(val)//将 val 的值存储到 atomic 变量中,并保证这个操作是原子性的。

exchange(val)	//将 val 的值存储到 atomic 变量中,并返回原先的值。

compare_exchange_weak(expected, val)	和 compare_exchange_strong(expected, val)	//比较 atomic 变量的值和 expected 的值是否相同,如果相同,则将 val 的值存储到 atomic 变量中,并返回 true;否则,将 atomic 变量的值存储到 expected 中,并返回 false。
例:
在 3 互斥量解决多线程数据共享问题 时,我们为了避免2个线程出现数据共享问题使用互斥量解决
int a = 0;
mutex mtx;
void add()
{
	for (int i = 0; i < 100000; i++) {
		mtx.lock();		//加锁
		a += 1;
		mtx.unlock();	//解锁
	}
}
int main()
{
	thread th1(add);
	thread th2(add);
	th1.join();
	th2.join();
	cout << a << endl;
	return 0;
}
接下来,我们使用atomic解决:修改add函数与变量a
atomic<int> a = 0;
void add()
{
	for (int i = 0; i < 100000; i++) { a += 1;}
}
效果相同
[外链图片转存中…(img-ZhPgRbnu-1696501458773)]
但是,原子操作的效率高,代码所用时间更短


 821
821


 被折叠的 条评论
为什么被折叠?
被折叠的 条评论
为什么被折叠?
 到【灌水乐园】发言


