


在项目中使用推送是在正常不过得了,其实像百度推送,友盟推送等都可以为我们开发者更方便做到推送;推送的原理就不说了,网上有很多。由于我在修改以前的项目,以前使用的是百度云3.2版本,在3.2到4.6其中版本变动不少,改了不少地方就不一一细说了, 就使用最新的吧~~
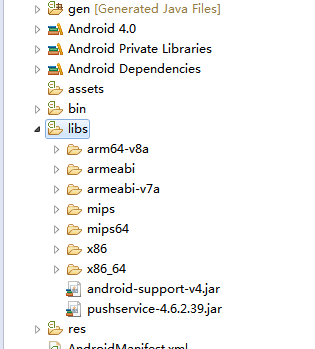
下载SDK附带demo,我是根据百度推送的api文档自己写了一个demo,先将下载下来的SDK中的libs导入项目中,
然后将申请的key写入配置文件中或者写入公共参数类中,写入配置文件中,是需要通过方法获得的,自带demo中有,然后配置推送所需要的权限
    <!-- Push service 运行需要的权限 -->
    <uses-permission android:name="android.permission.INTERNET" />
    <uses-permission android:name="android.permission.READ_PHONE_STATE" />
    <uses-permission android:name="android.permission.ACCESS_NETWORK_STATE" />
    <uses-permission android:name="android.permission.RECEIVE_BOOT_COMPLETED" />
    <uses-permission android:name="android.permission.WRITE_SETTINGS" />
    <uses-permission android:name="android.permission.VIBRATE" />
    <uses-permission android:name="android.permission.WRITE_EXTERNAL_STORAGE" />
    <uses-permission android:name="android.permission.DISABLE_KEYGUARD" />
    <uses-permission android:name="android.permission.ACCESS_COARSE_LOCATION" />
    <uses-permission android:name="android.permission.ACCESS_WIFI_STATE" />
    <uses-permission android:name="android.permission.ACCESS_DOWNLOAD_MANAGER" />
    <uses-permission android:name="android.permission.DOWNLOAD_WITHOUT_NOTIFICATION" />
    <uses-permission android:name="android.permission.EXPAND_STATUS_BAR" />
根据文档将需要配置的推送服务等直接复制进去
  <!-- push service start -->
        <!-- 用于接收系统消息以保证PushService正常运行 -->
        <receiver
            android:name="com.baidu.android.pushservice.PushServiceReceiver"
            android:process=":bdservice_v1" >
            <intent-filter>
                <action android:name="android.intent.action.BOOT_COMPLETED" />
                <action android:name="android.net.conn.CONNECTIVITY_CHANGE" />
                <action android:name="com.baidu.android.pushservice.action.notification.SHOW" />
                <action android:name="com.baidu.android.pushservice.action.media.CLICK" />
                <!-- 以下四项为可选的action声明,可大大提高service存活率和消息到达速度 -->
                <action android:name="android.intent.action.MEDIA_MOUNTED" />
                <action android:name="android.intent.action.USER_PRESENT" />
                <action android:name="android.intent.action.ACTION_POWER_CONNECTED" />
                <action android:name="android.intent.action.ACTION_POWER_DISCONNECTED" />
            </intent-filter>
        </receiver>
        <!-- Push服务接收客户端发送的各种请求 -->
        <receiver
            android:name="com.baidu.android.pushservice.RegistrationReceiver"
            android:process=":bdservice_v1" >
            <intent-filter>
                <action android:name="com.baidu.android.pushservice.action.METHOD" />
                <action android:name="com.baidu.android.pushservice.action.BIND_SYNC" />
            </intent-filter>
            <intent-filter>
                <action android:name="android.intent.action.PACKAGE_REMOVED" />

                <data android:scheme="package" />
            </intent-filter>
        </receiver>

        <service
            android:name="com.baidu.android.pushservice.PushService"
            android:exported="true"
            android:process=":bdservice_v1" >
            <intent-filter>
                <action android:name="com.baidu.android.pushservice.action.PUSH_SERVICE" />
            </intent-filter>
        </service>
        <!-- 4.4版本新增的CommandService声明,提升小米和魅族手机上的实际推送到达率 -->
        <service
            android:name="com.baidu.android.pushservice.CommandService"
            android:exported="true" />
        <!-- push结束 -->


        <!-- 4.6版本新增的Activity声明,提升Push后台存活率 -->
        <activity
            android:name="com.baidu.android.pushservice.PushKeepAlive"
            android:launchMode="singleInstance"
android:theme="@android:style/Theme.Translucent.NoTitleBar" />PushManager.startWork(getApplicationContext(),
PushConstants.LOGIN_TYPE_API_KEY, API_KEY);百度推送提供PushMessageReceiver并且重载所有的回调函数,如下:
    /**
     * 调用PushManager.startWork后,sdk将对push
     * server发起绑定请求,这个过程是异步的。绑定请求的结果通过onBind返回。 如果您需要用单播推送,需要把这里获取的channel
     * id和user id上传到应用server中,再调用server接口用channel id和user id给单个手机或者用户推送。
     *
     * @param context
     *            BroadcastReceiver的执行Context
     * @param errorCode
     *            绑定接口返回值,0 - 成功
     * @param appid
     *            应用id。errorCode非0时为null
     * @param userId
     *            应用user id。errorCode非0时为null
     * @param channelId
     *            应用channel id。errorCode非0时为null
     * @param requestId
     *            向服务端发起的请求id。在追查问题时有用;
     * @return none
     */
    @Override
    public void onBind(Context context, int errorCode, String appid,
            String userId, String channelId, String requestId) {
        String responseString = "onBind errorCode=" + errorCode + " appid="
                + appid + " userId=" + userId + " channelId=" + channelId
                + " requestId=" + requestId;
        Log.d(TAG, responseString);

        if (errorCode == 0) {
            // 绑定成功
            Log.d(TAG, "绑定成功");
        }
        // Demo更新界面展示代码,应用请在这里加入自己的处理逻辑
        updateContent(context, responseString);
    }

    /**
     * 接收透传消息的函数。
     *
     * @param context
     *            上下文
     * @param message
     *            推送的消息
     * @param customContentString
     *            自定义内容,为空或者json字符串
     */
    @Override
    public void onMessage(Context context, String message,
            String customContentString) {
        String messageString = "透传消息 message=\"" + message
                + "\" customContentString=" + customContentString;
        Log.d(TAG, messageString);

        // 自定义内容获取方式,mykey和myvalue对应透传消息推送时自定义内容中设置的键和值
        if (!TextUtils.isEmpty(customContentString)) {
            JSONObject customJson = null;
            try {
                customJson = new JSONObject(customContentString);
                String myvalue = null;
                if (!customJson.isNull("mykey")) {
                    myvalue = customJson.getString("mykey");
                }
            } catch (JSONException e) {
                // TODO Auto-generated catch block
                e.printStackTrace();
            }
        }

        // Demo更新界面展示代码,应用请在这里加入自己的处理逻辑
        updateContent(context, messageString);
    }

    /**
     * 接收通知点击的函数。
     *
     * @param context
     *            上下文
     * @param title
     *            推送的通知的标题
     * @param description
     *            推送的通知的描述
     * @param customContentString
     *            自定义内容,为空或者json字符串
     */
    @Override
    public void onNotificationClicked(Context context, String title,
            String description, String customContentString) {
        String notifyString = "通知点击 title=\"" + title + "\" description=\""
                + description + "\" customContent=" + customContentString;
        Log.d(TAG, notifyString);

        // 自定义内容获取方式,mykey和myvalue对应通知推送时自定义内容中设置的键和值
        if (!TextUtils.isEmpty(customContentString)) {
            JSONObject customJson = null;
            try {
                customJson = new JSONObject(customContentString);
                String myvalue = null;
                if (!customJson.isNull("mykey")) {
                    myvalue = customJson.getString("mykey");
                }
            } catch (JSONException e) {
                // TODO Auto-generated catch block
                e.printStackTrace();
            }
        }

        // Demo更新界面展示代码,应用请在这里加入自己的处理逻辑
        updateContent(context, notifyString);
    }

    /**
     * 接收通知到达的函数。
     *
     * @param context
     *            上下文
     * @param title
     *            推送的通知的标题
     * @param description
     *            推送的通知的描述
     * @param customContentString
     *            自定义内容,为空或者json字符串
     */

    @Override
    public void onNotificationArrived(Context context, String title,
            String description, String customContentString) {
    	Toast.makeText(context, "通知到达了", 0).show();
        String notifyString = "onNotificationArrived  title=\"" + title
                + "\" description=\"" + description + "\" customContent="
                + customContentString;
        Log.d(TAG, notifyString);

        // 自定义内容获取方式,mykey和myvalue对应通知推送时自定义内容中设置的键和值
        if (!TextUtils.isEmpty(customContentString)) {
            JSONObject customJson = null;
            try {
                customJson = new JSONObject(customContentString);
                String myvalue = null;
                if (!customJson.isNull("mykey")) {
                    myvalue = customJson.getString("mykey");
                }
            } catch (JSONException e) {
                // TODO Auto-generated catch block
                e.printStackTrace();
            }
        }
        // Demo更新界面展示代码,应用请在这里加入自己的处理逻辑
        // 你可以參考 onNotificationClicked中的提示从自定义内容获取具体值
        updateContent(context, notifyString);
    }

    /**
     * setTags() 的回调函数。
     *
     * @param context
     *            上下文
     * @param errorCode
     *            错误码。0表示某些tag已经设置成功;非0表示所有tag的设置均失败。
     * @param successTags
     *            设置成功的tag
     * @param failTags
     *            设置失败的tag
     * @param requestId
     *            分配给对云推送的请求的id
     */
    @Override
    public void onSetTags(Context context, int errorCode,
            List<String> sucessTags, List<String> failTags, String requestId) {
        String responseString = "onSetTags errorCode=" + errorCode
                + " sucessTags=" + sucessTags + " failTags=" + failTags
                + " requestId=" + requestId;
        Log.d(TAG, responseString);

        // Demo更新界面展示代码,应用请在这里加入自己的处理逻辑
        updateContent(context, responseString);
    }

    /**
     * delTags() 的回调函数。
     *
     * @param context
     *            上下文
     * @param errorCode
     *            错误码。0表示某些tag已经删除成功;非0表示所有tag均删除失败。
     * @param successTags
     *            成功删除的tag
     * @param failTags
     *            删除失败的tag
     * @param requestId
     *            分配给对云推送的请求的id
     */
    @Override
    public void onDelTags(Context context, int errorCode,
            List<String> sucessTags, List<String> failTags, String requestId) {
        String responseString = "onDelTags errorCode=" + errorCode
                + " sucessTags=" + sucessTags + " failTags=" + failTags
                + " requestId=" + requestId;
        Log.d(TAG, responseString);

        // Demo更新界面展示代码,应用请在这里加入自己的处理逻辑
        updateContent(context, responseString);
    }

    /**
     * listTags() 的回调函数。
     *
     * @param context
     *            上下文
     * @param errorCode
     *            错误码。0表示列举tag成功;非0表示失败。
     * @param tags
     *            当前应用设置的所有tag。
     * @param requestId
     *            分配给对云推送的请求的id
     */
    @Override
    public void onListTags(Context context, int errorCode, List<String> tags,
            String requestId) {
        String responseString = "onListTags errorCode=" + errorCode + " tags="
                + tags;
        Log.d(TAG, responseString);

        // Demo更新界面展示代码,应用请在这里加入自己的处理逻辑
        updateContent(context, responseString);
    }

    /**
     * PushManager.stopWork() 的回调函数。
     *
     * @param context
     *            上下文
     * @param errorCode
     *            错误码。0表示从云推送解绑定成功;非0表示失败。
     * @param requestId
     *            分配给对云推送的请求的id
     */
    @Override
    public void onUnbind(Context context, int errorCode, String requestId) {
        String responseString = "onUnbind errorCode=" + errorCode
                + " requestId = " + requestId;
        Log.d(TAG, responseString);

        if (errorCode == 0) {
            // 解绑定成功
            Log.d(TAG, "解绑成功");
        }
        // Demo更新界面展示代码,应用请在这里加入自己的处理逻辑
        updateContent(context, responseString);
}然后将该方法在配置中注册;
 <!-- 自定义receiver处理百度推送 -->
        <receiver android:name=".MyBaiDuPushReceiver" >
            <intent-filter>
                <!-- 接收push消息 -->
                <action android:name="com.baidu.android.pushservice.action.MESSAGE" />
                <!-- 接收bind、setTags等method的返回结果 -->
                <action android:name="com.baidu.android.pushservice.action.RECEIVE" />
                <!-- 接收通知点击事件,和通知自定义内容 -->
                <action android:name="com.baidu.android.pushservice.action.notification.CLICK" />
            </intent-filter>
        </receiver>
然后可以通过百度推送提供的控制台来验证你的配置是否成功。

手机安装测试===》
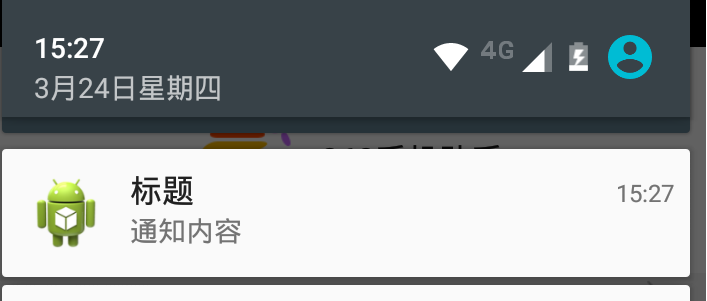

推送成功啦,需要注意的是,如果你在选择推送的用户范围时要注意几点:
1、百度推送所记录的设备数是根据手机的设备号来记录的,并不是记录安装次数,也就是说一台手机不管卸载重装多少次,只要设备号没更改就只记录一次;
2、用户范围:在选择指定设备和标签设备时要根据需求来选择,Channel ID 针对于每个手机是唯一的,你的手机就会被百度推送打上这个ID,推送时只要根据这个id就能推送到具体的某台设备上去;
而标签不仅可以标记某台设备,而且一台设备可以被标记多个标签,比如:推送到某一个小组,或者某一分公司下的所有成员。并且每个应用最多可以定义10000个标签,每个标签对应的设备数没有限制;
更为详细的步骤或者配置方面,可以查阅百度推送api文档:
百度推送API文档


 290
290

 被折叠的 条评论
为什么被折叠?
被折叠的 条评论
为什么被折叠?
 到【灌水乐园】发言


