


从http://hibernate.org/orm/官网下载hibernate,该文章里面用的是hibernate4.3.11
用eclipse或者myeclipse创建一个project,在src下面创建一个hibernate的xml文件,名字为hibernate.cfg.xml
<!DOCTYPE hibernate-configuration PUBLIC
"-//Hibernate/Hibernate Configuration DTD 3.0//EN"
"http://www.hibernate.org/dtd/hibernate-configuration-3.0.dtd">
<hibernate-configuration>
<session-factory>
<property name="hibernate.connection.driver_class">com.mysql.jdbc.Driver</property>
<property name="hibernate.connection.url">jdbc:mysql://localhost:3306/hibernate</property>
<property name="hibernate.connection.username">root</property>
<property name="hibernate.connection.password">123456</property>
</session-factory>
</hibernate-configuration>
然后创建一个类,一个实体,本文用的User包括id,name,password,添加get和set方法。
在mysql数据库里面创建一个对应的表,也是包括id,name,password,
添加一个配置文件,将user和表对应起来,代码如下:
<!DOCTYPE hibernate-mapping PUBLIC
"-//Hibernate/Hibernate Mapping DTD 3.0//EN"
"http://www.hibernate.org/dtd/hibernate-mapping-3.0.dtd">
<hibernate-mapping>
<class name="com.beijing.po.User" table="t_user">
<id name="id" column="id">
<generator class="native"></generator>
</id>
<property name="name" column="name"></property>
<property name="password" column="password"></property>
</class>
</hibernate-mapping>
完成以上步骤后需要在hibernate配置文件添加标签,添加后的标签为
<!DOCTYPE hibernate-configuration PUBLIC
"-//Hibernate/Hibernate Configuration DTD 3.0//EN"
"http://www.hibernate.org/dtd/hibernate-configuration-3.0.dtd">
<hibernate-configuration>
<session-factory>
<property name="hibernate.connection.driver_class">com.mysql.jdbc.Driver</property>
<property name="hibernate.connection.url">jdbc:mysql://localhost:3306/hibernate</property>
<property name="hibernate.connection.username">root</property>
<property name="hibernate.connection.password">123456</property>
<property name="hibernate.show_sql">true</property>
<mapping resource="com/beijing/po/User.hbm.xml"></mapping>
</session-factory>
</hibernate-configuration>
添加测试类,测试一下是否能够完成,代码如下:
package com.beijing.test;
import org.hibernate.Session;
import org.hibernate.SessionFactory;
import org.hibernate.Transaction;
import org.hibernate.cfg.Configuration;
import com.beijing.po.User;
public class TestClient {
public static void main(String[] args) {
Configuration cfg = new Configuration();
cfg = cfg.configure();
SessionFactory factory = cfg.buildSessionFactory();
Session session = factory.openSession();
Transaction tx = session.beginTransaction();
User user = new User();
user.setName("河北");
user.setPassword("4123");
session.save(user);
tx.commit();
}
}
这样一个hibernate的HelloWord就创建完成。
总的目录结构为
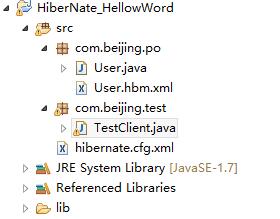
注:在hibernate的配置文件添加mapping时,起始目录默认为src根部。


 210
210

 被折叠的 条评论
为什么被折叠?
被折叠的 条评论
为什么被折叠?
 到【灌水乐园】发言


