


参考littleY- 仿超级课程表的课程界面设计
效果如下图
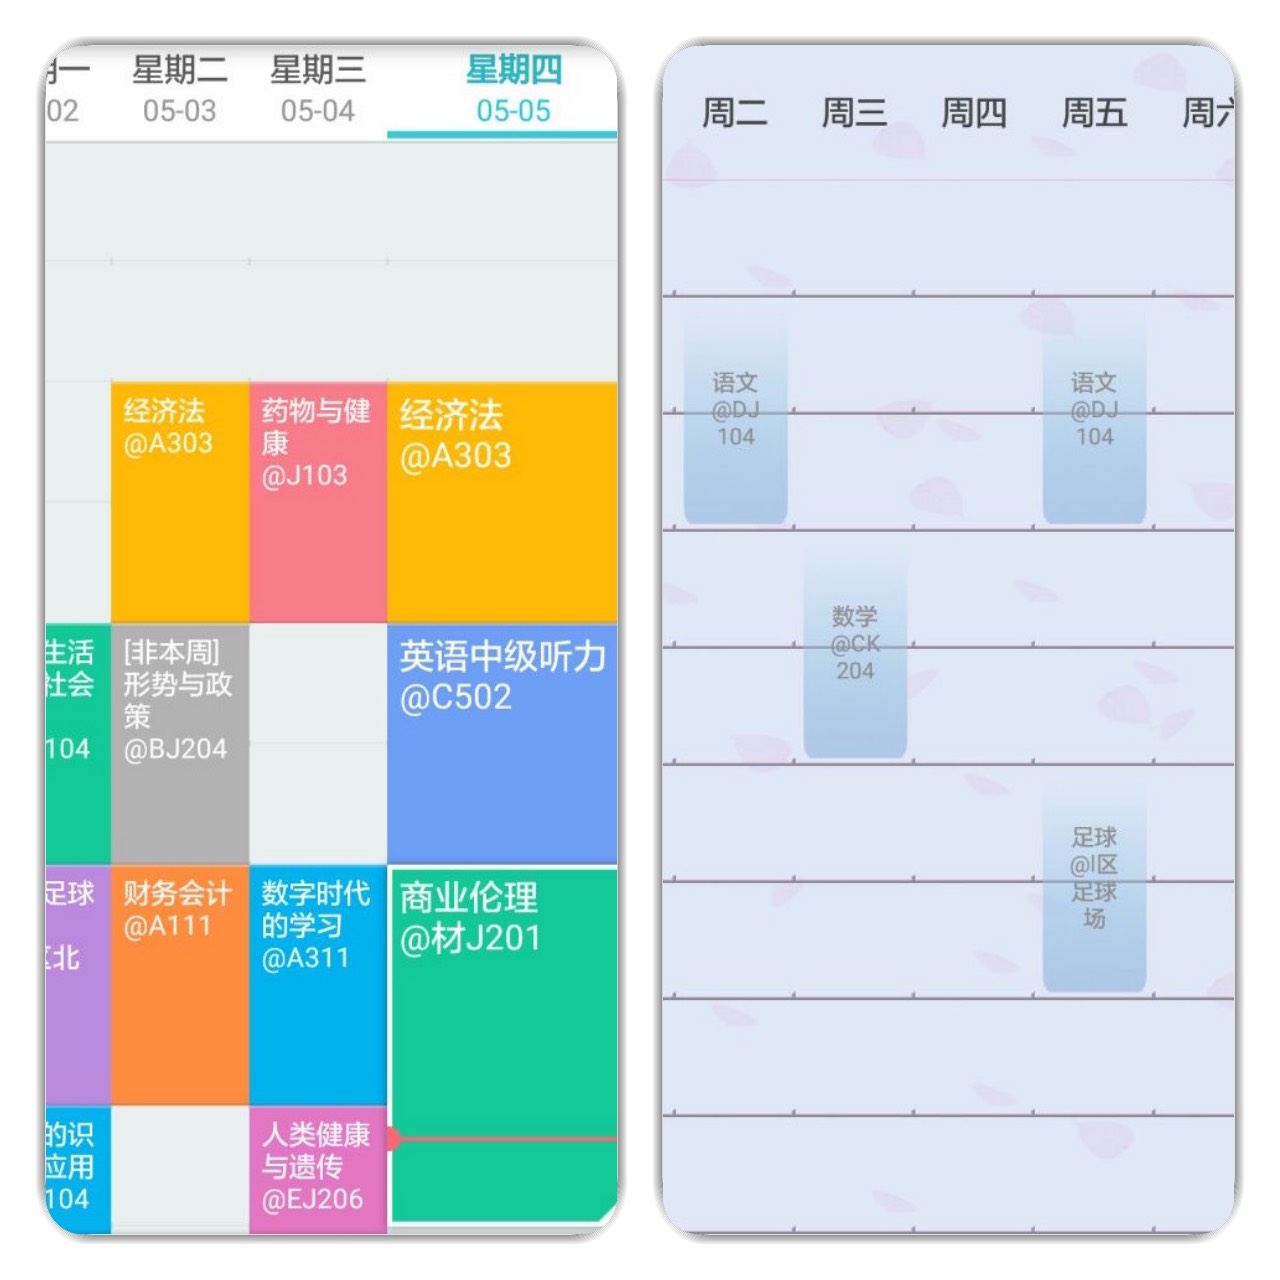
 1. 整个界面可以上下滚动,但第一栏显示周几的并不参与滚动
 2. 显示课程简要信息的块可以跨行合并显示
1.首先需要一个ScrollView来控制界面的滚动
2.其次需要一个只用于显示内容不会滚动的ListView(需要自定义)
3.最后需要动态添加TextView来显示课程的简要信息
1.主界面.xml
<?xml version="1.0" encoding="utf-8"?>
<LinearLayout xmlns:android="http://schemas.android.com/apk/res/android"
    xmlns:tools="http://schemas.android.com/tools"
    android:layout_width="match_parent"
    android:layout_height="match_parent"
    android:orientation="vertical"
    android:padding="0dp"
    tools:context=".Activity.ActivityMain">

    <LinearLayout
        android:layout_width="match_parent"
        android:layout_height="40dp"
        android:layout_margin="0dp"
        android:orientation="horizontal">

        <!--第一个TextView单独设置宽度-->
        <TextView
            android:id="@+id/month"
            style="@style/title_style"
            android:layout_width="20dp"
            android:layout_height="match_parent"
            android:gravity="center"
            android:text="@string/text_month" />

        <TextView
            android:id="@+id/classMonday"
            style="@style/title_style"
            android:layout_width="0dp"
            android:layout_height="match_parent"
            android:layout_weight="1"
            android:gravity="center"
            android:text="@string/text_monday" />

        <TextView
            android:id="@+id/classTuesday"
            style="@style/title_style"
            android:layout_width="0dp"
            android:layout_height="match_parent"
            android:layout_weight="1"
            android:gravity="center"
            android:text="@string/text_tuesday" />

        <TextView
            android:id="@+id/classWednesday"
            style="@style/title_style"
            android:layout_width="0dp"
            android:layout_height="match_parent"
            android:layout_weight="1"
            android:gravity="center"
            android:text="@string/text_wednesday" />

        <TextView
            android:id="@+id/classThursday"
            style="@style/title_style"
            android:layout_width="0dp"
            android:layout_height="match_parent"
            android:layout_weight="1"
            android:gravity="center"
            android:text="@string/text_thursday" />

        <TextView
            android:id="@+id/classFriday"
            style="@style/title_style"
            android:layout_width="0dp"
            android:layout_height="match_parent"
            android:layout_weight="1"
            android:gravity="center"
            android:text="@string/text_friday" />

        <TextView
            android:id="@+id/classSaturday"
            style="@style/title_style"
            android:layout_width="0dp"
            android:layout_height="match_parent"
            android:layout_weight="1"
            android:gravity="center"
            android:text="@string/text_saturday" />

        <TextView
            android:id="@+id/classSunday"
            style="@style/title_style"
            android:layout_width="0dp"
            android:layout_height="match_parent"
            android:layout_weight="1"
            android:gravity="center"
            android:text="@string/text_sunday" />
    </LinearLayout>

    <ScrollView
        android:id="@+id/mainScrollView"
        android:layout_width="match_parent"
        android:layout_height="match_parent">

        <!-- 作为父容器用于控制View动态添加-->
        <RelativeLayout
            android:id="@+id/relativeLayout"
            android:layout_width="match_parent"
            android:layout_height="wrap_content">

 <com.pic.one.mike.onepic.CustomView.CustomListView
                android:id="@+id/listView"
                android:layout_width="match_parent"
                android:layout_height="match_parent"/>
        </RelativeLayout>
    </ScrollView>
</LinearLayout>
2.CustomListView.java
public class CustomListView extends ListView {
    public CustomListView(Context context) {
        super(context);
    }

    public CustomListView(Context context, AttributeSet attrs) {
        super(context, attrs);
    }

    /**
     * 设置不滚动
     */
    @Override
    protected void onMeasure(int widthMeasureSpec, int heightMeasureSpec) {
        int expandSpec = MeasureSpec.makeMeasureSpec(Integer.MAX_VALUE >> 2,
                MeasureSpec.AT_MOST);
        super.onMeasure(widthMeasureSpec, expandSpec);
    }
}
3.动态添加用于显示课程简要信息的TextView
/** 获取屏幕参数*/
WindowManager manager = this.getWindowManager();                DisplayMetrics outMetrics = new DisplayMetrics();                                               manager.getDefaultDisplay().getMetrics(outMetrics);
int wScreen = outMetrics.widthPixels;
//作为父容器的,用于动态添加View的RelativeLayout
parentRl = (RelativeLayout) view.findViewById(R.id.relativeLayout);
RelativeLayout courseParent = new RelativeLayout(mContext);
courseParent.setOnClickListener(this);
/** 用来设置边距*/
int margin1Px = getResources().getDimensionPixelSize(R.dimen.fragment_class_course_margin1dp);
/** 节次、月份的宽度*/
int marginLessonPx = getResources().getDimensionPixelSize(R.dimen.fragment_class_month_num_width);
/** 本日课程的宽度*/
int lessonWidth = (wScreen - marginLessonPx) / 7;
/**
* 设置一门课程的高度和宽度,一节课的高度与宽度保持一致,把dp转换成像素乘以节数,
* 宽度为屏幕减去节次的宽度后的1/7,因为要显示8列,1列是节次,7列是一周的7天;
* 如果该课所在周数与今日周数相同,需单独设置其宽度*/
// 每单位课程的高度(1节为1单位)
int lessonHeight = getResources().getDimensionPixelSize(R.dimen.fragment_class_list_item_height);
// 课程的高度
int courseHeight = lessonHeight * (end - start + 1);
RelativeLayout.LayoutParams layoutParams;
layoutParams = new RelativeLayout.LayoutParams(lessonWidth, courseHeight);
/**设置一门课程显示的位置,利用周几和起始节来决定,设置view的marginLeft和marginTop;*/
layoutParams.setMargins(marginLessonPx + lessonWidth * (week - 1),
(start - 1) * (lessonHeight + margin1Px) + margin1Px, 0, 0);
courseParent.setLayoutParams(layoutParams);
/**9图只能通过背景设置拉伸,如果用src方式设置只会当作普通图片处理*/
switch (bgImg) {
case 1:
courseParent.setBackground(bg1);
break;
case 2:
courseParent.setBackground(bg2);
break;
case 3:
courseParent.setBackground(bg3);
break;
case 4:
courseParent.setBackground(bg4);
break;
case 5:
courseParent.setBackground(bg5);
break;
}
TextView courseText = new TextView(mContext);
/**需要设置布局参数以后才能设置Gravity*/
courseText.setLayoutParams(new RelativeLayout.LayoutParams(RelativeLayout.LayoutParams.MATCH_PARENT,RelativeLayout.LayoutParams.MATCH_PARENT));
//设置文本居中
courseText.setGravity(Gravity.CENTER);
/**设置文字*/
courseText.setText(courseName + "@" + classRoom);
float textSize;
textSize=getResources().getDimensionPixelSize(R.dimen.course_text_today_size);
/**
* 设置文字大小
* getTextSize返回值是以像素(px)为单位的,而setTextSize()是以sp为单位的,
* 因此要这样设置setTextSize(TypedValue.COMPLEX_UNIT_PX, size);*/
courseText.setTextSize(TypedValue.COMPLEX_UNIT_PX, textSize);
/**
* 设置颜色
* getResources().getColorStateList()和getColor()读取资源文件设置颜色过时
* 用如下方法从资源文件设置颜色*/
courseText.setTextColor(ContextCompat.getColor(mContext, R.color.color_Gray_8f));
/** 加入视图*/
courseParent.addView(courseText);
parentRl.addView(courseParent);


 495
495

 被折叠的 条评论
为什么被折叠?
被折叠的 条评论
为什么被折叠?
 到【灌水乐园】发言


