


最近趁着国补,入手了MacMini M4真香款。目前打算开个SSH,直接作为个小服务器用,因为可能会存储一些敏感秘钥,那无可避免的就要提到安全问题。
在这之前自己习惯性使用ssh公钥认证,后面考虑到可能会中毒等因素,也设置了私钥密码。长期高频词的私钥密码输入,也让自己又一次开始思考。是否有更安全,更简单的方案,比如Google的二次令牌。
市面上大多数是Linux配置文档,鲜有见到Mac的配置,在这里简单唠一唠吧。话不多说,直接开搞。(ssh开启在这里不多赘述)
简介
谷歌动态口令(Google Authenticator),是由推出的基于时间的一次性密码(Time-based One-time Password,简称TOTP),只需要在手机上安装该APP,就可以生成一个随着时间变化的一次性密码,用于帐户验证。
谷歌官方也有提供PAM模块,用于SSH, OpenVPN等服务登录校验。我们可以通过配置该模块,进而实现ssh二次认证。
项目地址:https://github.com/google/google-authenticator-libpam
安卓应用下载地址:https://github.com/google/google-authenticator-android/releases/tag/v5.00
使用
第一步:模块安装
首先需要安装Google Authenticator PAM module,查阅相关文档,发现并没有MacOS的安装方法,那其实我们可以尝试按照官方方案直接编译项目代码。但可能会有各式各样的兼容问题,依赖缺失问题。
幸好,万能的brew为我们提供了该模块的安装。
# 1. 通过brew search 可以搜索到相关模块
➜  ~ brew search google-authenticator-libpam
# ==> Formulae
# google-authenticator-libpam                                         google-java-format

# 2. 安装google-authenticator-libpam
➜  ~ brew install google-authenticator-libpam
第二步:创建OTP令牌
因为之前已经安装好了,我们可以直接执行google-authenticator命令即可。
-
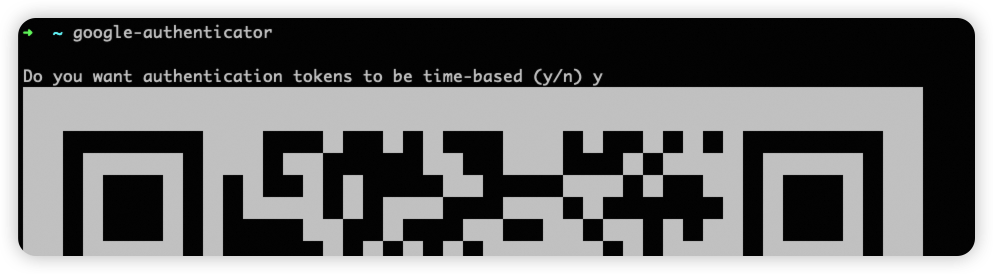
- 是否创建基于时间的认证token 【Y】
-
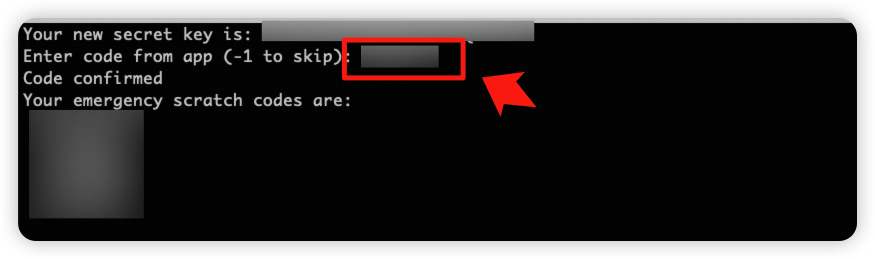
- 通过Google Authenticator APP扫描屏幕上的二维码,并获取6位验证码,输入即可。
-
- 此时会生成几行数字,这些是恢复秘钥,当遗失OTP令牌时,可通过这几个数字进行紧急登录,切记不要丢失,也不要随意保存。
# 4. 保存位置,默认即可
Do you want me to update your "/Users/admin/.google_authenticator" file? (y/n) y

# 5. 是否禁止多次使用同一个Token。即一个Token仅生效一次,建议Y
Do you want to disallow multiple uses of the same authentication
token? This restricts you to one login about every 30s, but it increases
your chances to notice or even prevent man-in-the-middle attacks (y/n) y

# 6. N 时间窗口30s,Y时间窗口4min,建议No
By default, a new token is generated every 30 seconds by the mobile app.
In order to compensate for possible time-skew between the client and the server,
we allow an extra token before and after the current time. This allows for a
time skew of up to 30 seconds between authentication server and client. If you
experience problems with poor time synchronization, you can increase the window
from its default size of 3 permitted codes (one previous code, the current
code, the next code) to 17 permitted codes (the 8 previous codes, the current
code, and the 8 next codes). This will permit for a time skew of up to 4 minutes
between client and server.
Do you want to do so? (y/n) n

# 7. 30s仅允许3次尝试,建议Y
If the computer that you are logging into isn't hardened against brute-force
login attempts, you can enable rate-limiting for the authentication module.
By default, this limits attackers to no more than 3 login attempts every 30s.
Do you want to enable rate-limiting? (y/n) y
第三步:配置ssh
在这里,我的配置需求是
- 禁用密码登录
- 仅允许 公钥+OTP进行登录
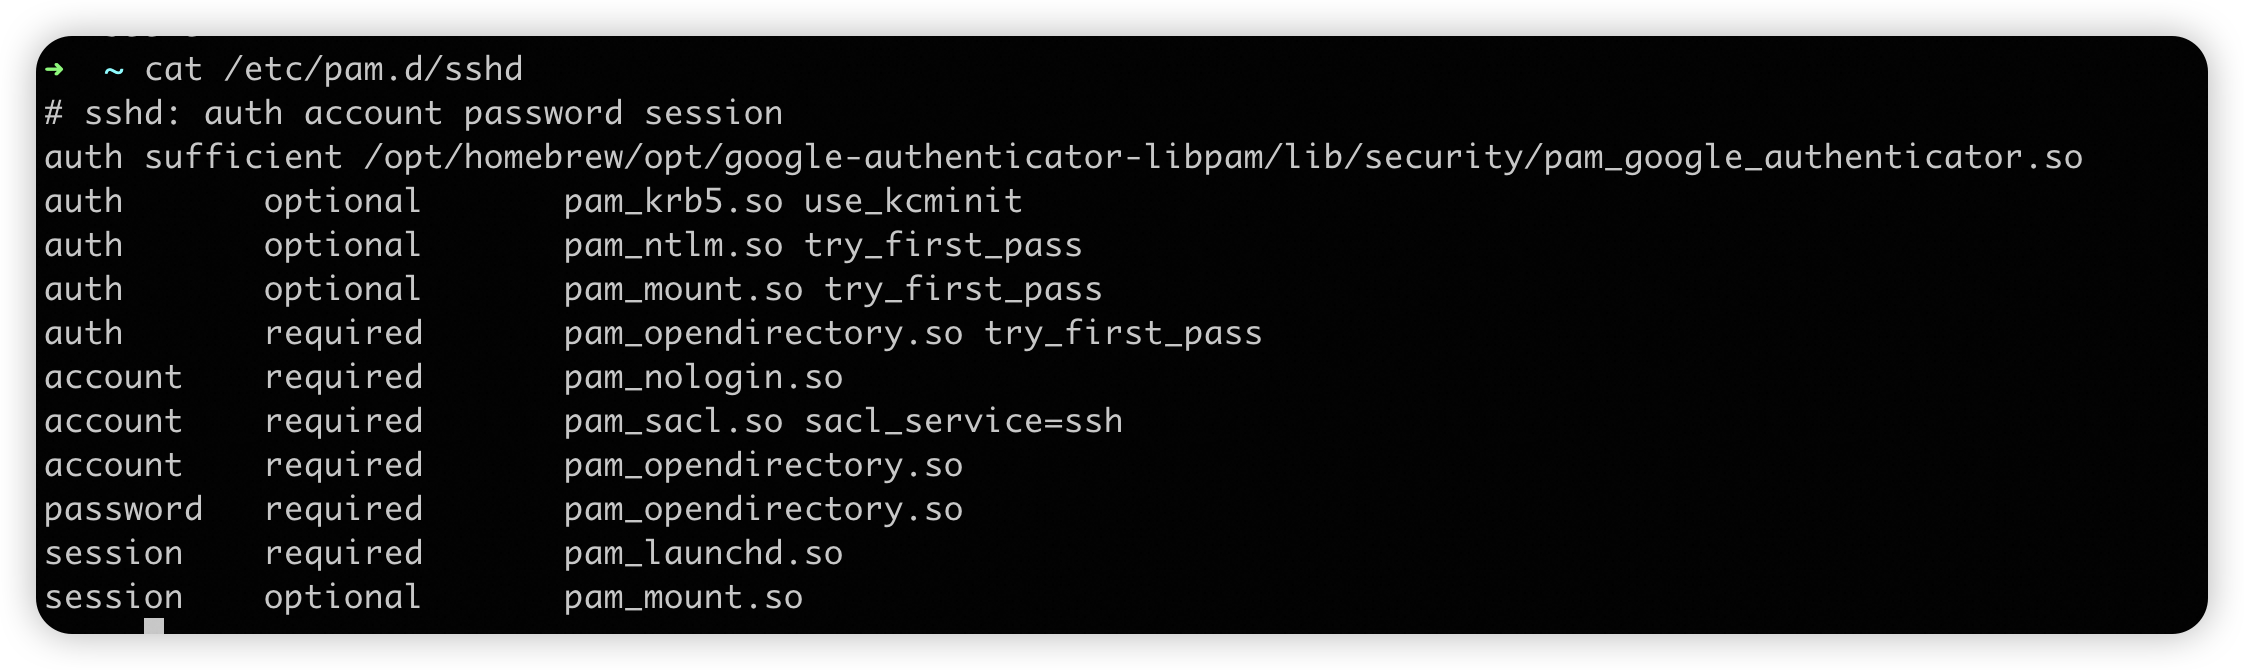
# 1. 配置/etc/pam.d/sshd
sudo vim /etc/pam.d/sshd
# 将下述内容写入该文件,且置于顶行
# 若配置为sufficient,仅会要求输入密码
auth sufficient /opt/homebrew/opt/google-authenticator-libpam/lib/security/pam_google_authenticator.so

# 若配置为required,会要求输入密码+OTP
# auth required /opt/homebrew/opt/google-authenticator-libpam/lib/security/pam_google_authenticator.so
# 2. 配置sshd_config
vim /etc/ssh/sshd_config
# 找到下述配置项,并进行修改,如不存在,可新增

# 必须关闭密码验证
PasswordAuthentication no
# 开启质疑-应答认证:谷歌校验必备
ChallengeResponseAuthentication yes

# 重要:配置仅允许公钥+验证
AuthenticationMethods publickey,keyboard-interactive:pam
最后,重启ssh即可
# 重启SSH
sudo launchctl unload /System/Library/LaunchDaemons/ssh.plist
sudo launchctl load -w /System/Library/LaunchDaemons/ssh.plist
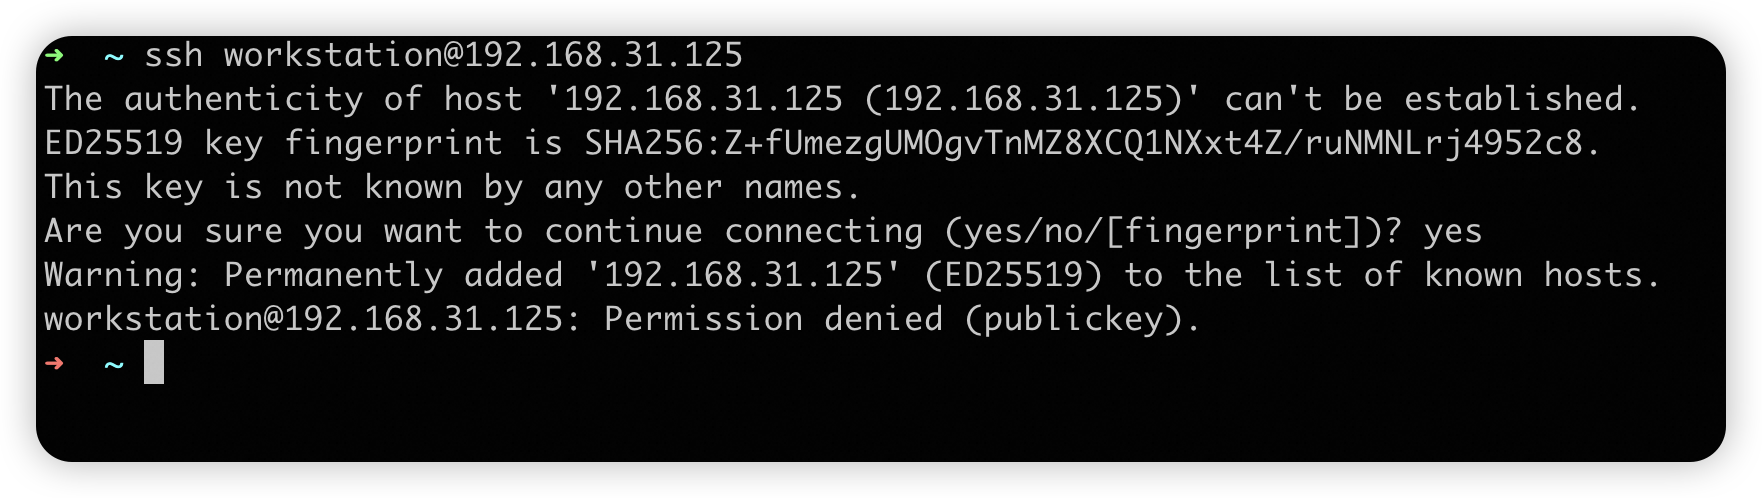
最终效果
仅允许公钥登录,禁止密码登录。
遇到的问题&解法
在配置过程中,一直无法满足公钥+OTP进行登录的方案,当配置AuthenticationMethods后,因为keyboard-interactive会校验密码+OTP,最终体感是进行了三重校验
- 公钥
- 密码
- OTP
在查询资料后,发现是/etc/pam.d/sshd配置的问题,当使用auth required 时,会作为必填项,然后继续向下执行,并校验密码。最终自己选择了auth sufficient,这个配置可以跳过后面的密码校验,即二次认证通过就OK了。
Warning:若配置为sufficient,请务必关闭密码登录选项,不然可能会因为输入OTP后直接登录成功。
至此,自己勉强搞定需求,虽然尚存BUG,但仍可接受。
BUG:公钥验证成功后,如OTP输入错误,仍可通过密码进行验证。

后续思路:
最终根源还是/etc/pam.d/sshd配置问题,在这里自己也取了个巧,将OTP验证置顶了,进而通过sufficient bypass了校验。
因为年纪大了,懒得折腾了,不太敢继续去改下面的内容。但大体思路应该也是直接注释掉密码验证模块即可。有兴趣的同学可以试试,并给个反馈


 6676
6676

 被折叠的 条评论
为什么被折叠?
被折叠的 条评论
为什么被折叠?
 到【灌水乐园】发言


