


二、生产者/消费者模式实现
生产者/消费者模式是等待/唤醒机制的经典案例
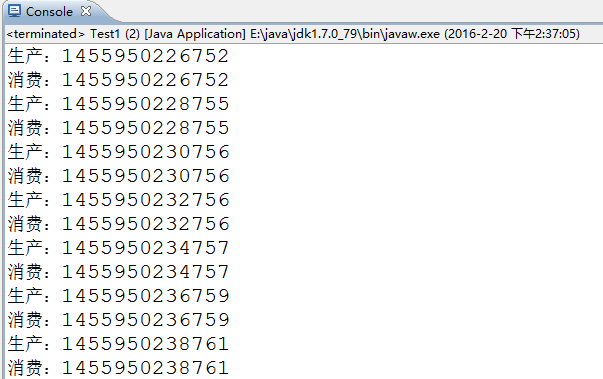
1、一生产与一消费:操作值
package org.jksoft.thread.product;

import org.junit.Test;

/**
 * 测试一:一生产者与一消费者
 *
 * @author mcl
 *
 *         2016-2-20-下午1:34:39
 */
public class Test1 {
	// value为空字符串时:代表没有生产货品
	private static String value = "";

	class ThreadP extends Thread {
		private Productor p;

		public ThreadP(Productor p) {
			this.p = p;
		}

		public void run() {
			while (true) {
				p.run();
			}
		}
	}

	class ThreadS extends Thread {
		private Spendor p;

		public ThreadS(Spendor p) {
			this.p = p;
		}

		public void run() {
			while (true) {
				p.run();
			}
		}
	}

	// 生产者
	class Productor {
		private String lock;

		public Productor(String lock) {
			this.lock = lock;
		}

		public void run() {
			synchronized (lock) {
				try {
					if (!(value.equals(""))) {
						lock.wait();
					}
					Thread.sleep(1000);
					value = System.currentTimeMillis() + "";
					System.out.println("生产:" + value);
					lock.notify();

				} catch (InterruptedException e) {
					// TODO Auto-generated catch block
					e.printStackTrace();
				}
			}
		}
	}

	// 消费者
	class Spendor extends Thread {
		private String lock;

		public Spendor(String lock) {
			this.lock = lock;
		}

		public void run() {
			synchronized (lock) {
				try {

					if (value.equals("")) {
						lock.wait();
					}
					Thread.sleep(1000);
					System.out.println("消费:" + value);
					value = "";
					lock.notify();

				} catch (InterruptedException e) {
					// TODO Auto-generated catch block
					e.printStackTrace();
				}
			}

		}
	}

	public static void main(String[] args) {
		String lock = new String("");
		Test1 t = new Test1();
		Spendor s = t.new Spendor(lock);
		Productor p = t.new Productor(lock);
		t.new ThreadP(p).start();
		t.new ThreadS(s).start();
	}

} 
2 多生产与多消费:操作值-假死
代码清单:
package org.jksoft.thread.product;

import org.junit.Test;

/**
 * 测试二:多生产者与多消费者-会造成假死
 *
 * @author mcl
 *
 *         2016-2-20-下午1:34:39
 */
public class Test2 {
	// value为空字符串时:代表没有生产货品
	private static String value = "";

	class ThreadP extends Thread {
		private Productor p;
		public ThreadP(Productor p) {
			this.p = p;
		}
		public void run() {
			while (true) {
				p.run();
			}
		}
	}
	class ThreadS extends Thread {
		private Spendor p;
		public ThreadS(Spendor p) {
			this.p = p;
		}
		public void run() {
			while (true) {
				p.run();
			}
		}
	}
	// 生产者
	class Productor {
		private String lock;
		public Productor(String lock) {
			this.lock = lock;
		}
		public void run() {
			synchronized (lock) {
				try {
					while (!(value.equals(""))) {
						System.out.println("生产者:" +Thread.currentThread().getName()+"waitting 了");
						lock.wait();
					}
					Thread.sleep(1000);
					value = System.currentTimeMillis() + "";
					System.out.println("生产者:" +Thread.currentThread().getName()+"Runnable 了");
					lock.notify();

				} catch (InterruptedException e) {
					// TODO Auto-generated catch block
					e.printStackTrace();
				}
			}
		}
	}
	// 消费者
	class Spendor extends Thread {
		private String lock;
		public Spendor(String lock) {
			this.lock = lock;
		}
		public void run() {
			synchronized (lock) {
				try {
					while(value.equals("")) {
						System.out.println("消费者:" +Thread.currentThread().getName()+"waitting 了");
						lock.wait();
					}
					Thread.sleep(1000);
					System.out.println("消费者:" +Thread.currentThread().getName()+"Runnable 了");
					value = "";
					lock.notify();

				} catch (InterruptedException e) {
					// TODO Auto-generated catch block
					e.printStackTrace();
				}
			}
		}
	}
	public static void main(String[] args) throws InterruptedException {
		String lock = new String("");
		Test2 t = new Test2();
		Spendor s = t.new Spendor(lock);
		Productor p = t.new Productor(lock);
		ThreadP[] threadP = new ThreadP[2];
		ThreadS[] threadS = new ThreadS[2];
		for(int i=0;i<2;i++){
			threadP[i] = t.new ThreadP(p);
			threadP[i].setName("生产者"+(i+1));
			threadS[i] = t.new ThreadS(s);
			threadS[i].setName("消费者"+(i+1));
			threadP[i].start();
			threadS[i].start();
		}
		Thread.sleep(10000);
		Thread[] threads = new Thread[Thread.currentThread().getThreadGroup().activeCount()];
		Thread.currentThread().getThreadGroup().enumerate(threads);
		for(int i=0;i<threads.length;i++){
			System.out.println("@@@@@@@@@@@@@@@@@@@"+threads[i].getName()+":"+threads[i].getState());
		}

	}

}
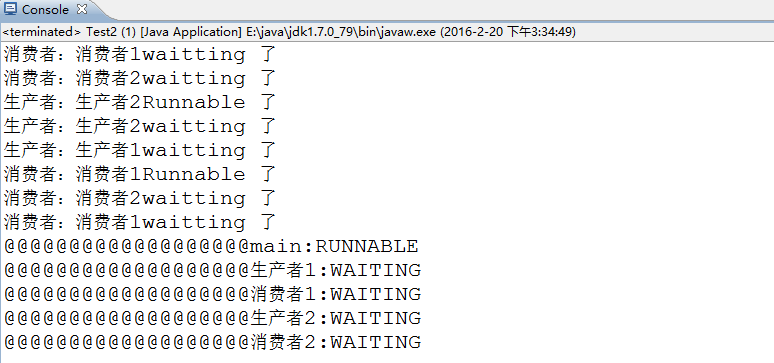
结果分析:产生假死的原因在,notify唤醒的可能不是异类,也许是同类。这就导致了所有的线程都处于wait状态,造成一种线程假死的状态。
解决方案很简单,把唤醒的notify()方法,换成 notifyAll()就可以了。
小结:if与where的切换,,可以解决当wait的条件发生改变时,系统正常运行。
notify与noifyAll的切换,可以解决线程可能唤醒的是同类,而不是异类的情况所造成的线程假死。


 168
168

 被折叠的 条评论
为什么被折叠?
被折叠的 条评论
为什么被折叠?
 到【灌水乐园】发言


