


文章目录
简介
控制器简介
苹果把控制器分成了两大类:
内容控制器(content view controller):用于显示内容,常见的有UIViewController,UITableViewController,UICollectionViewController等。
容器类控制器(Container ViewController):主要用于容纳其他内容控制器,本身并不主要用于显示有用的内容,主要工作负责在不同控制器之间切换,常见的有UINavigationController,UITabBarController等。
NavigationController简介
导航控制器,通过导航控制器,可以实现控制器之间的跳转和返回。导航控制器对于控制器的管理方式采用的就是栈的模式,遵守先入后出的原则。
无论是使用StoryBoard还是代码创建导航控制器,核心有2个步骤。
实例化一个UINavigtionController对象
指定该导航控制器对象的rootViewController.
本身并不去显示内容,必须要容纳其他的控制器。
storyboard创建
在storyboard里删除原本的控制器,拖入一个navigationController,并钩上is Initial View Controller
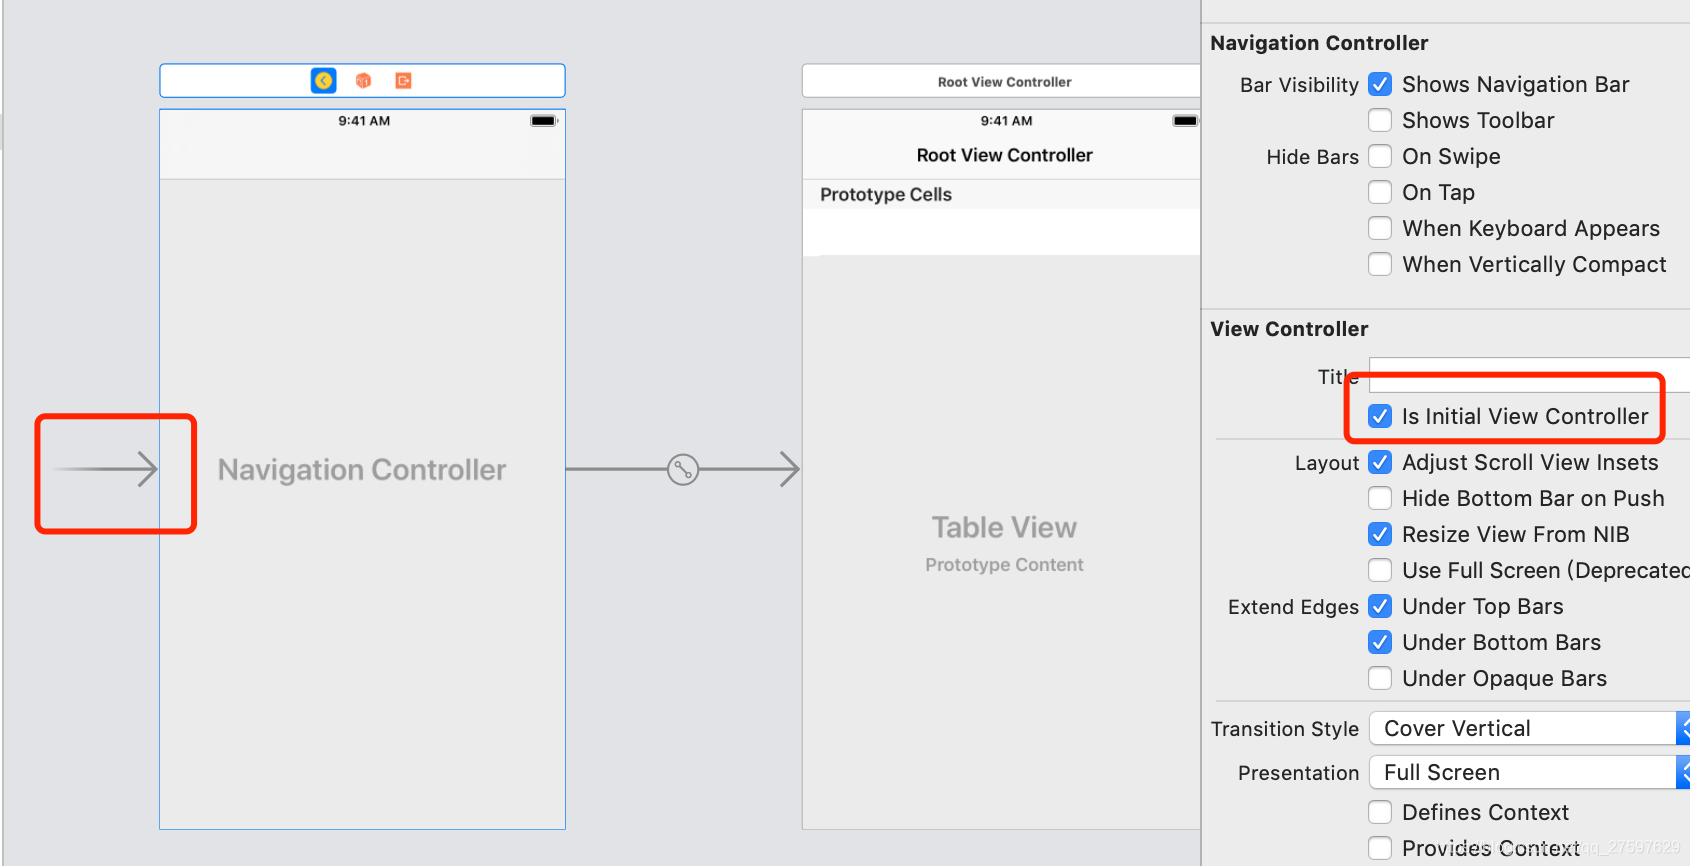
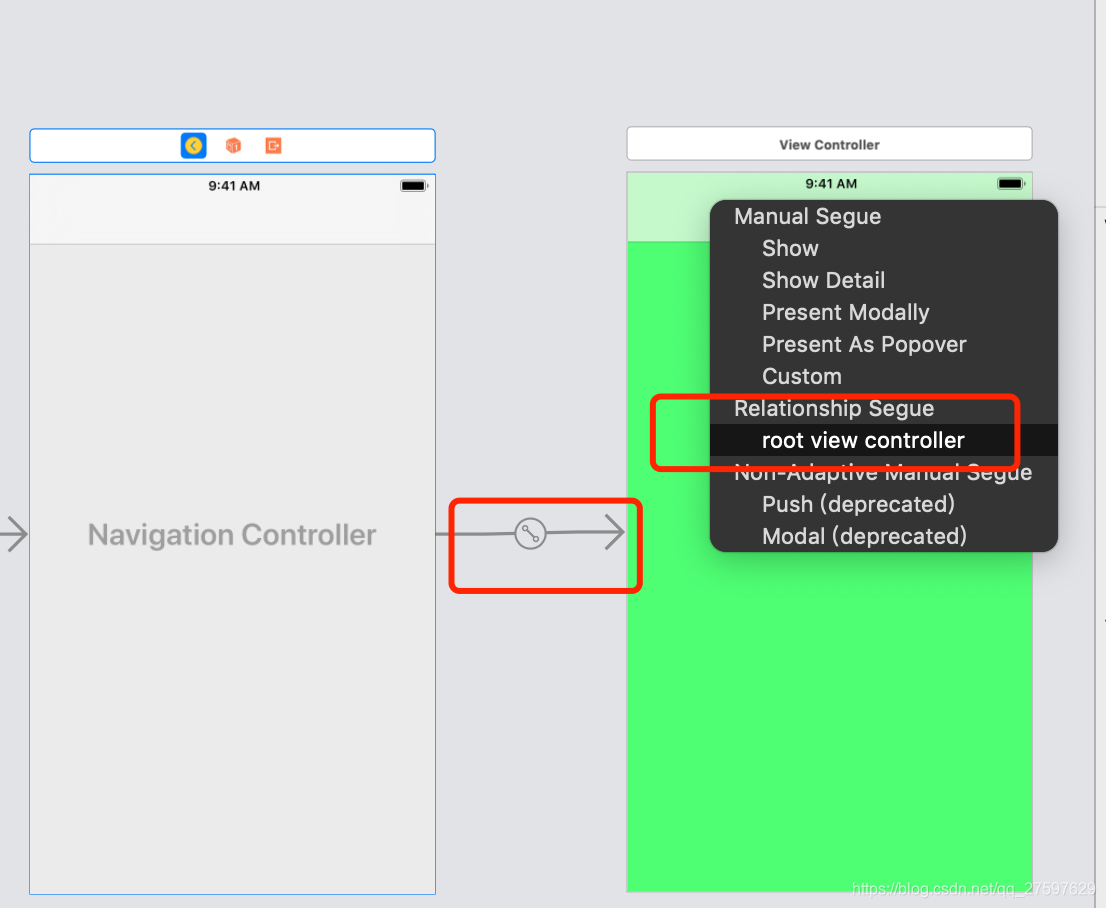
系统默认的导航栏控制器默认包含的时tableviewcontroller,可以删除掉,然后拖入一个viewController,并按住control键,拖动后选择root view controller.
纯代码创建
新建一个继承自UIViewController的类FirstViewController,和继承自UINavigationController的类MYNaviController,
将MYNaviController的rootViewcontorller设置成FirstViewController
将window的rootViewcontorller设置成MYNaviController
- (BOOL)application:(UIApplication *)application didFinishLaunchingWithOptions:(NSDictionary *)launchOptions {
    FirstViewController *viewController=[[FirstViewController alloc]init];
    MYNaviController *navigationVontroller=[[MYNaviController alloc]initWithRootViewController:viewController];

    self.window=[[UIWindow alloc]initWithFrame:[UIScreen mainScreen].bounds];
    [self.window setRootViewController:navigationVontroller];
    self.window.backgroundColor=[UIColor whiteColor];
    [self.window makeKeyAndVisible];
    return YES;
}
控制器跳转
1.控制器跳转
控制器的定义中,提供了push与pop的方法,来实现子控制器之间的跳转,其中:push对应入栈操作,pop对应出栈操作。
:入栈操作,显示新的子控制器。
:出栈操作,显示栈顶的控制器。
:出栈操作,显示指定的控制器
:出栈操作,显示导航控制器的根控制器(常用的是home键,直接回到首页了)
2.管理子控制器
导航控制器对象中提供了属性,用于管理该导航控制器下的所有子控制器。
@property(nonatomic,copy) NSArray *viewController;//存放本导航控制器管理的所有子控制器。(数组是有顺序的,按顺序放的)
@property(nullable,nonatomic,readonly,strong)UIViewController *topViewController;//获取栈顶控制器
3.UIViewController 中有关导航控制器的属性
在一个UIViewController对象中,可以获取到管理自身的导航控制器,通过该属性,任何一个子控制器都可以随意管理由同一个导航控制器管理的其他子控制器。
navigationItem:获取导航栏中的navigationItem
BOOL hidesBottomBarWhenPushed _TVOS_PROHIBITED:隐藏底部Bar,常用于隐藏TabBar
navigationController:获取导航控制器对象
使用
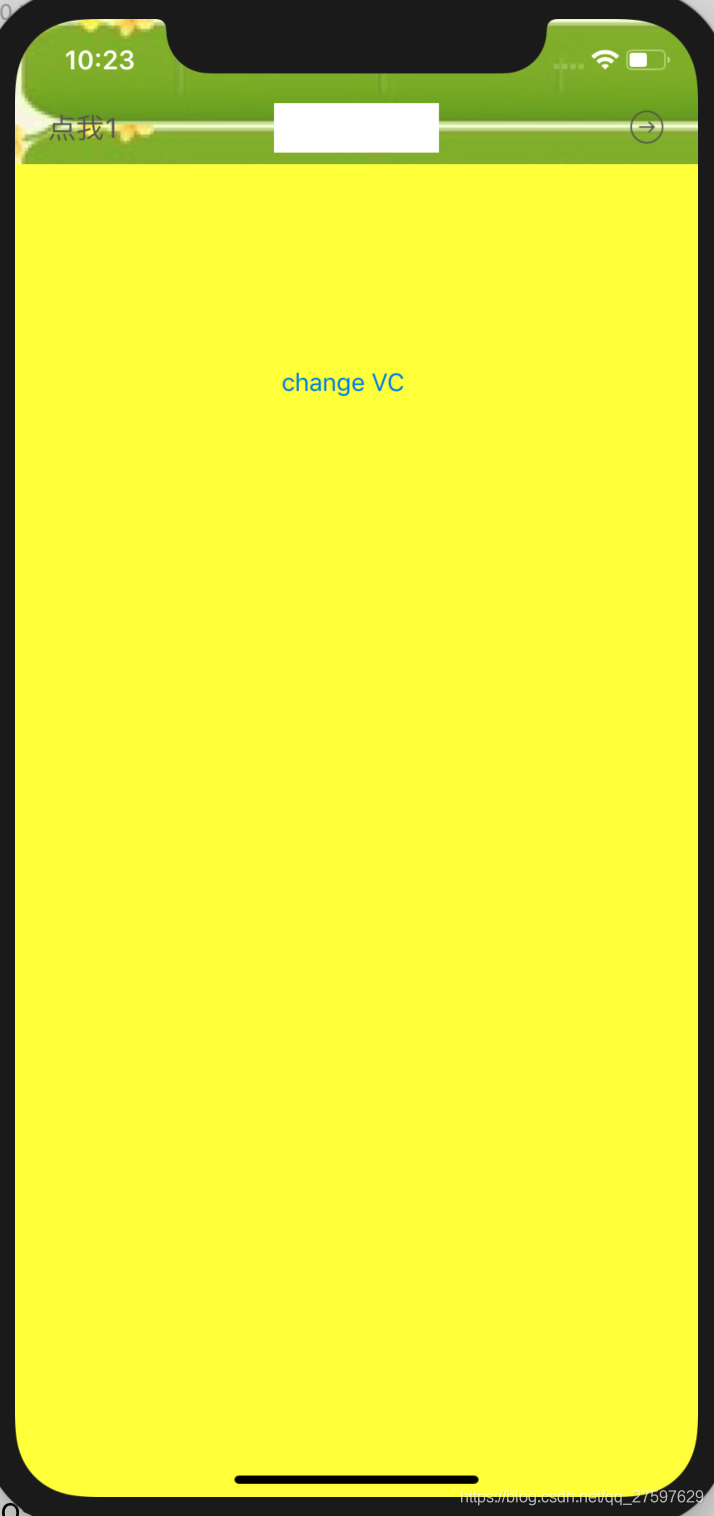
storyBoard中,导航栏控制器(关联继承自UINavigationController的类MYNaviController),包含了一个视图控制器(对应继承自UIViewController的FirstViewController)。
要实现控制器的跳转,需要在storyBoard和diamanté中对应新建一个控制器,SecondViewController。
希望在第一个控制器中设置一个按钮,当按下这个按钮的时候,跳转到第二个控制器.实际的使用是很常见的,比如点击按钮显示详情。
按住control拖动添加响应函数。
给secondViewController取一个ID:
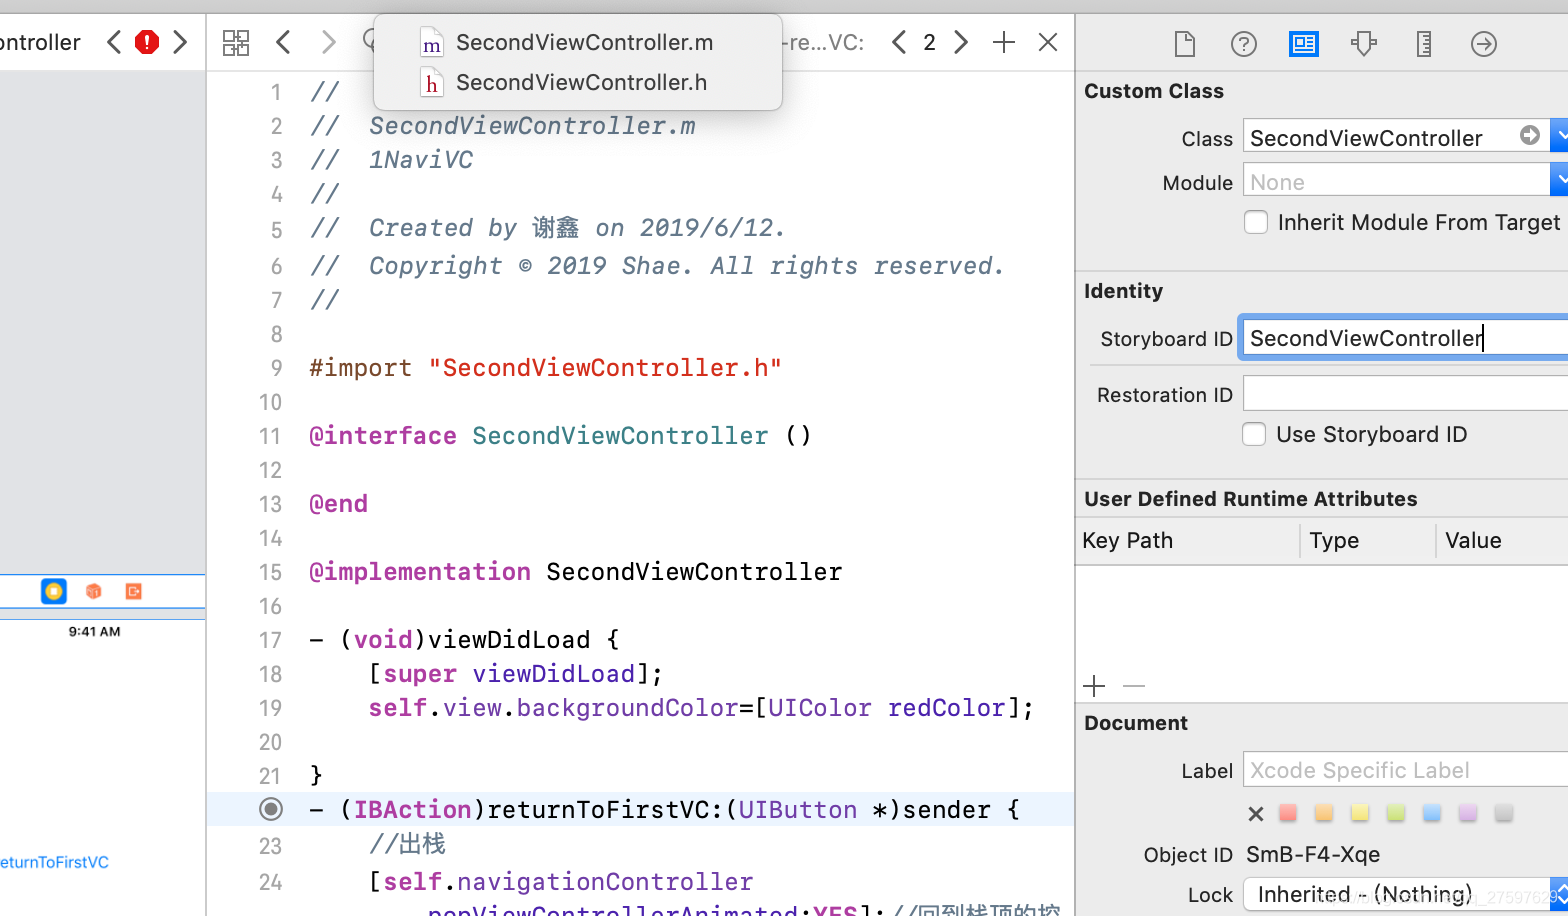
出栈的时候会销毁该类。
//
// FirstViewController.m
// 1NaviVC
//
// Created by on 2019/6/12.
// Copyright © 2019 Shae. All rights reserved.
//
#import "FirstViewController.h"
#import "SecondViewController.h"
@interface FirstViewController ()
@end
@implementation FirstViewController
- (void)viewDidLoad {
[super viewDidLoad];
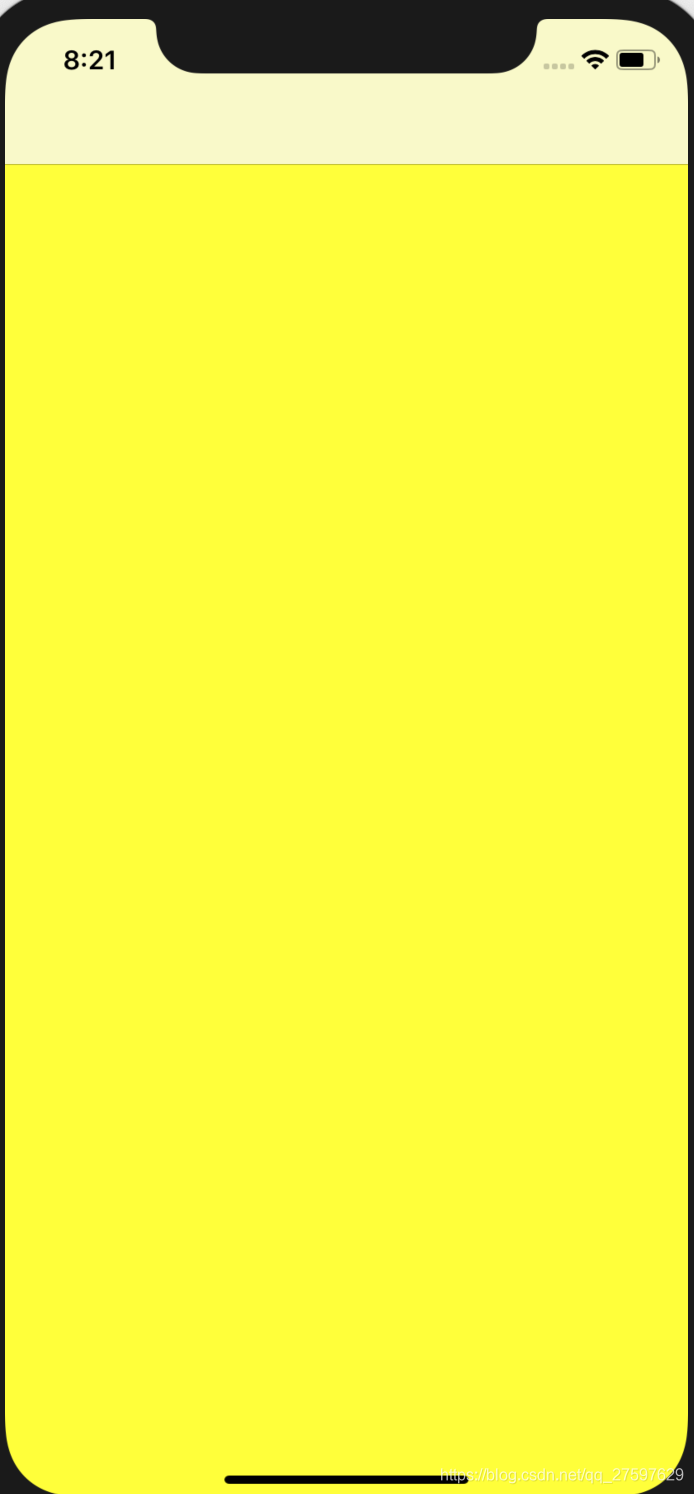
[self.view setBackgroundColor:[UIColor yellowColor]];
NSLog(@"%lu",self.navigationController.viewControllers.count);
}
- (IBAction)changeVC:(UIButton *)sender {
UIStoryboard *storyBoard=[UIStoryboard storyboardWithName:@"Main" bundle:nil];
SecondViewController *secondVC=[storyBoard instantiateViewControllerWithIdentifier:@"SecondViewController"];
//1.每一个viewcontroller里面都有一个navigationController
//2.动画的样式
[self.navigationController pushViewController:secondVC animated:YES];
}
@end
//
// SecondViewController.m
// 1NaviVC
//
// Created by on 2019/6/12.
// Copyright © 2019 Shae. All rights reserved.
//
#import "SecondViewController.h"
@interface SecondViewController ()
@end
@implementation SecondViewController
- (void)viewDidLoad {
[super viewDidLoad];
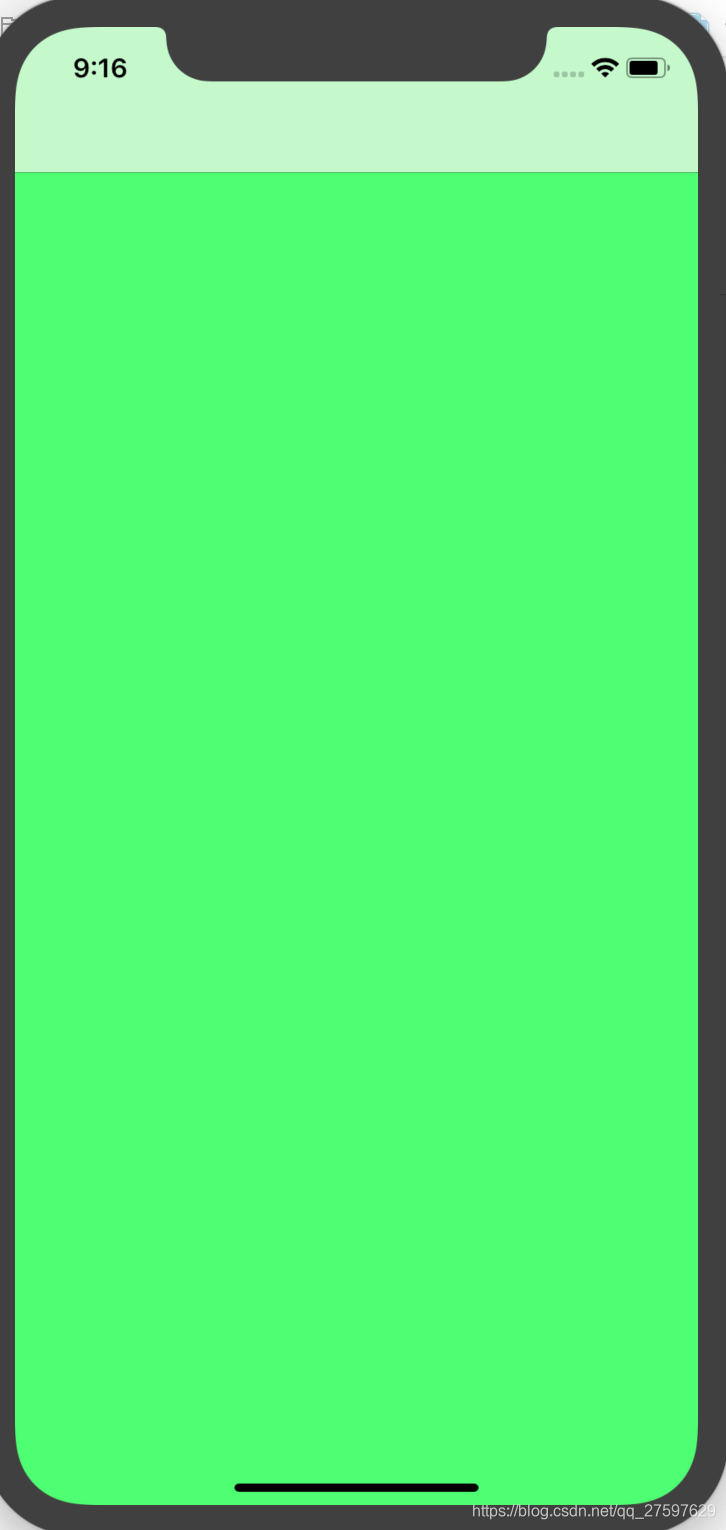
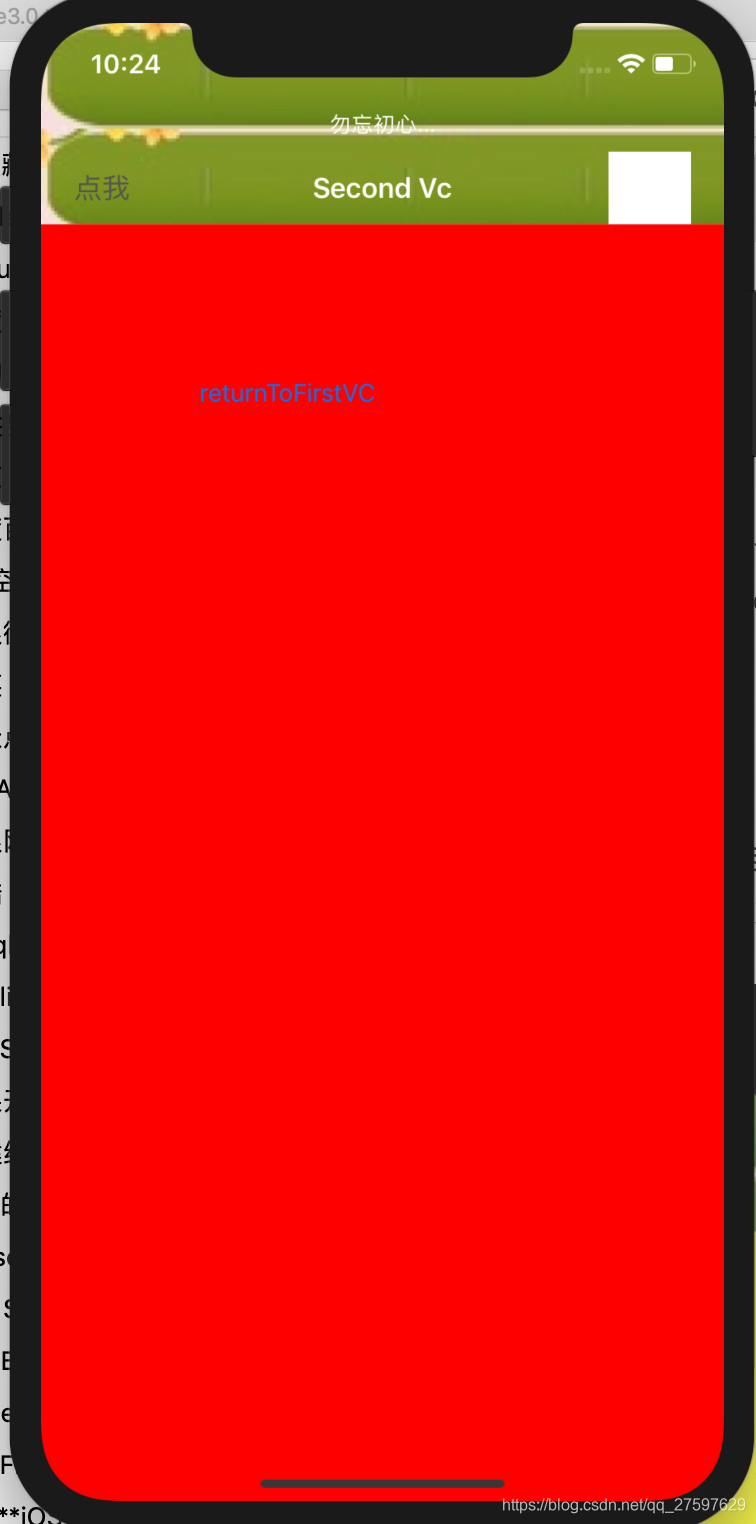
self.view.backgroundColor=[UIColor redColor];
NSLog(@"%lu",self.navigationController.viewControllers.count);
NSLog(@"%@",self.navigationController.viewControllers);
}
- (void)dealloc
{
NSLog(@"%s",__func__);
}
- (IBAction)returnToFirstVC:(UIButton *)sender {
//出栈
[self.navigationController popViewControllerAnimated:YES];//回到栈顶的控制器
}
@end
UINavigationBar
导航栏样式,每个应用的navigationBar样式都是不一样的。UINavigationBar继承自UIView,决定导航拦外观主要有两大内容:
-
UINavigationBar自身的外观属性:如背景颜色,文字颜色,BarStyle,背景图片等,所有子控制器都会使用的公共样式。当然在每个子控制器中,也可以修改NavigationBar样式。
-
UINavigationBar上的UINavigationItem:NavigationBar上的按钮都是UINavigationItem对象。
一个导航控制器的创建过程中,会先创建一个NavigationBar,然后NavigationBar会创建对应控制器的NavigationItem。
属性
- 定制UINavigationBar外观相关属性
barStyle:导航栏样式,控制的是最上面的状态栏
tintColor:导航栏文字颜色
barTintColor:导航栏背景颜色
setBackgroundImage:设置导航栏背景图片 - 管理UINavigationItem的相关属性
NSArray < UINavigationItem* >*items;
UINavigationItem *topItem;
UINavigationItem *backItem;
self.navigationBar.barTintColor=[UIColor orangeColor];
    self.navigationBar.tintColor=[UIColor darkGrayColor];
    self.navigationBar.barStyle=UIBarStyleBlack;//一开始是黑色,设置后变白色。
    [self.navigationBar setBackgroundImage:[UIImage imageNamed: @"1560682859113"] forBarMetrics:UIBarMetricsDefault];
在navigationbar包含的视图控制器里这样写设置的是公共的navigationController的属性
self.navigationController.navigationBar.barTintColor=[UIColor greenColor];
UINavigationItem
每个子控制器需要显示的标题和按钮不同,建议每个子控制器需要显示的导航栏标题和按钮,都建议在各自子控制器中定制。对于公共的导航栏样式可以放到navigationController中设置,或自定义一个navigationBar来进行设置。
属性
UINavigationBar的左侧,右侧以及中间都可以设置UINavigationItem,其中,中间可以显示一个UIview类型的titleView,左右可以分别显示一个或多个按钮(UIBarButton类型)
titleView:中间视图
leftBarButtonItem:左侧按钮
rightBarButtonItem:右侧按钮
leftBarButtonItems:左侧安放多个按钮
rightBarButtonItems:右侧安放多个按钮
UIBarButtonItem *rightBarButtonItem=[[UIBarButtonItem alloc]initWithBarButtonSystemItem:UIBarButtonSystemItemSearch target:self action:@selector(clickRightBtn)]; self.navigationItem.rightBarButtonItem=rightBarButtonItem;
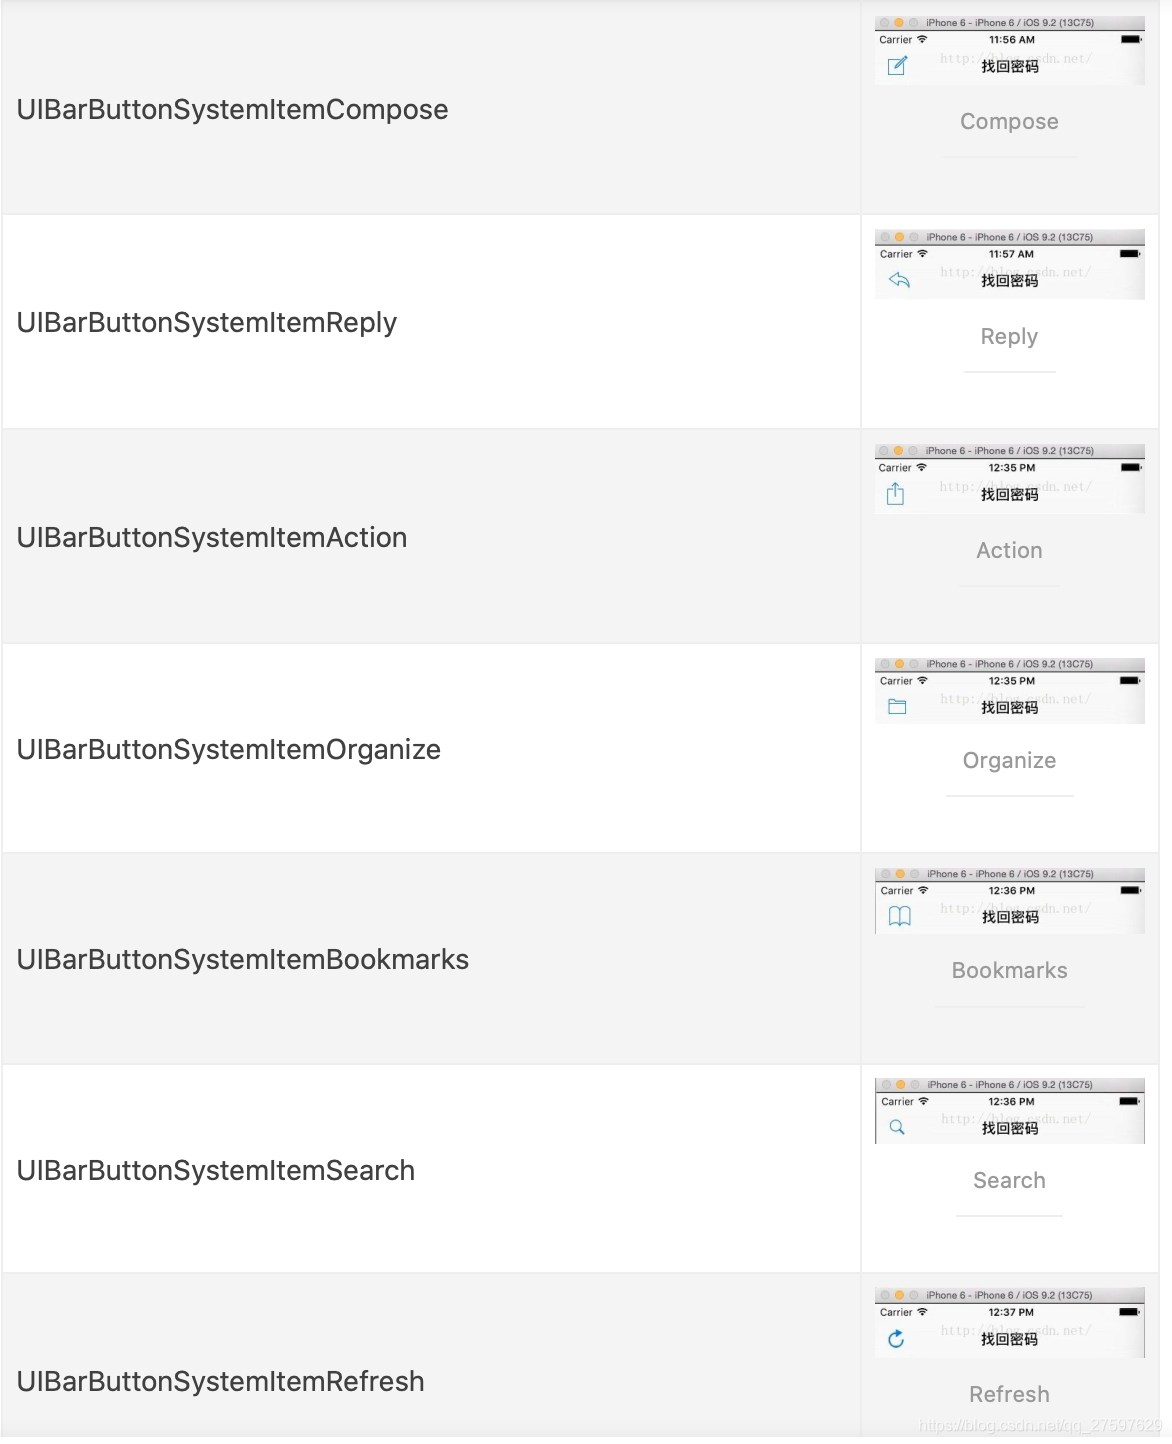
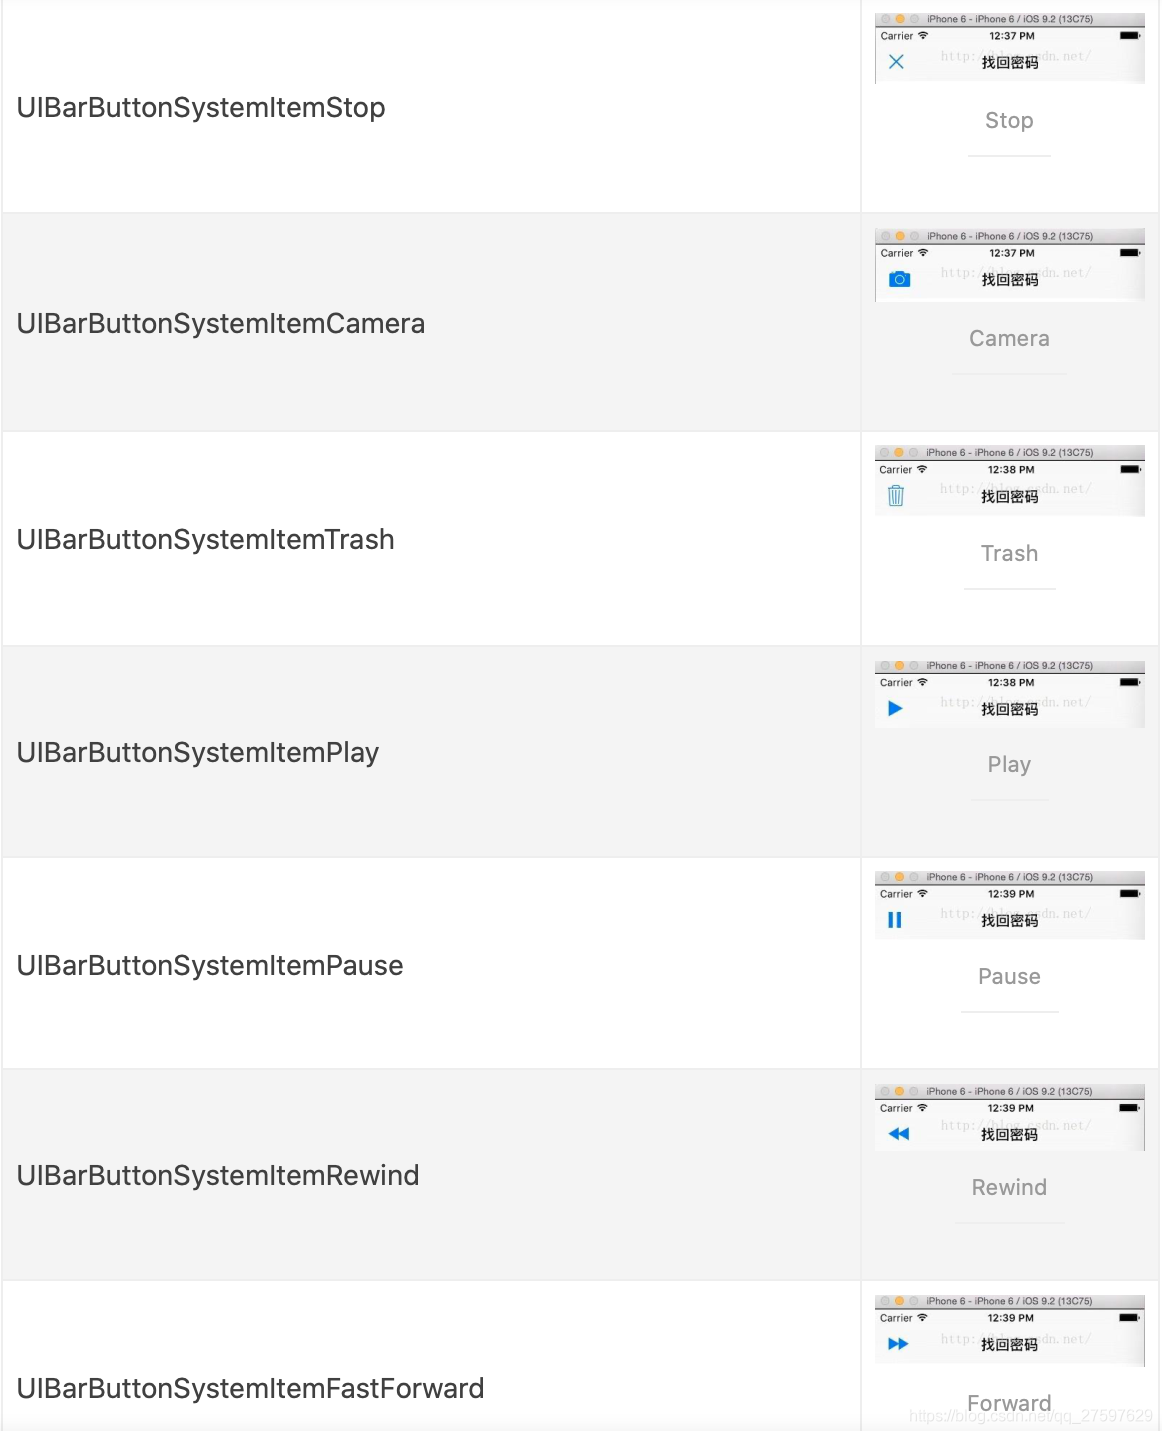
UIBarButtonItem的样式
UIBarButtonItemStylePlain 默认按钮风格;按下时会闪动
UIBarButtonItemStyleBordered 与 UIBarButtonItemStylePlain相同,
但显示的按钮有边框
UIBarButtonItemStyleDone 显示一个蓝色按钮,提醒用户编辑完毕时应该点
触(tap)该按钮。
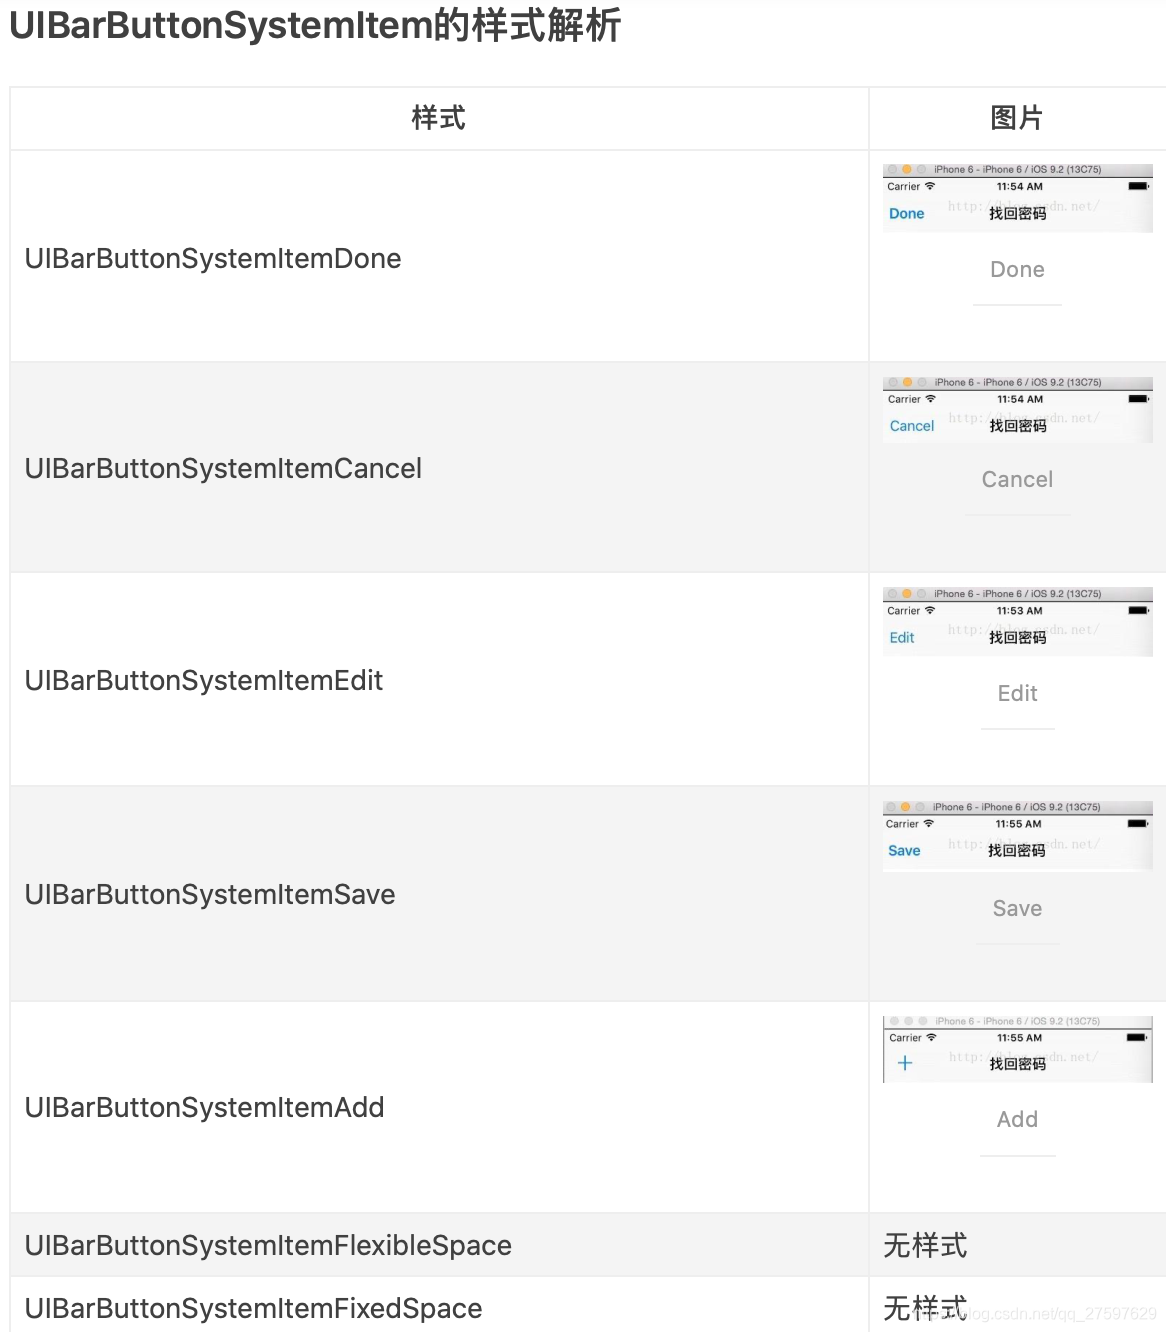
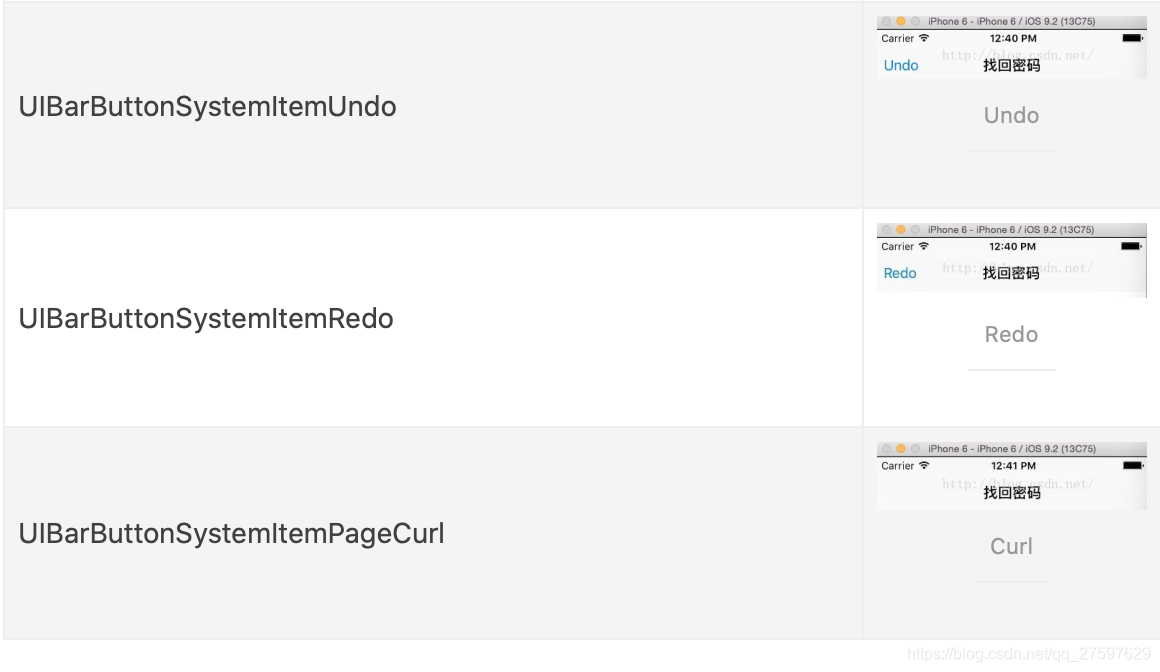
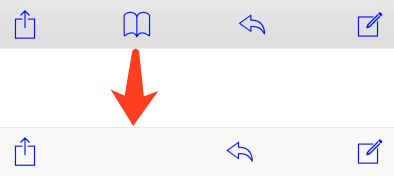
其中UIBarButtonSystemItemFlexibleSpace和UIBarButtonSystemItemFixedSpace两个是无样式的, 他们不是按钮,而是调整按钮间距用的对象.
举个例子:
让4个按钮等间距地分布在工具条中,在使用UIViewController的setToolbarItems:方法 追加按钮时,如下述代码一样在4个按钮之间追加IBarButtonSys
temItemFlexibleSpace对象即可。
例如下图:

首先创建方法
-  (UIBarButtonItem*)barButtonSystemItem :(UIBarButtonSystemItem) systemItem {
    UIBarButtonItem* button = [[UIBarButtonItem alloc] initWithBarButtonSystemItem:systemItem target:nil action:nil];
    return button;
}
调用
- (UIToolbar *)addToolbar
{
    UIToolbar *toolbar = [[UIToolbar alloc] initWithFrame:CGRectMake(0, 0, CGRectGetWidth(self.view.frame), 45)];
    toolbar.tintColor = [UIColor blueColor];
    toolbar.backgroundColor = [UIColor grayColor];
    toolbar.items = [NSArray arrayWithObjects:
                           [self barButtonSystemItem:UIBarButtonSystemItemAction],
                           [self barButtonSystemItem:UIBarButtonSystemItemFlexibleSpace],
                           [self barButtonSystemItem:UIBarButtonSystemItemBookmarks],
                           [self barButtonSystemItem:UIBarButtonSystemItemFlexibleSpace],
                           [self barButtonSystemItem:UIBarButtonSystemItemReply],
                           [self barButtonSystemItem:UIBarButtonSystemItemFlexibleSpace],
                           [self barButtonSystemItem:UIBarButtonSystemItemCompose],nil];
    return toolbar;
}
在调用的过程中,使用 UIBarButtonSystemItemFlexibleSpace去占位,达到实现规范化的目的
实现效果:

相应的 UIBarButtonSystemItemFixedSpace则是使特定位置控件替代.
示例
self.navigationController.navigationBar.barTintColor=[UIColor greenColor];//注意一定要是通过navigationController获取navigationBar
UIBarButtonItem *leftBarButtonItem=[[UIBarButtonItem alloc]initWithTitle:@"点我" style:UIBarButtonItemStylePlain target:self action:@selector(clickLeftBtn)];
    self.navigationItem.leftBarButtonItem=leftBarButtonItem;//可以self.navigationItem

   UIBarButtonItem *rightBarButtonItem=[[UIBarButtonItem alloc]initWithImage:[UIImage imageNamed:@"1"] style:UIBarButtonItemStylePlain target:self action:@selector(clickRightBtn)];
   //实际图片的图片大小会影响布局,默认是放在1x里,像素设置成66,然后放在3x里比较合适。
  self.navigationItem.rightBarButtonItem=rightBarButtonItem;

//之间的titleView
UIView *titleView=[[UIView alloc]initWithFrame:CGRectMake(0, 0, 100, 30)];
    titleView.backgroundColor=[UIColor whiteColor];
    self.navigationItem.titleView=titleView;

self.navigationItem.title=@"navigationItemTitle";
    self.title=@"Second Vc";//这两个title最后执行的那个生效,titleView的权限最大,有他它生效

    //提示语
     self.navigationItem.prompt=@"勿忘初心...";
}

//左右也可以是view
UIView *view=[[UIView alloc]initWithFrame:CGRectMake(0, 0, 50, 50)];
    view.backgroundColor =[UIColor whiteColor];
    UIBarButtonItem *rightView=[[UIBarButtonItem alloc]initWithCustomView:view];
    self.navigationItem.rightBarButtonItem=rightView;
也可以init的时候是view或自定义的button等等。当self.navigationItem的左中右是view的时候就可以随意添加,作出很秀的效果。
代理方法
1.UINavigationControllerDelegate
UINavigationController的代理方法可以监听控制器的入栈和出栈操作,一般把子控制器设置为UINavigationController的代理方法,常用的方法:
当栈顶的控制器执行执行Push或Pop操作后,被显示时调用。
- (void)navigationController:(UINavigationController *)navigationController willShowViewController:(UIViewController *)viewController animated:(BOOL)animated;
- (void)navigationController:(UINavigationController *)navigationController didShowViewController:(UIViewController *)viewController animated:(BOOL)animated;
2.UINavigationBarDelegate
UINavigationBar的代理方法可以监听UINavigationBar添加NavigationItem的入栈和出栈操作,一般把导航控制器设置为UINavigationBar的代理方法。
- (BOOL)navigationBar:(UINavigationBar *)navigationBar shouldPushItem:(UINavigationItem *)item; // called to push. return NO not to.
- (void)navigationBar:(UINavigationBar *)navigationBar didPushItem:(UINavigationItem *)item;    // called at end of animation of push or immediately if not animated
- (BOOL)navigationBar:(UINavigationBar *)navigationBar shouldPopItem:(UINavigationItem *)item;  // same as push methods
- (void)navigationBar:(UINavigationBar *)navigationBar didPopItem:(UINavigationItem *)item;
navigationController是同一个,虽然从第一个控制器切换到第二个控制器,都设置了代理,但是调用的是SecondViewController的代理方法.
在willShowViewController和didShowViewController之间调用didPushItem或者didPopItem
代码下载:https://github.com/ShaeZhuJiu/UInavigationController-.git


 3525
3525

 被折叠的 条评论
为什么被折叠?
被折叠的 条评论
为什么被折叠?
 到【灌水乐园】发言


