


Starter:场景启动器 Spring Boot官网Starter
其中一部分Starter

@Configuration //指定这个类是一个配置类
@ConditionalOnXXX //在指定条件成立的情况下自动配置类生效
@AutoConfigureAfter //指定自动配置类的顺序
@Bean //给容器中添加组件
@ConfigurationPropertie结合相关xxxProperties类来绑定相关的配置
@EnableConfigurationProperties //让xxxProperties生效加入到容器中
自动配置类要能加载
将需要启动就加载的自动配置类,配置在META‐INF/spring.factories
1、File->New Project,创建一个空的项目 hc-spring-boot-starter

之后增加两个项目 hc-spring-boot-starter-autoconfiguration(自动配置)和hc-spring-boot-starter(场景供其他应用调用)
hc-spring-boot-starter-autoconfiguration 项目结构

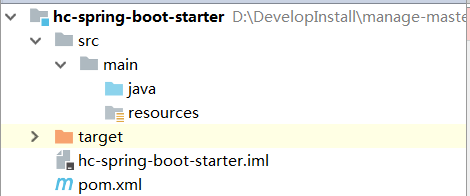
hc-spring-boot-starter 项目结构
在hc-spring-boot-starter-autoconfiguration项目的POM.xml,一定要有 spring-boot-starter依赖
<?xml version="1.0" encoding="UTF-8"?>
<project xmlns="http://maven.apache.org/POM/4.0.0" xmlns:xsi="http://www.w3.org/2001/XMLSchema-instance"
	xsi:schemaLocation="http://maven.apache.org/POM/4.0.0 https://maven.apache.org/xsd/maven-4.0.0.xsd">
	<modelVersion>4.0.0</modelVersion>
	<parent>
		<groupId>org.springframework.boot</groupId>
		<artifactId>spring-boot-starter-parent</artifactId>
		<version>2.2.6.RELEASE</version>
		<relativePath/> <!-- lookup parent from repository -->
	</parent>
	<groupId>com.hc.starter</groupId>
	<artifactId>hc-spring-boot-starter-autoconfiguration</artifactId>
	<version>0.0.1-SNAPSHOT</version>
	<name>hc-spring-boot-starter-autoconfiguration</name>
	<description>Demo project for Spring Boot</description>

	<properties>
		<java.version>1.8</java.version>
	</properties>

	<dependencies>
		<dependency>
			<groupId>org.springframework.boot</groupId>
			<artifactId>spring-boot-starter</artifactId>
		</dependency>
	</dependencies>

</project>
在hc-spring-boot-starter项目的POM.xml,引入hc-spring-boot-starter-autoconfiguration的坐标
<?xml version="1.0" encoding="UTF-8"?>
<project xmlns="http://maven.apache.org/POM/4.0.0"
         xmlns:xsi="http://www.w3.org/2001/XMLSchema-instance"
         xsi:schemaLocation="http://maven.apache.org/POM/4.0.0 http://maven.apache.org/xsd/maven-4.0.0.xsd">
    <modelVersion>4.0.0</modelVersion>

    <groupId>com.hc.starter</groupId>
    <artifactId>hc-spring-boot-starter</artifactId>
    <version>1.0-SNAPSHOT</version>


    <dependencies>
        <dependency>
            <groupId>com.hc.starter</groupId>
            <artifactId>hc-spring-boot-starter-autoconfiguration</artifactId>
            <version>0.0.1-SNAPSHOT</version>
        </dependency>
    </dependencies>
</project>
2、在 hc-spring-boot-starter-autoconfiguration项目中创建属性类 HelloProperties,并使用注解@ConfigurationProperties(prefix = "spring.hello") 表明前缀为spring.hello
package com.hc.starter;

import org.springframework.boot.context.properties.ConfigurationProperties;

/**
 * @project: spring-boot-starter
 * @package: com.hc.starter
 * @author: hc
 * @date: 2020/4/12 14:49
 */

@ConfigurationProperties(prefix = "spring.hello")
public class HelloProperties {

    private String prefix;
    private String suffix;

    public String getPrefix() {
        return prefix;
    }

    public String getSuffix() {
        return suffix;
    }

    public void setPrefix(String prefix) {
        this.prefix = prefix;
    }

    public void setSuffix(String suffix) {
        this.suffix = suffix;
    }

}
3、在 hc-spring-boot-starter-autoconfiguration项目中创建类 HelloService,供其他Spring Boot应用自动注入HelloService
package com.hc.starter;

/**
 * @project: spring-boot-starter
 * @package: com.hc.starter
 * @author: hc
 * @date: 2020/4/12 15:01
 */
public class HelloService {

    private HelloProperties properties;

    public HelloProperties getProperties() {
        return properties;
    }

    public void setProperties(HelloProperties properties) {
        this.properties = properties;
    }

    public String sayHello(String name) {
        return properties.getPrefix() + " " + name + " "  + properties.getSuffix();
    }
}
4、在 hc-spring-boot-starter-autoconfiguration项目中创建配置类 HelloAutoConfiguration,使用注解
@Configuration // 说明是配置类
@ConditionalOnWebApplication // Web应用才生效
@EnableConfigurationProperties({HelloProperties.class}) // 与HelloProperties类的属性进行绑定
package com.hc.starter;

import org.springframework.beans.factory.annotation.Autowired;
import org.springframework.boot.autoconfigure.condition.ConditionalOnWebApplication;
import org.springframework.boot.context.properties.EnableConfigurationProperties;
import org.springframework.context.annotation.Bean;
import org.springframework.context.annotation.Configuration;

/**
 * @project: spring-boot-starter
 * @package: com.hc.starter
 * @author: hc
 * @date: 2020/4/12 14:48
 */

@Configuration
@ConditionalOnWebApplication
@EnableConfigurationProperties({HelloProperties.class})
public class HelloAutoConfiguration {

    @Autowired
    private HelloProperties helloProperties;

    @Bean
    public HelloService helloService() {
        HelloService helloService = new HelloService();
        helloService.setProperties(helloProperties);
        return helloService;
    }

}
5、关键的一步,需要在类路径下创建 spring.factories文件,如果没有这步,自定义starter将不会成功

在文件中的配置,自动配置类使用的是自己定义的配置类 HelloAutoConfiguration
org.springframework.boot.autoconfigure.EnableAutoConfiguration=\
com.hc.starter.HelloAutoConfiguration
6、之后创建一个新的Spring Boot应用 Spring Boot
Spring Boot应用的pom.xml文件,引入 hc-spring-boot-starter项目的坐标
<?xml version="1.0" encoding="UTF-8"?>
<project xmlns="http://maven.apache.org/POM/4.0.0" xmlns:xsi="http://www.w3.org/2001/XMLSchema-instance"
	xsi:schemaLocation="http://maven.apache.org/POM/4.0.0 https://maven.apache.org/xsd/maven-4.0.0.xsd">
	<modelVersion>4.0.0</modelVersion>
	<parent>
		<groupId>org.springframework.boot</groupId>
		<artifactId>spring-boot-starter-parent</artifactId>
		<version>2.2.6.RELEASE</version>
		<relativePath/> <!-- lookup parent from repository -->
	</parent>
	<groupId>com.hc</groupId>
	<artifactId>spring-boot</artifactId>
	<version>0.0.1-SNAPSHOT</version>
	<name>spring-boot</name>
	<description>Demo project for Spring Boot</description>

	<properties>
		<java.version>1.8</java.version>
	</properties>

	<dependencies>
		<dependency>
			<groupId>org.springframework.boot</groupId>
			<artifactId>spring-boot-starter-web</artifactId>
		</dependency>

		<!-- 引入自定义 starter -->
		<dependency>
			<groupId>com.hc.starter</groupId>
			<artifactId>hc-spring-boot-starter</artifactId>
			<version>1.0-SNAPSHOT</version>
		</dependency>

		<dependency>
			<groupId>org.springframework.boot</groupId>
			<artifactId>spring-boot-starter-test</artifactId>
			<scope>test</scope>
			<exclusions>
				<exclusion>
					<groupId>org.junit.vintage</groupId>
					<artifactId>junit-vintage-engine</artifactId>
				</exclusion>
			</exclusions>
		</dependency>
	</dependencies>

	<build>
		<plugins>
			<plugin>
				<groupId>org.springframework.boot</groupId>
				<artifactId>spring-boot-maven-plugin</artifactId>
			</plugin>
		</plugins>
	</build>

</project>
此时能看到,依赖中已经有了自定义starter,如果没有自定义starter,请检查前面的相关配置是否正确

7、在Spring Boot项目的配置文件中配置HelloProperties类的前缀与后缀

spring.hello.prefix = 你好
spring.hello.suffix = 母校
8、在Spring Boot项目中创建一个 HelloControter 类,使用 @Autowired 自动注入 HelloService类,之后调用HelloService类的
sayHello方法,传递一个名称过去
package com.hc.springboot.controller;

import com.hc.starter.HelloService;
import org.springframework.beans.factory.annotation.Autowired;
import org.springframework.web.bind.annotation.RequestMapping;
import org.springframework.web.bind.annotation.RestController;

/**
 * @project: spring-boot
 * @package: com.hc.springboot.controller
 * @author: hc
 * @date: 2020/4/12 15:18
 */

@RestController
public class HelloControter {

    @Autowired
    HelloService helloService;

    @RequestMapping("/hello")
    public String hello() {
        return helloService.sayHello("广西外国语学院");
    }

}
9、调用到 hc-spring-boot-starter-autoconfiguration 项目中 HelloService 的sayHello方法

10、启动 Spring Boot应用,访问 http://localhost:8080/hello,此时能成功使用自定义starter


 519
519


 被折叠的 条评论
为什么被折叠?
被折叠的 条评论
为什么被折叠?
 到【灌水乐园】发言


