


一、新建Spring Boot项目
(一)使用Spring Initializr初始化Spring Boot项目。
1、网址:http://start.spring.io。
2、填写相关的参数(可以选择所需要的Dependencies)。
3、点击“Generate Project”会生成一个Spring Boot项目,并保存为ZIP文件。
4、解压下载的ZIP 文件。
5、从Eclipse中导入解压好的项目。
(二)使用Spring Tool Suite创建Spring Boot项目
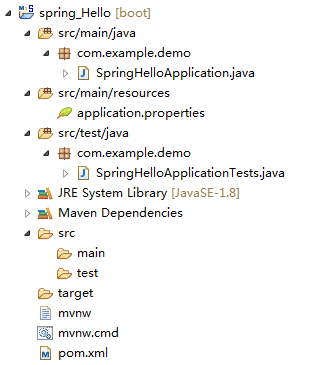
File -> New -> Spring Starter -> Project 填写相关参数(可以选择所需要的Dependencies)。新建好的Spring Boot项目结构如下:

(三)Spring Boot CLI
Spring Boot CLI是Spring Boot提供的控制台命令工具。
1、下载Spring Boot CLI。
2、下载好后解压,将CLI的bin添加到Path环境变量中。
3、使用命令初始化项目:
spring  init  --build=maven  --java-version=1.8  --dependencies=web  --packaging=jar  --boot-version=1.3.0.M1
--groupId=com.xxx --artifactId=xxxx
(四)Maven手工构建
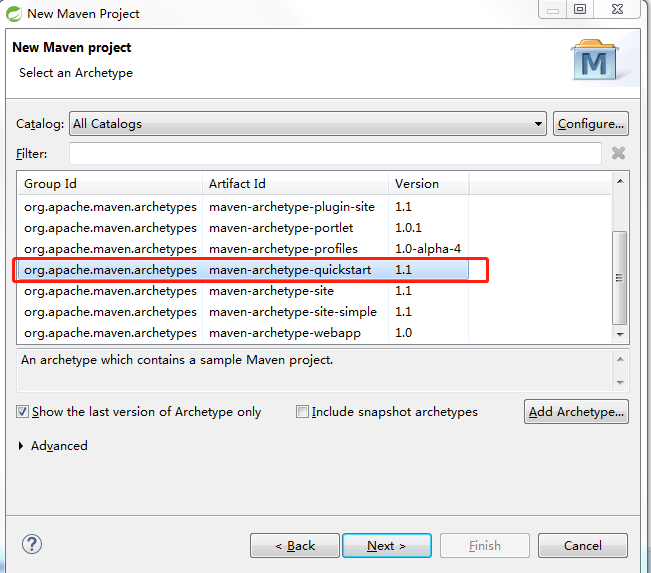
1、建立Maven项目。
2、修该pom.xml文件,添加父级依赖:
<parent>
    <groupId>org.springframework.boot</groupId>
    <artifactId>spring-boot-starter-parent</artifactId>
    <version>1.3.0.M1</version>
    <relativePath/>
</parent>
3、如有需要可添加web依赖:
<dependency>
    <groupId>org.springframework.boot</groupId>
    <artifactId>spring-boot-starter-web</artifactId>
</dependency>
4、添加Spring Boot的编译插件:
<build>
    <plugins>
        <plugin>
            <groupId>org.springframework.boot</groupId>
            <artifactId>spring-boot-maven-plugin</artifactId>
        </plugin>
    </plugins>
</build>
二、Spring Hello入门编写
1、为了操作方便,选择了使用STS工具直接新建Spring Boot项目。
2、方便起见,不再单独编写Controller类,直接在入口类周静编写代码(artifactId+Application构成入口类的命名规则)。
package com.example.demo;
import org.springframework.boot.SpringApplication;
import org.springframework.boot.autoconfigure.SpringBootApplication;
import org.springframework.web.bind.annotation.RequestMapping;
import org.springframework.web.bind.annotation.RestController;
@RestController
@SpringBootApplication //1
public class SpringHelloApplication {
    @RequestMapping("/hello")
    String index() {
        return "Hello Spring Boot";
    }
    public static void main(String[] args) { //2
        SpringApplication.run(SpringHelloApplication.class, args);
    }
}
代码解释:
(1)@SpringBootApplication是Spring Boot项目的核心注解,主要目的是开启自动配置。
(2)这是一个标准的Java应用的main方法,主要作用是作为项目启动的入口。
(3)@RestController说明了这个类是一个控制器类,由于没有单独编写控制器类,所以SpringHelloApplication这个类既是入口类,也是我们制定的控制器类。如果单独写了控制器类,给类上添加@RestController注解即可,然后写所需的方法。
3、运行效果
我们可以通过Maven命令,运行项目:
mvn spring-boot:run或单击SpringHelloApplication右键,在右键菜单中选择以Spring Boot APP或Java Application运行项目
访问http://localhost:8080/hello就可以看到页面显示了“Hello Spring Boot”
三、配置相关操作
1、修改Banner
(1)在Spring Boot启动的时候会有一个默认启动图案,如图所示。

(2)我们在src/main/resources下新建一个banner.txt。
(3)通过http://patorjk.com/software/taag网站生成字符,如敲入的为“YJS”,将网站生成的字符复制到banner.txt中。
(4)这时再启动程序,图案将变为制定的图案。
2、Spring Boot的配置文件
Spring Boot使用一个全局的配置文件application.properties或application.yml,放置在src/main/resources目录或者类路径的/config下。
Spring Boot不仅支持常规的properties配置文件,还支持yaml语言的配置文件。yaml是以数据为中心的语言,在配置数据的时候具有面向对象的特征。
Spring Boot的全局配置文件的作用是对一些默认配置的配置值进行修改。
简单示例:
将Tomcat的默认端口号8080修改为9090,并将访问路径“/hello”修改为“/helloboot”。可以在application.properties中添加:
server.port=9090
server.context-path=/helloboot
或在application.yml中添加:
server:
    port: 9090
    contextPath: /helloboot
3、@ImportResource来加载xml配置
@ImportResource({"classpath:some-context.xml","classpath:another-context.xml"})4、注入application.properties中的属性值
(1)在application.properties中添加:
book.author=wangbo
book.name=spring boot
(2)修改控制器类(在本示例中是修改入口类)
package com.example.demo;
import org.springframework.beans.factory.annotation.Value;
import org.springframework.boot.SpringApplication;
import org.springframework.boot.autoconfigure.SpringBootApplication;
import org.springframework.web.bind.annotation.RequestMapping;
import org.springframework.web.bind.annotation.RestController;
@RestController
@SpringBootApplication
public class SpringHelloApplication{
    @Value("${book.author}")//注意:book.author是和application.properties中对应的
    private String bookAuthor;
    @Value("${book.name}")
    private String bookName;
    @RequestMapping("/")
    String index() {
        return "book name is:"+bookName+" and book author is:" + bookAuthor;
    }
    public static void main(String[] args) {
        SpringApplication.run(SpringHelloApplication.class, args);
    }
}
(3)在浏览器中可看到显示出了读取到的属性值。
5、类型安全的配置(基于properties)
所谓类型安全配置,就是将某一对象注入到控制器类中,而这个对象的属性值是从application.properties中获取的。
(1)application.properties中:
author.name=wangbo
author.age=23
(2)添加类型安全的Bean(AuthorSettings类):
package com.example.demo;

import org.springframework.boot.context.properties.ConfigurationProperties;
import org.springframework.stereotype.Component;

@Component
@ConfigurationProperties(prefix="author")//注意:author是和application.properties中前缀一致的
public class AuthorSettings {

	private String name;
	private Long age;


	public String getName() {
		return name;
	}
	public void setName(String name) {
		this.name = name;
	}
	public Long getAge() {
		return age;
	}
	public void setAge(Long age) {
		this.age = age;
	}

}
代码解释:
通过@ConfigurationProperties加载properties文件内的配置,通过prefix属性指定properties的配置的前缀,通过locations指定properties文件的位置,例如:
@ConfigurationProperties(prefix = "author",locations = {"classpath:config/author.properties"})
本例不需要配置locations。
(3)控制器类中(本例是入口类)
package com.example.demo;
import org.springframework.beans.factory.annotation.Autowired;
import org.springframework.boot.SpringApplication;
import org.springframework.boot.autoconfigure.SpringBootApplication;
import org.springframework.web.bind.annotation.RequestMapping;
import org.springframework.web.bind.annotation.RestController;

@RestController
@SpringBootApplication
public class SpringHelloApplication{
    @Autowired
    private AuthorSettings authorSettings; //1
    @RequestMapping("/")
    public String index(){
        return "author name is "+ authorSettings.getName()+" and author age is "+authorSettings.getAge();
    }
    public static void main(String[] args) {
        SpringApplication.run(SpringHelloApplication.class, args);
    }
} 6、日志配置
Spring Boot支持Java Util Logging、Log4J、Log4J2和Logback作为日志框架,无论使用哪种日志框架,Spring Boot已为当前使用日志框架的控制台输出及文件输出做好了配置。
默认情况下,Spring Boot使用Logback作为日志框架。
配置日志级别:
logging.file=D:/mylog/log.log配置日志文件,格式为logging.level.包名=级别:
logging.level.org.springframework.web= DEBUG7、Profile配置
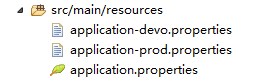
Profile是Spring用来针对不同的环境对不同的配置提供支持的,全局Profile配置使用application-{profile}.properties(如application-prod.properties)。
通过在application.properties中设置spring.profiles.active=prod来指定生效的Profile。
8、查看运行配置报告
可以通过下面三种方式查看当前项目中已启用和未启用的自动配置的报告。
(1)运行jar时增加--debug参数:
java -jar xx.jar --debug(2)在application.properties中设置属性:
debug=true(3)在STS中设置,如图所示。
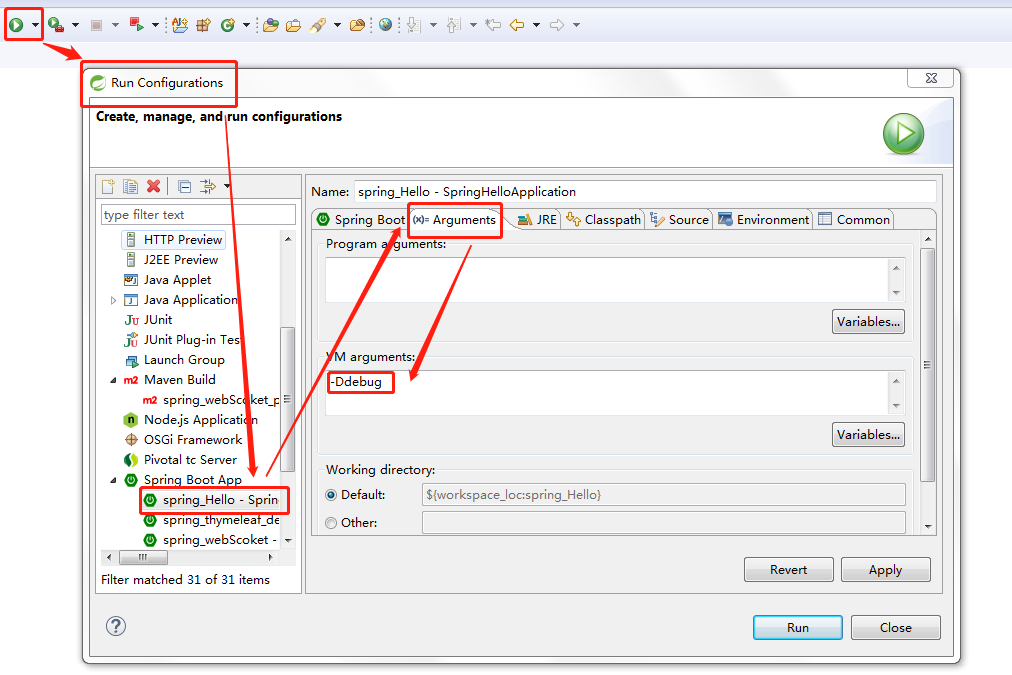
此时启动,可在控制台输出已启用的自动配置和未启动的自动配置。
四、自己写自动配置
1、新建starter的Maven项目
在pom.xml中修改代码如下:
<?xml version="1.0" encoding="UTF-8"?>
<project xmlns="http://maven.apache.org/POM/4.0.0" xmlns:xsi="http://www.w3.org/2001/XMLSchema-instance"
	xsi:schemaLocation="http://maven.apache.org/POM/4.0.0 http://maven.apache.org/xsd/maven-4.0.0.xsd">
	<modelVersion>4.0.0</modelVersion>

	<groupId>com.yjs</groupId>
	<artifactId>spring-boot-starter-hello</artifactId>
	<version>0.0.1-SNAPSHOT</version>
	<packaging>jar</packaging>

	<name>spring-boot-starter-hello</name>
	<url>http://maven.apache.org</url>
	<description>Demo project for Spring Boot</description>

	<properties>
		<project.build.sourceEncoding>UTF-8</project.build.sourceEncoding>
		<project.reporting.outputEncoding>UTF-8</project.reporting.outputEncoding>
		<java.version>1.8</java.version>
	</properties>

	<dependencies>
		<dependency>
			<groupId>org.springframework.boot</groupId>
			<artifactId>spring-boot-autoconfigure</artifactId>
			<version>1.5.10.RELEASE</version>
		</dependency>
		<dependency>
			<groupId>junit</groupId>
			<artifactId>junit</artifactId>
			<version>3.8.1</version>
			<scope>test</scope>
		</dependency>

	</dependencies>
	<!-- 使用Spring Boot正式版时,无须下列配置,给里程版本配的 -->
	<repositories>
		<repository>
			<id>spring-snapshots</id>
			<name>Spring Snapshots</name>
			<url>https://repo.spring.io/snapshot</url>
			<snapshots>
				<enabled>true</enabled>
			</snapshots>
		</repository>
		<repository>
			<id>spring-milestones</id>
			<name>Spring Milestones</name>
			<url>https://repo.spring.io/milestone</url>
			<snapshots>
				<enabled>false</enabled>
			</snapshots>
		</repository>
	</repositories>
	<pluginRepositories>
		<pluginRepository>
			<id>spring-snapshots</id>
			<name>Spring Snapshots</name>
			<url>https://repo.spring.io/snapshot</url>
			<snapshots>
				<enabled>true</enabled>
			</snapshots>
		</pluginRepository>
		<pluginRepository>
			<id>spring-milestones</id>
			<name>Spring Milestones</name>
			<url>https://repo.spring.io/milestone</url>
			<snapshots>
				<enabled>false</enabled>
			</snapshots>
		</pluginRepository>
	</pluginRepositories>

</project>
(2)属性配置,代码如下:
package com.yjs.springbootstarterhello;

import org.springframework.boot.context.properties.ConfigurationProperties;

@ConfigurationProperties(prefix="hello")
public class HelloServiceProperties {

	private static final String MSG = "world";
	private String msg = MSG;

	public String getMsg() {
		return msg;
	}
	public void setMsg(String msg) {
		this.msg = msg;
	}

}
代码解释:
类型安全的属性获取,在application.properties中通过hello.msg=来设置,若不设置,默认为hello.msg=world。
(3)判断依据类,代码如下:
package com.yjs.springbootstarterhello;

public class HelloService {

	private String msg;

	public String sayHello() {
		return "Hello" + msg;
	}

	public String getMsg() {
		return msg;
	}
	public void setMsg(String msg) {
		this.msg = msg;
	}

}
代码解释:
本例根据此类的存在与否来创建这个类的Bean,这个类可以是第三方类库的类。
(4)自动配置类,代码如下:
package com.yjs.springbootstarterhello;

import org.springframework.beans.factory.annotation.Autowired;
import org.springframework.boot.autoconfigure.condition.ConditionalOnClass;
import org.springframework.boot.autoconfigure.condition.ConditionalOnProperty;
import org.springframework.boot.context.properties.EnableConfigurationProperties;
import org.springframework.context.annotation.Bean;
import org.springframework.context.annotation.Configuration;
@Configuration
@EnableConfigurationProperties(HelloServiceProperties.class)
@ConditionalOnClass(HelloService.class)
@ConditionalOnProperty(prefix="hello",value="enabled",matchIfMissing = true)
public class HelloServiceAutoConfiguration {

	@Autowired
	private HelloServiceProperties helloServiceProperties;

	@Bean
	@ConditionalOnClass(HelloService.class)
	public HelloService helloService() {

		HelloService helloService = new HelloService();
		helloService.setMsg(helloServiceProperties.getMsg());
		return helloService;

	}
}
代码解释:
根据HelloServiceProperties提供的参数,并通过@ConditionalOnClass判断HelloService这个类在类路径中是否存在,且当容器中没有这个Bean的情况下自动配置这个Bean。
(5)注册配置。在6.5.1中我们知道,若想自动配置生效,需要注册自动配置类。在src/main/resources下新建META-INF/spring.factories,结构如图所示。
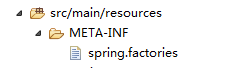
在spring.factories中填写如下内容注册:
org.springframework.boot.autoconfigure.EnableAutoConfiguration=\
com.yjs.springbootstarterhello.HelloServiceAutoConfiguration
若有多个自动配置,则用“,”隔开,此处“\”是为了换行后仍然能读到属性。
(6)使用starter。
新建Spring Boot项目,选择web依赖。并将我们自己的starter作为依赖,需要pom.xml中添加spring-boot-starter-hello的依赖:
<dependency>
    <groupId>com.yjs</groupId>
    <artifactId>spring-boot-starter-hello</artifactId>
    <version>0.0.1-SNAPSHOT</version>
</dependency>
在开发阶段,我们引入的依赖是spring-boot-starter-hello这个项目。在starter稳定之后,我们可以将spring-boot-starter-hello通过“mvn install”安装到本地库,或者将这个jar包发布到Maven私服上。
简单的运行类代码如下:
package com.example.springHello;

import org.springframework.beans.factory.annotation.Autowired;
import org.springframework.boot.SpringApplication;
import org.springframework.boot.autoconfigure.SpringBootApplication;
import org.springframework.web.bind.annotation.RequestMapping;
import org.springframework.web.bind.annotation.RestController;

import com.yjs.springbootstarterhello.HelloService;


@RestController
@SpringBootApplication
public class SpringHelloApplication {

	@Autowired
	HelloService helloService;

	@RequestMapping("/boots")
	public String index() {
		return helloService.sayHello();
	}

	public static void main(String[] args) {
		SpringApplication.run(SpringHelloApplication.class, args);
	}
}
访问http://localhost:8080可看到输出“Hello world”
这时在application.properties中配置msg的内容:
hello.msg=yjs五、Thymeleaf的使用
Thymeleaf是一个Java类库,它是一个xml/xhtml/html5的模板引擎,可以作为MVC的Web应用的View层。
Thymeleaf还提供了额外的模块与Spring MVC集成,所以我们可以使用Thymeleaf完全替代JSP。
1、新建Spring Boot项目
选择Thymeleaf依赖,spring-boot-starter-thymeleaf会自动包含spring-boot-starter-web
2、示例javaBean
此类用来在模板页面展示数据用,包含name属性和age属性:
package com.example.demo;

public class Person {
	private String name;
	private Integer age;

	public Person() {
		super();
	}
	public Person(String name, Integer age) {
		super();
		this.name = name;
		this.age = age;
	}
	public String getName() {
		return name;
	}
	public void setName(String name) {
		this.name = name;
	}
	public Integer getAge() {
		return age;
	}
	public void setAge(Integer age) {
		this.age = age;
	}

}
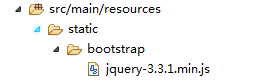
3、脚本样式静态文件
根据默认原则,脚本样式、图片等静态文件应放置在src/main/resources/static下,这里引入了Bootstrap和jQuery,结构如图所示。
4、演示界面
根据默认原则,页面应放置在src/main/resources/templates下。在src/main/resources/templates下新建index.html,如图所示。

代码如下:
<!-- 通过xmlns:th=http://www.thymeleaf.org命名空间,
	  将镜头页面转换为动态的视图。需要进行动态处理
	  的元素将使用“th:”为前缀;
-->
<html xmlns:th="http://www.thymeleaf.org">
<head>
	<meta content="text/html;charset=UTF-8"/>
	<meta  http-equiv="X-UA-Compatible" content="IE=edge"/>
	<meta name="viewport" content="width=device-width, initial-scale=1"/>
	<!-- 通过“@{}”引用Web静态资源 -->
	<link th:href="@{bootstrap/css/bootstrap.min.css}" rel="stylesheet"/>
	<link  th:href="@{bootstrap/css/bootstrap-theme.min.css}" rel="stylesheet"/>
</head>
<body>
	<div class="panel panel-primary">
		<div class="panel-heading">
			<h3 class="panel-title">访问model</h3>
		</div>
		<div class="panel-body">
			<!-- 使用<span  th:text="${singlePerson.name}"></span>访问model中的singlePerson的name属性 -->
			<span th:text="${singlePerson.name}"></span>
		</div>
	</div>
	<!-- 通过${not#lists.isEmpty(people)}表达式判断
		 people是否为空。Thymeleaf支持>、<、>=、<===、!=作为
		  比较条件,同时也支持将SpringEL表达式语言用于条件中。
	 -->
	<div th:if="${not #lists.isEmpty(people)}">
		<div class="panel panel-primary">
			<div class="panel-heading">
				<h3 class="panel-title">列表</h3>
			</div>
			<div class="panel-body">
				<ul class="list-group">
				<!-- 1、使用th:each来做循环迭代(th:each="person:${people}"),person作为迭代元素来使用。
					 2、 注意:需要处理的动态内容需要加上“th:”前缀。
				 -->
				<li class="list-group-item" th:each="person:${people}">
				<span th:text="${person.name}"></span>
				<span th:text="${person.age}"></span>
				<!-- 如果需要在html的代码里访问model中的属性,
					  例如,我们需要在列表后单击每一行后面的按钮获
					  得model中的值,可做如下处理 -->
				<button class="btn" th:οnclick="'getName(\'' + ${person.name} + '\');'">获得名字</button>
				</li>
				</ul>
			</div>
		</div>
	</div>

<script  th:src="@{bootstrap/jquery-3.3.1.min.js}" type="text/javascript"></script>
<script  th:src="@{bootstrap/bootstrap.min.js}"></script>

<!-- 1、通过th:inline=“javascript”添加到script标签,这样
	 JavaScript代码即可访问model中的属性;
	 2、通过“[[${}]]”格式获得实际的值。
-->
<script th:inline="javascript">
	var single = [[${singlePerson}]];
	console.log(single.name+"/"+single.age)
	<!-- 对应上面的  th:οnclick="'getName(\'' + ${person.name} + '\');'" -->
	function getName(name){
	console.log(name);
	}
</script>
</body>
</html>
5、数据准备
package com.example.demo;

import java.util.ArrayList;
import java.util.List;

import org.apache.catalina.Context;
import org.apache.catalina.connector.Connector;
import org.apache.tomcat.util.descriptor.web.SecurityCollection;
import org.apache.tomcat.util.descriptor.web.SecurityConstraint;
import org.springframework.boot.SpringApplication;
import org.springframework.boot.autoconfigure.SpringBootApplication;
import org.springframework.boot.context.embedded.EmbeddedServletContainerFactory;
import org.springframework.boot.context.embedded.tomcat.TomcatEmbeddedServletContainerFactory;
import org.springframework.context.annotation.Bean;
import org.springframework.stereotype.Controller;
import org.springframework.ui.Model;
import org.springframework.web.bind.annotation.RequestMapping;

@Controller
@SpringBootApplication
public class SpringThymeleafDemoApplication {

	@RequestMapping("/")
	public String index(Model model) {

		Person single = new Person("aa",11);

		List<Person> people = new ArrayList<Person>();
		Person p1 = new Person("xx",11);
		Person p2 = new Person("yy",22);
		Person p3 = new Person("zz",33);
		people.add(p1);
		people.add(p2);
		people.add(p3);

		model.addAttribute("singlePerson",single);
		model.addAttribute("people",people);

		return "index";
	}
	public static void main(String[] args) {
		SpringApplication.run(SpringThymeleafDemoApplication.class, args);
	}

}
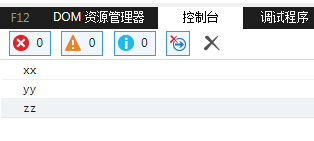
6、运行
访问http://localhost:8080即可看到页面相关数据展示。
单击页面的“获得名字”按钮即可看到名字输出
7、说明:
(1)类路径文件
把类路径下的/static、/public、/resources和/META-INF/resources文件夹下的静态文件直接映射为/**,可以通过http://localhost:8080/**来访问。
(2)webjar
何谓webjar,webjar就是将我们常用的脚本框架封装在jar包中的jar包,网站http://www.webjars.org。
把webjar的/META-INF/resources/webjars/下的静态文件映射为/webjar/**,可以通过
http://localhost:8080/webjar/**来访问。
(3)静态首页的支持
把静态index.html文件放置在如下目录。
classpath:/META-INF/resources/index.html
classpath:/resources/index.html
classpath:/static/index.html
classpath:/public/index.html
当我们访问应用根目录http://localhost:8080/时,会直接映射。
六、设置Favicon
若需要设置自己的Favicon,则只需将自己的favicon.ico(文件名不能变动,ico图标可在线转换)文件放置在类路径META-INF/resources/下:
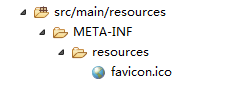
访问页面的时候在浏览器就可以看到了。


 7879
7879


 被折叠的 条评论
为什么被折叠?
被折叠的 条评论
为什么被折叠?
 到【灌水乐园】发言


