


前言
本文简单的介绍了如何使用 Squirrel 来为 WPF 客户端 进行自动检查更新。
Squirrel git 地址 :http:// https://github.com/Squirrel/Squirrel.Windows
本文使用了 Visual Studio 2022 进行演示讲解。
参考英文博客: https://intellitect.com/deploying-app-squirrel/
开始
第一步: 新建一个项目
打开VS2022,新建wpf项目,取名为 WpfApp2.
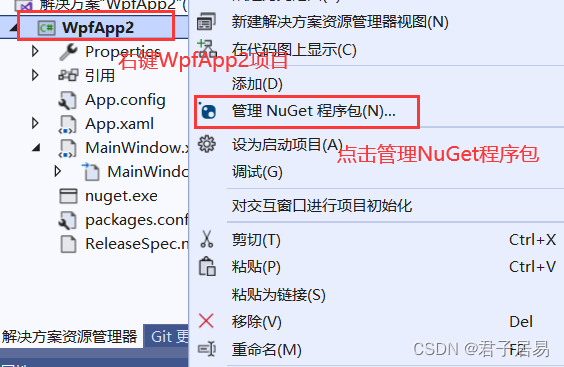
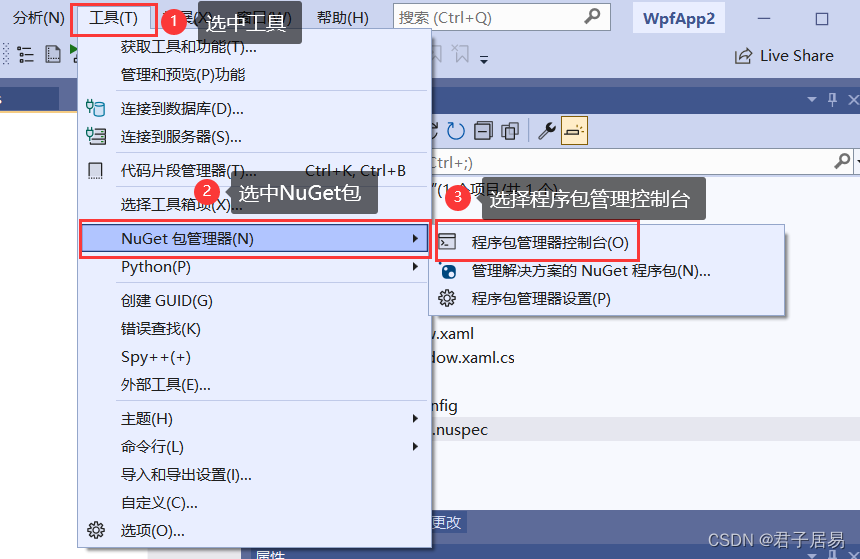
右键项目 WpfApp2>点击管理NuGet程序包
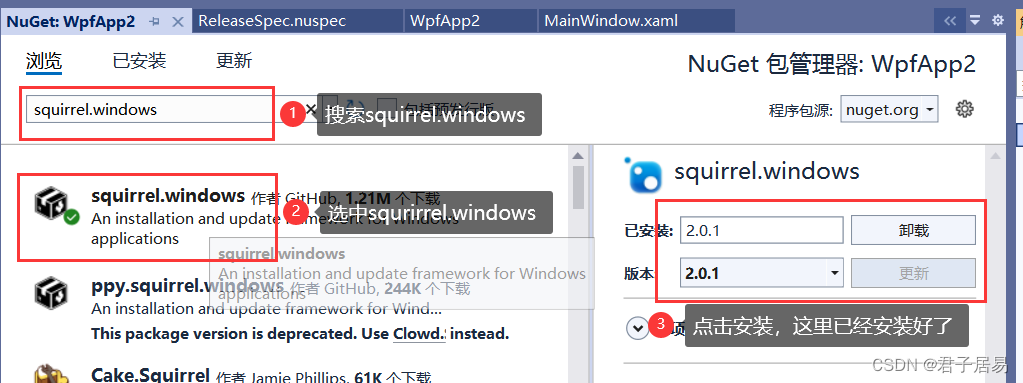
搜索squirrel.windows>点击安装
安装完成后,打开MainWindow.xaml,编辑Grid段代码如下:
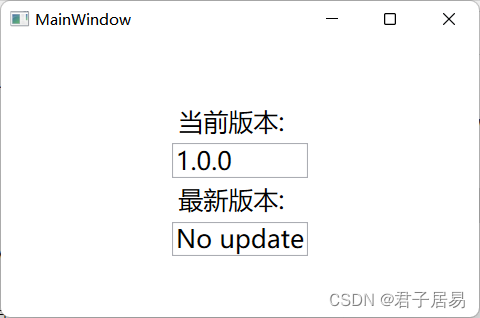
主要显示当前版本和最新版本信息
<Window x:Class="WpfApp2.MainWindow"
        xmlns="http://schemas.microsoft.com/winfx/2006/xaml/presentation"
        xmlns:x="http://schemas.microsoft.com/winfx/2006/xaml"
        xmlns:d="http://schemas.microsoft.com/expression/blend/2008"
        xmlns:mc="http://schemas.openxmlformats.org/markup-compatibility/2006"
        xmlns:local="clr-namespace:WpfApp2"
        mc:Ignorable="d"
        Title="MainWindow" Height="450" Width="800">
    <Grid>
        <StackPanel HorizontalAlignment="Center" VerticalAlignment="Center">
            <Label FontSize="20">
                当前版本:
            </Label>

            <TextBox x:Name="CurrentVersionTextBox"
                IsReadOnly="True"  FontSize="20">
            </TextBox>
            <Label  FontSize="20">
                最新版本:
            </Label >
            <TextBox x:Name="UpdateVersionTextBox"
                IsReadOnly="True"  FontSize="20">
            </TextBox>
        </StackPanel>
    </Grid>
</Window>
打开MainWindow.xaml.cs,添加Squirrel引用,
using Squirrel;并添加MainWindow的OnLoaded事件:
  /// <summary>
    /// MainWindow.xaml 的交互逻辑
    /// </summary>
    public partial class MainWindow : Window
    {

        public MainWindow()
        {
            InitializeComponent();

            Loaded += MainWindow_Loaded;
        }

        private void MainWindow_Closed(object sender, EventArgs e)
        {
            MessageBox.Show("关闭");
        }

        private async void MainWindow_Loaded(object sender, RoutedEventArgs e)
        {
            try
            {
                using (var updateManager = new UpdateManager(@"F:\SquirrelReleases"))
                {
                    CurrentVersionTextBox.Text = $"{updateManager.CurrentlyInstalledVersion()}";
                    var releaseEntry = await updateManager.UpdateApp();
                    UpdateVersionTextBox.Text = $"{releaseEntry?.Version.ToString() ?? "No update"}";
                    if (releaseEntry != null)
                    {
                        var r = MessageBox.Show("检测到新版本,是否重启更新?");
                        if (r == MessageBoxResult.OK)
                        {
                            UpdateManager.RestartApp();
                        }
                    }
                }

            }
            catch (System.Exception ex)
            {

             MessageBox.Show(ex.Message);
            }

        }

    }
测试项目准备完成。接下来我们需要进行打包以及版本更新的测试。
step.2 打包应用程序
首先需要下载 nuget.exe recommended latest:
https://www.nuget.org/downloads
将下载到的nuget.exe复制到项目根目录下。
接下来在项目中添加一个 ReleaseSpec.nuspec ,编辑内容为下面内容:
<?xml version="1.0" encoding="utf-8"?>
<package >
  <metadata>
    <id>ApplicationWPF</id>
    <version>0.0.0</version>
    <title>Title</title>
    <authors>Author</authors>
    <requireLicenseAcceptance>false</requireLicenseAcceptance>
    <license type="expression">MIT</license>
    <projectUrl>http://project_url_here_or_delete_this_line/</projectUrl>
    <iconUrl>http://icon_url_here_or_delete_this_line/</iconUrl>
    <description>Description</description>
    <releaseNotes>Summary of changes made in this release of the package.</releaseNotes>
    <copyright>$copyright$</copyright>
    <tags>Tag1 Tag2</tags>
  </metadata>

  <files>
    <file src="bin\Release\**" target="lib\net48" exclude="*.pdb;*.vshost.*"/>
  </files>
</package>
切换到release,并生成项目:
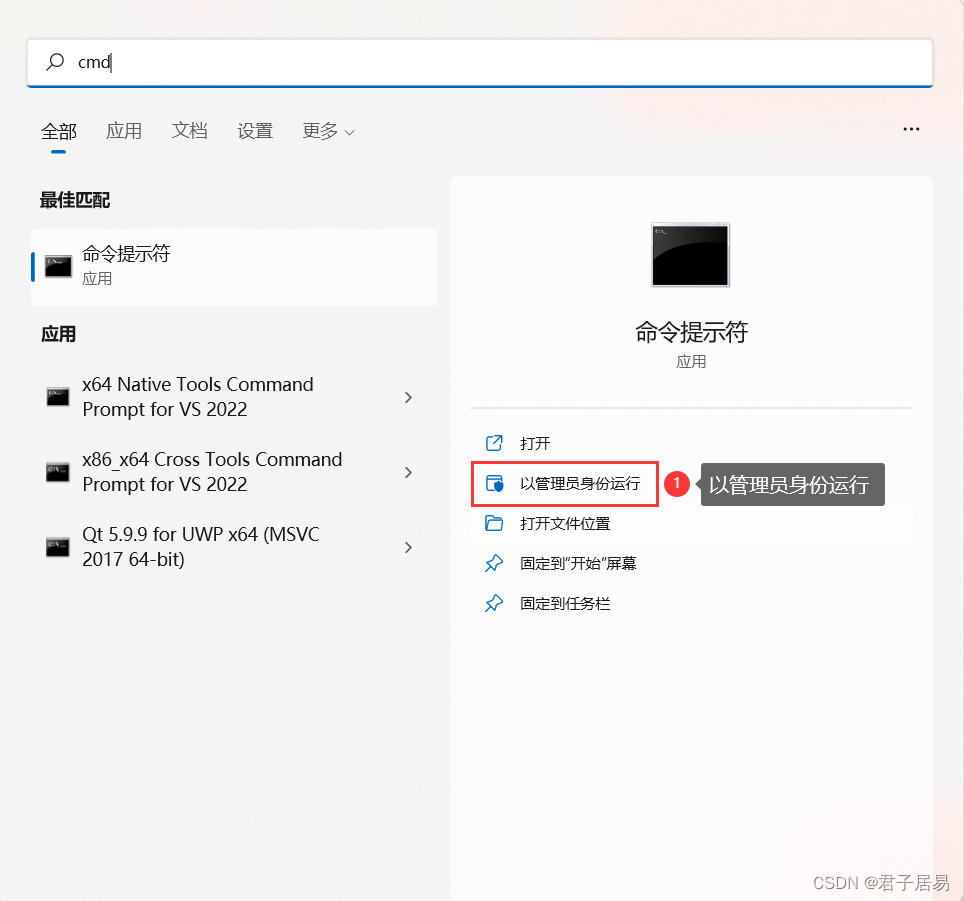
使用管理员身份运行cmd,并切换到项目根目录,运行下面命令:
nuget pack SquirrelTest.nuspec 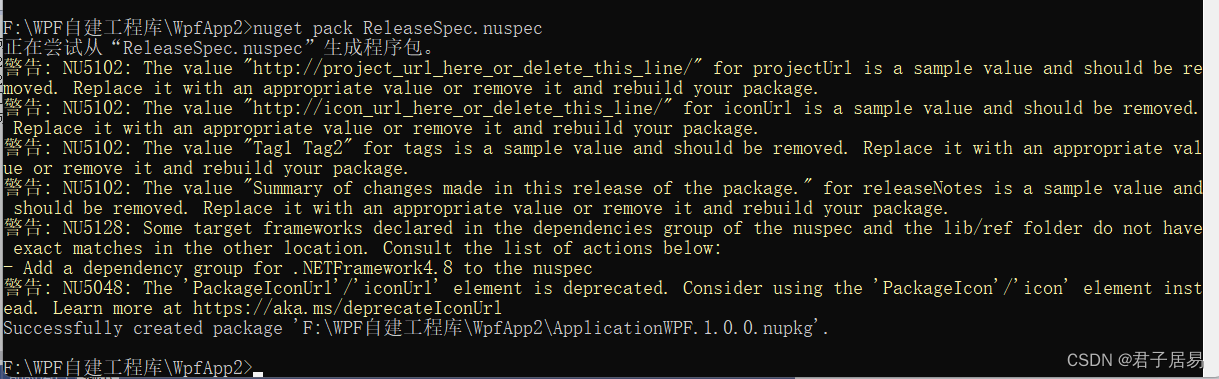
这条命令将会在项目根目录生成一个 SquirrelTest.0.0.0.nupkg 的文件。
在D盘根目录下新建 SquirrelReleases 文件夹。
切换到VS的程序包管理界面控制台,输入下面命令:
先打开程序包管理器控制台
Squirrel --releasify SquirrelTest.0.0.0.nupkg --releaseDir "F:\SquirrelReleases"这里F:\SquirrelReleases地址也可以放在远程服务器上
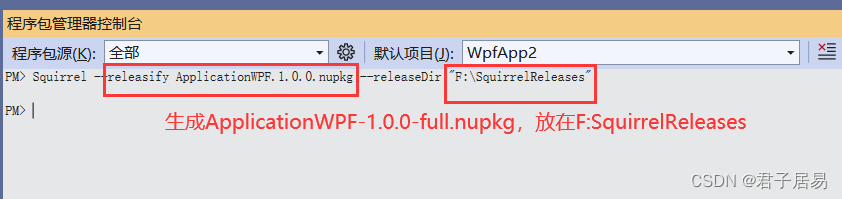
执行完后的界面显示如下: 
此时到F盘下的 SquirrelReleases 文件夹查看,可以发现生成了下面的文件。
双击Setup.exe,程序将会自动安装到 %AppData% 目录下,创建桌面快捷方式,并运行。

打开桌面快捷方式,展开如下
step.3 应用程序的自动更新
在MainWindow的Loaded事件中已经有新版本检测并更新的代码了。下面我们只需要发布新版本,在程序启动时将会自动提示更新。
打开ReleaseSpec.nuspec文件,修改version为1.0.1。重新生成项目。
再次以管理员身份运行cmd,切换到项目目录,执行 nuget pack 命令。此时生成的文件为 SquirrelTest.1.0.1.nupkg .
切换到vs的程序包管理器命令行,输入下面命令:
Squirrel --releasify SquirrelTest.1.0.1.nupkg --releaseDir "F:\SquirrelReleases"
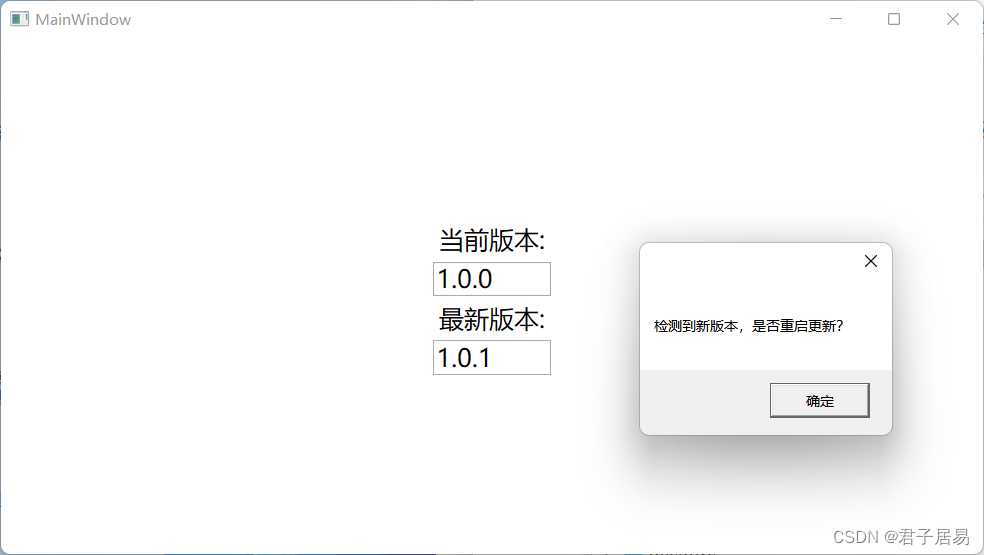
执行完毕后,双击桌面的SquirrelTest快捷方式,将会收到新版本提示:
点击弹窗的确定按钮后,应用将会以新版本重启:
本文引用了以下文章:
https://blog.csdn.net/wf824284257/article/details/89164525
Application Deployment Made Easy - IntelliTect
https://www.youtube.com/watch?v=UlNwQ6WqCMw


 4021
4021

 被折叠的 条评论
为什么被折叠?
被折叠的 条评论
为什么被折叠?
 到【灌水乐园】发言


