


运行环境:
jdk 1.8
springboot 2.7.9
swagger 3.0.0
Maven引入:
<!-- swagger接口文档 -->
<dependency>
    <groupId>io.springfox</groupId>
    <artifactId>springfox-boot-starter</artifactId>
    <version>3.0.0</version>
</dependency>
application.yaml:
spring:
  mvc:
    pathmatch:
      # 引入swagger3.0时加入的配置 localhost:2365/swagger-ui/index.html
      matching-strategy: ant_path_matcher
Swagger配置文件:
package com.ls.config.swaggerConfig;

import org.springframework.context.annotation.Bean;
import org.springframework.context.annotation.Configuration;
import springfox.documentation.builders.ApiInfoBuilder;
import springfox.documentation.builders.PathSelectors;
import springfox.documentation.builders.RequestHandlerSelectors;
import springfox.documentation.service.ApiInfo;
import springfox.documentation.service.Contact;
import springfox.documentation.spi.DocumentationType;
import springfox.documentation.spring.web.plugins.Docket;

@Configuration
public class RosSwaggerConfig {

    @Bean
    public Docket createRestApi(){
        //Docket: 摘要对象,通过对象配置 描述文件的信息
        Docket docket = new Docket(DocumentationType.OAS_30);
        docket.apiInfo(myApiInfo())
                //select():返回ApiSelectorBuilder对象,通过对象调用build()可以创建Docket对象
                .select()
                // 指定要扫描/维护接口文档的包(否则就全部扫描)
                .apis(RequestHandlerSelectors.basePackage("com.ls.api.leakageApi"))
                // 路径过滤:该Docket-UI展示时,只展示指定路径下的接口文档(any表示都展示)
                .paths(PathSelectors.any())
                .build();
        return docket;
    }

    // 接口文档的概要信息,返回ApiInfo对象
    private ApiInfo myApiInfo(){
        //标题
        String title = "ROS系统接口文档";
        //简单描述
        String description = "一个简单明了的接口信息文档";
        //版本
        String version = "V1.0.0";
        // url接口路径前缀
        String termsOfServiceUrl = "/";
        //作者信息
        Contact contact = new Contact("SLIU","","1549865882@qq.com");
        //协议
        String license = "The Apache License";
        //协议url
        String licenseUrl = "https://wwww.baidu.com";

        ApiInfo apiInfo =  new ApiInfoBuilder()
                .title(title)
                .description(description)
                .version(version)
                .termsOfServiceUrl(termsOfServiceUrl)
                .contact(contact)
                .license(license)
                .licenseUrl(licenseUrl)
                .build();
        return apiInfo;
    }

}
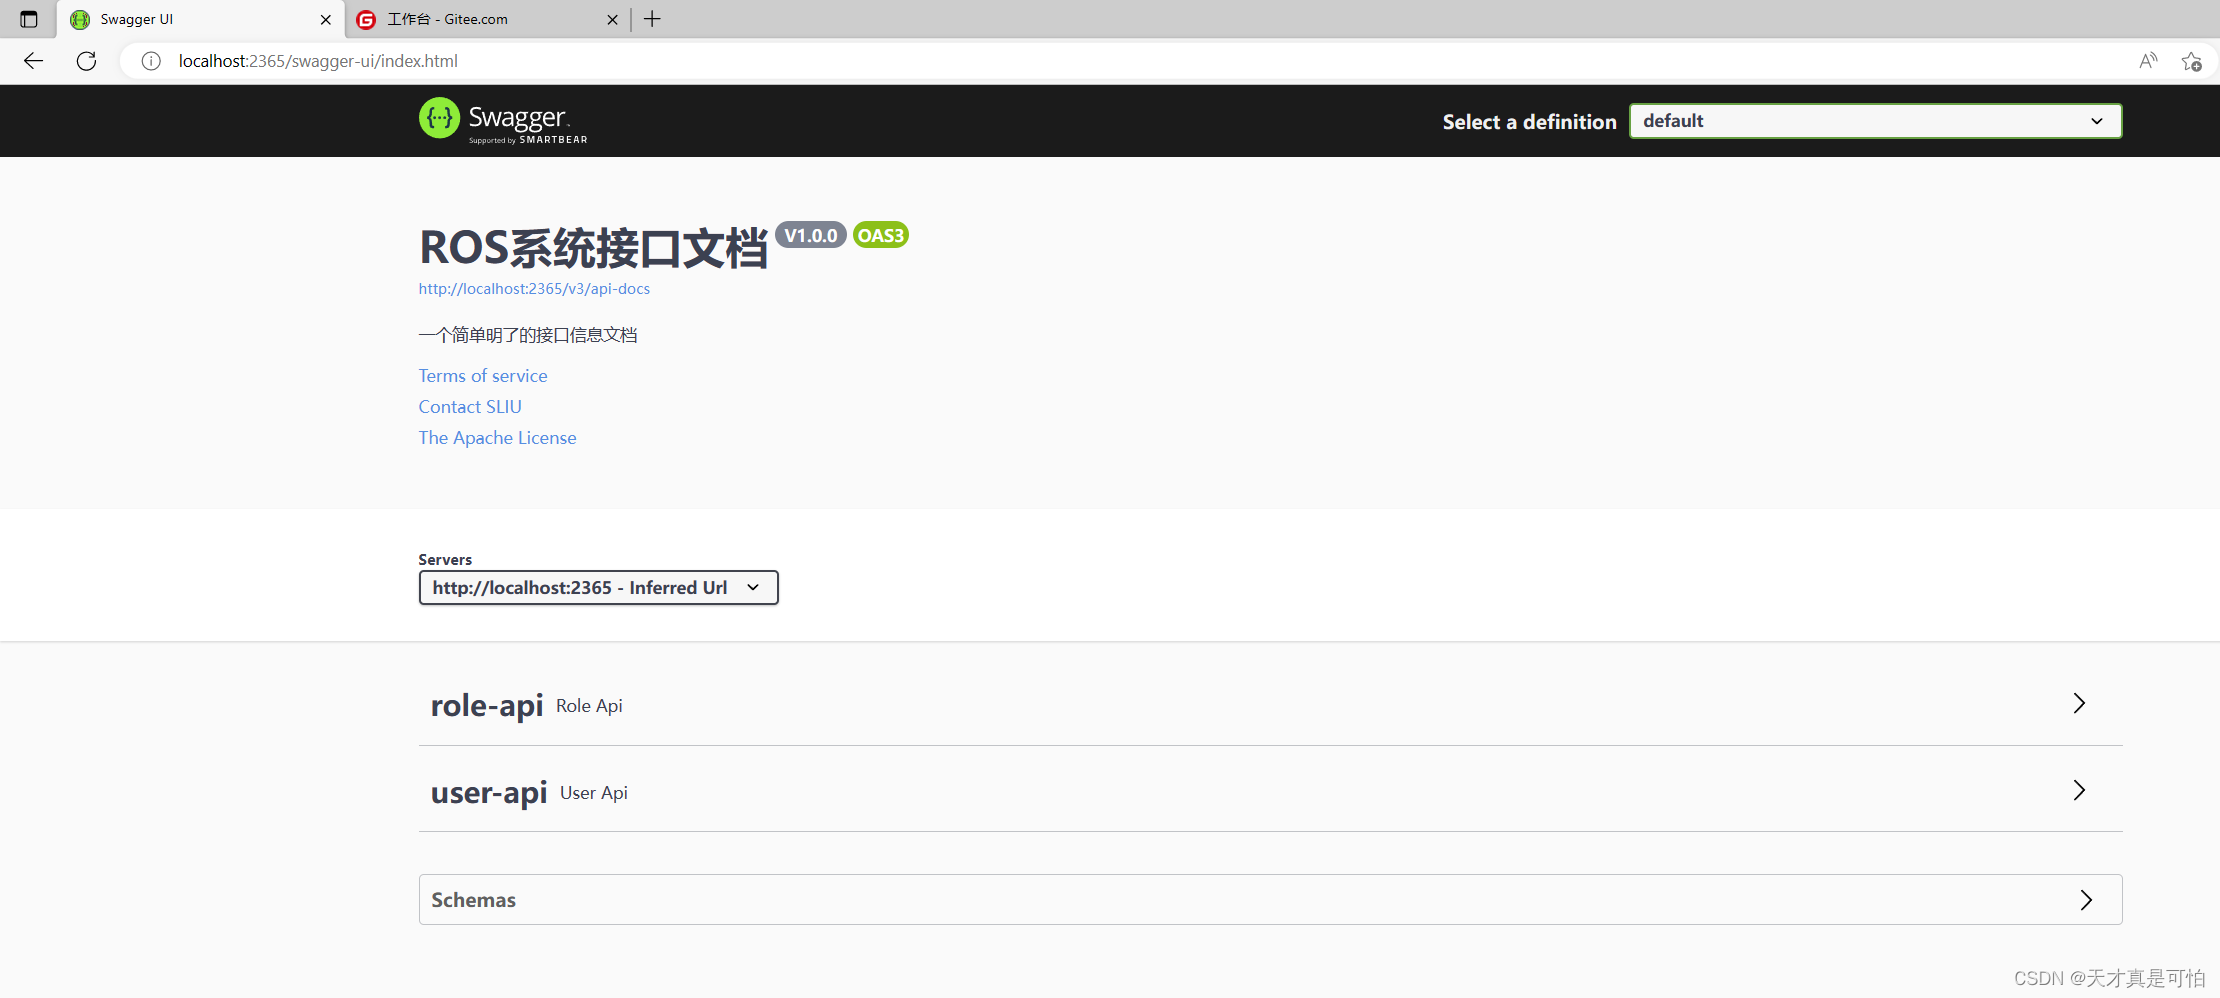
效果图:
引入Swagger遇到的困难:
描述:Failed to start bean 'documentationPluginsBootstrapper'; nested exception is java.lang.NullPointerException 没有这个bean,空指针了。
[17:37:45.470] ERROR org.springframework.boot.SpringApplication 821 reportFailure - Application run failed org.springframework.context.ApplicationContextException: Failed to start bean 'documentationPluginsBootstrapper'; nested exception is java.lang.NullPointerException
	at org.springframework.context.support.DefaultLifecycleProcessor.doStart(DefaultLifecycleProcessor.java:181) ~[spring-context-5.3.25.jar:5.3.25]
	at org.springframework.context.support.DefaultLifecycleProcessor.access$200(DefaultLifecycleProcessor.java:54) ~[spring-context-5.3.25.jar:5.3.25]
源码原因:
据网上资料找,3.0的Swagger已经不继承WebMvcConfig这个类,是继承了WebMvcConfigSupport类,从而改动了配置路径规则,然后报空指针,大概是这么个意思,想了解的可以去查一下具体原因。
解决报错的方法:
引入下面的配置,该配置是修改springboot的路径配置规则,springboot路径配置规则有两个,
path_pattern_parser , ant_path_matcher 。我们需要修改成 ant_path_matcher 路径配置规则。
spring:
  mvc:
    pathmatch:
      # 引入swagger3.0时加入的配置 localhost:2365/swagger-ui/index.html
      matching-strategy: ant_path_matcher
补充几点:
1. springfox-boot-starter 3.0.0 版本的swagger是最新版
2. 该版本已经不需要注解在启动文件上,例如:EnableOpenApi,EnableSwagger2等
3.该最新版本的官网资料:Swagger官网资料


 1454
1454

 被折叠的 条评论
为什么被折叠?
被折叠的 条评论
为什么被折叠?
 到【灌水乐园】发言


