


下载地址
安装
pcre
./configure && make && make install
nginx
./configure --prefix=/usr/local/webserver/nginx --with-cc-opt=-Wno-error --with-http_stub_status_module --with-http_ssl_module --with-pcre=/usr/local/src/pcre-8.45
make && make install
ubuntu16.04版本下nginx依赖的安装
apt-get install gcc
apt-get install libpcre3 libpcre3-dev
apt-get install zlib1g zlib1g-dev
sudo apt-get install openssl
#openssl-dev无法安装用libssl-dev代替
sudo apt-get install libssl-dev
apt-get install make
此处注意两个点:
- 编译选项
--with-cc-opt=-Wno-error - pcre安装目录
tomcat
依赖java,需要先安装java才能运行
tomcat包直接解压就行,不需要编译安装
配置
nginx
目录:/usr/local/webserver/nginx/html
备份默认配置,使用下面的配置
user www www;
worker_processes 1; #设置值和CPU核心数一致
error_log /usr/local/webserver/nginx/logs/nginx_error.log crit; #日志位置和日志级别
pid /usr/local/webserver/nginx/nginx.pid;
#Specifies the value for maximum file descriptors that can be opened by this process.
worker_rlimit_nofile 65535;
events
{
  use epoll;
  worker_connections 65535;
}
http
{
  include mime.types;
  default_type application/octet-stream;
  log_format main  '$remote_addr - $remote_user [$time_local] "$request" '
               '$status $body_bytes_sent "$http_referer" '
               '"$http_user_agent" $http_x_forwarded_for';

#charset gb2312;

  server_names_hash_bucket_size 128;
  client_header_buffer_size 32k;
  large_client_header_buffers 4 32k;
  client_max_body_size 8m;

  sendfile on;
  tcp_nopush on;
  keepalive_timeout 60;
  tcp_nodelay on;
  fastcgi_connect_timeout 300;
  fastcgi_send_timeout 300;
  fastcgi_read_timeout 300;
  fastcgi_buffer_size 64k;
  fastcgi_buffers 4 64k;
  fastcgi_busy_buffers_size 128k;
  fastcgi_temp_file_write_size 128k;
  gzip on;
  gzip_min_length 1k;
  gzip_buffers 4 16k;
  gzip_http_version 1.0;
  gzip_comp_level 2;
  gzip_types text/plain application/x-javascript text/css application/xml;
  gzip_vary on;

  #limit_zone crawler $binary_remote_addr 10m;
 #下面是server虚拟主机的配置
 server
  {
    listen 3000;#监听端口
    server_name localhost;#域名
    index index.html index.htm index.php;
    root /usr/local/webserver/nginx/html;#站点目录
      location ~ .*\.(php|php5)?$
    {
      #fastcgi_pass unix:/tmp/php-cgi.sock;
      fastcgi_pass 127.0.0.1:9000;
      fastcgi_index index.php;
      include fastcgi.conf;
    }
    location ~ .*\.(gif|jpg|jpeg|png|bmp|swf|ico)$
    {
      expires 30d;
  # access_log off;
    }
    location ~ .*\.(js|css)?$
    {
      expires 15d;
   # access_log off;
    }
    access_log off;
  }

}
测试配置文件

出现报错

添加www用户和组
groupadd -f www
useradd -g www www
修改index.html
<!DOCTYPE html>
<html>
<head>
<title>Welcome to nginx!</title>
<style>
    body {
        width: 35em;
        margin: 0 auto;
        font-family: Tahoma, Verdana, Arial, sans-serif;
    }
</style>
</head>
<body>
<h1 style="color:blue">nginx test</h1>
<img src="/images/jekins.jpg" height="200" width="200" />
</body>
</html>
tomcat
配置文件目录conf/server.xml
修改/apache-tomcat-10.0.23/webapps/ROOT/index.jsp
<!DOCTYPE html>
<html>
<head>
<title>Welcome to nginx!</title>
</head>
<body>

<h1 style="color:blue">tomcat test</h1>
<img src="/images/jekins.jpg" height="200" width="200" />

</body>
</html>
启动
nginx
nginx

注意:防火墙会影响端口的访问
# 查看防火墙状态
firewall-cmd --state
# 关闭防火墙
systemctl stop firewalld.service
# 禁止防火墙开机启动
systemctl disable firewalld.service
# 开放指定端口
firewall-cmd --zone=public --add-port=1935/tcp --permanent
# 关闭指定端口
firewall-cmd --remove-port=80/tcp --permanent
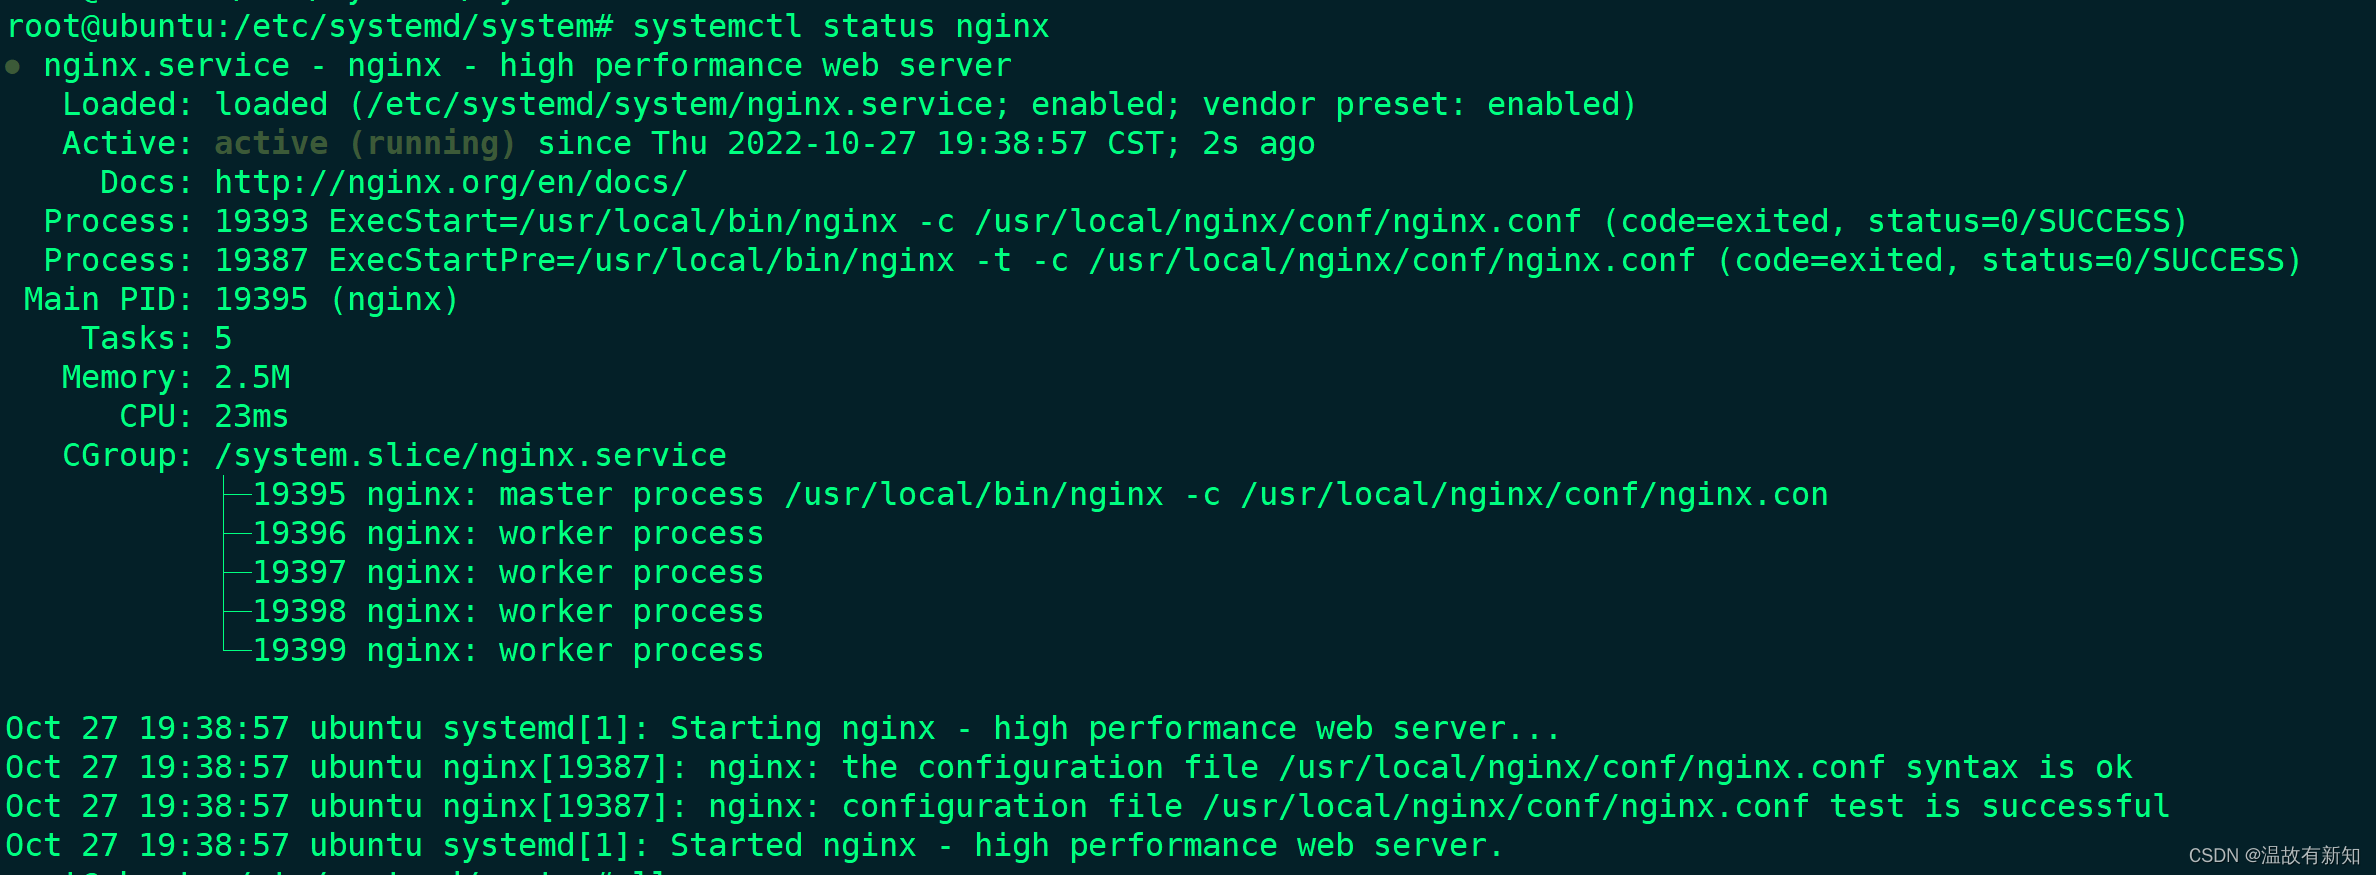
nginx设置开机自启
vim /etc/systemd/system/nginx.service
插入代码
[Unit]
Description=nginx - high performance web server
Documentation=http://nginx.org/en/docs/
After=network.target remote-fs.target nss-lookup.target

[Service]
Type=forking
PIDFile=/usr/local/nginx/nginx.pid
ExecStartPre=/usr/local/bin/nginx -t -c /usr/local/nginx/conf/nginx.conf
ExecStart=/usr/local/bin/nginx -c /usr/local/nginx/conf/nginx.conf
ExecReload=/bin/kill -s HUP $MAINPID
ExecStop=/bin/kill -s QUIT $MAINPID
PrivateTmp=true

[Install]
WantedBy=multi-user.target
执行下面命令
systemctl daemon-reload
systemctl enable nginx
systemctl start nginx
tomcat
./apache-tomcat-10.0.23/bin/startup.sh

其它命令
nginx
// 进程完成当前工作后再停止服务(推荐)
nginx -s quit
// 立即停止服务
nginx -s stop
// systemctl
systemctl stop nginx.service
// 杀进程
killall nginx
tomcat
./apache-tomcat-10.0.23/bin/shutdown.sh


 1万+
1万+


 被折叠的 条评论
为什么被折叠?
被折叠的 条评论
为什么被折叠?
 到【灌水乐园】发言


