


上一节我们分析了属性动画的基本用法,这些用法足以应付我们平时大多数动画需求,但是正如之前我们所说的,相比于补间动画,属性动画有了大幅改进,因此补间动画不能完成的功能,属性动画可以完成,今天我们就来学习一下属性动画的高级用法,看看如何实现一些补间动画所无法实现的功能。
ValueAnimator高级用法
补间动画只能对View对象进行动画操作,而属性动画就不再受这个限制,它可以对任意对象进行动画操作。下面我们就用ValueAnimator应用于Point对象,然后自定义View,onDraw()方法中根据这个Point对象的坐标值来进行绘制,利用Point对象画一条正玄曲线。
在开始前,我们先了解一下TypeEvaluator,TypeEvaluator用于告诉动画系统如何从初始值过渡到结束值。ValueAnimator.ofFloat()方法实现了初始值与结束值之间的平滑过渡,这个平滑过渡就是利用系统内置的FloatEvaluator实现的,那么我们看一下FloatEvaluator的源码:
/**
 * This evaluator can be used to perform type interpolation between <code>float</code> values.
 */
public class FloatEvaluator implements TypeEvaluator<Number> {

    /**
     * This function returns the result of linearly interpolating the start and end values, with
     * <code>fraction</code> representing the proportion between the start and end values. The
     * calculation is a simple parametric calculation: <code>result = x0 + t * (v1 - v0)</code>,
     * where <code>x0</code> is <code>startValue</code>, <code>x1</code> is <code>endValue</code>,
     * and <code>t</code> is <code>fraction</code>.
     *
     * @param fraction   The fraction from the starting to the ending values
     * @param startValue The start value; should be of type <code>float</code> or
     *                   <code>Float</code>
     * @param endValue   The end value; should be of type <code>float</code> or <code>Float</code>
     * @return A linear interpolation between the start and end values, given the
     *         <code>fraction</code> parameter.
     */
    public Float evaluate(float fraction, Number startValue, Number endValue) {
        float startFloat = startValue.floatValue();
        return startFloat + fraction * (endValue.floatValue() - startFloat);
    }
}
可以看到,FloatEvaluator实现了TypeEvaluator接口,然后重写evaluate()方法。evaluate()方法当中传入了三个参数,第一个参数fraction表示动画的完成度,我们根据它来计算当前动画的值应该是多少,第二第三个参数分别表示动画的初始值和结束值。那么FloatEvaluator的代码逻辑就是,用结束值减去初始值,算出它们之间的差值,然后乘以fraction这个系数,再加上初始值,那么就得到当前动画的值了。
ValueAnimator的ofFloat()和ofInt()方法,利用了系统内置的FloatEvaluator和IntEvaluator完成了动画的过渡。ValueAnimator中还有一个ofObject()方法,是用于对任意对象进行动画操作的,但是相比于浮点型或整型数据,对象的动画操作明显要更复杂一些,因为系统无法知道如何从初始对象过渡到结束对象,因此这个时候我们就需要实现一个自己的TypeEvaluator来告知系统如何进行过渡。
下面我们定义Point对象,用于管理点的坐标:
public class Point {
    private float x;
    private float y;

    public Point(float x, float y) {
        this.x = x;
        this.y = y;
    }

    public float getX() {
        return x;
    }

    public void setX(int x) {
        this.x = x;
    }

    public float getY() {
        return y;
    }

    public void setY(int y) {
        this.y = y;
    }


}
接下来定义PointSinEvaluator:
public class PointSinEvaluator implements TypeEvaluator {

    @Override
    public Object evaluate(float fraction, Object startValue, Object endValue) {
        Point startPoint = (Point) startValue;
        Point endPoint = (Point) endValue;
        float x = startPoint.getX() + fraction * (endPoint.getX() - startPoint.getX());
        float y = (float) (Math.sin(x * Math.PI / 180) * 100) + endPoint.getY() / 2;
        Point point = new Point(x, y);
        return point;
    }
}
PointSinEvaluator同样实现了TypeEvaluator接口并重写了evaluate()方法。evaluate()方法先是将startValue和endValue强转成Point对象,然后同样根据fraction来计算当前动画的x值,然后根据x值利用数学公司得到y的值,最后组装成一个Point对象作为当前对象返回。
接下来,我们就可以对Point对象尽心动画操作了,如从Point1过渡到Point2:
Point point1 = new Point(100, 100);
Point point2 = new Point(300, 300);
ValueAnimator anim = ValueAnimator.ofObject(new PointEvaluator(), point1, point2);
anim.setDuration(1000);
anim.start();下面,我们自定义SinView继承View,实现正选曲线:
public class SinView extends View {
public static final float RADIUS = 20f;
//圆的半径
private float radius = RADIUS;
private Point currentPoint;
//圆的画笔
private Paint mPaint;
//坐标轴画笔
private Paint linePaint;
private AnimatorSet animSet;
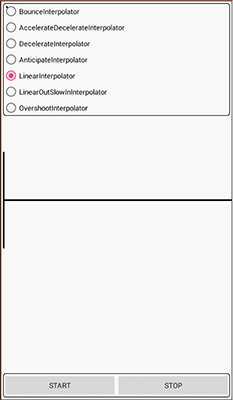
private TimeInterpolator interpolatorType = new LinearInterpolator();
public SinView(Context context, AttributeSet attrs) {
super(context, attrs);
mPaint = new Paint(Paint.ANTI_ALIAS_FLAG);
linePaint = new Paint(Paint.ANTI_ALIAS_FLAG);
linePaint.setColor(Color.BLACK);
linePaint.setStrokeWidth(5);
}
@Override
protected void onDraw(Canvas canvas) {
if (currentPoint == null) {
currentPoint = new Point(RADIUS, RADIUS);
drawCircle(canvas);
startAnimation();
} else {
drawCircle(canvas);
}
drawLine(canvas);//画坐标轴
}
/**
* 画坐标轴
*
* @param canvas
*/
private void drawLine(Canvas canvas) {
canvas.drawLine(10, getHeight() / 2, getWidth(), getHeight() / 2, linePaint);
canvas.drawLine(10, getHeight() / 2 - 150, 10, getHeight() / 2 + 150, linePaint);
canvas.drawPoint(currentPoint.getX(), currentPoint.getY(), linePaint);
}
public void startAnimation() {
Point startP = new Point(RADIUS, RADIUS);
Point endP = new Point(getWidth() - RADIUS, getHeight() - RADIUS);
//移动轨迹动画
ValueAnimator valueAnimator = ValueAnimator.ofObject(new PointSinEvaluator(), startP, endP);
valueAnimator.setRepeatCount(-1);
valueAnimator.setRepeatMode(ValueAnimator.REVERSE);
valueAnimator.addUpdateListener(new ValueAnimator.AnimatorUpdateListener() {
@Override
public void onAnimationUpdate(ValueAnimator animation) {
currentPoint = (Point) animation.getAnimatedValue();
postInvalidate();
}
});
//半径改变动画
ValueAnimator animScale = ValueAnimator.ofFloat(20f, 80f, 60f, 10f, 35f, 55f, 10f);
animScale.setRepeatCount(-1);
animScale.setRepeatMode(ValueAnimator.REVERSE);
animScale.setDuration(5000);
animScale.addUpdateListener(new ValueAnimator.AnimatorUpdateListener() {
@Override
public void onAnimationUpdate(ValueAnimator animation) {
radius = (float) animation.getAnimatedValue();
}
});
//动画集合
animSet = new AnimatorSet();
animSet.play(valueAnimator).with(animScale);
animSet.setDuration(5000);
animSet.setInterpolator(interpolatorType);//匀速变化
animSet.start();
}
private void drawCircle(Canvas canvas) {
float x = currentPoint.getX();
float y = currentPoint.getY();
canvas.drawCircle(x, y, radius, mPaint);
}在SinView的构造方法中,我们设置了实心圆的画笔和坐标轴的画笔,接着在onDraw()方法当中进行绘制。这里我们绘制的逻辑是由currentPoint这个对象控制的,如果currentPoint对象不等于空,那么就调用drawCircle()方法在currentPoint的坐标位置画出一个半径为20的圆,如果currentPoint对象是空,那么就调用startAnimation()方法来启动动画。
在startAnimation()方法中定义了一个startP和一个endP,坐标分别是View的左上角和右下角。们通过监听器对动画的过程进行了监听,每当Point值有改变的时候都会回调onAnimationUpdate()方法。在这个方法当中,我们对currentPoint对象进行了重新赋值,并调用了postInvalidate()方法,这样的话onDraw()方法就会重新调用,并且由于currentPoint对象的坐标已经改变了,那么绘制的位置也会改变,于是一个正选曲线动画效果也就实现了;正选曲线滑动的同时,我们对实心圆的半径进行动态改变,半径会在20f, 80f, 60f, 10f, 35f, 55f, 10f之间平滑过渡;最后通过动画集合AnimatorSet同时播放两个动画。
下面,我们在布局中引入SinView:
 <com.example.liuliu.xi.cityofanimation.view.SinView
        android:id="@+id/sin_view"
        android:layout_width="match_parent"
        android:layout_height="match_parent" />
最后运行一下程序,效果如下图所示:
(图传错了,没有颜色变化,实心圆一直是黑色)
ObjectAnimator的高级用法
ObjectAnimator内部的工作机制是通过寻找特定属性的get和set方法,然后通过方法不断地对值进行改变,从而实现动画效果。现在我们给SinView定义一个color属性,并提供它的get和set方法,用于动态改变实心圆的颜色。
添加color属性后,SinView:
public class SinView extends View {
    public static final float RADIUS = 20f;
    //圆的半径
    private float radius = RADIUS;
    private Point currentPoint;
    //圆的画笔
    private Paint mPaint;
    //坐标轴画笔
    private Paint linePaint;
    private AnimatorSet animSet;
    private TimeInterpolator interpolatorType = new LinearInterpolator();
    //圆的颜色
    private int color;

    public SinView(Context context, AttributeSet attrs) {
        super(context, attrs);
        mPaint = new Paint(Paint.ANTI_ALIAS_FLAG);
        linePaint = new Paint(Paint.ANTI_ALIAS_FLAG);
        linePaint.setColor(Color.BLACK);
        linePaint.setStrokeWidth(5);
    }

    public int getColor() {
        return color;
    }

    public void setColor(int color) {
        this.color = color;
        mPaint.setColor(this.color);
    }

    @Override
    protected void onDraw(Canvas canvas) {
        if (currentPoint == null) {
            currentPoint = new Point(RADIUS, RADIUS);
            drawCircle(canvas);
            startAnimation();
        } else {
            drawCircle(canvas);
        }

        drawLine(canvas);//画坐标轴
    }

    /**
     * 画坐标轴
     *
     * @param canvas
     */
    private void drawLine(Canvas canvas) {
        canvas.drawLine(10, getHeight() / 2, getWidth(), getHeight() / 2, linePaint);
        canvas.drawLine(10, getHeight() / 2 - 150, 10, getHeight() / 2 + 150, linePaint);
        canvas.drawPoint(currentPoint.getX(), currentPoint.getY(), linePaint);

    }

    public void startAnimation() {
        Point startP = new Point(RADIUS, RADIUS);
        Point endP = new Point(getWidth() - RADIUS, getHeight() - RADIUS);
        //移动轨迹动画
        ValueAnimator valueAnimator = ValueAnimator.ofObject(new PointSinEvaluator(), startP, endP);
        valueAnimator.setRepeatCount(-1);
        valueAnimator.setRepeatMode(ValueAnimator.REVERSE);
        valueAnimator.addUpdateListener(new ValueAnimator.AnimatorUpdateListener() {
            @Override
            public void onAnimationUpdate(ValueAnimator animation) {
                currentPoint = (Point) animation.getAnimatedValue();
                postInvalidate();
            }
        });
        //颜色改变动画,不断改变color属性值
        ObjectAnimator animColor = ObjectAnimator.ofObject(this, "color", new ArgbEvaluator(), Color.GREEN,
                Color.YELLOW, Color.BLUE, Color.WHITE, Color.RED);
        animColor.setRepeatCount(-1);
        animColor.setRepeatMode(ValueAnimator.REVERSE);
        //半径改变动画
        ValueAnimator animScale = ValueAnimator.ofFloat(20f, 80f, 60f, 10f, 35f, 55f, 10f);
        animScale.setRepeatCount(-1);
        animScale.setRepeatMode(ValueAnimator.REVERSE);
        animScale.setDuration(5000);
        animScale.addUpdateListener(new ValueAnimator.AnimatorUpdateListener() {
            @Override
            public void onAnimationUpdate(ValueAnimator animation) {
                radius = (float) animation.getAnimatedValue();
            }
        });
        //动画集合
        animSet = new AnimatorSet();
        animSet.play(valueAnimator).with(animColor).with(animScale);
        animSet.setDuration(5000);
        animSet.setInterpolator(interpolatorType);//匀速变化
        animSet.start();

    }

    private void drawCircle(Canvas canvas) {
        float x = currentPoint.getX();
        float y = currentPoint.getY();
        canvas.drawCircle(x, y, radius, mPaint);
    }
}
代码变动不大,添加了color属性,并提供了get、set方法,set方法用于改变实心圆的颜色;在startAnimation()中添加了实心圆颜色过渡的动画,利用ArgbEvaluator实现Color.GREEN,Color.YELLOW, Color.BLUE, Color.WHITE, Color.RED的平滑过渡。
运行一下,看看效果:
支付动画实例
下面,我们利用ValueAnimator和ObjectAnimator实现支付动画,效果图如下:
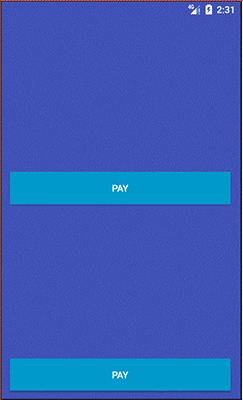
动画分为两部分,支付成功、支付失败。支付成功时,先画圆、再画左线、再画右线,然后整个View先放大到1.1倍,再还原,PaySuccessView如下:
public class PaySuccessView extends View {
    private static final float PADDING = 40;//圆距离父布局的距离
    private static final int DEFAULT_RADIUS = 150;//圆的默认半径
    private Paint mCirclePanit;
    private Paint mLinePaint;
    private float mCenterX, mCenterY;//中心点
    private float mRadius = 150;//圆的半径
    private final RectF mRectF = new RectF();
    private int mDegree;
    private Float mLeftValue = 0f;
    private Float mRightValue = 0f;
    private AnimatorSet mAnimatorSet = new AnimatorSet();
    private ValueAnimator mCircleAnim;
    private ValueAnimator mLineLeftAnimator;
    private ValueAnimator mLineRightAnimator;

    public PaySuccessView(Context context, AttributeSet attrs) {
        super(context, attrs);
        mCirclePanit = new Paint();
        mCirclePanit.setAntiAlias(true);
        mCirclePanit.setStrokeJoin(Paint.Join.ROUND);
        mCirclePanit.setStrokeWidth(5);
        mCirclePanit.setColor(Color.WHITE);
        mCirclePanit.setStyle(Paint.Style.STROKE);

        mLinePaint = new Paint();
        mLinePaint.setAntiAlias(true);
        mLinePaint.setStrokeJoin(Paint.Join.ROUND);
        mLinePaint.setStrokeWidth(5);
        mLinePaint.setColor(Color.WHITE);
        mLinePaint.setStyle(Paint.Style.STROKE);
    }

    @Override
    protected void onDraw(Canvas canvas) {
        super.onDraw(canvas);
        mRectF.left = mCenterX - mRadius;//圆的最左侧
        mRectF.top = mCenterY - mRadius;//圆的顶部
        mRectF.right = mCenterX + mRadius;//圆的最右侧
        mRectF.bottom = mCenterY + mRadius;//圆的底部
        canvas.drawArc(mRectF, 0, mDegree, false, mCirclePanit);//画圆
        canvas.drawLine(mCenterX - mRadius / 2, mCenterY,
                mCenterX - mRadius / 2 + mLeftValue, mCenterY + mLeftValue, mLinePaint);//画左线
        canvas.drawLine(mCenterX, mCenterY + mRadius / 2,
                mCenterX + mRightValue, mCenterY + mRadius / 2 - (3f / 2f) * mRightValue, mLinePaint);//画右线
    }

    @Override
    protected void onMeasure(int widthMeasureSpec, int heightMeasureSpec) {
        super.onMeasure(widthMeasureSpec, heightMeasureSpec);
        reMeasure();
    }

    private void reMeasure() {
        int mViewWidth = getWidth();
        int mViewHeight = getHeight();
        mCenterX = mViewWidth / 2;
        mCenterY = mViewHeight / 2;

    }

    public void startAnim(int radius) {
        radius = radius <= 0 ? DEFAULT_RADIUS : radius;
        this.mRadius = radius - PADDING;
        if (null != mAnimatorSet && mAnimatorSet.isRunning()) {
            return;
        }
        reset();
        reMeasure();
        mCircleAnim = ValueAnimator.ofInt(0, 360);
        mLineLeftAnimator = ValueAnimator.ofFloat(0, this.mRadius / 2f);//(起始值,终点值)
        mLineRightAnimator = ValueAnimator.ofFloat(0, this.mRadius / 2f);
        mCircleAnim.setDuration(700);
        mLineLeftAnimator.setDuration(350);
        mLineRightAnimator.setDuration(350);
        mCircleAnim.addUpdateListener(new ValueAnimator.AnimatorUpdateListener() {
            @Override
            public void onAnimationUpdate(ValueAnimator animation) {
                mDegree = (Integer) animation.getAnimatedValue();
                invalidate();
            }
        });
        mLineLeftAnimator.addUpdateListener(new ValueAnimator.AnimatorUpdateListener() {
            @Override
            public void onAnimationUpdate(ValueAnimator valueAnimator) {
                mLeftValue = (Float) valueAnimator.getAnimatedValue();
                invalidate();
            }
        });
        mLineRightAnimator.addUpdateListener(new ValueAnimator.AnimatorUpdateListener() {
            @Override
            public void onAnimationUpdate(ValueAnimator animation) {
                mRightValue = (Float) animation.getAnimatedValue();
                invalidate();
            }
        });
        mAnimatorSet.play(mCircleAnim).before(mLineLeftAnimator);
        mAnimatorSet.play(mLineRightAnimator).after(mLineLeftAnimator);
        mAnimatorSet.addListener(new AnimatorListenerAdapter() {
            @Override
            public void onAnimationEnd(Animator animation) {
                SuccessAnim();
            }
        });
        mAnimatorSet.start();
    }

    private void SuccessAnim() {
        ObjectAnimator scaleXAnim = ObjectAnimator.ofFloat(this, "scaleX", 1.0f, 1.1f, 1.0f);
        ObjectAnimator scaleYAnim = ObjectAnimator.ofFloat(this, "scaleY", 1.0f, 1.1f, 1.0f);
        AnimatorSet set = new AnimatorSet();
        set.setDuration(500);
        set.setInterpolator(new BounceInterpolator());
        set.playTogether(scaleXAnim, scaleYAnim);
        set.start();
    }

    public void reset() {
        mDegree = 0;
        mLeftValue = 0f;
        mRightValue = 0f;
        mCirclePanit.setColor(Color.WHITE);
        mLinePaint.setColor(Color.WHITE);
    }
}
支付失败时,先画圆,再左线,再右线,然后整个View左右移动若干距离,PayFailureView:
public class PayFailureView extends View {
    private static final float PADDING = 40;//圆距离父布局边界距离
    private static final int DEFAULT_RADIUS = 150;//默认圆大小
    private Paint mCirclePanit;
    private Paint mLinePaint;
    private float factor = 0.8f;
    private float temp;
    private float mCenterX, mCenterY;
    private float mRadius = 250;//圆的半径
    private final RectF mRectF = new RectF();
    private int mDegree;
    private Float mLeftValue = 0f;
    private Float mRightValue = 0f;
    private AnimatorSet mAnimatorSet = new AnimatorSet();

    private ValueAnimator mCircleAnim;
    private ValueAnimator mLineLeftAnimator;
    private ValueAnimator mLineRightAnimator;

    private PathMeasure pathLeftMeasure;
    private PathMeasure pathRightMeasure;
    private float[] mLeftPos = new float[2];
    private float[] mRightPos = new float[2];


    public PayFailureView(Context context, AttributeSet attrs) {
        this(context, attrs, 0);
    }

    public PayFailureView(Context context, AttributeSet attrs, int defStyleAttr) {
        super(context, attrs, defStyleAttr);
        mCirclePanit = new Paint();
        mCirclePanit.setAntiAlias(true);
        mCirclePanit.setStrokeJoin(Paint.Join.ROUND);
        mCirclePanit.setStrokeWidth(5);
        mCirclePanit.setColor(Color.WHITE);
        mCirclePanit.setStyle(Paint.Style.STROKE);

        mLinePaint = new Paint();
        mLinePaint.setAntiAlias(true);
        mLinePaint.setStrokeJoin(Paint.Join.ROUND);
        mLinePaint.setStrokeWidth(5);
        mLinePaint.setColor(Color.WHITE);
        mLinePaint.setStyle(Paint.Style.STROKE);
        reset();
        reMeasure();
    }

    @Override
    protected void onDraw(Canvas canvas) {
        super.onDraw(canvas);
        mRectF.left = mCenterX - mRadius;
        mRectF.top = mCenterY - mRadius;
        mRectF.right = mCenterX + mRadius;
        mRectF.bottom = mCenterY + mRadius;
        canvas.drawArc(mRectF, 0, mDegree, false, mCirclePanit);
        if (mLeftPos[1] > (mCenterY - temp) && mRightPos[1] > (mCenterY - temp)) {
            canvas.drawLine(mCenterX - temp, mCenterY - temp, mLeftPos[0], mLeftPos[1], mLinePaint);
            canvas.drawLine(mCenterX + temp, mCenterY - temp, mRightPos[0], mRightPos[1], mLinePaint);
        }
    }

    @Override
    protected void onMeasure(int widthMeasureSpec, int heightMeasureSpec) {
        super.onMeasure(widthMeasureSpec, heightMeasureSpec);
        reMeasure();
    }

    private void reMeasure() {
        int mViewWidth = getWidth();
        int mViewHeight = getHeight();
        mCenterX = mViewWidth / 2;
        mCenterY = mViewHeight / 2;

        temp = mRadius / 2.0f * factor;
        Path path = new Path();
        path.moveTo(mCenterX - temp, mCenterY - temp);
        path.lineTo(mCenterX + temp, mCenterY + temp);
        pathLeftMeasure = new PathMeasure(path, false);

        path = new Path();
        path.moveTo(mCenterX + temp, mCenterY - temp);
        path.lineTo(mCenterX - temp, mCenterY + temp);
        pathRightMeasure = new PathMeasure(path, false);


    }

    public void startAnim(int radius) {
        radius = radius <= 0 ? DEFAULT_RADIUS : radius;
        this.mRadius = radius - PADDING;
        if (null != mAnimatorSet && mAnimatorSet.isRunning()) {
            return;
        }
        reset();
        reMeasure();
        mCircleAnim = ValueAnimator.ofInt(0, 360);
        mLineLeftAnimator = ValueAnimator.ofFloat(0, pathLeftMeasure.getLength());
        mLineRightAnimator = ValueAnimator.ofFloat(0, pathRightMeasure.getLength());
        mCircleAnim.setDuration(700);
        mLineLeftAnimator.setDuration(350);
        mLineRightAnimator.setDuration(350);
        mCircleAnim.addUpdateListener(new ValueAnimator.AnimatorUpdateListener() {
            @Override
            public void onAnimationUpdate(ValueAnimator animation) {
                mDegree = (Integer) animation.getAnimatedValue();
                invalidate();
            }
        });
        mLineLeftAnimator.addUpdateListener(new ValueAnimator.AnimatorUpdateListener() {
            @Override
            public void onAnimationUpdate(ValueAnimator valueAnimator) {
                mLeftValue = (Float) valueAnimator.getAnimatedValue();
                pathLeftMeasure.getPosTan(mLeftValue, mLeftPos, null);
                invalidate();
            }
        });
        mLineRightAnimator.addUpdateListener(new ValueAnimator.AnimatorUpdateListener() {
            @Override
            public void onAnimationUpdate(ValueAnimator animation) {
                mRightValue = (Float) animation.getAnimatedValue();
                pathRightMeasure.getPosTan(mRightValue, mRightPos, null);
                invalidate();
            }
        });
        mAnimatorSet.play(mCircleAnim).before(mLineLeftAnimator);
        mAnimatorSet.play(mLineRightAnimator).after(mLineLeftAnimator);
        mAnimatorSet.addListener(new AnimatorListenerAdapter() {
            @Override
            public void onAnimationEnd(Animator animation) {
                failureAnim();
            }
        });
        mAnimatorSet.start();
    }

    private void failureAnim() {
        float currentX = this.getTranslationX();
        ObjectAnimator tansXAnim = ObjectAnimator.ofFloat(this, "translationX", currentX + 15);
        tansXAnim.setDuration(1000);
        tansXAnim.setInterpolator(new CycleInterpolator(3));
        tansXAnim.start();
    }

    public void reset() {
        mDegree = 0;
        mLeftValue = 0f;
        mRightValue = 0f;
        pathLeftMeasure = null;
        pathRightMeasure = null;
    }
}
属性动画的高级用法至此,也就介绍完了,谢谢大家关注!
代码地址:https://github.com/xiyy/CityOfAnimation


 被折叠的 条评论
为什么被折叠?
被折叠的 条评论
为什么被折叠?
 到【灌水乐园】发言


