


2018年2月9日
【目的】
经过一个月的学习,已经掌握了spring、springmvc和Mybatis三大框架的基础了,下面总结一下框架开发的步骤与要点,帮助记忆开发流程:
【0】架构设计与思路
1、数据存储:MySQL数据库;
2、ORM:Mybatis框架实现数据持久化;
3、Spring Core:采用Ioc和AOP统一管理JavaBean;
4、Web框架:采用SpringMVC进行Web请求的接收和处理;
5、前端框架:JSP作载体,使用jQuery以及HTML5、CSS3实现页面的展示与交互;
【1】新建Web Project,导入相应jar包:
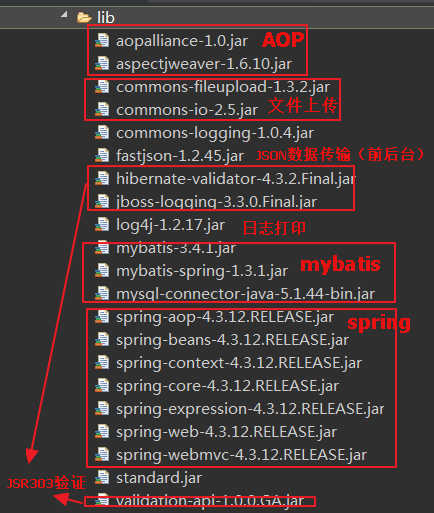
图1
(还需要补充两个jar包:JSTL.jar、commons-lang-2.3.jar)
【2】web.xml:
完成工作:1、配置了SpringMVC的核心控制器DispatchServlet、字符编码过滤器、指定Spring配置文件所在位置 和 配置ContextLoaderListener 等等;
<?xml version="1.0" encoding="UTF-8"?>
<web-app xmlns:xsi="http://www.w3.org/2001/XMLSchema-instance"
    xmlns="http://java.sun.com/xml/ns/javaee"
    xsi:schemaLocation="http://java.sun.com/xml/ns/javaee http://java.sun.com/xml/ns/javaee/web-app_2_5.xsd"
    id="WebApp_ID" version="2.5">

      <!-- 这个指定了log4j.xml放置的目录 -->
    <context-param>
		<param-name>log4jConfigLocation</param-name>
		<param-value>classpath:log4j.properties</param-value>
	</context-param>
	 <!-- 一定要加上这个listener -->
	<listener>
	    <listener-class>
	        org.springframework.web.util.Log4jConfigListener
	    </listener-class>
	</listener>

    <!-- 配置 DispatcherServlet -->
    <servlet>
        <servlet-name>springmvc</servlet-name>
        <servlet-class>org.springframework.web.servlet.DispatcherServlet</servlet-class>
        <init-param>
            <param-name>contextConfigLocation</param-name>
            <param-value>classpath:springmvc-servlet.xml</param-value>
        </init-param>
        <!--容器启动时就被加载了    -->
        <load-on-startup>1</load-on-startup>
    </servlet>
    <servlet-mapping>
        <servlet-name>springmvc</servlet-name>
        <url-pattern>/</url-pattern>
    </servlet-mapping>

   	<filter>
		<filter-name>springUtf8Encoding</filter-name>
		<filter-class>org.springframework.web.filter.CharacterEncodingFilter</filter-class>
		<init-param>
			<param-name>encoding</param-name>
			<param-value>UTF-8</param-value>
		</init-param>
		<init-param>
			<param-name>forceEncoding</param-name>
			<param-value>true</param-value>
		</init-param>
	</filter>
	<filter-mapping>
		<filter-name>springUtf8Encoding</filter-name>
		<url-pattern>/*</url-pattern>
	</filter-mapping>

    <welcome-file-list>
    	<welcome-file>/WEB-INF/jsp/login.jsp</welcome-file>
    </welcome-file-list>

    <context-param>
    	<param-name>contextConfigLocation</param-name>
    	<param-value>classpath:applicationContext-*.xml</param-value>
    </context-param>
    <!-- 配置Spring的ContextLoaderListener监听器,初始化spring容器 -->
    <listener>
    	<listener-class>
    	 	org.springframework.web.context.ContextLoaderListener
    	</listener-class>
    </listener>

</web-app>
【3】配置文件(/resources):
一、/resources/applicationContext-mybatis.xml:
--spring的配置文件,完成工作:配置数据源对象、事务管理、Mybatis的配置信息等等。下面分4个模块拆分讲解Spring配置内容:
(0)命名空间
<?xml version="1.0" encoding="UTF-8"?>
<beans xmlns="http://www.springframework.org/schema/beans"
	xmlns:xsi="http://www.w3.org/2001/XMLSchema-instance"
 	xmlns:context="http://www.springframework.org/schema/context"
 	xmlns:aop="http://www.springframework.org/schema/aop"
    xmlns:tx="http://www.springframework.org/schema/tx"
    xmlns:p="http://www.springframework.org/schema/p"
	xsi:schemaLocation="http://www.springframework.org/schema/beans
			http://www.springframework.org/schema/beans/spring-beans.xsd
			http://www.springframework.org/schema/context
        	http://www.springframework.org/schema/context/spring-context-4.0.xsd
        	http://www.springframework.org/schema/aop
        	http://www.springframework.org/schema/aop/spring-aop-4.2.xsd
   	        http://www.springframework.org/schema/tx
        	http://www.springframework.org/schema/tx/spring-tx.xsd
        ">
              //**配置信息
</beans>
(1)数据源相关配置
    <!-- 读取数据库配置文件 -->
    <context:property-placeholder location="classpath:database.properties"/>

	<!-- 获取数据源(dbcp连接池) -->
	<bean id="dataSource"
			class="org.apache.commons.dbcp.BasicDataSource"
			destroy-method="close" scope="singleton">
		<property name="driverClassName" value="${jdbc.driver}"></property>
		<property name="url" value="${jdbc.url}"></property>
		<property name="username" value="${jdbc.username}"></property>
		<property name="password" value="${jdbc.password}"></property>
		<property name="initialSize" value="${initialSize}"></property>
		<property name="maxActive" value="${maxActive}"></property>
		<property name="maxIdle" value="${maxIdle}"></property>
		<property name="minIdle" value="${minIdle}"></property>
		<property name="maxWait" value="${maxWait}"></property>
		<property name="removeAbandoned" value="${removeAbandoned}"></property>
		<property name="removeAbandonedTimeout" value="${removeAbandonedTimeout}"></property>
		<!-- sql心跳 -->
		<property name="testWhileIdle" value="ture"></property>
		<property name="testOnBorrow" value="false"></property>
		<property name="testOnReturn" value="false"></property>
		<property name="validationQuery" value="select 1"></property>
		<property name="timeBetweenEvictionRunsMillis" value="60000"></property>
		<property name="numTestsPerEvictionRun" value="${maxActive}"></property>
	</bean>
database.properties内容:
jdbc.driver=com.mysql.jdbc.Driver
jdbc.url=jdbc:mysql://localhost:3306/test
jdbc.username=root
jdbc.password=
initialSize=0
maxActive=8
maxIdle=8
minIdle=5
maxWait=-1
removeAbandoned=true
removeAbandonedTimeout=200
(2)事务管理相关配置
	<bean id="transactionManager"
	 		class="org.springframework.jdbc.datasource.DataSourceTransactionManager">
		<property name="dataSource" ref="dataSource"></property>
	</bean>
	<!--AOP 事务管理 -->
	<aop:aspectj-autoproxy></aop:aspectj-autoproxy>
	<aop:config proxy-target-class="true">
		<aop:pointcut
			expression="execution(**com.smbms.service..*(..)) " id="transService"/>
		<aop:advisor advice-ref="txAdvice" pointcut-ref="transService"/>
	</aop:config>
		<tx:advice id="txAdvice" transaction-manager="transactionManager">
		<tx:attributes>
			<tx:method name="smbms*"
				propagation="REQUIRED" rollback-for="Exception"></tx:method>
		</tx:attributes>
	</tx:advice>
(3)配置Mybatis的SQLSessionFactoryBean
	<!-- 配置Mybatis的SQLSessionFactoryBean -->
	<bean id="sqlSessionFactory" class="org.mybatis.spring.SqlSessionFactoryBean">
		<property name="dataSource" ref="dataSource"></property>
		<property name="configLocation" value="claspath:mybatis-config.xml"></property>
	</bean>
(4)配置Mybatis的MapperScannerConfigurer
	<!-- 配置Mybatis的MapperScannerConfigurer -->
	<bean class="org.mybatis.spring.mapper.MapperScannerConfigurer">
		<property name="basePackage" value="com.smbms.dao"></property>
	</bean>
二、/resources/springmvc-servlet.xml:
(0)命名空间:
<?xml version="1.0" encoding="UTF-8"?>
<beans  xmlns="http://www.springframework.org/schema/beans"
    xmlns:xsi="http://www.w3.org/2001/XMLSchema-instance"
    xmlns:context="http://www.springframework.org/schema/context"
    xmlns:mvc="http://www.springframework.org/schema/mvc"
    xsi:schemaLocation="http://www.springframework.org/schema/beans
    http://www.springframework.org/schema/beans/spring-beans.xsd
        http://www.springframework.org/schema/context
        http://www.springframework.org/schema/context/spring-context-4.0.xsd
        http://www.springframework.org/schema/mvc
        http://www.springframework.org/schema/mvc/spring-mvc-4.0.xsd">
</beans>
(1)配置 <mvc:annotation-driven> 标签:注解启动
    <!-- 配置  <mvc:annotation-driven> 标签:注解启动-->
    <mvc:annotation-driven></mvc:annotation-driven>
(2) <mvc:resources/>标签:mvc静态资源访问
   <!-- <mvc:resources/>标签:mvc静态资源访问   -->
    <mvc:resources mapping="/statics/**" location="/statics/"/>
(3) 配置MultipartResolver:文件上传
	<!-- 配置MultipartResolver:文件上传 -->
  	<bean id="multipartResolver"
  	  class="org.springframework.web.multipart.commons.CommonsMultipartResolver">
  	 	<property name="maxUploadSize" value="5000000"></property>
  	 	<property name="defaultEncoding" value="UTF-8"></property>
  	 </bean>
(4)配置多视图解析器--ContentNegotiatingViewResolver 由于springmvc可以根据请求报文的Accept属性值,将处理方法的返回值以XML、JSON、HTML等形式输出响应,所以可以通过设置请求报文的Accept属性值来 控制服务端返回的数据格式,这是通过强大的多视图解释器ContentNegotiatingViewResolver来进行灵活处理。
	<!-- 配置MultipartResolver:文件上传 -->
  	<bean id="multipartResolver"
  	  class="org.springframework.web.multipart.commons.CommonsMultipartResolver">
  	 	<property name="maxUploadSize" value="5000000"></property>
  	 	<property name="defaultEncoding" value="UTF-8"></property>
  	 </bean>
  	<bean class="org.springframework.web.servlet.view.ContentNegotiatingViewResolver">
  		<property name="favorParameter" value="true"></property>
  		<property name="defaultContentType" value="text/html"></property>
  		<property name="mediaTypes">
  			<map>
  				<entry key="html" value="text.html;charset=UTF-8"></entry>
  				<entry key="json" value="application/json;charset=UTF-8"></entry>
  				<entry key="xml" value="application/xml;charset=UTF-8"></entry>
  			</map>
  		</property>
  		<property name="viewResolvers">
  			<list>
			    <!-- 配置视图解析器: 如何把 handler 方法返回值解析为实际的物理视图 -->
			    <!--prefix 前缀+suffix 后缀  -->
			    <bean class="org.springframework.web.servlet.view.InternalResourceViewResolver">
			        <property name="prefix" value="/WEB-INF/jsp/"></property>
			        <property name="suffix" value=".jsp"></property>
			    </bean>
  			</list>
  		</property>
  	</bean>
<mvc:interceptors> <mvc:interceptor>
<mvc:mapping path="/sys/**"/>
<bean class="com.smbms.interceptor.SysInterceptor"></bean>
</mvc:interceptor>
</mvc:interceptors>
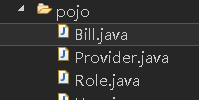
【4】数据对象模型(com.smbms.pojo)
【5】DAO数据访问接口(com.smbms.dao)

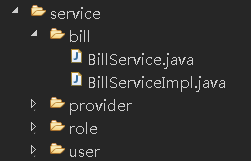
【6】系统服务接口(com.smbms.Service)
【7】前端控制器(com.smbms.Controller)

【8】系统工具类(com.smbms.tools)
tools包放置系统所有的公共对象和资源,以及工具类:分页、常量等等,此处不详述。
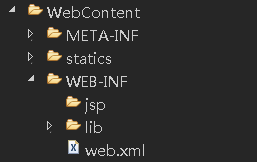
【9】前端页面(/WEB-INF/jsp)和静态资源文件(/WebContent/statics)
通过上述步骤,SSM框架便搭建完成。后续博文跟进系统功能来验证框架(电路)。


 289
289

 被折叠的 条评论
为什么被折叠?
被折叠的 条评论
为什么被折叠?
 到【灌水乐园】发言


