


最近公司由于发展需要,希望能通过SIP通话的方式来替代传统的电话模式,先简单介绍一个SIP。SIP(Session Initiation Protocol,会话初始协议)是由IETF(Internet Engineering Task Force,因特网工程任务组)制定的多媒体通信协议。它是一个基于文本的应用层控制协议,用于创建、修改和释放一个或多个参与者的会话。SIP 是一种源于互联网的IP 语音会话控制协议,具有灵活、易于实现、便于扩展等特点。
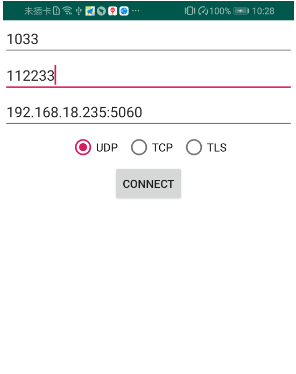
由于没有这方面的经验,在领导的推荐下,决定开始集成linphone到我们的项目里。开始也是万般艰辛,各种百度各种官网查资料,由于本地环境问题,官网下载的demo一直运行不了,然后在项目了引用也一直下载不成功,最后是通过maven仓库直接找到对应的linphoneSDK下载引用附上地址,再结合官网的demo成功的。先附上demo的截图:
公司是有现成的服务器的,所以我准备直接登陆可以实现了。
demo的主要流程就是注册
/**
     * 注册
     */
    private void configureAccount() {
        // At least the 3 below values are required
        mAccountCreator.setUsername(mUsername.getText().toString());
        mAccountCreator.setDomain(mDomain.getText().toString());
        mAccountCreator.setPassword(mPassword.getText().toString());

        // By default it will be UDP if not set, but TLS is strongly recommended
        switch (mTransport.getCheckedRadioButtonId()) {
            case R.id.transport_udp:
                mAccountCreator.setTransport(TransportType.Udp);
                break;
            case R.id.transport_tcp:
                mAccountCreator.setTransport(TransportType.Tcp);
                break;
            case R.id.transport_tls:
                mAccountCreator.setTransport(TransportType.Tls);
                break;
        }

        // This will automatically create the proxy config and auth info and add them to the Core
        ProxyConfig cfg = mAccountCreator.createProxyConfig();
        // Make sure the newly created one is the default
        //注册到服务器
        LinphoneService.getCore().setDefaultProxyConfig(cfg);
    }
根据回调的信息查看结果
mCoreListener = new CoreListenerStub() {
/**
* 监听注册是否成功
* @param core
* @param cfg
* @param state
* @param message
*/
@Override
public void onRegistrationStateChanged(Core core, ProxyConfig cfg, RegistrationState state, String message) {
if (state == RegistrationState.Ok) {
finish();
} else if (state == RegistrationState.Failed) {
Toast.makeText(ConfigureAccountActivity.this, "Failure: " + message, Toast.LENGTH_LONG).show();
}
}
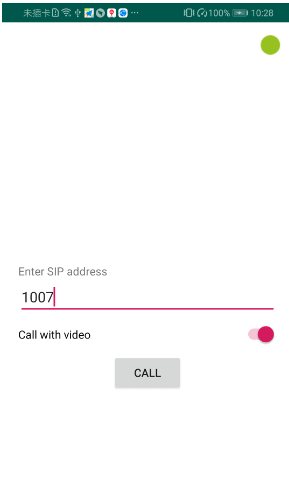
};拨打电话
      /**
         * 拨打电话
         */
        callButton.setOnClickListener(new View.OnClickListener() {
            @Override
            public void onClick(View v) {
                Core core = LinphoneService.getCore();
                Address addressToCall = core.interpretUrl(mSipAddressToCall.getText().toString());
                CallParams params = core.createCallParams(null);

                Switch videoEnabled = findViewById(R.id.call_with_video);
                params.enableVideo(videoEnabled.isChecked());

                if (addressToCall != null) {
                    core.inviteAddressWithParams(addressToCall, params);
                }
            }
});多的不说附上demo,大家自行下载把~


 1321
1321


 被折叠的 条评论
为什么被折叠?
被折叠的 条评论
为什么被折叠?
 到【灌水乐园】发言


