


【目录】
Nodejs学习笔记(一)——基础之全局对象、包和npm
Nodejs学习笔记(二)——模块
Nodejs学习笔记(三)——同步和与异步之文件系统模块
Nodejs学习笔记(四)——http协议与服务器
Nodejs学习笔记(六)——Mysql模块
Nodejs学习笔记(七)——接口API
文章目录
框架:是一整套解决方案,简化已有功能,添加之前没有的功能。
一、express框架下载安装
基于Node.js的框架,快速、开放、极简的WEB开发框架。
网址:www.expressjs.com
属于第三方模块,需要先去下载安装
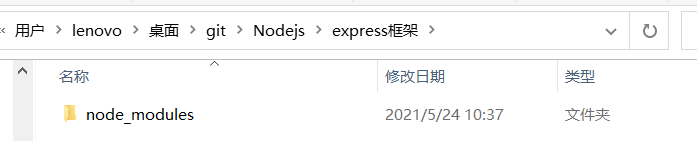
npm install express
下载后会有一个node——modules包:
二、路由
路由:用来处理不同的请求,根据请求的URL和请求的方法来做出特定的响应。
路由的三要素:请求的URL,请求的方法,回调函数
1. res响应对象
1.1设置响应的内容并发送:res.send()
app.get('/list', (res, req)=>{
//设置自响应的内容并发送
	res.send('这是商品列表');
});
app.get('/person', (req, res)=>{
    res.send(`<h2>这是个人中心</h2>
    欢迎回来`);
});
1.2 设置响应的重定向并发送:res.redirect();
get /study 跳转到tmooc
app.get('/study', (req, res)=>{
    res.redirect('http://www.tmooc.cn/');
});
get / 跳转到/person
(同一服务器下直接写/URL)
app.get('/', (req, res)=>{
    res.redirect('/person');
});
1.3 设置响应的文件并发送:sendFile()
文件必须使用绝对路径(__dirname)
//添加路由(get /index),响应1.html
app.get('/index', (req, res)=>{
//res.sendFile(__dirname+'\\1.html');
//响应文件
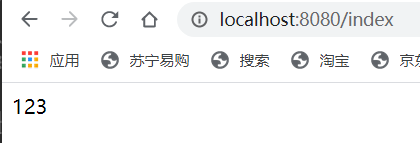
res.sendFile(__dirname+'/1.html');
});
1.html:
<p>123</p>
以上三种响应在一个路由中只能调用一次
2.req 请求对象
req.url 获取请求的url
req.method 获取请求的请求方法
req.query 获取以查询字符串格式传递的数据
三、数据传递的方法
| 传递方式 | 格式 | 路由获取 |
|---|---|---|
| get传递 | 查询字符串http://127.0.0.1:8080/mysearch?kw=笔记本&id=2 | req.query 格式为对象 |
| post传递 | 采用流的方式,不可见 | 通过事件的方式 req.on(‘data’, (chunk)=>{ chunk 获取的数据,格式为buffer,转字符串后为查询字符串,需要借助查询字符串模块解析为对象}) |
| 路由传参 | http://127.0.0.1:8080/package/express app.get(’/package/:pname’,(req,res)=>{ | req.params 获取路由传参的数据,格式为对象 |
})
1.对比get和post传递数据的区别:
- get传递的数据格式为查询字符串,URL中可见;post传递的方式是以流的方式,URL不可见;post更安全,通常注册、登录使用。get传递的速度更快,通常搜索的时候使用。
- get传递的数据有大小限制,根据不同的浏览器大小不同,范围2~8k之间,post没有大小限制。
2.get传递
search.html:
<!DOCTYPE html>
<html lang="en">
<head>
    <meta charset="UTF-8">
    <title>search</title>
</head>
<body>

<h2>用户搜索</h2>
<!--
    form   用于提交,向服务器发请求
    method 设置请求的方法
        get 不安全,使用查询字符串传递数据
        post  安全,from data传

    action 设置请求的url
    name   保存用户输入的值
-->
<form method = "get" action = "/mysearch">
    <input type = "text" name = "kw"/>
    <input type = "submit" />
</form>

</body>
</html>
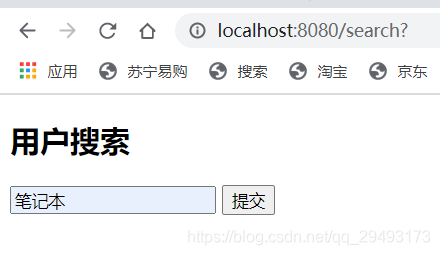
提交后,将以查询字符串方式传递数据,设置请求的url为/mysearch
server.js:
const express = require('express');
const url = require('url');
const app = express();
app.listen(8080);
app.get('/search', (req, res)=>{
res.sendFile(__dirname+'/search.html');
});
//表单/mysearch的响应
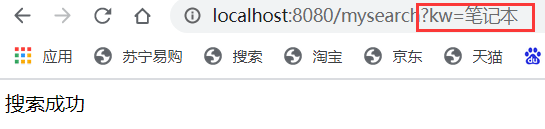
app.get('/mysearch', (req, res)=>{
//req获取请求的url和请求方法
//console.log(req.url, req.method);
//获取以查询字符串格式传递的数据
console.log(req.query);
res.send('搜索成功');
});
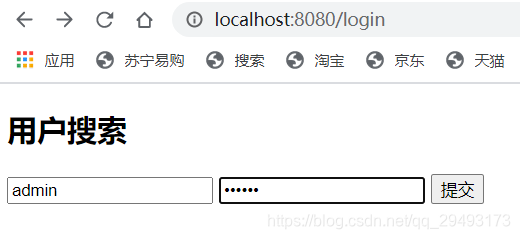
3.post传递
login.html:
<!DOCTYPE html>
<html lang="en">
<head>
    <meta charset="UTF-8">
    <title>search</title>
</head>
<body>

<h2>用户搜索</h2>
<!--
    form   用于提交,向服务器发请求
    method 设置请求的方法
    action 设置请求的url
    name   保存用户输入的值
-->
<form method = "post" action = "/mylogin">
    <input type = "text" name = "user"/>
    <input type = "password" name = "password"/>
    <input type = "submit" />
</form>

</body>
</html>
页面生成:
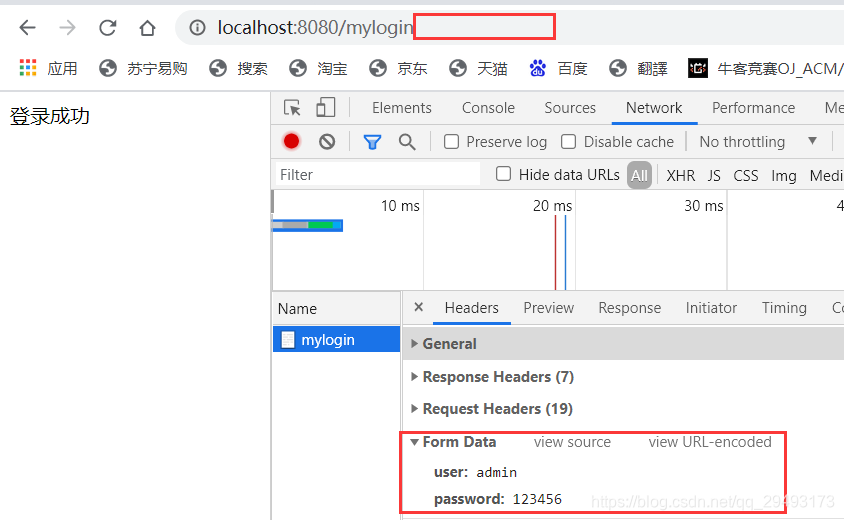
提交后,post方式跳转后不会在url显示传递的数据,但在F12下Network可以看见数据是通过From Data传递,所以要使用文件流传递数据:
server.js:使用文件流获取数据,querystring转换查询字符串
const express = require('express');
const querystring = require('querystring');
const url = require('url');

const app = express();
app.listen(8080);

app.get('/login', (req, res)=>{
    res.sendFile(__dirname+'/login.html');
});

//表单/mylogin的响应,传过来是post方式,也要使用post方式响应
app.post('/mylogin', (req, res)=>{
    //获取以查询字符串格式传递的数据
    //使用文件流 chunk获取的分段数据
    req.on('data', (chunk)=>{
        //得到数据为buffer,转字符串后为查询字符串
        console.log(chunk.toString());
        let obj = querystring.parse(chunk.toString());
        console.log(obj);
    });

    res.send('登录成功');
});

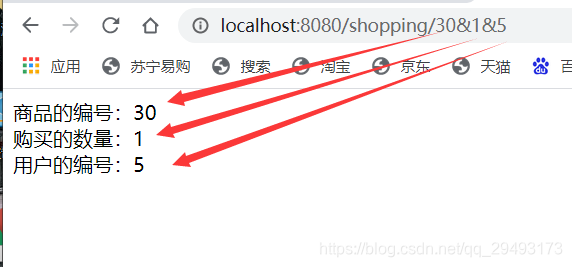
4.路由传参
创建添加到购物车的路由(get /shopping),传递商品的编号lid、购买的数量count、用户的编号uid,最后响应以下内容
商品的编号:xx
购买的数量:xx
用户的编号:xx
req.params 获取路由传参的数据,格式为对象
const express = require('express');

const app = express();
app.listen(8080);

//:lid、:count、:uid为三组形参,严格按照格式进行查询
app.get('/shopping/:lid&:count&:uid', (req, res)=>{
    //console.log(req.params);
    res.send(`
        商品的编号:${req.params.lid}<br>
        购买的数量:${req.params.count}<br>
        用户的编号:${req.params.uid}
    `)
});
输入“http://localhost:8080/shopping/30&1&5”,对应的形参位置就会传递值。
四、路由器
1. 创建路由器并导出
const express = require('express');//引入express
const r = express.Router();//创建路由器对象

//添加路由
module.exports = r;
2. 引入路由器模块
const userRouter = require('./02_user.js');
3. 在web服务器下引入并挂载
app.use('/user', userRouter);
参数1:要添加的前缀
参数2:要挂载的路由器
路由器示例代码:
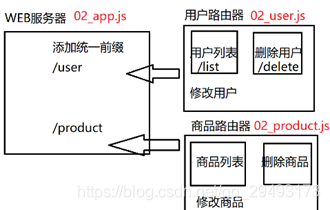
02_app(WEB服务器):
//创建服务器
const express = require('express');
const app = express();
app.listen(8080);

//引入用户路由器模块
const userRouter = require('./02_user.js');
//console.log(userRouter);

//引入商品路由器模块
const productRouter = require('./02_product.js');
//console.log(productRouter);


//挂载路由器到WEB服务器,路由才能成为web服务器下的一部分
// /user/list
app.use('/user', userRouter);
// /product/list
app.use('/product', productRouter);
02_user.js(用户路由器):
//引入express模块
const express = require('express');
//创建路由器对象
const r = express.Router();
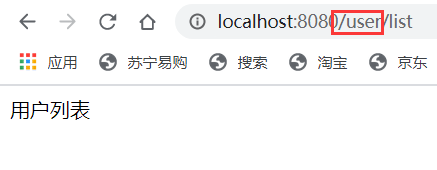
//添加路由get /list 响应'用户列表
r.get('/list', (req, res)=>{
res.send('用户列表');
})
module.exports = r;
输入前缀为/user的“/user/list”会响应用户列表
02_product.js(商品路由器):
const express = require('express');
const r = express.Router();
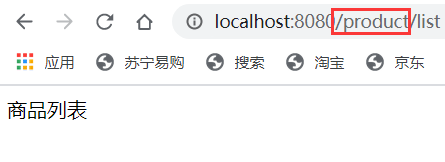
//添加路由get /list 响应'商品列表
r.get('/list', (req, res)=>{
res.send('商品列表');
})
module.exports = r;
输入前缀为/product的“/product/list”会响应用户列表:
五、中间件
用于拦截对路由的请求,也可以做出响应,允许往后继续执行(下一个中间件或者路由);
本质是一个函数,一旦拦截到会自动调用这个函数。
分为应用级中间件、路由级中间件、内置中间件、第三方中间件、错误处理中间件。
1.应用级中间件
也成为自定义中间件
- app.use(要拦截的URL,回调函数)
app.use('/list', fn);
function fn(req, res, next) {
	next();//往后继续执行,可能是下一个中间件,或路由
}
next() 往后继续执行
示例:
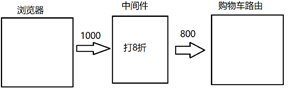
get方式添加/shopping路由,并用中间件拦截/shopping,将传递的price打八折,并在路由中响应打折后的price
//创建服务器
const express = require('express');
const app = express();
app.listen(8080);

//传过去的price打八折再继续执行下去
function fn(req, res, next) {
    req.query.price *= 0.8;//打折,隐式转数值
    next();//继续执行
}
//拦截/shopping,调用fn
app.use('/shopping', fn);

//添加到购物车路由(get /shopping)
app.get('/shopping', (req, res)=>{
    res.send(`
    商品的最终价格:${req.query.price}
    `);
});
2.路由级中间件
路由器的使用
- app.use(要拦截的URL,路由器)
3.内置中间件
托管静态资源(html、css、js、图像)
如果浏览器要请求静态资源,不需要通过路由响应文件,而是自动去寻找文件
- app.use(express.static(‘要托管的目录’));
示例:在static.js中静态自动请求public下的资源,public下有1.html
static.js:
const express = require('express');
const app = express();
app.listen(8080);

//托管静态资源;如果浏览器端要请求静态资源,自动到public目录中寻找
app.use(
    express.static('./public')//同目录下的public目录
)
public下1.html:
<h2>这是public下的1.html文件</h2>
此时可以直接使用localhost:8080/1.html访问,并显示1.html的页面内容:

4.第三方中间件
第三方中间件属于第三方模块,需要先去下载安装
npm install body-parser
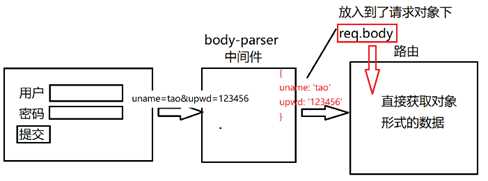
(1)body-parser中间件
将post请求的数据解析为对象
- 引入body-parser中间件
const bodyParser = require('body-parser'); - 使用body-parser中间件,将post请求的数据解析为对象,内容放在 req.body 中
app.use(bodyParser.urlencoded({ extended:false }));
extended:是否使用第三方查询字符串模块qs,不使用则使用核心模块下querystring - 获取post传递的数据,前提使用了该中间件!
console.log(req.body);
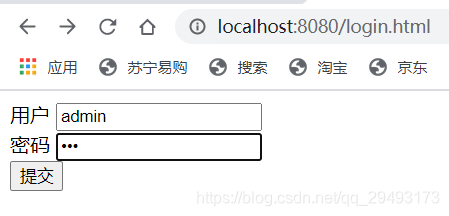
示例:托管静态资源login.html在public目录下,页面提交表单后,在/login响应登录成功,并获取post传递的数据。
/public/login.html:
<!DOCTYPE html>
<html lang="en">
<head>
    <meta charset="UTF-8">
    <title>login</title>
</head>
<body>

<form method="post" action = "/login">
用户 <input type = "text" name = "user"/><br>
密码 <input type = "password" name = "upwd"/><br>
<input type = "submit"/>
</form>

</body>
</html>
server.js:使用body-parser中间件
//1、引入body-parser中间件
const bodyParser = require('body-parser');
//创建服务器
const express = require('express');
const app = express();
app.listen(8080);
//托管静态资源
app.use(express.static('./public'));
//2、使用body-parser中间件,将post请求的数据解析为对象,放在req.body中
app.use(bodyParser.urlencoded({
extended:false//是否使用第三方查询字符串模块qs。不使用则使用核心模块下querystring
}));
app.post('/login', (req, res)=>{
/*法一:post获取数据原方式:文件流(需在头部引入querystring模块)
let str = chunk.toString();
let obj = querystring.parse(str);
console.log(obj);
*/
//法二:使用body-parser中间件方法:
//3、获取post传递的数据
//前提使用了中间件
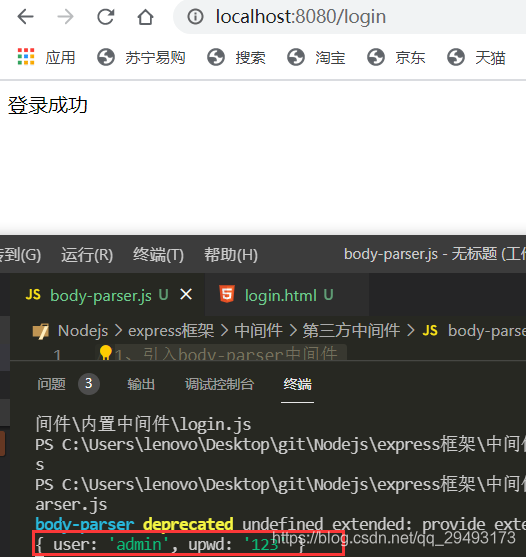
console.log(req.body);
res.send('登录成功');
});
首先访问托管的静态资源localhost:8080/login.html:
提交后,响应登陆成功, 并获取post传递的数据:


 582
582


 被折叠的 条评论
为什么被折叠?
被折叠的 条评论
为什么被折叠?
 到【灌水乐园】发言


