


目录
第一部分 IPP环境搭建(基于win10的WSL)
我是基于win10的WSL搭建的IPP环境,当然用别的办法也是ok的,所以这个安装过程仅供参考
IPP库可以在许多平台上搭建,我个人偏向于使用linux跑程序,不过我不太想使用双系统或者VMware这种虚拟机,所以我选择使用win10的WSL中的Ubunut 18.04子系统来安装IPPI库。
ps:WSL现在有个wsl2,功能更多,但是我觉得wsl1够用了,所以并没有升级wsl2。
1.1 WSL的几种安装方法
1.1.1 开启wsl支持
用管理员身份打开powershell,输入下面的命令(参考资料)
$ dism.exe /online /enable-feature /featurename:Microsoft-Windows-Subsystem-Linux /all /norestart
1.1.2 (可选)使用Windows store直接安装
这种方法的优点是非常简单,缺点是好像无法自定义WSL的安装路径(默认是装在C盘,路径为C:\Users\用户名\AppData\Local\Packages\CanonicalGroupLimited.Ubuntu18.04onWindows_79rhkp1fndgsc\LocalState\rootfs),ipp库的完整版本需要30G,比较大,因此我们可以只安装icc和ippi两个组件,两个组件的话其实只需要几个g就ok了,另外,看帮助文档,好像安装ipp的时候可以通过--install-dir参数来指定安装目录,因此应该可以通过指定--install-dir为/mnt/d/目录就可以把ipp装到d盘了。
安装步骤:
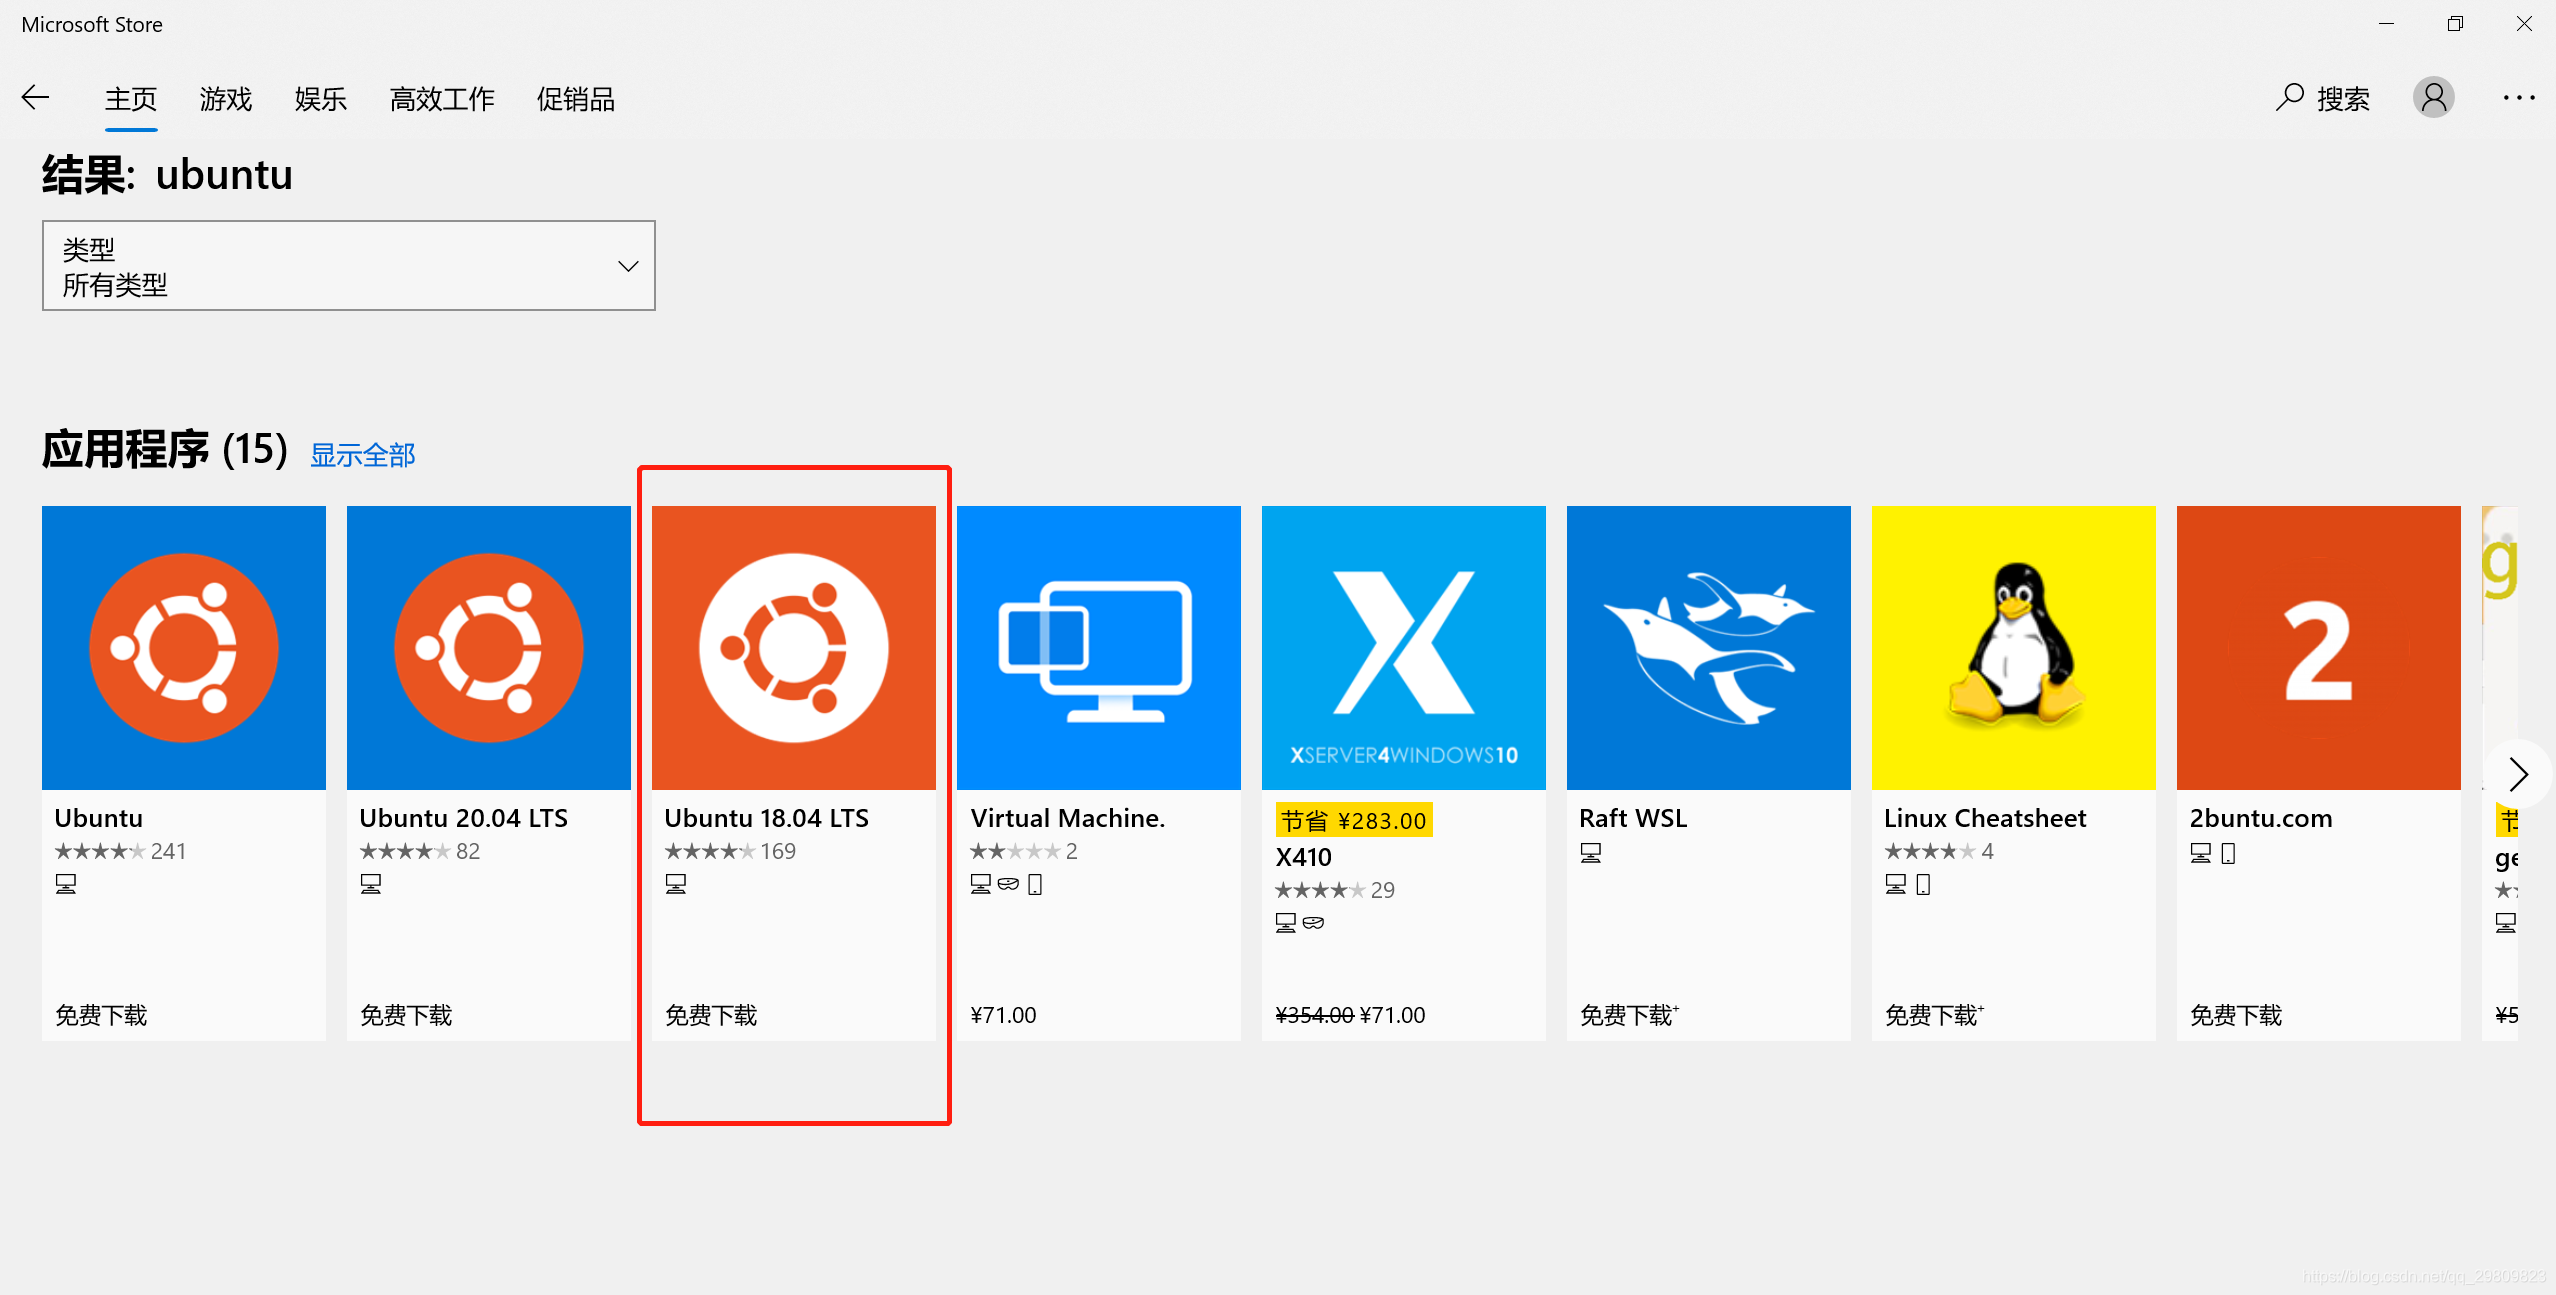
(1)下载
打开应用商店,搜索ubuntu,安装ubuntu 18.04
(2)安装
- 步骤一结束后,就可以在开始菜单中找到ubuntu 18.04,直接打开它
- 第一次打开wsl,会有几分钟的初始化过程,然后让你输入用户名和密码,这个根据提示完成即可
1.1.3 (可选)使用LxRunOffline自定义安装wsl
1. 安装LxRunOffline
- 下载LxRunOffline,下载网址,当前最新版(3.5.0版本),
LxRunOffline-v3.5.0-mingw.zip和LxRunOffline-v3.5.0-msvc.zip任选一个下载。 - 解压
- 测试,使用
LxRunOffline version命令
$ C:\Users\15758> D:\MyTool\LxRunOffline\LxRunOffline.exe version
LxRunOffline v3.5.0
2. 下载wsl离线文件
- 下载地址,里面有多个wsl版本,- 我选择的是Ubuntu 18.04
3. 解压wsl offline文件
- 将
Ubuntu_1804.2019.522.0_x64.appx改为Ubuntu_1804.2019.522.0_x64.zip,然后解压到你想要安装的目录。
4. 安装wsl
使用命令lxrunoffline i -n <WSL名称> -d <安装路径> -f <安装包路径>.tar.gz安装,示例如下
C:\Users\15758>lxrunoffline i -n ubuntu -d D:\MyApp\Ubuntu18 -f D:\MyApp\Ubuntu18\install.tar.gz
[WARNING] Ignoring an unsupported file "dev/full" of type 0020000.
[WARNING] Ignoring an unsupported file "dev/null" of type 0020000.
[WARNING] Ignoring an unsupported file "dev/ptmx" of type 0020000.
[WARNING] Ignoring an unsupported file "dev/random" of type 0020000.
[WARNING] Ignoring an unsupported file "dev/tty" of type 0020000.
[WARNING] Ignoring an unsupported file "dev/urandom" of type 0020000.
[WARNING] Ignoring an unsupported file "dev/zero" of type 0020000.
[WARNING] Love this tool? Would you like to make a donation: https://github.com/DDoSolitary/LxRunOffline/blob/master/README.md#donation
5. 打开wsl
双击ubuntu1804.exe,即可打开wsl
6. wsl初始化
第一次打开wsl,会有几分钟的初始化过程,然后让你输入用户名和密码,这个根据提示完成即可
1.2 (可选)使用VScode连接wsl
使用vscode开发的话会方便很多,而VSCode连接wsl也很简单,安装一个插件就可以用了,教程如下。
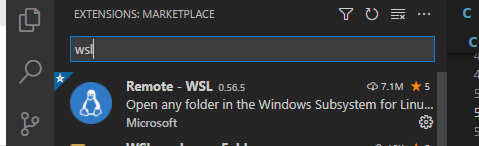
1.2.1 插件下载
在Vscode的插件商店搜索wsl,下载第一个插件
1.2.2 连接wsl
- 按图中的步骤连接,注意窗口右下角的进度条,第一次连接会比较慢
- 连接上之后就可以使用了(oepnFile或者openFolder打开文件或文件夹)

1.3 在ubuntu上安装IPP库
1.3.1 基本软件安装
安装好的wsl中没有gcc,所以需要先安装一些必要的工具,步骤如下(详细过程略):
- 修改apt源为国内源,
sudo vim /etc/apt/source.list - 更新apt源,
sudo apt update - 安装编译组件,
sudo apt install build-essential
1.3.2 IPP库的安装
1. 下载
$ wget https://registrationcenter-download.intel.com/akdlm/irc_nas/17769/l_BaseKit_p_2021.2.0.2883_offline.sh
2. 傻瓜式一键安装(占用空间大,不推荐)
我使用的静默安装方法(官网也提供了交互式安装方法)。
sudo sh ./l_BaseKit_p_2021.1.0.2659_offline.sh -s -a --silent --eula accept
安装过程中的输出如下所示
lmy@ubuntu-lmy:/media/lmy/Data/ubuntu/ipp$ sudo sh ./l_BaseKit_p_2021.1.0.2659_offline.sh -s -a --silent --eula accept
QStandardPaths: XDG_RUNTIME_DIR not set, defaulting to '/tmp/runtime-root'
Checking system requirements...
Done.
Wait while the installer is preparing...
Done.
Launching the installer...
QStandardPaths: XDG_RUNTIME_DIR not set, defaulting to '/tmp/runtime-root'
Intel® Graphics Compute Runtime for OpenCL™ not found.
For developing and running applications for GPU on this system, the latest version of the Intel® Graphics Driver is required. Please reference the GPU driver section at <a href="https://dgpu-docs.intel.com/installation-guides/index.html">https://dgpu-docs.intel.com/installation-guides/index.html</a> about GPU driver version(s) and installation information.
Start installation flow...
Installed Location: /opt/intel/oneapi
Installation has successfully completed
Log file: /opt/intel/oneapi/logs/installer.install.intel.oneapi.lin.basekit.product,v=2021.1.0-2659.2021.06.19.22.41.16.813721.log
3. 自定义安装(灵活,推荐)
ubuntu@WZY:~$ sh ./l_BaseKit_p_2021.1.0.2659_offline.sh  -a --silent --install-dir /mnt/d/ipp_product --eula accept  --components intel.oneapi.lin.dpcpp-cpp-compiler:intel.oneapi.lin.dpcpp-library:intel.oneapi.lin.ipp.devel
Extract l_BaseKit_p_2021.1.0.2659_offline to /home/ubuntu/l_BaseKit_p_2021.1.0.2659_offline...
[#################################################################################################################################################################################]
Extract l_BaseKit_p_2021.1.0.2659_offline completed!
QStandardPaths: XDG_RUNTIME_DIR not set, defaulting to '/tmp/runtime-ubuntu'
Checking system requirements...
Done.
Wait while the installer is preparing...
Done.
Launching the installer...
QStandardPaths: XDG_RUNTIME_DIR not set, defaulting to '/tmp/runtime-ubuntu'
Intel® Graphics Compute Runtime for OpenCL™ not found.
For developing and running applications for GPU on this system, the latest version of the Intel® Graphics Driver is required. Please reference the GPU driver section at <a href="https://dgpu-docs.intel.com/installation-guides/index.html">https://dgpu-docs.intel.com/installation-guides/index.html</a> about GPU driver version(s) and installation information.
Start installation flow...
Installed Location: /mnt/d/ipp_product
Installation has successfully completed
Log file: /mnt/d/ipp_product/logs/installer.install.intel.oneapi.lin.basekit.product,v=2021.1.0-2659.2021.07.20.02.27.41.739813.log
Remove extracted files: /home/ubuntu/l_BaseKit_p_2021.1.0.2659_offline...
ubuntu@WZY:~$
附:删除指定组件的操作
# 第一步,查询产品id和版本号
ubuntu@WZY:/opt/intel/oneapi/installer$ sudo ./installer  -s -a --list-products
QStandardPaths: XDG_RUNTIME_DIR not set, defaulting to '/tmp/runtime-root'
ID                               Version       Language Installed Name
=============================================================================================
intel.oneapi.lin.basekit.product 2021.1.0-2659          true      Intel® oneAPI Base Toolkit
# 第二步,查看组件安装信息(我一开始全部安装了,所以显示都是true),注意这里的product-id和product-ver和第一步的输出一致
ubuntu@WZY:/opt/intel/oneapi/installer$ sudo /opt/intel/oneapi/installer/installer  -s -a  --list-components --product-id=intel.oneapi.lin.basekit.product --product-ver=2021.1.0-2659
QStandardPaths: XDG_RUNTIME_DIR not set, defaulting to '/tmp/runtime-root'
ID                                  Version      Language Installed Name
==========================================================================================================================
intel.oneapi.lin.tbb.devel          2021.1.1-119          true      Intel® oneAPI Threading Building Blocks
intel.oneapi.lin.dpcpp-cpp-compiler 2021.1.1-189          true      Intel® oneAPI DPC++/C++ Compiler
intel.oneapi.lin.dpcpp-library      2021.1.1-189          true      Intel® oneAPI DPC++ Library
intel.oneapi.lin.mkl.devel          2021.1.1-52           true      Intel® oneAPI Math Kernel Library
intel.oneapi.lin.ipp.devel          2021.1.1-47           true      Intel® Integrated Performance Primitives
intel.oneapi.lin.dal.devel          2021.1.1-79           true      Intel® oneAPI Data Analytics Library
intel.oneapi.lin.advisor            2021.1.1-43           true      Intel® Advisor
intel.oneapi.lin.dnnl               2021.1.1-55           true      Intel® oneAPI Deep Neural Network Library
intel.oneapi.lin.ccl.devel          2021.1.1-54           true      Intel® oneAPI Collective Communications Library
intel.oneapi.lin.vtune              2021.1.1-61           true      Intel® VTune(TM) Profiler
intel.oneapi.lin.dpcpp-ct           2021.1.1-59           true      Intel® DPC++ Compatibility Tool
intel.oneapi.lin.python3            2021.1.1-44           true      Intel® Distribution for Python*
intel.oneapi.lin.vpl                2021.1.1-66           true      Intel® oneAPI Video Processing Library
intel.oneapi.lin.ippcp.devel        2021.1.1-54           true      Intel® Integrated Performance Primitives Cryptography
intel.oneapi.lin.dpcpp_dbg          10.0.0-2219           true      Intel® Distribution for GDB*
# 第三步,卸载指定组件
4. 设置环境变量
$ source /opt/intel/oneapi/setvars.sh
上面那个一次性的(关闭终端重新打开就失效了),如果要让终端启动时自动设置环境变量,运行下列命令:
$ echo "source /opt/intel/oneapi/setvars.sh" >> ~/.bashrc
5. 验证环境
- 拷贝GetBilinearTransform.c到wsl中
- 使用下面的命令编译GetBilinearTransform.c,目标文件为GetBilinearTransform
$ icx GetBilinearTransform.c -g -o GetBilinearTransform -I$IPPROOT/include -L$IPPROOT/lib/intel64 -lippi -lipps -lippcore
- 运行GetBilinearTransform
$ ./GetBilinearTransform
Exit status 0 (ippStsNoErr: No errors)
第二部分 IPPi函数的分析方法
一、定位函数位置
如果我们要查看ippi库中某个函数的具体实现,那首先要知道这个函数时在哪里定义的。查找的方法肯定是很多的,我这里只是介绍一下个人觉得比较方便的办法。
思路是在调试程序的时候,在函数入口处设置断点,然后堆栈信息里就会显示该函数在哪里定义的。
以ippiGetBilinearTransform函数为例(有很多IDE可以简化编译和调试步骤,但是我这里全部以linux下的终端命令为例)
1. 编译
此处编译ipp提供的example文件GetBilinearTransform.c,因为它里面调用了ippiGetBilinearTransform函数。(如果是使用命令行编译的话,记得加-g参数,否则没有调试信息),我的编译命令如下:
$ icx GetBilinearTransform.c -g -o GetBilinearTransform -I$IPPROOT/include -L$IPPROOT/lib/intel64 -lippi -lipps -lippcore
2. 调试
思路是,使用gdb-oneapi(ipp库自带的)启动示例程序;设置函数断点;运行;等程序在函数断点处停下来后就打印一下堆栈信息,堆栈信息里就包括了这个函数的定义所在的文件(此处为libippi.so.10)
# 运行gdb-oneapi
$ gdb-oneapi GetBilinearTransform
# 设置断点
$ (gdb) b ippiGetBilinearTransform
# 运行
$ (gdb) r
# 查看堆栈
$ (gdb) bt
# 然后就可以看到下面这行,说明该函数时在/opt/intel/oneapi/ipp/2021.1.1/lib/intel64/libippi.so.10里定义的
0x00007fffff1a37a0 in ippiGetBilinearTransform () from /opt/intel/oneapi/ipp/2021.1.1/lib/intel64/libippi.so.10
完整命令(包括输出)如下所示:
ubuntu@WZY:~/ipp$ gdb-oneapi GetBilinearTransform
GNU gdb (Intel(R) Distribution for GDB* 2021.1.0) 10.0.50
Copyright (C) 2020 Free Software Foundation, Inc.; (C) 2020 Intel Corp.
License GPLv3+: GNU GPL version 3 or later <http://gnu.org/licenses/gpl.html>
This is free software: you are free to change and redistribute it.
There is NO WARRANTY, to the extent permitted by law.
Type "show copying" and "show warranty" for details.
This GDB was configured as "x86_64-pc-linux-gnu".
Type "show configuration" for configuration details.

For information about how to find Technical Support, Product Updates,
User Forums, FAQs, tips and tricks, and other support information, please visit:
<http://www.intel.com/software/products/support/>.
For help, type "help".
Type "apropos word" to search for commands related to "word"...
Reading symbols from GetBilinearTransform...
(gdb) b ippiGetBilinearTransform
Breakpoint 1 at 0x400c30
(gdb) r
Starting program: /home/ubuntu/ipp/GetBilinearTransform

Breakpoint 1, 0x00007fffff1a37a0 in ippiGetBilinearTransform () from /opt/intel/oneapi/ipp/2021.1.1/lib/intel64/libippi.so.10
(gdb) bt
#0  0x00007fffff1a37a0 in ippiGetBilinearTransform () from /opt/intel/oneapi/ipp/2021.1.1/lib/intel64/libippi.so.10
#1  0x0000000000400eef in main () at GetBilinearTransform.c:71
(gdb)
二、查看函数内容
方法1 在IDA Pro中查看函数内容
1. IDA Pro打开目标文件
在这里以前面得到的libippi.so.10为例,直接打开就好
2. 在functions中找到我们需要的函数
具体操作办法可以是:在functions窗口右键,选择fliter那个,然后查找ippiGetBilinearTransform关键字即可,查找结果如图(简单看一下汇编可知,l9_ippiGetBilinearTransform是关键代码)

3. 查看函数信息
- 比如在Disassembly window窗口查看汇编,使用Generate Pseudocode查看伪代码
- 在伪代码窗口,我们可以修改变量名称/类型、添加注释等,来增加可读性(操作就是右键->对应菜单);还可以进行双击子函数进行函数跳转
- 其它的根据具体情况分析吧
方法2 使用gcc的objdump工具查看函数汇编内容
用法为: objdump -S target
如下:
ubuntu@WZY:~/ipp$ objdump -S GetBilinearTransform | head -n 50

GetBilinearTransform:     file format elf64-x86-64


Disassembly of section .init:

0000000000400ba0 <_init>:
  400ba0:       48 83 ec 08             sub    $0x8,%rsp
  400ba4:       48 8b 05 3d c4 20 00    mov    0x20c43d(%rip),%rax        # 60cfe8 <__gmon_start__>
  400bab:       48 85 c0                test   %rax,%rax
  400bae:       74 02                   je     400bb2 <_init+0x12>
  400bb0:       ff d0                   callq  *%rax
  400bb2:       48 83 c4 08             add    $0x8,%rsp
  400bb6:       c3                      retq

Disassembly of section .plt:

0000000000400bc0 <.plt>:
  400bc0:       ff 35 42 c4 20 00       pushq  0x20c442(%rip)        # 60d008 <_GLOBAL_OFFSET_TABLE_+0x8>
  400bc6:       ff 25 44 c4 20 00       jmpq   *0x20c444(%rip)        # 60d010 <_GLOBAL_OFFSET_TABLE_+0x10>
  400bcc:       0f 1f 40 00             nopl   0x0(%rax)

0000000000400bd0 <printf@plt>:
  400bd0:       ff 25 42 c4 20 00       jmpq   *0x20c442(%rip)        # 60d018 <printf@GLIBC_2.2.5>
  400bd6:       68 00 00 00 00          pushq  $0x0
  400bdb:       e9 e0 ff ff ff          jmpq   400bc0 <.plt>

0000000000400be0 <memset@plt>:
  400be0:       ff 25 3a c4 20 00       jmpq   *0x20c43a(%rip)        # 60d020 <memset@GLIBC_2.2.5>
  400be6:       68 01 00 00 00          pushq  $0x1
  400beb:       e9 d0 ff ff ff          jmpq   400bc0 <.plt>

0000000000400bf0 <ippiWarpBilinearBack_32f_C1R@plt>:
  400bf0:       ff 25 32 c4 20 00       jmpq   *0x20c432(%rip)        # 60d028 <ippiWarpBilinearBack_32f_C1R>
  400bf6:       68 02 00 00 00          pushq  $0x2
  400bfb:       e9 c0 ff ff ff          jmpq   400bc0 <.plt>
三、汇编级别调试函数
调试方法很多,我仅仅列出来我实验过的,供参考。
3.1 使用gdb命令进行调试
3.1.1 gdb命令介绍
gdb提供的有汇编级调试,主要的命令有
ninext instruction,跳到下一条指令si进入函数内部si进入函数内部b除了c语言调试中常用的断点外,还可以在指定地址处设置断点,比如b *0x10a38或b ippiGetBilinearTransform
(gdb) b ippiGetBilinearTransform
Breakpoint 1 at 0x400c30
bt或者where查看当前堆栈信息
(gdb) bt
#0  0x00007fffff1a37a0 in ippiGetBilinearTransform () from /opt/intel/oneapi/ipp/2021.1.1/lib/intel64/libippi.so.10
#1  0x0000000000400eef in main () at GetBilinearTransform.c:71
info registers或者info r查看当前寄存器信息
(gdb) info r
rax            0x0                 0
rbx            0x0                 0
rcx            0x7ffffffec6d0      140737488275152
rdx            0x409b10            4234000
rsi            0x800000008         34359738376
rdi            0x0                 0
rbp            0x7ffffffec630      0x7ffffffec630
rsp            0x7ffffffec630      0x7ffffffec630
\r8             0x4                 4
r9             0x7ffffffec740      140737488275264
r10            0xa                 10
r11            0x7fffff1a37a0      140737473296288
r12            0x400c90            4197520
r13            0x7ffffffeca50      140737488276048
r14            0x0                 0
r15            0x0                 0
rip            0x7ffffc48efc4      0x7ffffc48efc4 <l9_ippiGetBilinearTransform+4>
eflags         0x202               [ IF ]
cs             0x33                51
ss             0x2b                43
ds             0x0                 0
es             0x0                 0
fs             0x0                 0
gs             0x0                 0
-
info all-registers可以查看到更多的寄存器 -
i r rax: 表示rax寄存器的值 -
tui reg general在tui中显示通用寄存器的值;tui reg float浮点寄存器;tui reg system系统寄存器;tui reg next,显示下一页的寄存器 -
x/[count][format][address]给定地址(也可以是函数名),打印该地址处的汇编信息,使用help x可以查看具体参数。常用示例:x/10i foo,打印foo函数前10行的指令
(gdb) x/10i ippiGetBilinearTransform
   0x7fffff1a37a0 <ippiGetBilinearTransform>:   jmpq   *0x24ec1a(%rip)        # 0x7fffff3f23c0 <dippiGetBilinearTransform>
   0x7fffff1a37a6 <ippiGetBilinearTransform+6>: nopl   0x0(%rax,%rax,1)
   0x7fffff1a37ae <ippiGetBilinearTransform+14>:        nopl   0x0(%rax)
   0x7fffff1a37b5 <ippiGetBilinearTransform+21>:        nopl   0x0(%rax)
   0x7fffff1a37b9 <ippiGetBilinearTransform+25>:        nopl   0x0(%rax)
   0x7fffff1a37c0 <ippiWarpBilinearGetBufferSize>:      jmpq   *0x24ec02(%rip)        # 0x7fffff3f23c8 <dippiWarpBilinearGetBufferSize>
   0x7fffff1a37c6 <ippiWarpBilinearGetBufferSize+6>:    nopl   0x0(%rax,%rax,1)
   0x7fffff1a37ce <ippiWarpBilinearGetBufferSize+14>:   nopl   0x0(%rax)
   0x7fffff1a37d5 <ippiWarpBilinearGetBufferSize+21>:   nopl   0x0(%rax)
   0x7fffff1a37d9 <ippiWarpBilinearGetBufferSize+25>:   nopl   0x0(%rax)
disassemble address[,address]或者disas address[,address]打印addr处的汇编指令,如果提供了两个addr,则打印两个地址中间的指令。使用help disassemble可以查看具体参数。常用示例:disassemble /s foo,打印foo函数的汇编指令
(gdb) disassemble /s ippiGetBilinearTransform
Dump of assembler code for function ippiGetBilinearTransform:
   0x00007fffff1a37a0 <+0>:     jmpq   *0x24ec1a(%rip)        # 0x7fffff3f23c0 <dippiGetBilinearTransform>
   0x00007fffff1a37a6 <+6>:     nopl   0x0(%rax,%rax,1)
   0x00007fffff1a37ae <+14>:    nopl   0x0(%rax)
   0x00007fffff1a37b5 <+21>:    nopl   0x0(%rax)
   0x00007fffff1a37b9 <+25>:    nopl   0x0(%rax)
3.1.2 调试步骤
和IDE的调试步骤差不多,但是需要敲命令实现
1、启动gdb,运行目标程序(前面查找函数定义时已经介绍过了)
2、设置断点
3、运行程序 run或者r
4、查看堆栈信息,bt或者where
5、查看汇编代码,使用前面介绍x或者disassemble指令
6、查看寄存器状态,info r
7、跳到下一条指令,ni
8、再次查看寄存器状态info r
…
基本就是根据具体情况,重复上面的步骤,来达到调试的目的
3.2 使用vscode调试
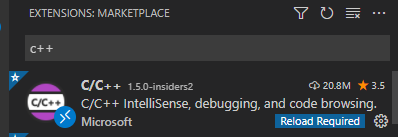
3.2.1 c/c++插件
搜索c++,安装第一个插件
3.2.2 oneapi插件
VScode的插件仓库有三个oneapi的插件,直接搜索oneapi就可以找到
- 第一个应该是基于intel Vtune的代码分析插件
- 第二个 不太清楚有什么用
- 第三个 配置
intel oneapi的环境,以及帮助我们生成task.json(编译用)和launch.json(调试用)

第三个插件的简单使用
我这里是使用第三个插件,插件文档介绍了详细用法,我这里简单介绍一下
1、使用快捷键ctrl+shift+p,输入oneapi应该就可以看到插件的基本功能

2、点击Intel oneAPI: Set oneAPI environment,设置环境(只要ipp库装好后,环境变量设置的是正确的,就应该没问题)
3、使用插件生成调试配置文件。与上面类似,点击Generate Launch configurations,它会让你选择需要调试的目标文件,自己根据实际情况选择(注意:如果你没有提前编译好目标文件,那么这里是不会出现的);剩下的选项都选默认就可以了(注意不要一直点,它好像是一个循环,一直点的话会不断地往文件里加配置,等待回到一开始的时候/或者右下角提示的时候按esc退出就好了);然后它自动设置好了launch.json文件。
生成的launch.json大致如下所示(比较关键的是字段"program": "/home/ubuntu/ipp/GetBilinearTransform",)
{
    "configurations": [
        {
            "name": "(gdb-oneapi) GetBilinearTransform Launch",
            "type": "cppdbg",
            "request": "launch",
            "preLaunchTask": "",
            "postDebugTask": "",
            "program": "/home/ubuntu/ipp/GetBilinearTransform",
            "args": [],
            "stopAtEntry": false,
            "cwd": "${workspaceFolder}",
            "environment": [],
            "externalConsole": false,
            "MIMode": "gdb",
            "miDebuggerPath": "/opt/intel/oneapi/debugger/latest/gdb/intel64/bin/gdb-oneapi",
            "setupCommands": [
                {
                    "description": "Enable pretty-printing for gdb",
                    "text": "-enable-pretty-printing",
                    "ignoreFailures": true
                }
            ]
        }
    ]
}
4、(可选)其实也可以手动生成调试配置文件。比如根据我上面发的文件模板,修改program参数为你自己的目标文件即可。
5、设置断点(如果无法设置断点,说明插件没生效)
6、按f5即可启动调试
ps:它还会显示FPU和SSE等寄存器


 3630
3630


 被折叠的 条评论
为什么被折叠?
被折叠的 条评论
为什么被折叠?
 到【灌水乐园】发言


