Swift 4.0 GCD 倒计时按钮

override func viewDidLoad() {
        super.viewDidLoad()
        //写一个按钮
        btn.frame.size = CGSize(width: 100, height: 50)
        btn.center = view.center
        btn.backgroundColor = .red
        view.addSubview(btn)
        btn.addTarget(self, action: #selector(timeChange), for: .touchUpInside)
        btn.setTitle("发送验证码", for: .normal)
    }

点击事件:

@objc func timeChange() {
        
        var time = 10
        let codeTimer = DispatchSource.makeTimerSource(flags: .init(rawValue: 0), queue: DispatchQueue.global())
        codeTimer.schedule(deadline: .now(), repeating: .milliseconds(1000))  //此处方法与Swift 3.0 不同
        codeTimer.setEventHandler {
            
            time = time - 1
            
            DispatchQueue.main.async {
                self.btn.isEnabled = false
            }
            
            if time < 0 {
                codeTimer.cancel()
                DispatchQueue.main.async {
                    self.btn.isEnabled = true
                    self.btn.setTitle("重新发送", for: .normal)
                }
                return
            }
            
            DispatchQueue.main.async {
                self.btn.setTitle("\(time)", for: .normal)
            }
            
        }
        
        codeTimer.activate()
        
    }

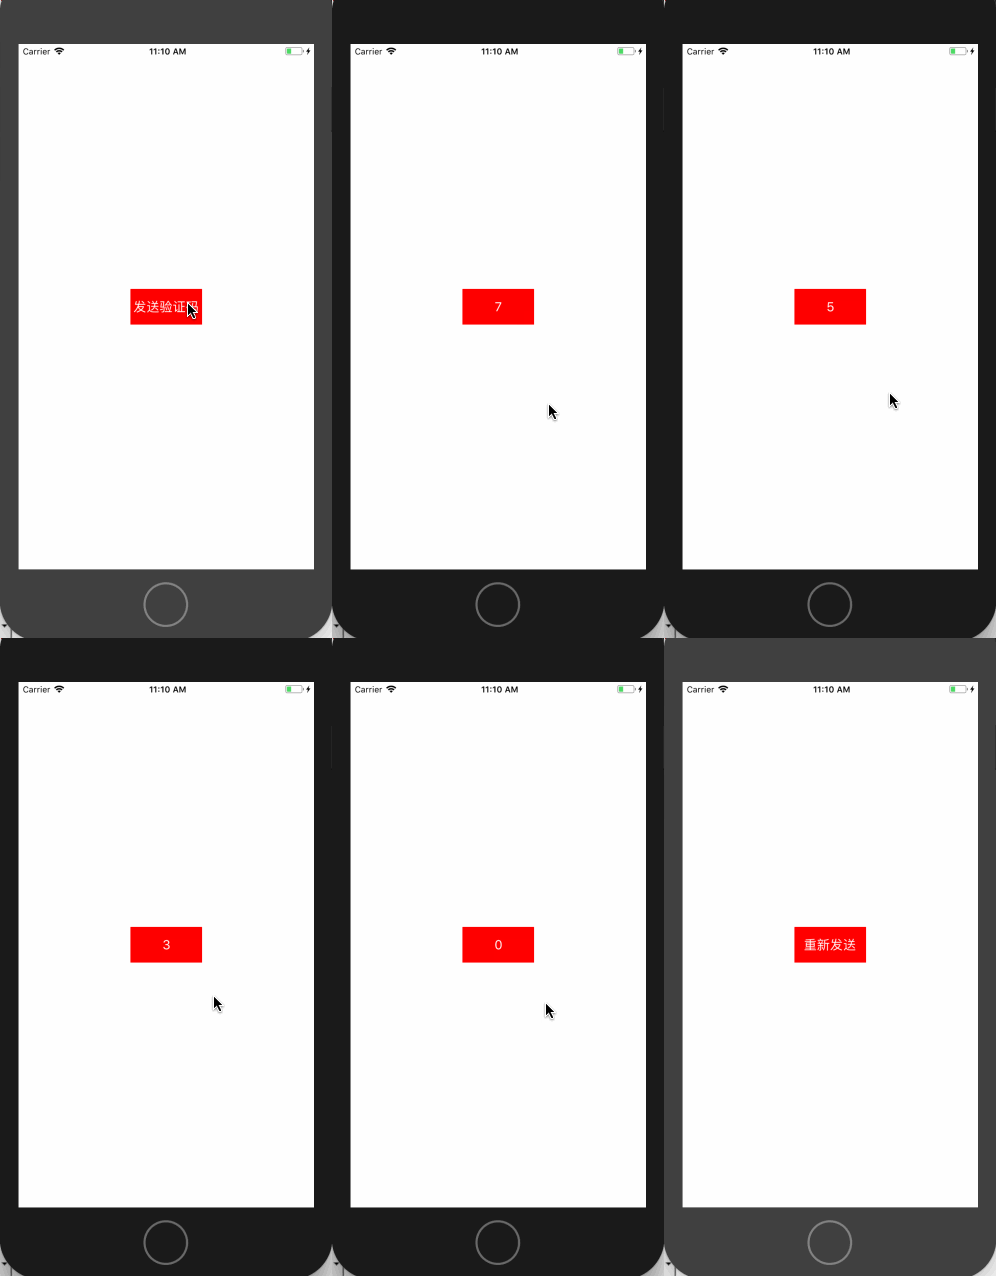
效果图:


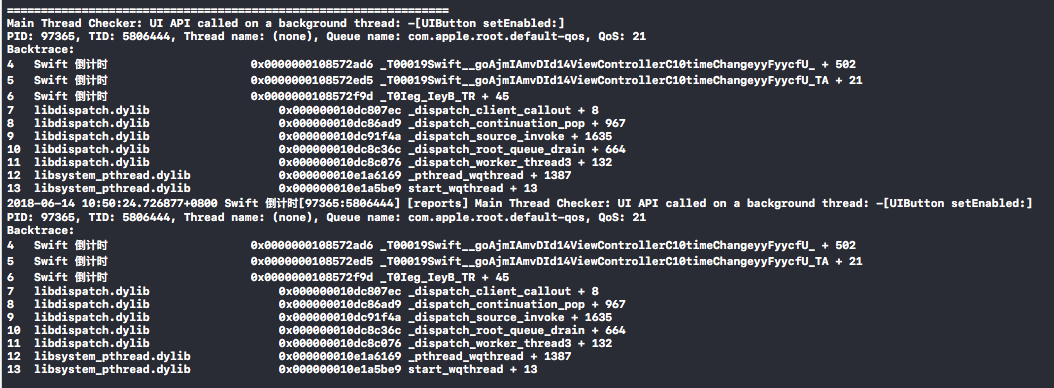
注意:点击事件中的 self.btn.isEnabled  self.btn.setTitle 须放在主线程中进行,不然控制台报错,截图如下:


  • 2
    点赞
  • 2
    收藏
    觉得还不错? 一键收藏
  • 0
    评论
Swift 4.0中,系统没有提供直接的底部弹窗控件。但是你可以使用UIAlertController和UIAlertAction来创建一个自定义的底部弹窗。下面是一个示例代码: ```swift func showBottomAlert() { let alertController = UIAlertController(title: nil, message: nil, preferredStyle: .actionSheet) let action1 = UIAlertAction(title: "Action 1", style: .default) { (action) in // 处理点击 Action 1 的操作 } alertController.addAction(action1) let action2 = UIAlertAction(title: "Action 2", style: .default) { (action) in // 处理点击 Action 2 的操作 } alertController.addAction(action2) let cancelAction = UIAlertAction(title: "Cancel", style: .cancel) { (action) in // 处理点击取消按钮的操作 } alertController.addAction(cancelAction) if let popoverPresentationController = alertController.popoverPresentationController { popoverPresentationController.sourceView = self.view popoverPresentationController.sourceRect = CGRect(x: self.view.bounds.midX, y: self.view.bounds.maxY, width: 0, height: 0) popoverPresentationController.permittedArrowDirections = [] } present(alertController, animated: true, completion: nil) } ``` 在上面的代码中,我们创建了一个UIAlertController,并添加了两个UIAlertAction作为选项,以及一个UIAlertAction作为取消按钮。然后,我们通过present方法将底部弹窗显示在屏幕上。 注意,为了将弹窗显示在底部,我们设置了popoverPresentationController的sourceView为当前的view,并且设置了sourceRect的位置在屏幕底部中间。这样就能够实现底部弹窗的效果。 希望这可以帮助你实现底部弹窗!如果还有其他问题,请随时提问。

“相关推荐”对你有帮助么?

  • 非常没帮助
  • 没帮助
  • 一般
  • 有帮助
  • 非常有帮助
提交
评论
添加红包

请填写红包祝福语或标题

红包个数最小为10个

红包金额最低5元

当前余额3.43前往充值 >
需支付:10.00
成就一亿技术人!
领取后你会自动成为博主和红包主的粉丝 规则
hope_wisdom
发出的红包
实付
使用余额支付
点击重新获取
扫码支付
钱包余额 0

抵扣说明:

1.余额是钱包充值的虚拟货币,按照1:1的比例进行支付金额的抵扣。
2.余额无法直接购买下载,可以购买VIP、付费专栏及课程。

余额充值