


Apollo简介
Apollo(阿波罗)是携程框架部门研发的分布式配置中心,能够集中化管理应用不同环境、不同集群的配置,配置修改后能够实时推送到应用端,并且具备规范的权限、流程治理等特性,适用于微服务配置管理场景。

环境准备
java: JDK 1.8.x
maven:3.x.x
mysql:5.7.x 【建议不要低于5.7,否则后面创建数据库表的sql会有问题,某些功能不支持】
apollo: 1.10.0
1、安装好其它依赖环境,开始 -> 拉取Apollo项目:https://github.com/apolloconfig/apollo

2、创建需要的数据库(拿到对应2个sql去数据库执行)


3、打包项目(build package)
将下载下来的 apollo 源码导入到idea中,我们需要关注的几个项目:

找到 /apollo/scripts/build.bat(Linux 是 bulid.sh)
Windows下:build.bat
rem
rem Copyright 2021 Apollo Authors
rem
rem Licensed under the Apache License, Version 2.0 (the "License");
rem you may not use this file except in compliance with the License.
rem You may obtain a copy of the License at
rem
rem http://www.apache.org/licenses/LICENSE-2.0
rem
rem Unless required by applicable law or agreed to in writing, software
rem distributed under the License is distributed on an "AS IS" BASIS,
rem WITHOUT WARRANTIES OR CONDITIONS OF ANY KIND, either express or implied.
rem See the License for the specific language governing permissions and
rem limitations under the License.
rem
@echo off

rem apollo config db info
// & 后面拼接的内容可根据对应安装的数据库版本情况
set apollo_config_db_url="jdbc:mysql://localhost:3306/ApolloConfigDB?zeroDateTimeBehavior=convertToNull&characterEncoding=utf8&serverTimezone=UTC"
set apollo_config_db_username="root"
set apollo_config_db_password="123"

rem apollo portal db info
set apollo_portal_db_url="jdbc:mysql://localhost:3306/ApolloPortalDB?zeroDateTimeBehavior=convertToNull&characterEncoding=utf8&serverTimezone=UTC"
set apollo_portal_db_username="root"
set apollo_portal_db_password="123"

rem meta server url, different environments should have different meta server addresses
set dev_meta="http://localhost:configService对应的端口"
set fat_meta="http://someIp:8080"
set uat_meta="http://anotherIp:8080"
set pro_meta="http://yetAnotherIp:8080"

set META_SERVERS_OPTS=-Ddev_meta=%dev_meta% -Dfat_meta=%fat_meta% -Duat_meta=%uat_meta% -Dpro_meta=%pro_meta%

rem =============== Please do not modify the following content ===============
rem go to script directory
cd "%~dp0"

cd ..

rem package config-service and admin-service
echo "==== starting to build config-service and admin-service ===="

call mvn clean package -DskipTests -pl apollo-configservice,apollo-adminservice -am -Dapollo_profile=github -Dspring_datasource_url=%apollo_config_db_url% -Dspring_datasource_username=%apollo_config_db_username% -Dspring_datasource_password=%apollo_config_db_password%

echo "==== building config-service and admin-service finished ===="

echo "==== starting to build portal ===="

call mvn clean package -DskipTests -pl apollo-portal -am -Dapollo_profile=github,auth -Dspring_datasource_url=%apollo_portal_db_url% -Dspring_datasource_username=%apollo_portal_db_username% -Dspring_datasource_password=%apollo_portal_db_password% %META_SERVERS_OPTS%

echo "==== building portal finished ===="

pause
Linux下:bulid.sh
#!/bin/sh
#
# Copyright 2021 Apollo Authors
#
# Licensed under the Apache License, Version 2.0 (the "License");
# you may not use this file except in compliance with the License.
# You may obtain a copy of the License at
#
# http://www.apache.org/licenses/LICENSE-2.0
#
# Unless required by applicable law or agreed to in writing, software
# distributed under the License is distributed on an "AS IS" BASIS,
# WITHOUT WARRANTIES OR CONDITIONS OF ANY KIND, either express or implied.
# See the License for the specific language governing permissions and
# limitations under the License.
#

# apollo config db info
apollo_config_db_url='jdbc:mysql://虚拟机内网IP地址:3306/ApolloConfigDB?zeroDateTimeBehavior=convertToNull&characterEncoding=utf8&serverTimezone=UTC'
apollo_config_db_username='root'
apollo_config_db_password='123456'

# apollo portal db info
apollo_portal_db_url='jdbc:mysql://虚拟机内网IP地址:3306/ApolloPortalDB?zeroDateTimeBehavior=convertToNull&characterEncoding=utf8&serverTimezone=UTC'
apollo_portal_db_username='root'
apollo_portal_db_password='123456'

# meta server url, different environments should have different meta server addresses
dev_meta=http://虚拟机内网IP地址:configService对应的端口
fat_meta=http://fill-in-fat-meta-server:8080
uat_meta=http://fill-in-uat-meta-server:8080
pro_meta=http://fill-in-pro-meta-server:8080

META_SERVERS_OPTS="-Ddev_meta=$dev_meta -Dfat_meta=$fat_meta -Duat_meta=$uat_meta -Dpro_meta=$pro_meta"

# =============== Please do not modify the following content =============== #
# go to script directory
cd "${0%/*}" || exit

cd ..

# package config-service and admin-service
echo "==== starting to build config-service and admin-service ===="

mvn clean package -DskipTests -pl apollo-configservice,apollo-adminservice -am -Dapollo_profile=github -Dspring_datasource_url=$apollo_config_db_url -Dspring_datasource_username=$apollo_config_db_username -Dspring_datasource_password=$apollo_config_db_password

echo "==== building config-service and admin-service finished ===="

echo "==== starting to build portal ===="

mvn clean package -DskipTests -pl apollo-portal -am -Dapollo_profile=github,auth -Dspring_datasource_url=$apollo_portal_db_url -Dspring_datasource_username=$apollo_portal_db_username -Dspring_datasource_password=$apollo_portal_db_password $META_SERVERS_OPTS

echo "==== building portal finished ===="
修改完上面的配置之后,执行build.sh 批处理命令文件进行编译打包,在执行的过程中可能会出现一些异常(一般是maven依赖异常),自行百度解决之后,再重新执行。
打包成功之后,找到 apollo-configservice、apollo-adminservice、apollo-portal 下的 target 目录(build是执行 maven 的 package 命令),找到已经打好的三个压缩包,copy 出来放到一个单独的目录(方便启动)。

解压到某个目录下

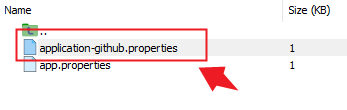
4、修改 config 目录下的 properties 文件
# DataSource
spring.jpa.database=mysql -- 默认不是MySQL,不设置会报错
spring.datasource.driver-class-name=com.mysql.cj.jdbc.Driver
spring.datasource.url = jdbc:mysql://虚拟机内网IP:3306/ApolloConfigDB?zeroDateTimeBehavior=convertToNull&characterEncoding=utf8&serverTimezone=UTC&useSSL=false
spring.datasource.username = 用户名
spring.datasource.password = 密码
server.port=对应端口
server.address=虚拟机内网IP
eureka.client.register-with-eureka=false
eureka.client.fetch-registry=false
5、进入jar 的当前目录,=依次=启动apollo-configservice、apollo-adminservice、apollo-portal 三个服务。相隔服务启动等2分钟,有依赖
nohup java -Dserver.port=configservice对应的端口 -Deureka.instance.ip-address=虚拟机外网IP地址 -Deureka.instance.homePageUrl=http://虚拟机外网IP地址:configservice对应的端口 -jar apollo-configservice-1.10.0-SNAPSHOT.jar &

nohup java -Dserver.port=adminservice对应的端口 -Deureka.instance.ip-address=虚拟机外网IP地址 -Deureka.instance.homePageUrl=http://虚拟机外网IP地址:adminservice对应的端口 -jar apollo-adminservice-1.10.0-SNAPSHOT.jar &

nohup java -Dserver.port=portal对应的端口  -jar apollo-portal-1.10.0-SNAPSHOT.jar &
全部启动完成之后,打开浏览器输入:http://localhost:8070
登录名/密码:apollo/admin
http://localhost:8080 如果出现eureka 的管理界面,说明服务启动正常


 464
464


 被折叠的 条评论
为什么被折叠?
被折叠的 条评论
为什么被折叠?
 到【灌水乐园】发言


