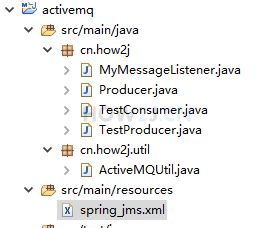
消息中间件系列教材 (六)- ActiveMQ - Spring方式


步骤1:spring 模式
步骤2:先运行,看到效果,再学习
步骤3:模仿和排错
步骤4:pom.xml
步骤5:spring_jms.xml
步骤6:ActiveMQUtil
步骤7:Producer
步骤8:TestProducer
步骤9:MyMessageListener
步骤10:TestConsumer
步骤11:模式切换

步骤 1 : spring 模式

前面学习的是 jms 模式,下面来采用 spring 模式使用 activeMQ。

步骤 2 : 先运行,看到效果,再学习

老规矩,先下载下载区(点击进入)的可运行项目,配置运行起来,确认可用之后,再学习做了哪些步骤以达到这样的效果。 
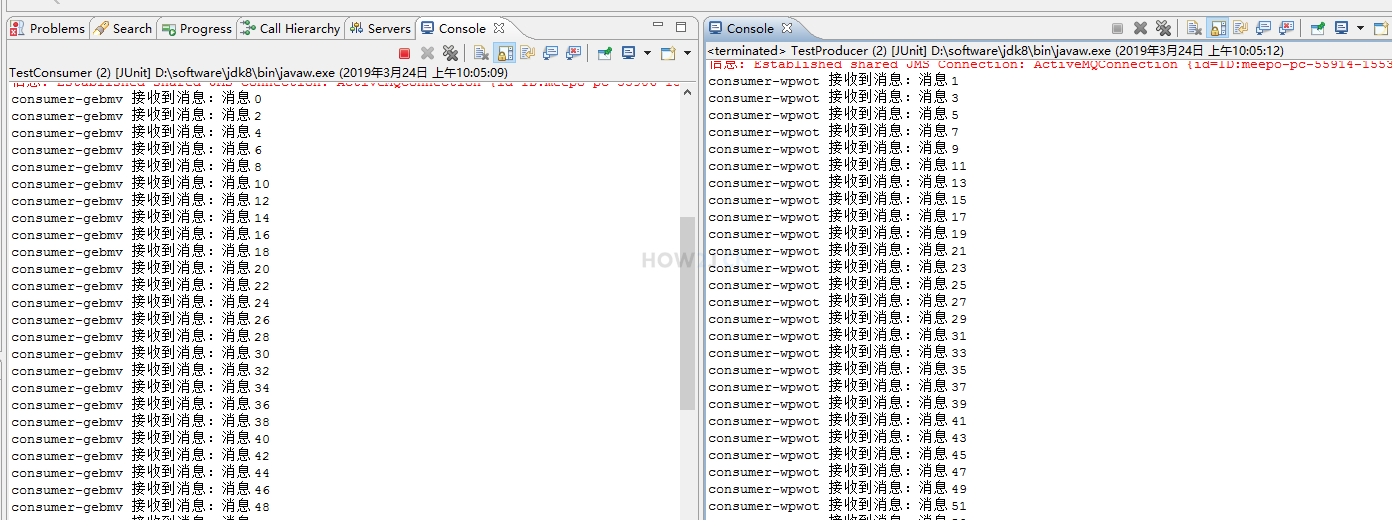
先运行 1次 TestConsumer, 然后运行 1次 TestProducer。
可以看到如图所示的,有两个消费者在瓜分 消息。
e? 明明只启动了一次TestConsumer ,为什么会有两个消费者呢?
因为采用 spring 模式, 会用到一个叫做 消息监听容器的 类: DefaultMessageListenerContainer, 它会伴随 spring的启动而自动启动。 所以无论是 TestConsumer,还是 TestProducer 里面都会有它了。 这个在后面会详细讲解。

先运行,看到效果,再学习

步骤 3 : 模仿和排错

在确保可运行项目能够正确无误地运行之后,再严格照着教程的步骤,对代码模仿一遍。 
模仿过程难免代码有出入,导致无法得到期望的运行结果,此时此刻通过比较正确答案 ( 可运行项目 ) 和自己的代码,来定位问题所在。 
采用这种方式,学习有效果,排错有效率,可以较为明显地提升学习速度,跨过学习路上的各个槛。 

推荐使用diffmerge软件,进行文件夹比较。把你自己做的项目文件夹,和我的可运行项目文件夹进行比较。 
这个软件很牛逼的,可以知道文件夹里哪两个文件不对,并且很明显地标记出来 
这里提供了绿色安装和使用教程:diffmerge 下载和使用教程

步骤 4 : pom.xml

引入 activemq, spring , junit ,hutool 等等

<project xmlns="http://maven.apache.org/POM/4.0.0"xmlns:xsi="http://www.w3.org/2001/XMLSchema-instance"xsi:schemaLocation="http://maven.apache.org/POM/4.0.0 http://maven.apache.org/xsd/maven-4.0.0.xsd">

  <modelVersion>4.0.0</modelVersion>

  <groupId>cn.how2j</groupId>

  <artifactId>activemq</artifactId>

  <version>0.0.1-SNAPSHOT</version>

  <name>activemq</name>

  <description>activemq</description>

  <dependencies>

          <dependency>

            <groupId>org.apache.activemq</groupId>

            <artifactId>activemq-client</artifactId>

            <version>5.13.4</version>

         </dependency>

          <dependency>

            <groupId>org.springframework</groupId>

            <artifactId>spring-jms</artifactId>    

            <version>4.3.2.RELEASE</version>    

        </dependency>

          <dependency>

            <groupId>org.springframework</groupId>

            <artifactId>spring-test</artifactId>

            <version>4.2.4.RELEASE</version>    

        </dependency>

        <dependency>

            <groupId>junit</groupId>

            <artifactId>junit</artifactId>

            <version>4.9</version>

        </dependency>

      <dependency>

        <groupId>cn.hutool</groupId>

        <artifactId>hutool-all</artifactId>

        <version>4.3.1</version>

    </dependency

  </dependencies>


</project>

步骤 5 : spring_jms.xml

在 resources下创建 spring_jms.xml 文件,这里其实就是对 activemq 的相关配置。

spring_jms.xml

<?xml version="1.0" encoding="UTF-8"?>

<beans xmlns="http://www.springframework.org/schema/beans"

    xmlns:xsi="http://www.w3.org/2001/XMLSchema-instance"

    xmlns:p="http://www.springframework.org/schema/p"

    xmlns:context="http://www.springframework.org/schema/context"

    xmlns:dubbo="http://code.alibabatech.com/schema/dubbo"

    xmlns:mvc="http://www.springframework.org/schema/mvc"

    xsi:schemaLocation="http://www.springframework.org/schema/beans http://www.springframework.org/schema/beans/spring-beans.xsd

        http://www.springframework.org/schema/mvc http://www.springframework.org/schema/mvc/spring-mvc.xsd

        http://code.alibabatech.com/schema/dubbo http://code.alibabatech.com/schema/dubbo/dubbo.xsd

        http://www.springframework.org/schema/context http://www.springframework.org/schema/context/spring-context.xsd">

   <context:component-scan base-package="cn.how2j"></context:component-scan>        

    <!-- 真正可以产生Connection的ConnectionFactory,由对应的 JMS服务厂商提供-->  

    <bean id="targetConnectionFactory"class="org.apache.activemq.ActiveMQConnectionFactory">  

        <property name="brokerURL" value="tcp://127.0.0.1:61616"/>  

    </bean>          


    <!-- Spring用于管理真正的ConnectionFactory的ConnectionFactory -->  

    <bean id="connectionFactory"class="org.springframework.jms.connection.SingleConnectionFactory">  


    <!-- 目标ConnectionFactory对应真实的可以产生JMS Connection的ConnectionFactory -->  

        <property name="targetConnectionFactory" ref="targetConnectionFactory"/>  

    </bean>         


    <!-- Spring提供的JMS工具类,它可以进行消息发送、接收等 -->  

    <bean id="jmsTemplate" class="org.springframework.jms.core.JmsTemplate">  

        <!-- 这个connectionFactory对应的是我们定义的Spring提供的那个ConnectionFactory对象 -->  

        <property name="connectionFactory" ref="connectionFactory"/>  

    </bean>      


    <!--这个是队列目的地, ActiveMQQueue 就表示队列模式。 如果要用主题模式就改成 ActiveMQTopic就行了 -->  

    <bean id="textDestination" class="org.apache.activemq.command.ActiveMQQueue">  

        <constructor-arg value="queue_style"/>  

    </bean>  


    <!-- 我的监听类 -->

    <bean id="myMessageListener" class="cn.how2j.MyMessageListener"></bean>


    <!-- 消息监听容器,会伴随spring的启动 -->

    <bean class="org.springframework.jms.listener.DefaultMessageListenerContainer">

        <property name="connectionFactory" ref="connectionFactory" />

        <property name="destination" ref="textDestination" />

        <property name="messageListener" ref="myMessageListener" />

    </bean>           


</beans>

步骤 6 : ActiveMQUtil

工具类,用于判断服务器是否启动。

package cn.how2j.util;


import javax.swing.JOptionPane;


import cn.hutool.core.util.NetUtil;


public class ActiveMQUtil {


    public static void main(String[] args) {

        checkServer();

    }

    public static void checkServer() {

        if(NetUtil.isUsableLocalPort(8161)) {

            JOptionPane.showMessageDialog(null"ActiveMQ 服务器未启动 ");

            System.exit(1);


    }

}

步骤 7 : Producer

生产者类

package cn.how2j;


import javax.jms.Destination;

import javax.jms.JMSException;

import javax.jms.Message;

import javax.jms.Session;


import org.springframework.beans.factory.annotation.Autowired;

import org.springframework.jms.core.JmsTemplate;

import org.springframework.jms.core.MessageCreator;

import org.springframework.stereotype.Component;


@Component

public class Producer {


    @Autowired

    private JmsTemplate jmsTemplate;


    @Autowired

    private Destination textDestination;


    public void sendTextMessage(final String text){

        jmsTemplate.send(textDestination, new MessageCreator() {


            public Message createMessage(Session session) throws JMSException {

                return session.createTextMessage(text);

            }

        });

    }


}

步骤 8 : TestProducer

测试生产者,发送100条消息

package cn.how2j;

import org.junit.Before;

import org.junit.Test;

import org.junit.runner.RunWith;

import org.springframework.beans.factory.annotation.Autowired;

import org.springframework.test.context.ContextConfiguration;

import org.springframework.test.context.junit4.SpringJUnit4ClassRunner;


import cn.how2j.util.ActiveMQUtil;


@RunWith(SpringJUnit4ClassRunner.class)

@ContextConfiguration(locations="classpath:spring_jms.xml")

public class TestProducer {

    @Autowired

    private Producer producer;


    @Before

    public void checkServer() {

        ActiveMQUtil.checkServer();

    }


    @Test

    public void testSend(){

        for (int i = 0; i < 100; i++) {

            producer.sendTextMessage("消息 " + i);

        }

    }

}

步骤 9 : MyMessageListener

监听类,用于获取新的消息

package cn.how2j;


import javax.jms.JMSException;

import javax.jms.Message;

import javax.jms.MessageListener;

import javax.jms.TextMessage;


import cn.hutool.core.util.RandomUtil;


public class MyMessageListener implements MessageListener {


    String name = "consumer-"+ RandomUtil.randomString(5);

    public  MyMessageListener() {

        System.out.println(name + " started");

    }


    public void onMessage(Message message) {

        TextMessage textMessage=(TextMessage)message;        

        try {

            System.out.println(name+" 接收到消息:"+textMessage.getText());

        catch (JMSException e) {

            e.printStackTrace();

        }

    }

}

步骤 10 : TestConsumer

消费者测试类,他其实什么都没做。 虽然它什么都没做,但是因为他是运行在 spring框架下的测试,所以一旦启动,就会导致一个新的 DefaultMessageListenerContainer 被启动,间接地导致 一个新的 MyMessageListener 被启动。 于是也就充当了消费者的角色了。
其中的

System.in.read();


是为了这个测试类不退出,可以一直监听用。

与这个类似的,  TestProducer 类的启动,也会导致一个 MyMessageListener 被启动,所以 TestProducer 本身既是一个生产者,也是一个消费者。
于是在一开始的测试 先运行,看到效果,再学习 里,也就有了 两个消费者存在的截图了。

package cn.how2j;


import java.io.IOException;


import org.junit.Before;

import org.junit.Test;

import org.junit.runner.RunWith;

import org.springframework.test.context.ContextConfiguration;

import org.springframework.test.context.junit4.SpringJUnit4ClassRunner;


import cn.how2j.util.ActiveMQUtil;


@RunWith(SpringJUnit4ClassRunner.class)

@ContextConfiguration(locations="classpath:spring_jms.xml")

public class TestConsumer {

    @Before

    public void checkServer() {

        ActiveMQUtil.checkServer();

    }


    @Test

    public void test(){

        try {

            //写这个是为了不让当前测试退出。  因为 spring的配置, MyMessageListener 会自动启动

            System.in.read();

        catch (IOException e) {

            e.printStackTrace();

        }        

    }    

}

步骤 11 : 模式切换

当前例子是队列模式,那么要做主题模式怎么办呢? 修改 spring_jms 就可以了,对了 queue_style 最好也修改成 topic_style,免得混淆。

<!--这个是队列目的地, ActiveMQQueue 就表示队列模式。 如果要用主题模式就改成 ActiveMQTopic就行了 -->  

<bean id="textDestination" class="org.apache.activemq.command.ActiveMQQueue">  

    <constructor-arg value="queue_style"/>  

</bean>  


更多内容,点击了解: https://how2j.cn/k/message/message-activemq-spring/2028.html

  • 0
    点赞
  • 1
    收藏
    觉得还不错? 一键收藏
  • 0
    评论
评论
添加红包

请填写红包祝福语或标题

红包个数最小为10个

红包金额最低5元

当前余额3.43前往充值 >
需支付:10.00
成就一亿技术人!
领取后你会自动成为博主和红包主的粉丝 规则
hope_wisdom
发出的红包
实付
使用余额支付
点击重新获取
扫码支付
钱包余额 0

抵扣说明:

1.余额是钱包充值的虚拟货币,按照1:1的比例进行支付金额的抵扣。
2.余额无法直接购买下载,可以购买VIP、付费专栏及课程。

余额充值