


在官网给的源码中,学习如何搭建第一个基于shiro的例子:
- 开发工具 IDEA 2017.2.3
- JDK 1.8
- Spring 4.3.8
- Shiro 1.3.2
搭建一个web的maven项目:
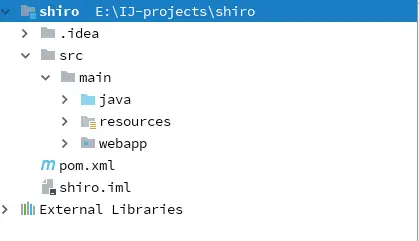
image.png
在pom.xml文件里添加
<dependencies>
    <dependency>
      <groupId>org.apache.shiro</groupId>
      <artifactId>shiro-core</artifactId>
      <version>1.3.2</version>
    </dependency>
    <dependency>
      <groupId>org.apache.shiro</groupId>
      <artifactId>shiro-spring</artifactId>
      <version>1.3.2</version>
    </dependency>
    <dependency>
      <groupId>org.apache.shiro</groupId>
      <artifactId>shiro-ehcache</artifactId>
      <version>1.4.0</version>
    </dependency>
    <dependency>
      <groupId>net.sf.ehcache</groupId>
      <artifactId>ehcache-core</artifactId>
      <version>2.6.11</version>
    </dependency>
    <dependency>
      <groupId>org.apache.shiro</groupId>
      <artifactId>shiro-web</artifactId>
      <version>1.3.2</version>
    </dependency>
    <dependency>
      <groupId>javax.servlet</groupId>
      <artifactId>javax.servlet-api</artifactId>
      <version>3.1.0</version>
      <scope>provided</scope>
    </dependency>
    <dependency>
      <groupId>hsqldb</groupId>
      <artifactId>hsqldb</artifactId>
      <version>1.8.0.10</version>
      <scope>runtime</scope>
    </dependency>
    <dependency>
      <groupId>org.slf4j</groupId>
      <artifactId>slf4j-log4j12</artifactId>
      <version>1.7.21</version>
      <scope>runtime</scope>
    </dependency>
    <dependency>
      <groupId>org.slf4j</groupId>
      <artifactId>jcl-over-slf4j</artifactId>
      <version>1.7.25</version>
      <scope>runtime</scope>
    </dependency>
    <dependency>
      <groupId>log4j</groupId>
      <artifactId>log4j</artifactId>
      <version>1.2.17</version>
      <scope>runtime</scope>
    </dependency>
    <dependency>
      <groupId>org.springframework</groupId>
      <artifactId>spring-context</artifactId>
      <version>4.3.8.RELEASE</version>
    </dependency>
    <dependency>
      <groupId>org.springframework</groupId>
      <artifactId>spring-jdbc</artifactId>
      <version>4.3.8.RELEASE</version>
    </dependency>
    <dependency>
      <groupId>org.springframework</groupId>
      <artifactId>spring-webmvc</artifactId>
      <version>4.3.8.RELEASE</version>
    </dependency>
    <dependency>
      <groupId>javax.servlet</groupId>
      <artifactId>jstl</artifactId>
      <version>1.2</version>
      <scope>runtime</scope>
    </dependency>
  </dependencies>
修改web.xnk文件:配置springmvc前端控制器啊和shiro的拦截器
  <context-param>
    <param-name>contextConfigLocation</param-name>
    <param-value>classpath:applicationContext.xml</param-value>
  </context-param>
  <!-- Shiro Filter is defined in the spring application context: -->
  <filter>
    <filter-name>shiroFilter</filter-name>
    <filter-class>org.springframework.web.filter.DelegatingFilterProxy</filter-class>
    <init-param>
      <param-name>targetFilterLifecycle</param-name>
      <param-value>true</param-value>
    </init-param>
  </filter>

  <filter-mapping>
    <filter-name>shiroFilter</filter-name>
    <url-pattern>/*</url-pattern>
  </filter-mapping>

  <listener>
    <listener-class>org.springframework.web.context.ContextLoaderListener</listener-class>
  </listener>

  <servlet>
    <servlet-name>spring</servlet-name>
    <servlet-class>org.springframework.web.servlet.DispatcherServlet</servlet-class>
  </servlet>
  <servlet-mapping>
    <servlet-name>spring</servlet-name>
    <url-pattern>/</url-pattern>
  </servlet-mapping>
在资源文件夹新建applicationContext.xml文件
<?xml version="1.0" encoding="UTF-8"?>
<beans xmlns="http://www.springframework.org/schema/beans"
       xmlns:xsi="http://www.w3.org/2001/XMLSchema-instance"
       xsi:schemaLocation="http://www.springframework.org/schema/beans http://www.springframework.org/schema/beans/spring-beans.xsd">
    <!-- =========================================================
         Shiro Core Components - Not Spring Specific
         ========================================================= -->
    <!-- Shiro's main business-tier object for web-enabled applications
         (use DefaultSecurityManager instead when there is no web environment)-->
    <!--
        1配置安全管理器
    -->
    <bean id="securityManager" class="org.apache.shiro.web.mgt.DefaultWebSecurityManager">
        <property name="cacheManager" ref="cacheManager"/>
        <!-- Single realm app.  If you have multiple realms, use the 'realms' property instead. -->
        <property name="realm" ref="jdbcRealm"/>
    </bean>

    <!-- Let's use some enterprise caching support for better performance.  You can replace this with any enterprise
         caching framework implementation that you like (Terracotta+Ehcache, Coherence, GigaSpaces, etc -->
    <!--
        2配置缓存cacheManager
        需要加入相关依赖
    -->
    <bean id="cacheManager" class="org.apache.shiro.cache.ehcache.EhCacheManager">
        <!-- Set a net.sf.ehcache.CacheManager instance here if you already have one.  If not, a new one
             will be creaed with a default config:
             <property name="cacheManager" ref="ehCacheManager"/> -->
        <!-- If you don't have a pre-built net.sf.ehcache.CacheManager instance to inject, but you want
             a specific Ehcache configuration to be used, specify that here.  If you don't, a default
             will be used.:
        <property name="cacheManagerConfigFile" value="classpath:some/path/to/ehcache.xml"/> -->
    </bean>

    <!-- Used by the SecurityManager to access security data (users, roles, etc).
         Many other realm implementations can be used too (PropertiesRealm,
         LdapRealm, etc. -->
    <!--
        3配置安全数据源
    -->
    <bean id="jdbcRealm" class="com.ximi.shiro.MyRealm">

    </bean>

    <!-- =========================================================
         Shiro Spring-specific integration
         ========================================================= -->
    <!-- Post processor that automatically invokes init() and destroy() methods
         for Spring-configured Shiro objects so you don't have to
         1) specify an init-method and destroy-method attributes for every bean
            definition and
         2) even know which Shiro objects require these methods to be
            called. -->
    <!--
        4配置LifecycleBeanPostProcessor: 可以子自动的调用配置在spring IOC容器中的shiro bean的生命周期方法
    -->
    <bean id="lifecycleBeanPostProcessor" class="org.apache.shiro.spring.LifecycleBeanPostProcessor"/>

    <!-- Enable Shiro Annotations for Spring-configured beans.  Only run after
         the lifecycleBeanProcessor has run: -->
    <!--
        5配置DefaultAdvisorAutoProxyCreator:启用IOC容器中使用shiro的注解
    -->
    <bean class="org.springframework.aop.framework.autoproxy.DefaultAdvisorAutoProxyCreator"
          depends-on="lifecycleBeanPostProcessor"/>
    <bean class="org.apache.shiro.spring.security.interceptor.AuthorizationAttributeSourceAdvisor">
        <property name="securityManager" ref="securityManager"/>
    </bean>

    <!-- Define the Shiro Filter here (as a FactoryBean) instead of directly in web.xml -
         web.xml uses the DelegatingFilterProxy to access this bean.  This allows us
         to wire things with more control as well utilize nice Spring things such as
         PropertiesPlaceholderConfigurer and abstract beans or anything else we might need: -->
    <!--
        6配置shiroFilter:如果web.xml中不单独配置targetName属性的话,
        默认id要和web.xml中DelegatingFilterProxy的Filter name属性一致!!!!
    -->
    <bean id="shiroFilter" class="org.apache.shiro.spring.web.ShiroFilterFactoryBean">
        <property name="securityManager" ref="securityManager"/>
        <property name="loginUrl" value="/login.jsp"/>
        <property name="successUrl" value="/index.jsp"/>
        <property name="unauthorizedUrl" value="/unauthorized.jsp"/>
        <!-- The 'filters' property is not necessary since any declared javax.servlet.Filter bean
             defined will be automatically acquired and available via its beanName in chain
             definitions, but you can perform overrides or parent/child consolidated configuration
             here if you like: -->
        <!-- <property name="filters">
            <util:map>
                <entry key="aName" value-ref="someFilterPojo"/>
            </util:map>
        </property> -->
        <!--
            配置那些页面需要保护
            访问那些页面需要什么权限
            anon:匿名
            authc:保护的(必须登陆之后才能访问)
        -->
        <property name="filterChainDefinitions">
            <value>
                /login = anon

                # everything else requires authentication:
                /** = authc
            </value>
        </property>
    </bean>
</beans>
配置springmvc的组件:spring-servlet.xml
<?xml version="1.0" encoding="UTF-8"?>
<beans xmlns="http://www.springframework.org/schema/beans"
       xmlns:xsi="http://www.w3.org/2001/XMLSchema-instance" xmlns:mvc="http://www.springframework.org/schema/mvc"
       xmlns:context="http://www.springframework.org/schema/context"
       xsi:schemaLocation="http://www.springframework.org/schema/beans http://www.springframework.org/schema/beans/spring-beans.xsd http://www.springframework.org/schema/mvc http://www.springframework.org/schema/mvc/spring-mvc.xsd http://www.springframework.org/schema/context http://www.springframework.org/schema/context/spring-context.xsd">

    <context:component-scan base-package="com.ximi.shiro"/>

    <bean class="org.springframework.web.servlet.view.InternalResourceViewResolver">
        <property name="prefix" value="/"/>
        <property name="suffix" value=".jsp"/>
    </bean>

    <mvc:annotation-driven/>

    <mvc:default-servlet-handler/>

</beans>
配置log4j,控制台输出日志:log4j.properties
log4j.rootLogger=INFO, stdout

log4j.appender.stdout=org.apache.log4j.ConsoleAppender
log4j.appender.stdout.layout=org.apache.log4j.PatternLayout
log4j.appender.stdout.layout.ConversionPattern=%d %p [%c] - %m %n

# General Apache libraries
log4j.logger.org.apache=WARN

# Spring
log4j.logger.org.springframework=WARN

# Default Shiro logging
log4j.logger.org.apache.shiro=TRACE

# Disable verbose logging
log4j.logger.org.apache.shiro.util.ThreadContext=WARN
log4j.logger.org.apache.shiro.cache.ehcache.EhCache=WARN
先实现身份验证
流程
- 1、收集用户身份/凭证,即如用户名/密码
- 2、调用 Subject.login 进行登录,如果失败将得到相应AuthenticationException 异常,根据异常提示用户错误信息;否则登录成功
- 3、创建自定义的 Realm 类,继承org.apache.shiro.realm.AuthorizingRealm 类,实现doGetAuthenticationInfo() 方法
代码实现
1.编写一个简单的login表单页面
2.编写Controller,获取输入的参数,创建token对象,传给 Subject.login
3.编写自定义Realm类,实现doGetAuthenticationInfo() 方法里的逻辑


 553
553

 被折叠的 条评论
为什么被折叠?
被折叠的 条评论
为什么被折叠?
 到【灌水乐园】发言


