


文章目录
前言
processOn文档跳转
接上一篇:手撕netty源码(二)- 初始化ServerBootstrap
本篇讲解 ServerBootstrap 的bind方法,绑定端口,其实这个方法里面做了很多事,不止有绑定端口。
一、initAndRegister
//以下方法都在 io/netty/bootstrap/AbstractBootstrap.java

public ChannelFuture bind(int inetPort) {
    return bind(new InetSocketAddress(inetPort));
}

public ChannelFuture bind(SocketAddress localAddress) {
    validate();
    return doBind(ObjectUtil.checkNotNull(localAddress, "localAddress"));
}

private ChannelFuture doBind(final SocketAddress localAddress) {
	// 1.初始化并且完成注册
    final ChannelFuture regFuture = initAndRegister();
    final Channel channel = regFuture.channel();
    if (regFuture.cause() != null) {
        return regFuture;
    }

    if (regFuture.isDone()) {
        // At this point we know that the registration was complete and successful.
        ChannelPromise promise = channel.newPromise();
        // 2. 绑定端口
        doBind0(regFuture, channel, localAddress, promise);
        return promise;
    } else {
        、、、
        // 这里不是主线
    }
}
主要关注initAndRegister() 和 doBind0() 两个方法
先看一下initAndRegister()
final ChannelFuture initAndRegister() {
    Channel channel = null;
    try {
    	// 创建channel,从第二篇文章可以知道,
    	// 如果定义channel是这样写的
    	// b.channel(NioServerSocketChannel.class);
    	// 这里其实就是创建一个NioServerSocketChannel的实例
        channel = channelFactory.newChannel();
        init(channel);
    } catch (Throwable t) {
        if (channel != null) {
            // channel can be null if newChannel crashed (eg SocketException("too many open files"))
            channel.unsafe().closeForcibly();
            // as the Channel is not registered yet we need to force the usage of the GlobalEventExecutor
            return new DefaultChannelPromise(channel, GlobalEventExecutor.INSTANCE).setFailure(t);
        }
        // as the Channel is not registered yet we need to force the usage of the GlobalEventExecutor
        return new DefaultChannelPromise(new FailedChannel(), GlobalEventExecutor.INSTANCE).setFailure(t);
    }

    ChannelFuture regFuture = config().group().register(channel);
    if (regFuture.cause() != null) {
        if (channel.isRegistered()) {
            channel.close();
        } else {
            channel.unsafe().closeForcibly();
        }
    }

    return regFuture;
}
1.1 channelFactory.newChannel()
channelFactory.newChannel()执行完成之后,会创建一个NioServerSocketChannel的实例,如下图:

1.2 init(channel)
init(channel)中主要做的就是将在pipline中插入一个handler,这个handler的initChannel方法:
1、将创建ServerBootstrap时配置的handler加入到pipline
2、给ch.eventLoop()提交一个任务,这个任务是将new ServerBootstrapAcceptor 插入到pipline
但是这个handler何时被触发现在还不知道
// io/netty/bootstrap/ServerBootstrap.java
void init(Channel channel) {
    setChannelOptions(channel, newOptionsArray(), logger);
    setAttributes(channel, newAttributesArray());

    ChannelPipeline p = channel.pipeline();

    final EventLoopGroup currentChildGroup = childGroup;
    final ChannelHandler currentChildHandler = childHandler;
    final Entry<ChannelOption<?>, Object>[] currentChildOptions = newOptionsArray(childOptions);
    final Entry<AttributeKey<?>, Object>[] currentChildAttrs = newAttributesArray(childAttrs);

    p.addLast(new ChannelInitializer<Channel>() {
        @Override
        public void initChannel(final Channel ch) {
            final ChannelPipeline pipeline = ch.pipeline();
            ChannelHandler handler = config.handler();
            if (handler != null) {
                pipeline.addLast(handler);
            }

            ch.eventLoop().execute(new Runnable() {
                @Override
                public void run() {
                    pipeline.addLast(new ServerBootstrapAcceptor(
                            ch, currentChildGroup, currentChildHandler, currentChildOptions, currentChildAttrs));
                }
            });
        }
    });
}
但是你以为插入之后,pipline的结构会是这样的吗?
HeadContext <====> new DefaultChannelHandlerContext(new ChannelInitializer<Channel>()) <====> TailContext.
其实并不完全是,请看源码:
// io/netty/channel/DefaultChannelPipeline.java
public final ChannelPipeline addLast(EventExecutorGroup group, String name, ChannelHandler handler) {
    final AbstractChannelHandlerContext newCtx;
    synchronized (this) {
        checkMultiplicity(handler);

        newCtx = newContext(group, filterName(name, handler), handler);

        addLast0(newCtx);

        // If the registered is false it means that the channel was not registered on an eventLoop yet.
        // In this case we add the context to the pipeline and add a task that will call
        // ChannelHandler.handlerAdded(...) once the channel is registered.
        if (!registered) {
            newCtx.setAddPending();
            callHandlerCallbackLater(newCtx, true);
            return this;
        }

        EventExecutor executor = newCtx.executor();
        if (!executor.inEventLoop()) {
            callHandlerAddedInEventLoop(newCtx, executor);
            return this;
        }
    }
    callHandlerAdded0(newCtx);
    return this;
}

// io/netty/channel/DefaultChannelPipeline.java
private void addLast0(AbstractChannelHandlerContext newCtx) {
   AbstractChannelHandlerContext prev = tail.prev;
    newCtx.prev = prev;
    newCtx.next = tail;
    prev.next = newCtx;
    tail.prev = newCtx;
}
除了addLast0(newCtx)完成了pipline的插入之外,由于现在还没有开始register,所以还会执行 callHandlerCallbackLater(newCtx, true),并且将newCtx.setAddPending()
pipline中有一个PendingHandlerCallback pendingHandlerCallbackHead。它指向一个单向链表的头元素,但是,这个链表有什么用现在还不知道

1.3 config().group().register(channel)
从上一篇手撕netty源码(二)- 初始化ServerBootstrap【1.2 初始化group】知道,config().group()返回的其实就是 bossGroup
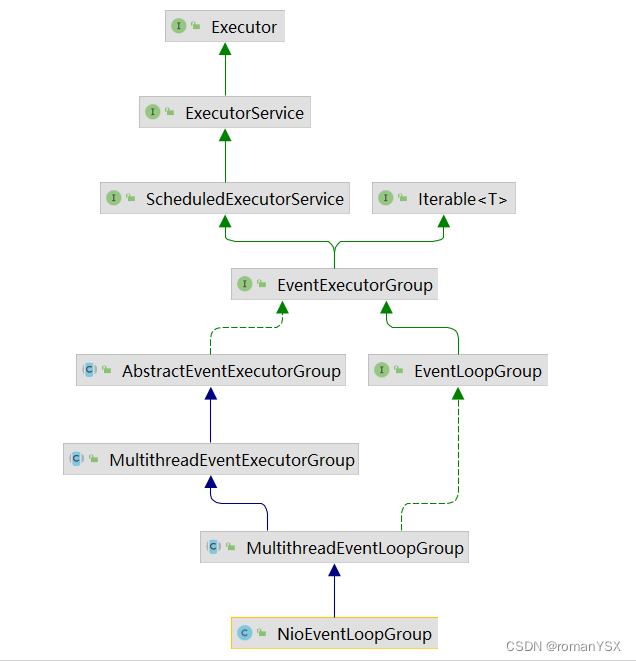
从上图很容易看得出,register方法该去哪里找:
// io/netty/channel/MultithreadEventLoopGroup.java
public ChannelFuture register(Channel channel) {
    return next().register(channel);
}

// io/netty/channel/MultithreadEventLoopGroup.java
public EventLoop next() {
    return (EventLoop) super.next();
}

// io/netty/util/concurrent/MultithreadEventExecutorGroup.java
public EventExecutor next() {
    return chooser.next();
}
看到chooser了,熟悉吧,回顾手撕netty源码(一)- NioEventLoopGroup【2.2 EventExecutorChooser 的创建】
这里chooser.next()返回的就是NioEventLoop的实例了,看看它是怎么注册的:
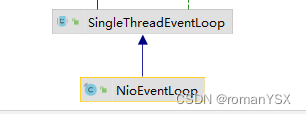
别忘了这里的channel是谁,就是上传创建的NioServerSocketChannel对象,从创建时的代码也可以看到:unsafe 其实就是 new NioMessageUnsafe()
// io/netty/channel/SingleThreadEventLoop.java
public ChannelFuture register(Channel channel) {
    return register(new DefaultChannelPromise(channel, this));
}

@Override
public ChannelFuture register(final ChannelPromise promise) {
    ObjectUtil.checkNotNull(promise, "promise");
    promise.channel().unsafe().register(this, promise);
    return promise;
}
至此,已经完成了channel的初始化和初步注册

二、doBind
完成服务端端口的监听
private static void doBind0(
       final ChannelFuture regFuture, final Channel channel,
        final SocketAddress localAddress, final ChannelPromise promise) {

    // This method is invoked before channelRegistered() is triggered.  Give user handlers a chance to set up
    // the pipeline in its channelRegistered() implementation.
    channel.eventLoop().execute(new Runnable() {
        @Override
        public void run() {
            if (regFuture.isSuccess()) {
                channel.bind(localAddress, promise).addListener(ChannelFutureListener.CLOSE_ON_FAILURE);
            } else {
                promise.setFailure(regFuture.cause());
            }
        }
    });
}


 被折叠的 条评论
为什么被折叠?
被折叠的 条评论
为什么被折叠?
 到【灌水乐园】发言


