


hutool工具多sheet自定义导出excel
大致需求
前端页面有个excel表格插件,内容配置都以json的形式保存。现在需要后台去解析这些配置并导出excel。本来以为很简单的一个导出功能,无非插入字段设置格式,结果硬是折腾了一周,坑有点多所以这里记一下。
hutool工具导出excel简单说明
主要使用三个关键包,其本质上还是apache poi。实现类底层最终还是hssfworkbook和xssfworkbook,具体区别不再赘述
import cn.hutool.poi.excel.ExcelReader;
import cn.hutool.poi.excel.ExcelUtil;
import cn.hutool.poi.excel.ExcelWriter;
下面补充一下导出代码
		/*文件名称*/
        String fileName = URLEncoder.encode(excelName, StandardCharsets.UTF_8);
        response.setContentType("application/vnd.ms-excel");
        response.setCharacterEncoding("utf-8");
        response.setHeader("content-disposition", "attachment;filename=" + fileName + ".xls");
        /*创建ExcelWriter*/
        ExcelWriter writer = ExcelUtil.getWriter();

        /*index 计数,excel的sheet页索引*/
        AtomicInteger index = new AtomicInteger();

        /*循环处理sheet*/
        for (int i = 0; i < config.size(); i++) {
            if (index.get() == 0) {
                //更改默认的sheet页命名
                writer.renameSheet(sheet .getName());
            } else {
                //创建新的sheet页
                writer.setSheet(sheet .getName());
            }

			// 具体sheet内容
			.......

			/*sheet页计数器*/
            index.getAndIncrement();
        }

        // 输出文件
        ServletOutputStream out = null;
        try {
            out = response.getOutputStream();
        } catch (IOException e) {
            log.error("导出失败!!", e);
            e.printStackTrace();
        }
        writer.flush(out, true);
        // 关闭writer,释放内存
        writer.close();
        //此处记得关闭输出Servlet流
        IoUtil.close(out);
需要的功能及使用问题
合并单元格
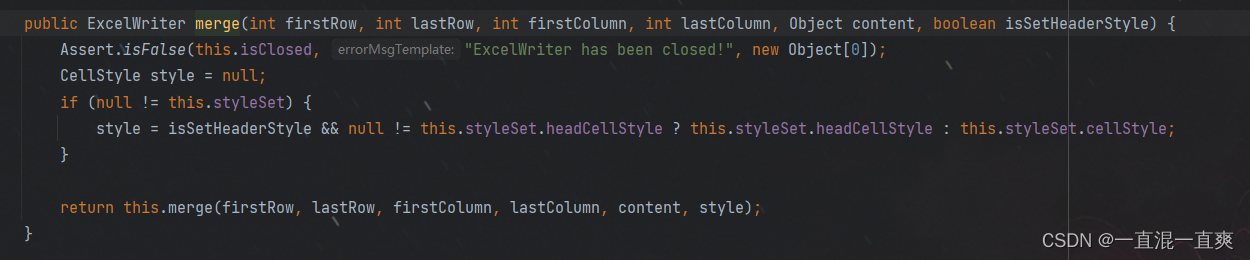
这个算是本次导出最简单的处理了,直接调用 ExcelWriter中的merge方法即可
writer.merge(r, r + rs - 1, c, c + cs - 1, null, false);
设置表格列宽和行高
这边有两个点,一个是前端页面直接获取的数值无法直接在po中使用,需要自己判断转化。第二个点就是没有行的情况下需要自己先创建(因为我是先解析行高度和列宽,后面合并再进行赋值的)。
使用poi的 setHeight 和 setColumnWidth
		// 行高
 		Set<String> indexStrList = jsonObject.keySet();
        for (String indexStr : indexStrList) {
            Row row = writer.getOrCreateRow(Integer.parseInt(indexStr));
            int height = jsonObject.getInt(indexStr, 20);
            row.setHeight((short) (height * 15));
        }
        // 列宽
        Set<String> indexStrList = jsonObject.keySet();
        for (String indexStr : indexStrList) {
            int weidth = jsonObject.getInt(indexStr, 70);
            writer.getSheet().setColumnWidth(Integer.parseInt(indexStr), weidth * 35);
        }
单元格内容及样式添加
这边因为无法判断接下来的单元格式数字还是文本所以只能采用先赋值内容在,在添加格式的办法
这里遇到了本次最大的坑!!!!
单元格样式CellStyle ,正常想法肯定都是
cellStyle = workbook.createCellStyle();
cellStyle.setVerticalAlignment(VerticalAlignment.CENTER);
cellStyle.setAlignment(HorizontalAlignment.CENTER);
....
cell.setCellStyle(cellStyle);
然后问题就出现了,你会发现前面一个或几个起作用,后面包括第二个sheet样式“丢了”,其实不是丢了,后来发现是被后面样式给覆盖了。
百度都给了一个方法 cloneStyleFrom(),可能我理解有问题反正照抄基本都G了,一起还搜到了一个问题

我自己没遇到,而且我导出的表格一共也就二三十个单元格 远远达不到格式上限。所以我一开始天真的以为只要用了cloneStyleFrom就OK了。
用了cloneStyleFrom前两行样式OK 后面又开始被覆盖。
这个复制和类的复制完全不一样不要联想类的clone()。这个cloneStyleFrom为了解决样式与workbook不同源的问题。设置同源后,再使用以下代码设置单元格样式就行了,都解决到这里了顺便就一起处理了样式上限的问题。
样式赋值代码
			CellStyle cellStyle = getCellStyleByMap(sheetIndex, ht, bg, ct, cell.getRow().getSheet().getWorkbook());
            // 这行代码修改前使用的是cell.setCellStyle(cellStyle),会引起其他异常,必须修改
            cell.getCellStyle().cloneStyleFrom(cellStyle);
            cell.setCellStyle(cellStyle);
样式获取代码
sheetIndex:第几个sheet;ht:居中位置;bg:背景色;ct:前端单元格格式json
 	/**
     * 全局样式map,避免【The maximum number of Cell Styles was exceeded. You can define up to 64000 style in a .xlsx Workbook】
     */
    private Map<String, CellStyle> styleMap;

		----------------------------------------------------------------------------------

		private CellStyle getCellStyleByMap(int sheetIndex, String ht, String bg, JSONObject ct, Workbook workbook) {
        // 拼接样式集的key
        String ctKey = "null";
        if (ObjectUtil.isNotEmpty(ct)) {
            ctKey = ct.getStr("t", "null");
        }
        String key = sheetIndex + "_" + (StringUtils.isEmpty(ht) ? "0" : ht) + "_" + (StringUtils.isEmpty(bg) ? "null" : bg) + "_" + ctKey;

        CellStyle cellStyle;
        // 判断全局样式集合
        if (!this.styleMap.isEmpty() && this.styleMap.containsKey(key)) {
            cellStyle = this.styleMap.get(key);
            return cellStyle;
        }

        // 为空则创建
        cellStyle = workbook.createCellStyle();

        // 单元格内容显示位置
        addAlignment(ht, cellStyle);

        // 单元格边框处理
        addBorder(cellStyle);

        // 单元格格式
        if (ObjectUtil.isNotEmpty(ct) && "null".equals(ctKey)) {
            addDataFormat(cellStyle, workbook, ctKey, ct);
        }

        // 背景颜色
        addBackgroundColor(bg, workbook, cellStyle);

        // 添加样式集,返回结果
        this.styleMap.put(key, cellStyle);
        return cellStyle;
    }
到这里单元格内容位置问题已经解决了
		// 单元格赋值
            if (StringUtils.isNotEmpty(value)) {
                cell.setCellValue(value);
            }
 		// 垂直居中
        cellStyle.setVerticalAlignment(VerticalAlignment.CENTER);
        // 水平居中
         cellStyle.setAlignment(HorizontalAlignment.CENTER);
         /*左边框样式*/
        cellStyle.setBorderLeft(BorderStyle.THIN);
        /*左边框颜色*/
        cellStyle.setLeftBorderColor(HSSFColor.HSSFColorPredefined.GREY_25_PERCENT.getIndex());
        /*上边框样式*/
        cellStyle.setBorderTop(BorderStyle.THIN);
        /*上边框颜色*/
        cellStyle.setTopBorderColor(HSSFColor.HSSFColorPredefined.GREY_25_PERCENT.getIndex());
        /*右边框样式*/
        cellStyle.setBorderRight(BorderStyle.THIN);
        /*右边框颜色*/
        cellStyle.setRightBorderColor(HSSFColor.HSSFColorPredefined.GREY_25_PERCENT.getIndex());
        /*下边框样式*/
        cellStyle.setBorderBottom(BorderStyle.THIN);
        /*下边框颜色*/
        cellStyle.setBottomBorderColor(HSSFColor.HSSFColorPredefined.GREY_25_PERCENT.getIndex());
        // 单元格格式
        String fa;
        DataFormat dataFormat = workbook.createDataFormat();
        String  fa = "yyyy-MM-dd HH:mm:ss";
        cellStyle.setDataFormat(dataFormat.getFormat(fa));
背景颜色
背景颜色遇到两个问题:到底是HSSFWorkbook还是XSSFWorkbook实现的;还有一个问题是两种实现方式的颜色自定义是完全不一样的,XSSF简单点这里不在列举,可以百度
先说下第一个处理办法 (很简单,但当时自己没想到),instanceof 判断一下即可
if (workbook instanceof HSSFWorkbook) {
}
第二个问题就有点麻烦了,先把16进制颜色转rgb,但是颜色赋值的方法是setFillForegroundColor();

没错short 人都傻了这玩意竟然是枚举,百度内容就不提了,有些人抄的什么玩意垃圾信息太多
后来还是找到了解决办法
		int red = 255;
        int green = 255;
        int blue = 255;
        if (StringUtils.isNotEmpty(bg)) {
            String colorCode16 = bg.replace("#", "");
            int[] rgb = ColorUtils.getRGB(colorCode16);
            red = rgb[0];
            green = rgb[1];
            blue = rgb[2];
        }
	if (workbook instanceof HSSFWorkbook) {
            HSSFWorkbook hssf = (HSSFWorkbook) workbook;
            HSSFPalette palette = hssf.getCustomPalette();
            HSSFColor color = palette.findSimilarColor((byte) red, (byte) green, (byte) blue);
            palette.setColorAtIndex(color.getIndex(), (byte) red, (byte) green, (byte) blue);
            cellStyle.setFillForegroundColor(color.getIndex());
            cellStyle.setFillPattern(FillPatternType.SOLID_FOREGROUND);
        }
你以为这就完了吗,too young too simple,你会发现你创建的最后一个单元格如果有颜色整张表格剩下的单元格都变成了这个颜色,懒得搜解决办法了,我直接每次录入结束默认加一个空单元格
插入图片
方法很明确,参数很傻逼,前四个是边距,后四个是坐标。网上说的边距基本都是和左上右下四个边的边距,但是我自己导出来的效果感觉确实左上两个边,这里按自己导出结果调整吧
		Sheet sheet = writer.getSheet();
        Drawing<?> drawingPatriarch = sheet.createDrawingPatriarch();

        //设置图片单元格位置
        ClientAnchor anchor = drawingPatriarch.createAnchor(excelImageDto.getLeft() * 11, excelImageDto.getTop() * 6, excelImageDto.getRight() * 11, excelImageDto.getBottom() * 6,
                excelImageDto.getDx1(), excelImageDto.getDy1(), excelImageDto.getDx2(), excelImageDto.getDy2());
        //随单元格改变位置和大小
        anchor.setAnchorType(ClientAnchor.AnchorType.MOVE_AND_RESIZE);

        //添加图片
        int pictureIndex = sheet.getWorkbook().addPicture(pictureData, picType);
        drawingPatriarch.createPicture(anchor, pictureIndex);
参考链接
https://blog.csdn.net/aw277866304/article/details/123985940
https://www.saoniuhuo.com/question/detail-2385912.html
https://blog.csdn.net/fl8545/article/details/127904474
https://blog.csdn.net/qq_42939896/article/details/105537520


 122
122


 被折叠的 条评论
为什么被折叠?
被折叠的 条评论
为什么被折叠?
 到【灌水乐园】发言


