


目录

Gradle 是一个强大的构建自动化工具,它使用 Groovy 或 Kotlin 作为 DSL(领域特定语言)来定义构建脚本,具有高度的灵活性和可扩展性。使用 Gradle 来创建 Spring Boot 项目,能够充分利用 Gradle 的依赖管理、任务执行等功能,使项目的构建和管理更加高效。
一、IDEA 创建项目
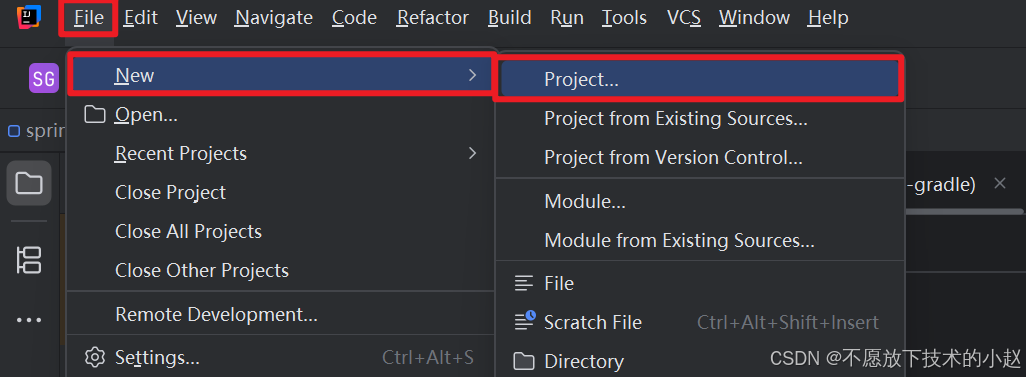
1、打开 IDEA,菜单选择 File -> New -> Project...。
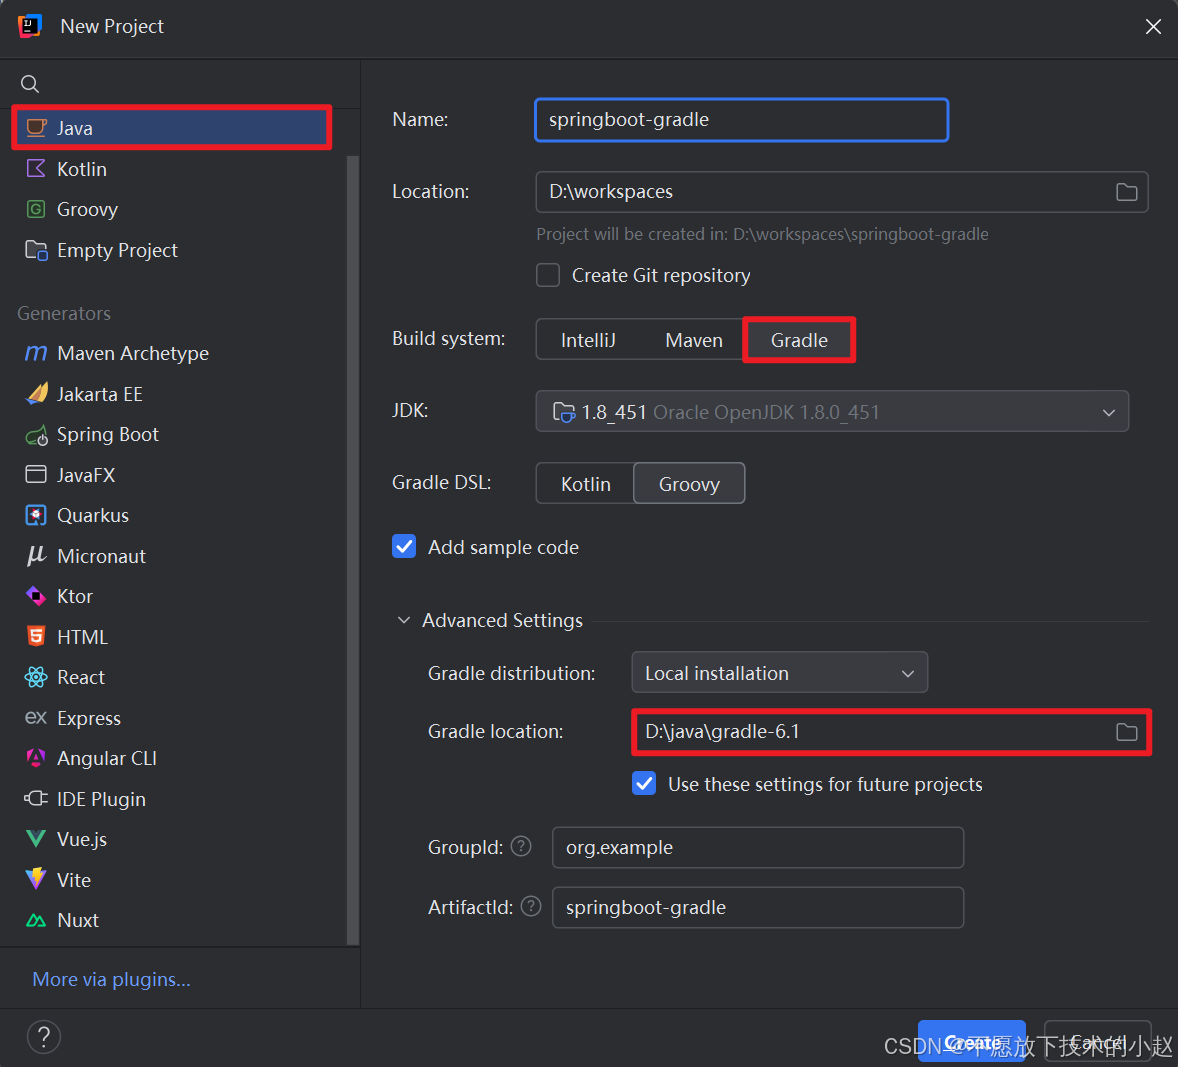
2、选择 Java,输入项目名称,设置 Gradle 和 SDK 版本。设置完毕之后,点击 Create 即可完成项目创建。
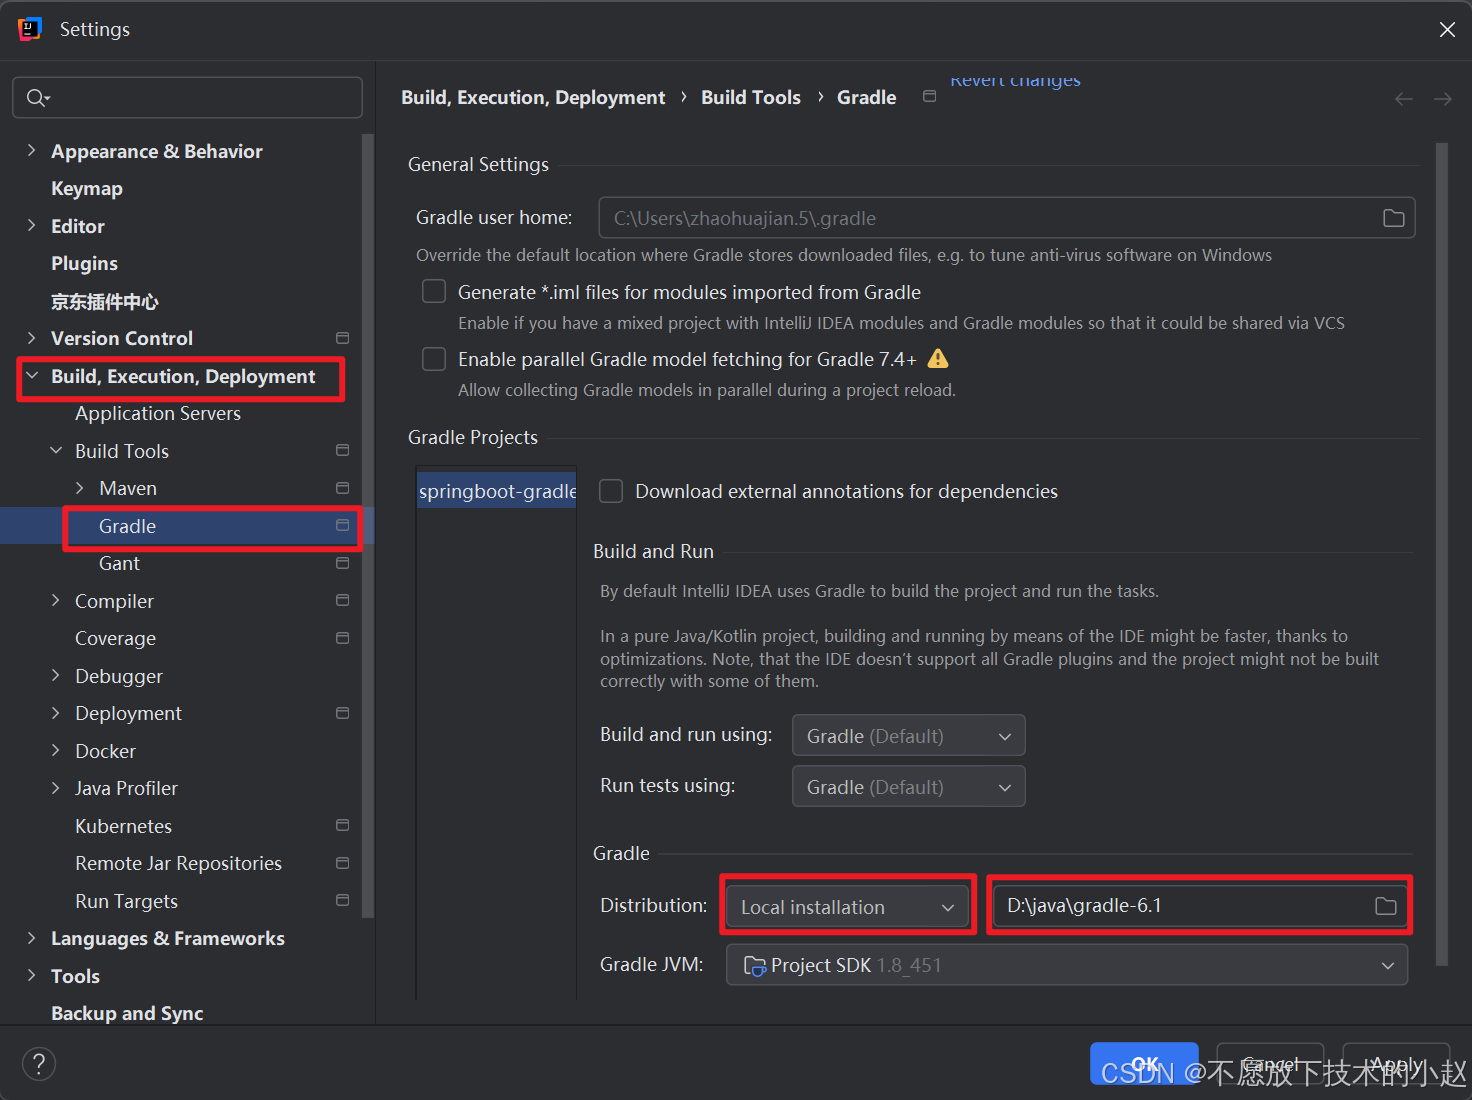
3、项目创建好之后需要先 Ctrl + Alt + S 打开 Settings 界面,配置 Gradle 为本地路径。
(如果没有配置 Gradle,IDEA 会自动进行下载,如果看到需要手动取消掉。)
4、项目创建好之后,文件目录结构如下所示:
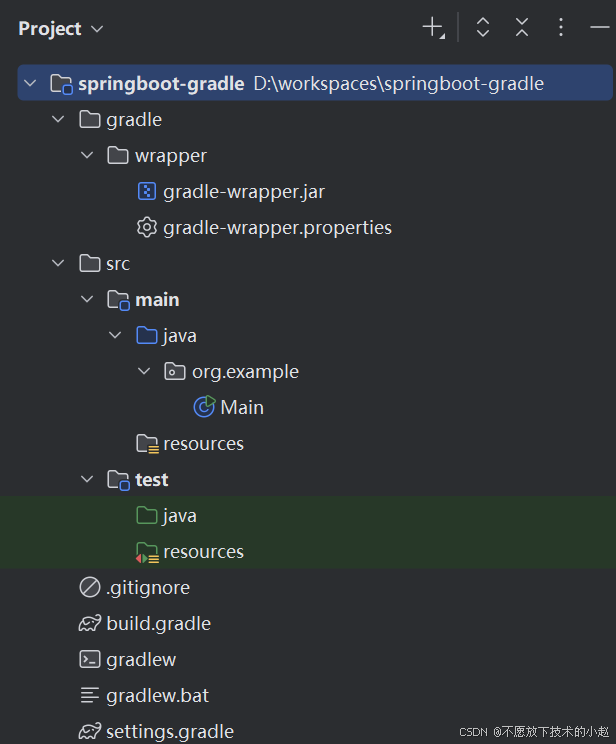
至此我们就完成项目创建了,IDEA 帮我们自动创建了两个文件:build.gradle 和 settings.gradle;接下来还需要进行一些配置。
二、配置 & 依赖
2.1 build.gradle 配置
打开 build.gradle 文件,自动生成的内容为:
plugins {
    id 'java'
}

group = 'org.example'
version = '1.0-SNAPSHOT'

repositories {
    mavenCentral()
}

dependencies {
    testImplementation platform('org.junit:junit-bom:5.10.0')
    testImplementation 'org.junit.jupiter:junit-jupiter'
}

test {
    useJUnitPlatform()
}
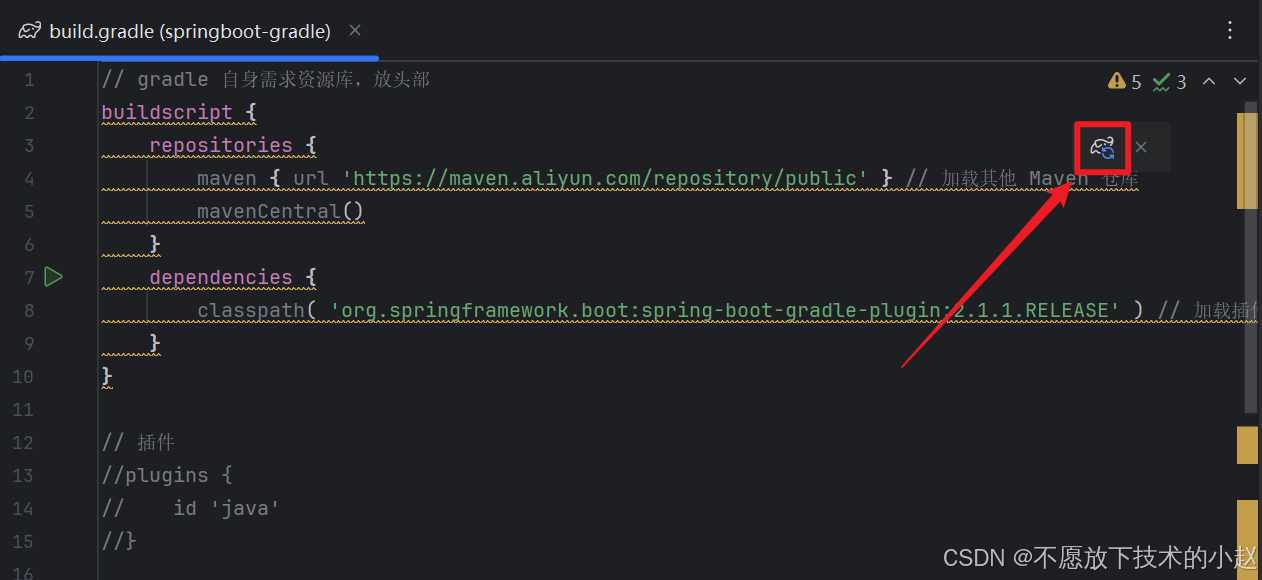
需要添加一些内容,添加后 build.gradle 文件内容如下:
// gradle 自身需求资源库,放头部
buildscript {
    repositories {
        maven { url 'https://maven.aliyun.com/repository/public' } // 加载其他 Maven 仓库
        mavenCentral()
    }
    dependencies {
        classpath( 'org.springframework.boot:spring-boot-gradle-plugin:2.1.1.RELEASE' ) // 加载插件,用到里面的函数方法
    }
}

// 插件
//plugins {
//    id 'java'
//}

apply plugin: 'java'
apply plugin: 'idea'
// 使用 spring boot 框架
apply plugin: 'org.springframework.boot'
// 使用 spring boot 的自动依赖管理
apply plugin: 'io.spring.dependency-management'

group = 'org.example'
version = '1.0-SNAPSHOT'

// 执行项目中所使用的资源仓库
repositories {
    maven { url 'https://maven.aliyun.com/repository/public' }
    mavenCentral()
}

// 项目中需要的依赖
dependencies {
    // 添加 jupiter 测试的依赖
    testImplementation 'org.junit.jupiter:junit-jupiter-api:5.6.0'
    // 添加 jupiter 测试的依赖
    testRuntimeOnly 'org.junit.jupiter:junit-jupiter-engine'

    // 添加 spring-boot-starter-web 的依赖,必须排除 security(根据自身需求)
    implementation('org.springframework.boot:spring-boot-starter-web') {
        exclude group: 'org.springframework.security', module: 'spring-security-config'
    }

    // 添加 spring-boot-starter-test 该依赖对于编译测试是必须的,默认包含编译产品依赖和编译时依赖
    testImplementation 'org.springframework.boot:spring-boot-starter-test'
    // 添加 junit 测试的依赖
    testImplementation group: 'junit', name: 'junit', version: '4.11'
    // 添加 lombok
    annotationProcessor 'org.projectlombok:lombok:1.18.22' // annotationProcessor 代表 main 下代码的注解执行器
    testAnnotationProcessor 'org.projectlombok:lombok:1.18.22' // testAnnotationProcessor 代表 test 下代码的注解执行器
    compileOnly group: 'org.projectlombok', name: 'lombok', version: '1.18.22' // compileOnly 代表编译时使用的lombok
}

// 第二种排除依赖方法
//configurations {
//    compile.exclude group: 'org.codehaus.jackson', module:'jackson-mapper-asl' // 消除依赖
//}

test {
    useJUnitPlatform()
}
保存文件,IDEA 会提示有依赖需要更新,点击即可自动下载:
2.2 gradle-wrapper.properties(版本管理)
若发现 gradle 版本问题,可以修改此文件,提升 gradle 版本;项目默认为:
#Tue Aug 05 20:35:01 CST 2025
distributionBase=GRADLE_USER_HOME
distributionPath=wrapper/dists
distributionUrl=https\://services.gradle.org/distributions/gradle-6.1-bin.zip
zipStoreBase=GRADLE_USER_HOME
zipStorePath=wrapper/dists
修改后:
distributionBase=GRADLE_USER_HOME
distributionPath=wrapper/dists
distributionUrl=https\://services.gradle.org/distributions/gradle-7.2-bin.zip
zipStoreBase=GRADLE_USER_HOME
zipStorePath=wrapper/dists
更改 distributionUrl,将版本更换为 gradle-7.2-bin。
三、编写源文件
1、项目初始化时,会自动建好 src/main/java 目录,目录下 org.example 包中会有一个 Main.java,这个我们用不到,可以删掉。
2、在 org.example 包下新建一个如下类:
SpringBootGradleApplication.java
package org.example;

import lombok.extern.slf4j.Slf4j;
import org.springframework.boot.SpringApplication;
import org.springframework.boot.autoconfigure.SpringBootApplication;
import org.springframework.core.env.Environment;

import java.net.InetAddress;
import java.net.UnknownHostException;
import java.util.HashMap;
import java.util.Map;

/**
 * Created by michael on 2020/04/28.
 */
@Slf4j
@SpringBootApplication
public class SpringBootGradleApplication {

    private static final String SPRING_PROFILE_DEFAULT = "spring.profiles.default";

    /**
     * dev:开发、qa:测试、pre:预发、prod:生产;为空则默认读取“application.yml”
     */
    private static final String PROFILE = "";

    private static void addDefaultProfile(SpringApplication app) {
        Map<String, Object> defProperties = new HashMap<>();
        defProperties.put(SPRING_PROFILE_DEFAULT, PROFILE);
        app.setDefaultProperties(defProperties);
    }

    private static String[] getActiveProfiles(Environment env) {
        String[] profiles = env.getActiveProfiles();
        return profiles.length == 0 ? env.getDefaultProfiles() : profiles;
    }

    public static void main(String[] args) {

        SpringApplication app = new SpringApplication(SpringBootGradleApplication.class);
        addDefaultProfile(app);

        Environment env = app.run(args).getEnvironment();
        String applicationName = env.getProperty("spring.application.name");
        String serverPort = env.getProperty("server.port");
        String configServerStatus = env.getProperty("spring.profiles.active");

        try {
            String hostAddress = InetAddress.getLocalHost().getHostAddress();

            log.info("\n---------------------------------------------------------------------------------\n\t" +
                            "Application '{}' is running! Access URLs:\n\t" +
                            "Local: \t\thttp://localhost:{}\n\t" +
                            "External: \thttp://{}:{}\n---------------------------------------------------------------------------------",
                    applicationName,
                    serverPort,
                    hostAddress, serverPort);

            log.info("\n---------------------------------------------------------------------------------\n\t" +
                            "Config Server: \t{}\n---------------------------------------------------------------------------------",
                    configServerStatus == null ? "Not found or not setup for this application" : configServerStatus);

        } catch (UnknownHostException e) {
            e.printStackTrace();
        }
    }
}
3、再在 org.example 包下创建一个 controller 目录,用来放 RESTful 接口。
4、在 org.example.controller 包下创建一个 Controller,代码如下:
package org.example.controller;

import org.springframework.web.bind.annotation.GetMapping;
import org.springframework.web.bind.annotation.RequestMapping;
import org.springframework.web.bind.annotation.RestController;

/**
 * Created by michael on 2020/04/28.
 */
@RestController
@RequestMapping("/hello")
public class HelloController {

    @GetMapping("/welcome")
    public String welcome() {
        return "Hello Word";
    }
}
5、在 resources 中,右键新建 application.yml 配置文件,文件内容如下:
server:
  port: 8088

spring:
  application:
    name: springboot-gradle
四、运行 & 测试
4.1 启动程序
有三种启动方式:
- 方式一:在控制台,执行
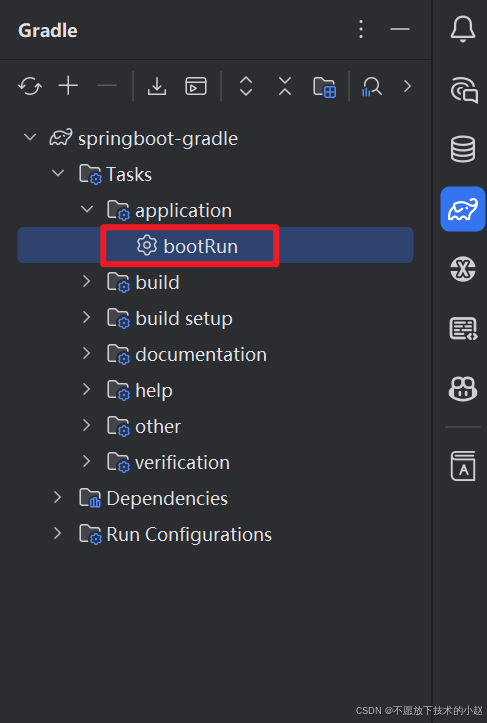
gradle bootrun命令。 - 方式二:在 IDEA 中,双击 Gradle 下的
bootRun按钮。
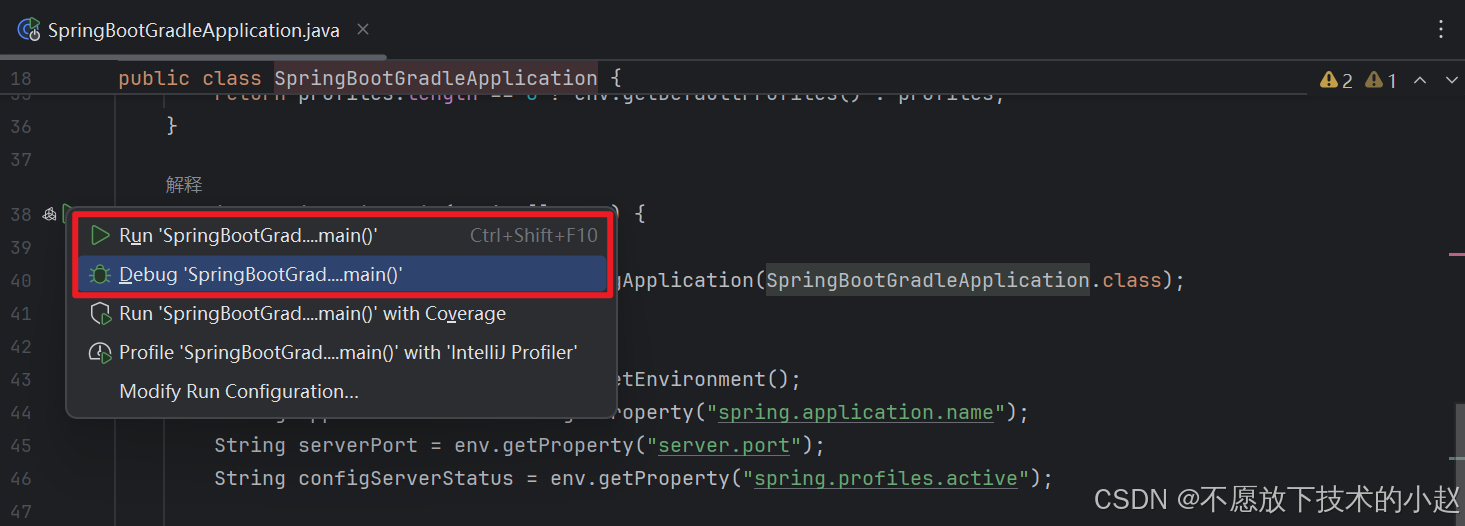
- 方式三:点击
SpringBootGradleApplication.java中 main() 前的启动按钮。
4.2 测试
项目启动之后,我们可以看到控制台日志中成功打印出了我们在配置文件中的配置,如下所示:
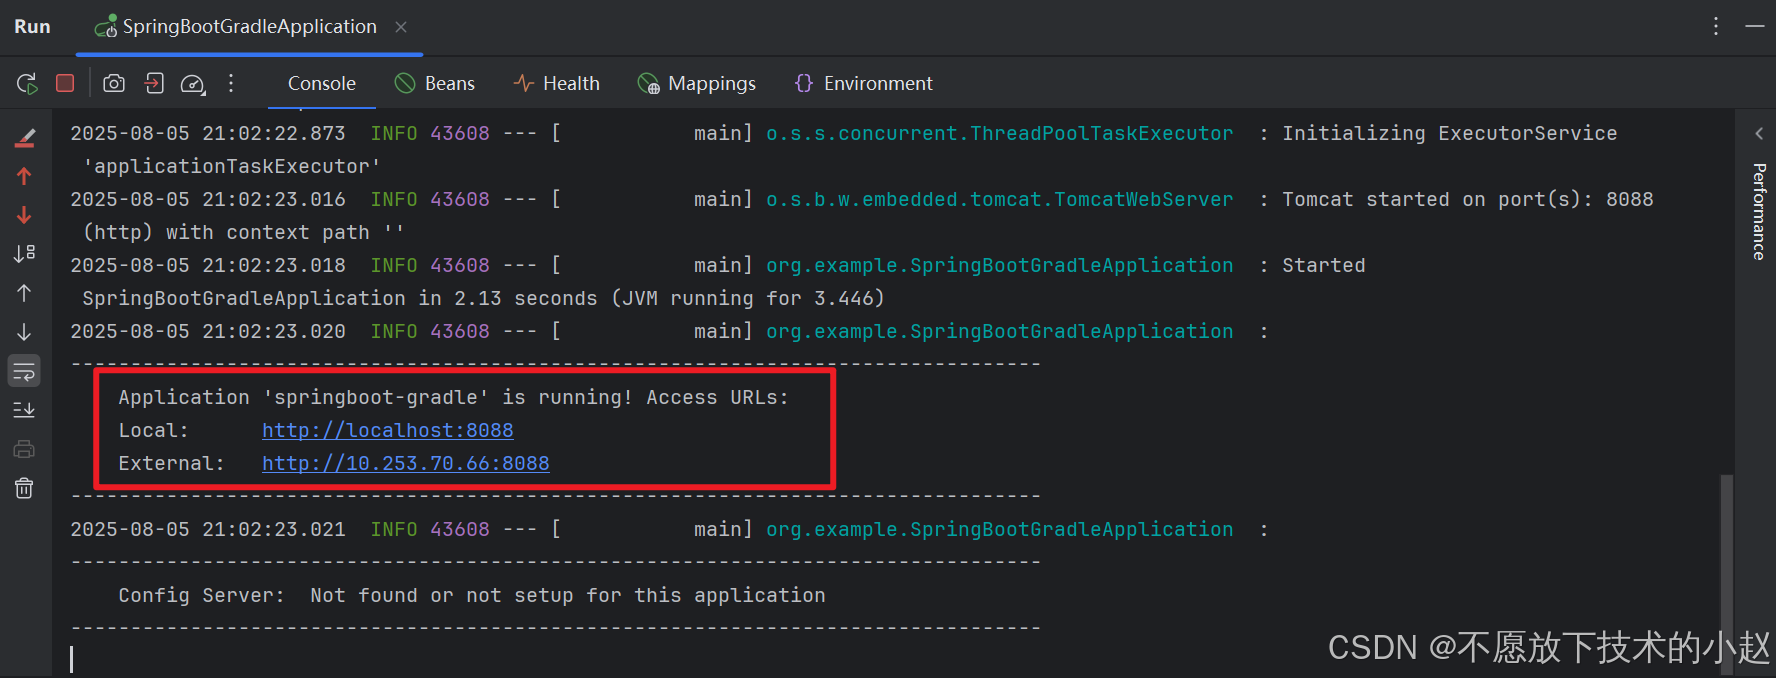
在浏览器访问地址:http://localhost:8088/hello/welcome,就可以看到效果了:

整理完毕,完结撒花~ 🌻
参考地址:
1.IDEA+Gradle搭建Spring Boot项目,https://blog.csdn.net/qq_38288606/article/details/121031239


 8877
8877

 被折叠的 条评论
为什么被折叠?
被折叠的 条评论
为什么被折叠?
 到【灌水乐园】发言


