


Service作为Android四大组件,使用的场景也很多,尤其是在播放音乐时,使用到的基本都是服务,因为不需要界面,所以可以在Activity退出之后,还可以在后台运行。
1、Service
启动Service的方式有2种:startService和bindService,两者的生命周期不同,使用的场景也不同。
			case R.id.btn_start:
                Intent intent = new Intent(this,MyService.class);
                startService(intent);
                break;
            case R.id.btn_stop:
                Intent intent1 = new Intent(this,MyService.class);
                stopService(intent1);
                break;
启动和停止的都是同一个服务,而且使用startService这种方式,即便是退出Activity之后,也不会立即销毁,还是正常在后台运行。
而对于bindService来说,跟startService还是有很多不同的:
(1)bindService不会走onStartCommand方法,而是会走onBind方法,而且只会走一次,startService多次启动会多次执行onStartCommand;
(2)bindService在Activity退出后,会立刻销毁服务,而startService会在后台继续运行。
			case R.id.btn_bind:
                Intent intent2 = new Intent(this,MyService.class);
                bindService(intent2,conn,BIND_AUTO_CREATE);
                break;
            case R.id.btn_unbind:
                unbindService(conn);
                break;
2、bindService
既然我们想要服务能够在后台持续运行,显然bindService的方式是行不通的,但存在即合理,bindService存在的意义是什么呢?
通常在使用bindService时,是用来监控任务进度,例如在下载文件时,或者执行其他任务时,当前的进度反馈。
当使用startService启动服务时,会执行onCreate方法,那么如果在onCreate方法中启动一个子线程,来模拟耗时操作,那么其进度,就可以通过bindService来获取。
在使用bindService来启动服务时,会执行onBind方法,返回的是一个IBinder对象,在Android中有一个类Binder实现了该接口,因此可以自定义一个Binder类返回。
和startService不同的时,在bindService时,需要传入ServiceConnection对象,之前说到过,无论多少次bindService,都只会执行一次onBind方法,所以之后再绑定服务的时候,执行的就是ServiceConnection的onServiceConnected方法,在该方法中,也有一个IBinder对象,与onBind中的IBinder对应。
public class MyService extends Service {

    private  int i;
    @Override
    public void onCreate() {
        Log.e("TAG","服务创建了");
        super.onCreate();

        new Thread(new Runnable() {
            @Override
            public void run() {
                for (i = 0;i<100;i++){
                    try {
                        Thread.sleep(1000);
                    } catch (InterruptedException e) {
                        e.printStackTrace();
                    }
                }
            }
        }).start();
    }

    @Override
    public int onStartCommand(Intent intent, int flags, int startId) {
        Log.e("TAG","服务启动了");
        return super.onStartCommand(intent, flags, startId);
    }

    @Override
    public IBinder onBind(Intent intent) {
        Log.e("TAG","onBind");
        // TODO: Return the communication channel to the service.
        return new MyBinder();
    }

    class MyBinder extends Binder{

        public int getProgress(){
            return i;
        }
    }
    @Override
    public void onDestroy() {
        super.onDestroy();
        Log.e("TAG","服务销毁了");
    }
}
 conn = new ServiceConnection() {
            @Override
            public void onServiceConnected(ComponentName name, IBinder service) {
                MyService.MyBinder binder = (MyService.MyBinder) service;
                int progress = binder.getProgress();
                Log.e("TAG","当前的进度:"+progress);
            }

            @Override
            public void onServiceDisconnected(ComponentName name) {

            }
        };
2020-06-05 09:45:27.705 18359-18359/com.example.exam04 E/TAG: 服务创建了
2020-06-05 09:45:27.706 18359-18359/com.example.exam04 E/TAG: 服务启动了
2020-06-05 09:45:30.674 18359-18359/com.example.exam04 E/TAG: onBind
2020-06-05 09:45:30.685 18359-18359/com.example.exam04 E/TAG: 当前的进度:2
2020-06-05 09:45:36.611 18359-18359/com.example.exam04 E/TAG: 当前的进度:8
2020-06-05 09:45:43.354 18359-18359/com.example.exam04 E/TAG: 当前的进度:15
2020-06-05 09:45:49.481 18359-18359/com.example.exam04 E/TAG: 当前的进度:21
2020-06-05 09:45:54.533 18359-18359/com.example.exam04 E/TAG: 当前的进度:26
3、AIDL
AIDL是安卓接口定义语言,就是用来定义接口,来进行进程间通信;之前说到过的IBinder通信接口,仅限于同进程间Activity与Service之间的通信,但是对于进程间的通信,例如A手机想要监控B手机进度的情况,那么就需要使用AIDL。
(1)远程启动服务
对于客户端A中的MyService.class,客户端B是拿不到的,如果想要远程启动,就需要使用隐示意图来完成。
<service
            android:name=".MyService"
            android:enabled="true"
            android:exported="true">
            <!--方便远程调用-->
            <intent-filter>
                <action android:name="com.remote.service"/>
            </intent-filter>
        </service>
在Android 5.0之后,不能直接使用隐式意图,需要显示的声明Action和包名。这样在客户端B就将客户端A的服务启动了。
			case R.id.btn_start:
                Intent intent = new Intent();
                //Android 5.0以后需要显示声明 Action和包名
                intent.setAction("com.remote.service");
                intent.setPackage("com.example.exam04");
                startService(intent);
                break;
            case R.id.btn_stop:
                Intent intent2 = new Intent();
                //Android 5.0以后需要显示声明 Action和包名
                intent2.setAction("com.remote.service");
                intent2.setPackage("com.example.exam04");
                stopService(intent2);
                break;
(2)远程绑定服务
与启动服务一致,都需要获取Service的Action和包名。
			case R.id.btn_bind:
                Intent intent3 = new Intent();
                //Android 5.0以后需要显示声明 Action和包名
                intent3.setAction("com.remote.service");
                intent3.setPackage("com.example.exam04");
                bindService(intent3,conn,BIND_AUTO_CREATE);
                break;
            case R.id.btn_unbind:
                unbindService(conn);
                break;
(3)AIDL的使用
—创建aidl文件
因为aidl接口是作为进程间通信的接口,所有不同进程两边的aidl文件必须保持一致。
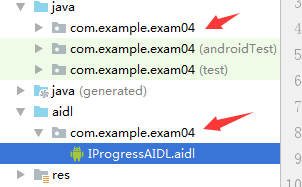
在创建aidl文件时,系统会生成同包名的一个文件夹,文件夹下包含aidl文件
在aidl文件中定义一个发布进度的方法。
// IProgressAIDL.aidl
package com.example.exam04;

// Declare any non-default types here with import statements

interface IProgressAIDL {
    /**
     * Demonstrates some basic types that you can use as parameters
     * and return values in AIDL.
     */
    void basicTypes(int anInt, long aLong, boolean aBoolean, float aFloat,
            double aDouble, String aString);

    //发布进度的接口
    void publishProgress();
}
—自动生成java文件
build工程之后,生成了一个java文件,当中创建了一个Stub抽象类,该类是继承自Binder而且实现了刚才自定义的aidl接口。
之前在onBind方法中,是通过返回一个Binder对象,所以自定义了一个类继承自Binder,但是在创建aidl文件之后,系统创建了一个Stub类也是一个Binder类,因此可以返回该类即可。
 @Override
    public IBinder onBind(Intent intent) {
        Log.e("TAG","onBind");
        // TODO: Return the communication channel to the service.
//        return new MyBinder();

        //返回自己创建的aidl对象
        return new IMyAidlInterface.Stub() {
            @Override
            public void publishProgress() throws RemoteException {
                Log.e("TAG","当前进度是:"+i);
            }
        };
    }
—onServiceConnected处理接口回调
之前在onServiceConnected方法中,通过强制类型转换获取自定义的Binder类对象,调用其中的方法获取进度值,在使用aidl接口时,Stub类中有一个asInterface可以将Binder转换为自定义的aidl接口,从而执行自定义的方法。
 conn = new ServiceConnection() {
            @Override
            public void onServiceConnected(ComponentName name, IBinder service) {
//                MyService.MyBinder binder = (MyService.MyBinder) service;
                int progress = binder.getProgress();
                Log.e("TAG","当前的进度:"+progress);

				//将IBinder接口转换为IMyAidlInterface接口
                IMyAidlInterface myAidlInterface =
                        IMyAidlInterface.Stub.asInterface(service);
                try {
                    myAidlInterface.publishProgress();
                } catch (RemoteException e) {
                    e.printStackTrace();
                }
            }

            @Override
            public void onServiceDisconnected(ComponentName name) {

            }
        };
—另一个进程使用aidl文件
在另一个进程中,要将aidl文件原封不动的移植过去,才可以。


conn = new ServiceConnection() {
            @Override
            public void onServiceConnected(ComponentName name, IBinder service) {
                IMyAidlInterface myAidlInterface =
                        IMyAidlInterface.Stub.asInterface(service);
                try {
                    myAidlInterface.publishProgress();
                } catch (RemoteException e) {
                    e.printStackTrace();
                }
            }

            @Override
            public void onServiceDisconnected(ComponentName name) {

            }
        };
使用相同的aidl文件,就可以实现跨进程的通信。


 428
428


 被折叠的 条评论
为什么被折叠?
被折叠的 条评论
为什么被折叠?
 到【灌水乐园】发言


