


 本文详细介绍了OCR环境的搭建步骤,包括Pillow、tesseract-ocr及pytesseract的安装方法,并解决了常见的环境变量配置问题。
1.安装pillow
直接使用 pip install Pillow
使用 Pycharm 安装
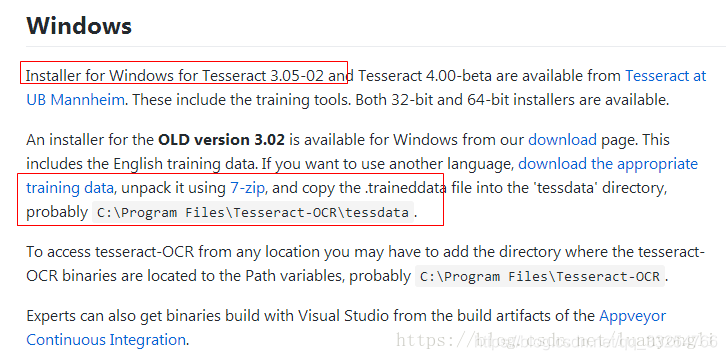
2.安装 tesseract-ocr
github 地址: https://github.com/tesseract-ocr/tesseract
进去选择wiki,在选择对应的版本即可。安装时默认只有一个 eng. 的识别库,可以勾选想要添加的库,或者自己单独下载后放到安装文件夹. tessdata 下。
3.安装 pytesseract
直接使用 pip install pytesseract
使用 Pycharm 安装
遇到 的问题:
- FileNotFoundError: [WinError 2] 系统找不到指定的文件
解决方法:
方法1: 将tesseract.exe添加到环境变量PATH中,(经测试我的不能使用)
注意: 为了使环境变量生效,需要关闭 cmd. 窗口或是关闭 pycharm 等 ide 重新启动
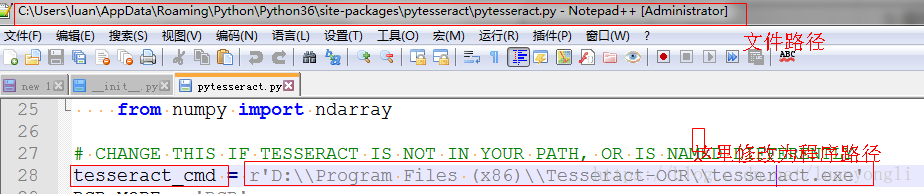
方法2: 修改 pytesseract.py 文件,指定 tesseract.exe 安装路径(亲测可用)
首先找到pytesseract.py文件,然后对其进行修改。以我的电脑为例:
2.pytesseract.pytesseract.TesseractError: (1, ‘Error opening data file \Tesseract-OCR\tessdata/eng.traineddata’) 解决方法: (我的没有出现,出现了尝试一下)
方法1:
将tessdata目录的上级目录所在路径(默认为tesseract-ocr安装目录)添加至TESSDATA_PREFIX环境变量中
例如: C:\Program Files (x86)\Tesseract-OCR
Please make sure the TESSDATA_PREFIX environment variable is set to the parent directory of your “tessdata” directory.
方法2: 在.py文件配置中指定tessdata-dir 【我用这个:代码在下面】
tessdata_dir_config = ‘–tessdata-dir “D:\Tesseract-OCR\tessdata”’# tessdata_dir_config = '–tessdata-dir “'C:\Program Files (x86)\Tesseract-OCR\tessdata”'pytesseract.image_to_string(image, config=tessdata_dir_config)
附: trainedata下载地址: the latest from github.com
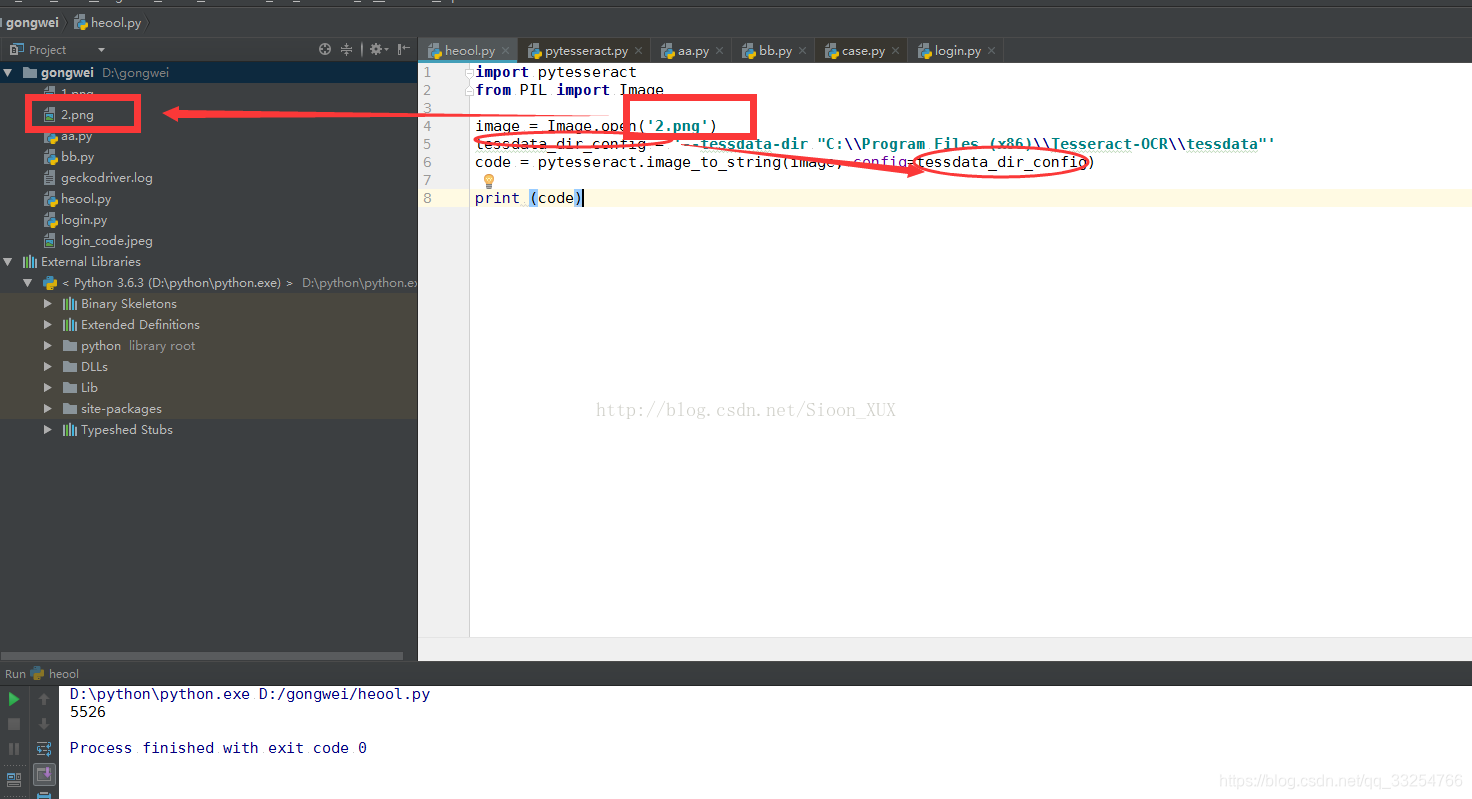
测试
代码如下:
importpytesseract
fromPIL importImage
#访问相对路径如下图,绝对路径是下一行代码
image = Image.open(‘C:\Users\hf\Desktop\code.jpg’)
tessdata_dir_config =’–tessdata-dir “C:\Program Files (x86)\Tesseract-OCR\tessdata”’
code = pytesseract.image_to_string(image,config=tessdata_dir_config)
print(code)


 598
598

 被折叠的 条评论
为什么被折叠?
被折叠的 条评论
为什么被折叠?
 到【灌水乐园】发言


