


springboot启动源码分析
1. spring boot main方法
springboot 项目启动通常都是通过一个主函数启动(main方法),如下
@SpringBootApplicationpublic class SpringBoot04WebRestfulcrudApplication {
    public static void main(String[] args) {        									 		SpringApplication.run(SpringBoot04WebRestfulcrudApplication.class, args);
    }
}
核心就在于SpringApplication.run()这个方法,查看其实现
public static ConfigurableApplicationContext run(Object source, String... args) {   		return run(new Object[] { source }, args);
}
public static ConfigurableApplicationContext run(Object[] sources, String[] args) { 		return new SpringApplication(sources).run(args);
}
2. SpringApplication构造函数分析
发现传入sources,new了一个SpringApplication对象,这个sources其实就是main方法中传入的SpringBoot04WebRestfulcrudApplication.class这个class对象。继续跟踪源码,发现在创建SpringApplication对象调用了initialize(sources)方法
public SpringApplication(Object... sources) {
    initialize(sources);
}
initialize方法实现如下:
//前面定义的sources集合
private final Set<Object> sources = new LinkedHashSet<Object>();
//initialize方法实现
@SuppressWarnings({ "unchecked", "rawtypes" })
private void initialize(Object[] sources) {
    //做判定
    if (sources != null && sources.length > 0) {
        this.sources.addAll(Arrays.asList(sources));
    }
    //用于判定当前应用是否为web应用
    this.webEnvironment = deduceWebEnvironment();
    //实例话classpath下 META-INF/spring.factories中已配置的ApplicationContextInitializer
    //对应的类
    setInitializers((Collection) getSpringFactoriesInstances(
        ApplicationContextInitializer.class));
    //实例话classpath下 META-INF/spring.factories中已配置的ApplicationListener对应的类
    setListeners((Collection) getSpringFactoriesInstances(ApplicationListener.class));
    ///根据调用栈,获取main方法对应的类
    this.mainApplicationClass = deduceMainApplicationClass();
}


//deduceWebEnvironment方法实现
private boolean deduceWebEnvironment() {
    //判定WEB_ENVIRONMENT_CLASSES对应的全类名类是否存在,都存在的话就返回true,否则返回false
    for (String className : WEB_ENVIRONMENT_CLASSES) {
        if (!ClassUtils.isPresent(className, null)) {
            return false;
        }
    }
    return true;
}

//mainApplicationClass定义
private Class<?> mainApplicationClass定义;
分析 setInitializers((Collection)getSpringFactoriesInstances(ApplicationContextInitializer.class)) 这个方法,先看(Collection)getSpringFactoriesInstances(ApplicationContextInitializer.class) 到底干了什么,
private <T> Collection<? extends T> getSpringFactoriesInstances(Class<T> type) {
    return getSpringFactoriesInstances(type, new Class<?>[] {});
}
可以看到getSpringFactoriesInstances(Class type)调用了重载的方法:getSpringFactoriesInstances(Class type, Class<?>[] parameterTypes, Object… args),在看看这个重载的方法实现,需要注意的是参数中的Class type这个时候是ApplicationContextInitializer.class对应的class对象
private <T> Collection<? extends T> getSpringFactoriesInstances(Class<T> type, Class<?>[] 	parameterTypes, Object... args) {
    //创建一个类加载器
    ClassLoader classLoader = Thread.currentThread().getContextClassLoader();
    // Use names and ensure unique to protect against duplicates
    Set<String> names = new LinkedHashSet<String>(
        // 根据传入的type类型的class对象从springBoot项目classpath类路径下META-
        // INF/spring.factories获取对应的属性内容,也就是一些类的全类名
        SpringFactoriesLoader.loadFactoryNames(type, classLoader));
    // 根据names set集合中的全类名,实例化对应类
    List<T> instances = createSpringFactoriesInstances(type, parameterTypes,
                                                       classLoader, args, names);
    //排序
    AnnotationAwareOrderComparator.sort(instances);
    return instances;
}
在看下SpringFactoriesLoader.loadFactoryNames(type, classLoader)这个方法干了什么事情
public static List<String> loadFactoryNames(Class<?> factoryClass, ClassLoader classLoader) {
//获取factoryClass对应的全类名,也就是		//org.springframework.context.ApplicationContextInitializer
		String factoryClassName = factoryClass.getName();
		try {
//获取classpath类路径下的META-INF/spring.factories这个资源文件
//在基本的springboot项目中,一个有3个这个文件:

// org/springframework/boot/spring-boot-autoconfigure/1.5.9.RELEASE/spring-boot-
// autoconfigure-1.5.9.RELEASE.jar!/META-INF/spring.factories

// org/springframework/boot/spring-boot/1.5.9.RELEASE/spring-boot-
// 1.5.9.RELEASE.jar!/META-INF/spring.factories

// org/springframework/boot/spring-boot/1.5.9.RELEASE/spring-beans/4.3.13.RELEASE/spring-
// beans-4.3.13.RELEASE.jar!/META-INF/spring.factories
			Enumeration<URL> urls = (classLoader != null ? classLoader.getResources(FACTORIES_RESOURCE_LOCATION) :
					ClassLoader.getSystemResources(FACTORIES_RESOURCE_LOCATION));
			List<String> result = new ArrayList<String>();
            //遍历资源
			while (urls.hasMoreElements()) {
                //获取资源文件路径
				URL url = urls.nextElement();
                //获取资源文件内容
				Properties properties = PropertiesLoaderUtils.loadProperties(new UrlResource(url));
                //获取指定的property属性对应的值,这里也就是获取
                //org.springframework.context.ApplicationContextInitializer对应的值
				String factoryClassNames = properties.getProperty(factoryClassName);
				//StringUtils.commaDelimitedListToStringArray是以逗号为分隔符,把一个string转
                //成一个string数组的
                					   	result.addAll(Arrays.asList(StringUtils.commaDelimitedListToStringArray(factoryClassNames)));
			}
			return result;
		}
		catch (IOException ex) {
			throw new IllegalArgumentException("Unable to load [" + factoryClass.getName() +
					"] factories from location [" + FACTORIES_RESOURCE_LOCATION + "]", ex);
		}
}

//FACTORIES_RESOURCE_LOCATION的定义
public static final String FACTORIES_RESOURCE_LOCATION = "META-INF/spring.factories";
所以SpringFactoriesLoader.loadFactoryNames(type, classLoader)的作用就是:根据传入的type类型的class对象从springBoot项目classpath类路径下META-INF/spring.factories获取对应的属性内容,在基本的springboot项目中,一个有3个这个文件:
- org/springframework/boot/spring-boot-autoconfigure/1.5.9.RELEASE/spring-boot- autoconfigure-1.5.9.RELEASE.jar!/META-INF/spring.factories
- org/springframework/boot/spring-boot/1.5.9.RELEASE/spring-boot-
1.5.9.RELEASE.jar!/META-INF/spring.factories - org/springframework/boot/spring-boot/1.5.9.RELEASE/spring-beans/4.3.13.RELEASE/spring-
beans-4.3.13.RELEASE.jar!/META-INF/spring.factories
说完了SpringFactoriesLoader.loadFactoryName(type, classLoader)之后,接着往下走,可以看到调用了
List instances = createSpringFactoriesInstances(type, parameterTypes,classLoader, args, names)方法,从方法名就知道是创建实例用的,看代码
//说明一下:
//type在这里就是ApplicationContextInitializer类型的class对象
//parameterTypes在这里是一个空的数据
//classLoader 类加载器
//args也是空的
//names SpringFactoriesLoader.loadFactoryName(type, classLoader)方法获取的全类名
private <T> List<T> createSpringFactoriesInstances(Class<T> type在这里就是,
			Class<?>[] parameterTypes, ClassLoader classLoader, Object[] args,
			Set<String> names) {

		List<T> instances = new ArrayList<T>(names.size());
		for (String name : names) {
			try {
				Class<?> instanceClass = ClassUtils.forName(name, classLoader);
                //Assert.isAssignable用来判定instanceClass类是否为type的子类
				Assert.isAssignable(type, instanceClass);
				Constructor<?> constructor = instanceClass
						.getDeclaredConstructor(parameterTypes);
                //使用constructor进行无参实例化,无餐是因为args是空的
				T instance = (T) BeanUtils.instantiateClass(constructor, args是空的);
				instances.add(instance);
			}
			catch (Throwable ex) {
				throw new IllegalArgumentException(
						"Cannot instantiate " + type + " : " + name, ex);
			}
		}
		return instances;
}


// instantiateClasss实现
public static <T> T instantiateClass(Constructor<T> ctor, Object... args) throws 		 	BeanInstantiationException {
		Assert.notNull(ctor, "Constructor must not be null");
		try {
			ReflectionUtils.makeAccessible(ctor);
            //实例化
			return ctor.newInstance(args);
		}
		catch (InstantiationException ex) {
			throw new BeanInstantiationException(ctor, "Is it an abstract class?", ex);
		}
		catch (IllegalAccessException ex) {
			throw new BeanInstantiationException(ctor, "Is the constructor accessible?", ex);
		}
		catch (IllegalArgumentException ex) {
			throw new BeanInstantiationException(ctor, "Illegal arguments for constructor", ex);
		}
		catch (InvocationTargetException ex) {
			throw new BeanInstantiationException(ctor, "Constructor threw exception", ex.getTargetException());
		}
}
在看下setInitializers方法实现
public void setInitializers(
    Collection<? extends ApplicationContextInitializer<?>> initializers) {
    //初始化initializers
    this.initializers = new ArrayList<ApplicationContextInitializer<?>>();
    //添加内容
    this.initializers.addAll(initializers);
}
//initializers就是定义的一个List
private List<ApplicationContextInitializer<?>>;
setListeners((Collection) getSpringFactoriesInstances(ApplicationListener.class))就不在详细分析了,作用就是实例化classpath类路径下的META-INF/spring.factories中的ApplicationListener对应的java类,和setInitializers((Collection)getSpringFactoriesInstances(ApplicationContextInitializer.class))类似。
到目前为止initialize(Object[] sources)方法中还有最后一步:
this.mainApplicationClass = deduceMainApplicationClass();
具体实现如下:
private Class<?> deduceMainApplicationClass() {
    try {
        StackTraceElement[] stackTrace = new RuntimeException().getStackTrace();
        for (StackTraceElement stackTraceElement : stackTrace) {
            if ("main".equals(stackTraceElement.getMethodName())) {
                return Class.forName(stackTraceElement.getClassName());
            }
        }
    }
    catch (ClassNotFoundException ex) {
        // Swallow and continue
    }
    return null;
}
总结一下:到这里SpringApplication 类的构造函数就基本梳理完了,springboot在实例化SpringApplication 的时候还实例化了一些类:classpath下META-INF/spring.factories中ApplicationContextInitializer、ApplicationListener两个类全类名对应的属性,知道了这里,那我们也完全可以自己写一个META-INF/spring.factories文件,通过SpringApplication 的getSpringFactoriesInstances(Class type)方法去实例化自己想要实例化的类,当然这也需要自己写代码去实现,但是如果看懂源码,写起来真的不难。给个demo
public class SpringBoot04WebRestfulcrudApplication {

    public static void main(String[] args) {
        SpringApplication.run(SpringBoot04WebRestfulcrudApplication.class, args);

        List<String> result = new ArrayList<String>();
        ClassLoader classLoader = Thread.currentThread().getContextClassLoader();
        result = SpringFactoriesLoader.loadFactoryNames(Department.class, classLoader);
        System.out.println(result);

        //通过反射创建实例化对象,省略
    }
自定义spring.factories文件

打印结果

这里面有很多值得我们去留意的东西,特别是在整个过程中使用到的一些方法,既然写源码的可以用,那我们也可以去用,看源码的目的不仅仅在于弄清楚原理,还可以帮助我们去扩宽自己的视野、思维,知道这个东西原来还可以这样去用。
//创建一个类加载器
ClassLoader classLoader = Thread.currentThread().getContextClassLoader();

//获取classpath类路径下的META-INF/spring.factories这个资源文件
Enumeration<URL> urls = (classLoader != null ?
	classLoader.getResources(SpringFactoriesLoader.FACTORIES_RESOURCE_LOCATION) :
			ClassLoader.getSystemResources(
                SpringFactoriesLoader.FACTORIES_RESOURCE_LOCATION));

//获取资源文件内容,PropertiesLoaderUtils是spring公司自己封装的,可以直接使用,并且其中还有其他的方法
//可以供我们使用
Properties properties = PropertiesLoaderUtils.loadProperties(new UrlResource(url));

//使用Class的constructor对象实例话参数,BeanUtils是spring公司自己封装的,可以直接使用,并且其中还有其他的方法,可以供我们使用
T instance = (T) BeanUtils.instantiateClass(constructor, args);
3. SpringApplication run方法分析
可以看到在new了一个SpringApplication对象之后,直接调用了run方法
public static ConfigurableApplicationContext run(Object[] sources, String[] args) {
    return new SpringApplication(sources).run(args);
}
run方法的具体实现如下:
public ConfigurableApplicationContext run(String... args) {
    //统计任务耗时的工具类,用于记录run方法执行的耗时时间
    StopWatch stopWatch = new StopWatch();
    stopWatch.start();
    //ConfigurableApplicationContext是ApplicationContext的子类
    ConfigurableApplicationContext context = null;
    FailureAnalyzers analyzers = null;
    //参看3.1 configureHeadlessProperty()详解
    configureHeadlessProperty();
    //参看3.2 getRunListeners(args)详解
    SpringApplicationRunListeners listeners = getRunListeners(args);
    //参看3.3 listeners.starting()详解
    listeners.starting();
    try {
        //初始化ApplicationArguments对象,不做详细介绍
        //ApplicationArguments类可以用来SpringApplication.run()的应用程序参数,也就是args
        ApplicationArguments applicationArguments = new DefaultApplicationArguments(
            args);
        //参看3.4 prepareEnvironment(listeners,applicationArguments)详解
        ConfigurableEnvironment environment = prepareEnvironment(listeners,
                                                                 applicationArguments);
        Banner printedBanner = printBanner(environment);
        context = createApplicationContext();
        analyzers = new FailureAnalyzers(context);
        prepareContext(context, environment, listeners, applicationArguments,
                       printedBanner);
        refreshContext(context);
        afterRefresh(context, applicationArguments);
        listeners.finished(context, null);
        stopWatch.stop();
        if (this.logStartupInfo) {
            new StartupInfoLogger(this.mainApplicationClass)
                .logStarted(getApplicationLog(), stopWatch);
        }
        return context;
    }
    catch (Throwable ex) {
        handleRunFailure(context, listeners, analyzers, ex);
        throw new IllegalStateException(ex);
    }
}
说明一下这里的args含义。其实这里的args就是我们的启动参数,也就是我们在运行主函数的时候设置的启动项

3.1 configureHeadlessProperty()详解
跟踪configureHeadlessProperty()源码
private void configureHeadlessProperty() {
    System.setProperty(SYSTEM_PROPERTY_JAVA_AWT_HEADLESS, System.getProperty(
        SYSTEM_PROPERTY_JAVA_AWT_HEADLESS, Boolean.toString(this.headless)));
}

//顺便把SYSTEM_PROPERTY_JAVA_AWT_HEADLESS定义也给出来
private static final String SYSTEM_PROPERTY_JAVA_AWT_HEADLESS = "java.awt.headless";
上述含义是给属性设值System.setProperty(),它的值来源于System.getProperty(),这里可能有些读者会比较疑惑,把系统java.awt.headless对应的属性值取出来,又把他赋值给java.awt.headless,这不是多此一举吗?
其实这是因为System中的两个读写属性的方法不对等.
System中getProperty()有2个重载方法,但却只有一个setProperty()方法,其中getProperty()有单参和双参两方法,单参就是简单的获取属性,有就有,没有就没有,双参则聪明一点,在没有的时候会返回一个调用者指定的默认值,所以经过这样操作后,不管有没有那个属性,最终都能保证有.
所以先取后设.
那么:做了这样的操作后,SpringBoot想干什么呢?
其实是想设置该应用程序,即使没有检测到显示器,也允许其启动.
对于服务器来说,是不需要显示器的,所以要这样设置.
3.2 getRunListeners(args)详解
点进去,我们可以看到getRunListeners(args)方法的具体实现
private SpringApplicationRunListeners getRunListeners(String[] args) {
    //定义Class类型的数组
    Class<?>[] types = new Class<?>[] { SpringApplication.class, String[].class };
    return new SpringApplicationRunListeners(logger, getSpringFactoriesInstances(
        SpringApplicationRunListener.class, types, this, args));
}

//logger为日志定义
private static final Log logger = LogFactory.getLog(SpringApplication.class);
可以看到核心就在于return new SpringApplicationRunListeners(logger, getSpringFactoriesInstances(
SpringApplicationRunListener.class, types, this, args))这句代码。
getSpringFactoriesInstances(SpringApplicationRunListener.class, types, this, args) 这在前面就已经讲过了,此处不再赘述,意思就是获取classpath下META-INF/spring.factories中SpringApplicationRunListener.class全类名对应属性值的实例集合,最后的结果也就是实例化EventPublishingRunListener这个类。顺带一提,如果看到这里还觉得不理解、或者陌生、生疏的话,那建议读者先回头再仔细地把2小节涉及的源码详细走一遍。
需要注意的是EventPublishingRunListener类实例化的时候使用的是自身的构造方法,如下:
public EventPublishingRunListener(SpringApplication application, String[] args) {
    this.application = application;
    this.args = args;
    this.initialMulticaster = new SimpleApplicationEventMulticaster();
    for (ApplicationListener<?> listener : application.getListeners()) {
        this.initialMulticaster.addApplicationListener(listener);
    }
}
application.getListeners()获取的其实也就是在第2小节中new SpringApplication对象的过程中,实例化的
classpath下META-INF/spring.factories中ApplicationListener.class全类名对应的Java类,可能有读者并没有注意到,这里点出来,一共有10个实例化类。

this.initialMulticaster.addApplicationListener(listener)方法的实现如下:
@Override
public void addApplicationListener(ApplicationListener<?> listener) {
    synchronized (this.retrievalMutex) {
        // Explicitly remove target for a proxy, if registered already,
        // in order to avoid double invocations of the same listener.
        Object singletonTarget = AopProxyUtils.getSingletonTarget(listener);
        if (singletonTarget instanceof ApplicationListener) {
            this.defaultRetriever.applicationListeners.remove(singletonTarget);
        }
        this.defaultRetriever.applicationListeners.add(listener);
        this.retrieverCache.clear();
    }
}


//defaultRetriever定义
private final ListenerRetriever defaultRetriever = new ListenerRetriever(false);
所以this.initialMulticaster.addApplicationListener(listener)方法的作用就是讲前面提到的10个监听器给到SimpleApplicationEventMulticaster的父抽象类AbstractApplicationEventMulticaster中的内部类ListenerRetriever里面的applicationListeners这个set集合。
有了EventPublishingRunListener类的实例之后,会执行new SpringApplicationRunListeners这个方法,实现如下:
SpringApplicationRunListeners(Log log,
			Collection<? extends SpringApplicationRunListener> listeners) {
    this.log = log;
    this.listeners = new ArrayList<SpringApplicationRunListener>(listeners);
}

//listeners变量定义
private final List<SpringApplicationRunListener> listeners;

//顺便提一下,EventPublishingRunListener是SpringApplicationRunListener的实现类
public class EventPublishingRunListener implements SpringApplicationRunListener, Ordered {
//具体代码内容省略,此处值说明EventPublishingRunListener是SpringApplicationRunListener的子类
}
所以 getRunListeners(args)详解这个方法的作用就是创建SpringApplicationRunListeners的实例化对象。
此处要注意SpringApplicationRunListeners和SpringApplicationRunListener的关系
SpringApplicationRunListeners中包含了private final List<SpringApplicationRunListener> listeners集合- 真正负责事件发布的是
SpringApplicationRunListener SpringApplicationRunListener中又维护了SimpleApplicationEventMulticaster对象,并通过该对象将事件广播给各个监听器
3.3 listeners.starting()详解
读者可以参考我的另外一篇文章:springBoot事件监听机制,里面有关于这个方法的详细介绍,这里就不再赘述。
3.4 prepareEnvironment(listeners,applicationArguments)详解
从方法名来看,该方法就是用来准备环境的,那到底是准备什么环境?怎么实现的?接着看源码
private ConfigurableEnvironment prepareEnvironment(
			SpringApplicationRunListeners listeners,
			ApplicationArguments applicationArguments) {
    //根据应用类型初始化不同的系统环境实例,详情参看3.4.1小节
    ConfigurableEnvironment environment = getOrCreateEnvironment();
    //详情参看3.4.2小节
    configureEnvironment(environment, applicationArguments.getSourceArgs());
    //详情参看3.4.3小节
    listeners.environmentPrepared(environment);
    if (!this.webEnvironment) {
        environment = new EnvironmentConverter(getClassLoader())
            .convertToStandardEnvironmentIfNecessary(environment);
    }
    return environment;
}


//environment定义
private ConfigurableEnvironment environment;
//webEnvironment定义
private boolean webEnvironment;
3.4.1 getOrCreateEnvironment()分析
getOrCreateEnvironment()实现如下:
//getOrCreateEnvironment()方法实现
private ConfigurableEnvironment getOrCreateEnvironment() {
    if (this.environment != null) {
        return this.environment;
    }
    if (this.webEnvironment) {
        return new StandardServletEnvironment();
    }
    return new StandardEnvironment();
}
单从实现上看,这个方法确实很简单,就是根据不同的条件,初始化不同的对象。这里的this.webEnvironment是true,在第2小节this.webEnvironment = deduceWebEnvironment()确定,所以其实这里是初始化了一个StandardServletEnvironment对象。
但是要说明的核心其实并不是这个,如果这么简单,那就没有必要特意用一小节来说了。关键是下面要说明的东西:
首选给出StandardServletEnvironment的UML类图:可以看到StandardServletEnvironment、
StandardEnvironment、AbstractEnvironment三者之间的继承关系

首先StandardServletEnvironment、StandardEnvironment中并没有明确的定义无参构造函数,所以初始化的时候使用的是默认的无参构造函数,而AbstractEnvironment明确中定义了无参构造函数,所以在
new StandardServletEnvironment()的时候会先去调用AbstractEnvironment中的无参构造函数,定义如下:
public AbstractEnvironment() {
    customizePropertySources(this.propertySources);
    if (logger.isDebugEnabled()) {
        logger.debug("Initialized " + getClass().getSimpleName() + " with PropertySources 				" + this.propertySources);
    }
}

//propertySources定义
private final MutablePropertySources propertySources = new
    MutablePropertySources(this.logger);
可以看到其实这个方法的核心在于 customizePropertySources(this.propertySources), 而这个方法其实是去调用StandardServletEnvironment中重写的customizePropertySources方法的,声明一下,这里的调用关系和spring自己没有任何关系,只是单纯的java继承类之间的调用关系,如果不明白,需要去自行脑补。
StandardServletEnvironment中重写的customizePropertySources方法实现如下:
protected void customizePropertySources(MutablePropertySources propertySources) {
    propertySources.addLast(new StubPropertySource(SERVLET_CONFIG_PROPERTY_SOURCE_NAME));
    propertySources.addLast(new
        StubPropertySource(SERVLET_CONTEXT_PROPERTY_SOURCE_NAME));
    if (JndiLocatorDelegate.isDefaultJndiEnvironmentAvailable()) {
        propertySources.addLast(new JndiPropertySource(JNDI_PROPERTY_SOURCE_NAME));
    }
    //调用父类StandardEnvironment customizePropertySources方法
    super.customizePropertySources(propertySources);
}

//SERVLET_CONTEXT_PROPERTY_SOURCE_NAME定义
public static final String SERVLET_CONTEXT_PROPERTY_SOURCE_NAME =
    "servletContextInitParams";

//SERVLET_CONFIG_PROPERTY_SOURCE_NAME定义
public static final String SERVLET_CONFIG_PROPERTY_SOURCE_NAME =
    "servletConfigInitParams";
可以看到会向AbstractEnvironment中的propertySources依次添加name为servletConfigInitParams、servletContextInitParams、jndiProperties 、systemProperties、systemEnvironment 的PropertySource。
所以getOrCreateEnvironment()方法作用在于:
1. 根据应用类型初始化不同的系统环境实例,并且在这个过程中向AbstractEnvironment中的propertySources依次添加name为servletConfigInitParams、servletContextInitParams、jndiProperties 、systemProperties、systemEnvironment 的PropertySource。
可以得到:此时AbstractEnvironment中的propertySources中的顺序到现在为:servletConfigInitParams 、servletContextInitParams 、jndiProperties 、systemProperties 、systemEnvironment。
3.4.2 configureEnvironment分析
configureEnvironment(environment, applicationArguments.getSourceArgs())这行代码,实现如下:
//configureEnvironment方法实现
protected void configureEnvironment(ConfigurableEnvironment environment,
			String[] args) {
   //根据命令行参数转换为org.springframework.core.env.PropertySource,其中name为commandLineArgs
    configurePropertySources(environment, args);

    configureProfiles(environment, args);
}
里面就调用了2个方法,逐一分析
3.4.2.1 configurePropertySources解析
protected void configurePropertySources(ConfigurableEnvironment environment,
			String[] args) {
    //从上面创建的ConfigurableEnvironment实例中获取MutablePropertySources实例
    MutablePropertySources sources = environment.getPropertySources();
     //如果有defaultProperties属性的话,则把默认属性添加为最后一个元素
    if (this.defaultProperties != null && !this.defaultProperties.isEmpty()) {
        sources.addLast(
            new MapPropertySource("defaultProperties", this.defaultProperties));
    }
    //这里addCommandLineProperties默认为true 如果有命令行参数的数
    if (this.addCommandLineProperties && args.length > 0) {
        //name为:commandLineArgs
        String name = CommandLinePropertySource.COMMAND_LINE_PROPERTY_SOURCE_NAME;
        //如果之前的MutablePropertySources中有name为commandLineArgs的PropertySource的话,则把
        //当前命令行参数转换为CompositePropertySource类型,和原来的PropertySource进行合并,替换原
        //来的PropertySource
        if (sources.contains(name)) {
            PropertySource<?> source = sources.get(name);
            CompositePropertySource composite = new CompositePropertySource(name);
            composite.addPropertySource(new SimpleCommandLinePropertySource(
                name + "-" + args.hashCode(), args));
            composite.addPropertySource(source);
            sources.replace(name, composite);
        }
        else {
            //如果之前没有name为commandLineArgs的PropertySource的话,则将其添加为
            //MutablePropertySources中的第一个元素,注意了这里将命令行参数添加为
            //ConfigurableEnvironment中MutablePropertySources实例的第一个元素,且永远是第一个元
            //素
            sources.addFirst(new SimpleCommandLinePropertySource(args));
        }
    }
}
启动springBoot的主函数之后,代码会走到
sources.addFirst(new SimpleCommandLinePropertySource(args))中,先看
new SimpleCommandLinePropertySource(args)的实现
//SimpleCommandLinePropertySource构造方法
public SimpleCommandLinePropertySource(String... args) {
    super(new SimpleCommandLineArgsParser().parse(args));
}
new SimpleCommandLineArgsParser()只是单纯的创建了SimpleCommandLineArgsParser对象,核心还在于它的parse方法,点进去看实现
public CommandLineArgs parse(String... args) {
    CommandLineArgs commandLineArgs = new CommandLineArgs();
    for (String arg : args) {
        if (arg.startsWith("--")) {
            String optionText = arg.substring(2, arg.length());
            String optionName;
            String optionValue = null;
            if (optionText.contains("=")) {
                optionName = optionText.substring(0, optionText.indexOf("="));
                optionValue = optionText.substring(optionText.indexOf("=")+1, optionText.length());
            }
            else {
                optionName = optionText;
            }
            if (optionName.isEmpty() || (optionValue != null && optionValue.isEmpty())) {
                throw new IllegalArgumentException("Invalid argument syntax: " + arg);
            }
            commandLineArgs.addOptionArg(optionName, optionValue);
        }
        else {
            commandLineArgs.addNonOptionArg(arg);
        }
    }
    return commandLineArgs;
}

//CommandLineArgs类中addOptionArg的实现
public void addOptionArg(String optionName, String optionValue) {
    if (!this.optionArgs.containsKey(optionName)) {
        this.optionArgs.put(optionName, new ArrayList<String>());
    }
    if (optionValue != null) {
        this.optionArgs.get(optionName).add(optionValue);
    }
}
//CommandLineArgs类中定义的optionArgs变量
Map<String, List<String>> optionArgs
可以看到这里面就是对springBoot启动参数(也可以叫命令行参数,如–spring.profiles.active=prod)的解析,用途就是将spring.profiles.active、prod放进CommandLineArgs对象的optionArgs中,以spring.profiles.active作为key,prod放进key对应的List中。
所以可以知道其实真正解析命令行参数的逻辑其实是在SimpleCommandLineArgsParser中的parse方法里面
public SimpleCommandLinePropertySource(String... args) {
    super(new SimpleCommandLineArgsParser().parse(args));
}
然后会去调用SimpleCommandLinePropertySource父类对应的构造方法,一直看下去会发现其实最后是调用PropertySource类的构造方法:
//name是CommandLinePropertySource中定义的变量COMMAND_LINE_PROPERTY_SOURCE_NAME
//source是前面SimpleCommandLineArgsParser方法中返回CommandLineArgs对象
public PropertySource(String name, T source是) {
    Assert.hasText(name, "Property source name must contain at least one character");
    Assert.notNull(source, "Property source must not be null");
    this.name = name;
    this.source = source;
}

public static final String COMMAND_LINE_PROPERTY_SOURCE_NAME = "commandLineArgs";
//configureEnvironment方法实现
protected void configureEnvironment(ConfigurableEnvironment environment,
			String[] args) {
   //根据命令行参数转换为org.springframework.core.env.PropertySource,其中name为commandLineArgs
    configurePropertySources(environment, args);

    configureProfiles(environment, args);
}
结论:SpringBoot把命令行参数转换为PropertySource,并添加为环境变量中的第一个元素,那么此时AbstractEnvironment中的propertySources中的顺序到现在为:commandLineArgs、servletConfigInitParams 、servletContextInitParams 、jndiProperties 、systemProperties 、systemEnvironment。
3.4.2.2 configureProfiles分析
从方法名字上看方法的含义是配置Profiles,学过springBoot的人对这个东西肯定不陌生,profile是用来对不同的环境提供不同配置的功能。所以这个方法应该是用来让我们配置的关于profile发挥作用的,下面正式开始介绍。
实现如下:
protected void configureProfiles(ConfigurableEnvironment environment, String[] args) {
    environment.getActiveProfiles();
    Set<String> profiles = new LinkedHashSet<String>(this.additionalProfiles);
    profiles.addAll(Arrays.asList(environment.getActiveProfiles()));
    environment.setActiveProfiles(profiles.toArray(new String[profiles.size()]));
}
先看environment.getActiveProfiles(),实现如下:
String[] getActiveProfiles();
这是Environment接口的方法,实现在其实现类AbstractEnvironment中,代码如下:
@Override
public String[] getActiveProfiles() {
    return StringUtils.toStringArray(doGetActiveProfiles());
}
可以看到核心还是在于doGetActiveProfiles()这个方法,代码如下:
protected Set<String> doGetActiveProfiles() {
    synchronized (this.activeProfiles) {
        if (this.activeProfiles.isEmpty()) {
            String profiles = getProperty(ACTIVE_PROFILES_PROPERTY_NAME);
            if (StringUtils.hasText(profiles)) {
                setActiveProfiles(StringUtils.commaDelimitedListToStringArray(
                    StringUtils.trimAllWhitespace(profiles)));
            }
        }
        return this.activeProfiles;
    }
}

//ACTIVE_PROFILES_PROPERTY_NAME定义,spring.profiles.active是不是很熟悉?
public static final String ACTIVE_PROFILES_PROPERTY_NAME = "spring.profiles.active";
先看getProperty(ACTIVE_PROFILES_PROPERTY_NAME)这段代码:
@Override
public String getProperty(String key) {
    return this.propertyResolver.getProperty(key);
}

//propertyResolver定义
private final ConfigurablePropertyResolver propertyResolver =
			new PropertySourcesPropertyResolver(this.propertySources);

//propertySources定义
private final MutablePropertySources propertySources = new
    MutablePropertySources(this.logger);
可以看到在执行this.propertyResolver时会实际上会初始化一个PropertySourcesPropertyResolver对象,并且传入了当前的MutablePropertySources实例propertySources,然后执行PropertySourcesPropertyResolver类的getProperty方法,代码如下:
@Override
public String getProperty(String key) {
    return getProperty(key, String.class, true);
}
继续看getProperty(key, String.class, true)的代码:
// 此时传入的3个参数分别为:
// key:spring.profiles.active
// targetValueType:String.Class
// resolveNestedPlaceholders:true

protected <T> T getProperty(String key, Class<T> targetValueType, boolean
	resolveNestedPlaceholders) {
        if (this.propertySources != null) {
        	//对propertySources进行循环遍历
            for (PropertySource<?> propertySource : this.propertySources) {
            	//日志打印的判断,和底层逻辑无关,不做说明
                if (logger.isTraceEnabled()) {
                    logger.trace("Searching for key '" + key + "' in PropertySource '" +
                                 propertySource.getName() + "'");
                }
                //Object value = prod
                Object value = propertySource.getProperty(key);
                if (value != null) {
                    if (resolveNestedPlaceholders && value instanceof String) {
                    	// 处理属性占位符,如${server.port},底层委托到
                    	// PropertyPlaceholderHelper完成
                        value = resolveNestedPlaceholders((String) value);
                    }
                    logKeyFound(key, propertySource, value);
                    return convertValueIfNecessary(value, targetValueType);
                }
            }
        }
        if (logger.isDebugEnabled()) {
            logger.debug("Could not find key '" + key + "' in any property source");
        }
        return null;
}

// this.propertySources中propertySources的定义
private final PropertySources propertySources;
可以看到代码中核心就在于对this.propertySources的遍历,this.propertySources包含:
commandLineArgs、servletConfigInitParams 、servletContextInitParams 、jndiProperties 、systemProperties 、systemEnvironment。

看Object value = propertySource.getProperty(key)这段,注意第一次循环遍历的时候propertySources实际上是SimpleCommandLinePropertySource类型,所以真正执行逻辑的应该是SimpleCommandLinePropertySource中的getProperty方法,实际上SimpleCommandLinePropertySource
的getProperty方法是继承于父类CommandLinePropertySource,实现如下:
@Override
public final String getProperty(String name) {
    //nonOptionArgsPropertyName实际上是nonOptionArgs
    if (this.nonOptionArgsPropertyName.equals(name)) {
        Collection<String> nonOptionArguments = this.getNonOptionArgs();
        if (nonOptionArguments.isEmpty()) {
            return null;
        }
        else {
            return StringUtils.collectionToCommaDelimitedString(nonOptionArguments);
        }
    }
    Collection<String> optionValues = this.getOptionValues(name);
    if (optionValues == null) {
        return null;
    }
    else {
        return StringUtils.collectionToCommaDelimitedString(optionValues);
    }
}
this.nonOptionArgsPropertyName.equals(name)=false,所以执行this.getOptionValues(name),代码如下:
protected abstract List<String> getOptionValues(String name);
这个一个抽象方法,看SimpleCommandLinePropertySource中的实现:
@Override
protected List<String> getOptionValues(String name) {
    //此时
    return this.source.getOptionValues(name);
}

//this.source中source定义
protected final T source;
代码不解释了,直接看图就懂了

所以 propertySource.getProperty(key)的结果就应该是String类型的prod,也即Object value = prod。
resolveNestedPlaceholders((String) value)用来处理属性占位符,如${server.port},实现如下:
protected String resolveNestedPlaceholders(String value) {
    return (this.ignoreUnresolvableNestedPlaceholders ?
            resolvePlaceholders(value) : resolveRequiredPlaceholders(value));
}

//ignoreUnresolvableNestedPlaceholders定义
private boolean ignoreUnresolvableNestedPlaceholders = false;
其实这里执行的就是 resolveRequiredPlaceholders(value),实现如下:
@Override
public String resolveRequiredPlaceholders(String text) throws IllegalArgumentException {
    if (this.strictHelper == null) {
        this.strictHelper = createPlaceholderHelper(false);
    }
    return doResolvePlaceholders(text, this.strictHelper);
}
先看createPlaceholderHelper(false),实现如下:
private PropertyPlaceholderHelper createPlaceholderHelper(boolean
	ignoreUnresolvablePlaceholders) {
		// this.placeholderPrefix = ${
		// this.placeholderSuffix = }
		// valueSeparator = :
		return new PropertyPlaceholderHelper(this.placeholderPrefix,
			this.placeholderSuffix,
				this.valueSeparator, ignoreUnresolvablePlaceholders);
}
其实这里也就是创建PropertyPlaceholderHelper的一个实例,信息如下:

继续看return doResolvePlaceholders(text, this.strictHelper),代码如下:
private String doResolvePlaceholders(String text, PropertyPlaceholderHelper helper) {
	return helper.replacePlaceholders(text,
		new PropertyPlaceholderHelper.PlaceholderResolver() {
		@Override
        public String resolvePlaceholder(String placeholderName) {
            return getPropertyAsRawString(placeholderName);
        }
	});
}
这里调用了PropertyPlaceholderHelper的replacePlaceholders方法,代码如下:
public String replacePlaceholders(String value, PlaceholderResolver placeholderResolver) {
    Assert.notNull(value, "'value' must not be null");
    return parseStringValue(value, placeholderResolver, new HashSet<String>());
}
parseStringValue(value, placeholderResolver, new HashSet<String>())代码如下:
// value = prod
protected String parseStringValue(
			String value, PlaceholderResolver placeholderResolver, Set<String> visitedPlaceholders) {

		StringBuilder result = new StringBuilder(value);
		// startIndex = -1
		int startIndex = value.indexOf(this.placeholderPrefix);
		while (startIndex != -1) {
			int endIndex = findPlaceholderEndIndex(result, startIndex);
			if (endIndex != -1) {
				String placeholder = result.substring(startIndex +
                	this.placeholderPrefix.length(), endIndex);
				String originalPlaceholder = placeholder;
				if (!visitedPlaceholders.add(originalPlaceholder)) {
					throw new IllegalArgumentException(
							"Circular placeholder reference '" + originalPlaceholder + "' in property definitions");
				}
				placeholder = parseStringValue(placeholder, placeholderResolver,
                                               visitedPlaceholders);
				String propVal = placeholderResolver.resolvePlaceholder(placeholder);
				if (propVal == null && this.valueSeparator != null) {
					int separatorIndex = placeholder.indexOf(this.valueSeparator);
					if (separatorIndex != -1) {
						String actualPlaceholder = placeholder.substring(0,
                        	separatorIndex);
						String defaultValue = placeholder.substring(separatorIndex +
                        	this.valueSeparator.length());
						propVal =
                            placeholderResolver.resolvePlaceholder(actualPlaceholder);
						if (propVal == null) {
							propVal = defaultValue;
						}
					}
				}
				if (propVal != null) {
					propVal = parseStringValue(propVal, placeholderResolver,
                                               visitedPlaceholders);
					result.replace(startIndex, endIndex +
                                   this.placeholderSuffix.length(), propVal);
					if (logger.isTraceEnabled()) {
						logger.trace("Resolved placeholder '" + placeholder + "'");
					}
					startIndex = result.indexOf(this.placeholderPrefix, startIndex +
                                                propVal.length());
				}
				else if (this.ignoreUnresolvablePlaceholders) {
					startIndex = result.indexOf(this.placeholderPrefix, endIndex +
                                                this.placeholderSuffix.length());
				}
				else {
					throw new IllegalArgumentException("Could not resolve placeholder '" +
							placeholder + "'" + " in value \"" + value + "\"");
				}
				visitedPlaceholders.remove(originalPlaceholder);
			}
			else {
				startIndex = -1;
			}
		}

		return result.toString();
}
这里startIndex的值为-1,所以直接执行return result.toString(),也就是return prod。
后面这两句就再解释了,请读者自行分析,很简单。
logKeyFound(key, propertySource, value);
return convertValueIfNecessary(value, targetValueType);
我们继续回到AbstractEnvironment的doGetActiveProfiles方法上来
protected Set<String> doGetActiveProfiles() {
    synchronized (this.activeProfiles) {
        if (this.activeProfiles.isEmpty()) {
            String profiles = getProperty(ACTIVE_PROFILES_PROPERTY_NAME);
            if (StringUtils.hasText(profiles)) {
                setActiveProfiles(StringUtils.commaDelimitedListToStringArray(
                    StringUtils.trimAllWhitespace(profiles)));
            }
        }
        return this.activeProfiles;
    }
}
String profiles = getProperty(ACTIVE_PROFILES_PROPERTY_NAME)这句已经说完了,继续往下走
setActiveProfiles(StringUtils.commaDelimitedListToStringArray(
	StringUtils.trimAllWhitespace(profiles)));
从方法名字上看,我们可以知道这个段代码是用于设置profile的,实现如下:
public void setActiveProfiles(String... profiles) {
    Assert.notNull(profiles, "Profile array must not be null");
    synchronized (this.activeProfiles) {
        this.activeProfiles.clear();
        for (String profile : profiles) {
            validateProfile(profile);
            this.activeProfiles.add(profile);
        }
    }
}

// activeProfiles定义
private final Set<String>  activeProfiles = new LinkedHashSet<String>()
validateProfile(profile)用来做数据校验,不做说明,请自己看,很简单。
this.activeProfiles.add(profile) 就是向activeProfiles这个set里面添加元素。
所以我们可以得出结论:environment.getActiveProfiles()方法就是向AbstractEnvironment类中activeProfiles变量添加profile元素
继续往下走,configureProfiles方法的第一行代码已经分析完了
protected void configureProfiles(ConfigurableEnvironment environment, String[] args) {
    environment.getActiveProfiles();
    Set<String> profiles = new LinkedHashSet<String>(this.additionalProfiles);
    profiles.addAll(Arrays.asList(environment.getActiveProfiles()));
    environment.setActiveProfiles(profiles.toArray(new String[profiles.size()]));
}
后面的方法不再去说明,都很简单。
对整个3.4.2.2总结一下:就是为了给AbstractEnvironment类中的activeProfiles变量添加关于profile的内容,如我们这里的prod。
3.4.3 listeners.environmentPrepared(environment)方法解析
在观看这一小节内容之前,读者最好对springBoot的是事件监听机制与一定的了解,能更加容易的去理解代码,若是有不了解的读者,可以看下我的另外一篇文章:springBoot启动事件监听机制,里面有对springBoot的详细介绍。
现在正式开始介绍listeners.environmentPrepared(environment)方法,具体实现如下:
public void environmentPrepared(ConfigurableEnvironment environment) {
    for (SpringApplicationRunListener listener : this.listeners) {
        listener.environmentPrepared(environment);
    }
}
关键代码在 listener.environmentPrepared(environment)这一句,而environmentPrepared方法在EventPublishingRunListener类中的实现如下:
@Override
public void environmentPrepared(ConfigurableEnvironment environment) {
    this.initialMulticaster.multicastEvent(new ApplicationEnvironmentPreparedEvent(
        this.application, this.args, environment));
}
看到这里,如果认真看过3.3 listeners.starting()方法这一小节内容的读者就不会陌生,甚至到这里都可以自己去分析后面的代码走向了,这里还是再大概介绍一下。
进一步跟踪源码,代码会执行到SimpleApplicationEventMulticaster类中的multicastEvent方法
//event是ApplicationEnvironmentPreparedEvent类型的
@Override
public void multicastEvent(final ApplicationEvent event, ResolvableType eventType) {
    ResolvableType type = (eventType != null ? eventType :
                           		resolveDefaultEventType(event));
    for (final ApplicationListener<?> listener : getApplicationListeners(event, type)) {
        Executor executor = getTaskExecutor();
        if (executor != null) {
            executor.execute(new Runnable() {
                @Override
                public void run() {
                    invokeListener(listener, event);
                }
            });
        }
        else {
            invokeListener(listener, event);
        }
    }
}
getApplicationListeners(event, type)是根据事件类型获取对应的监听器集合,关于这部分的内容再springBoot启动事件监听机制中有详细介绍,有兴趣的读者可以看看。
这里ApplicationEnvironmentPreparedEvent事件类型获取监听器有7个,依次是:
- ConfigFileApplicationListener
- AnsiOutputApplicationListener
- LoggingApplicationListener
- ClasspathLoggingApplicationListener
- BackgroundPreinitializer
- DelegatingApplicationListener
- FileEncodingApplicationListener
最后会分别调用这7个监听器的onApplicationEvent方法
private void doInvokeListener(ApplicationListener listener, ApplicationEvent event) {
    try {
        //调用监听器的onApplicationEvent方法
        listener.onApplicationEvent(event);
    }
    catch (ClassCastException ex) {
        String msg = ex.getMessage();
        if (msg == null || msg.startsWith(event.getClass().getName())) {
            Log logger = LogFactory.getLog(getClass());
            if (logger.isDebugEnabled()) {
                logger.debug("Non-matching event type for listener: " + listener, ex);
            }
        }
        else {
            throw ex;
        }
    }
}
至于监听器自身的onApplicationEvent方法这里不做介绍,有兴趣的读者可以自行研究一下。
到这里,整个3.4 prepareEnvironment(listeners,applicationArguments)方法就介绍完了,整个方法就是用来配置运行环境相关的一些东西。
3.5 printBanner(environment)方法解析
这个方法主要用来在springBoot启动的时候打印springBoot的标志
跟踪源码
private Banner printBanner(ConfigurableEnvironment environment) {
    //bannerMod = Banner.Mode.CONSOLE,判断逻辑为false.
    if (this.bannerMode == Banner.Mode.OFF) {
        return null;
    }
    //resourceLoader 会是 DefaultResourceLoader类型的变量
    ResourceLoader resourceLoader = this.resourceLoader != null ? this.resourceLoader
        : new DefaultResourceLoader(getClassLoader());
    //实例化SpringApplicationBannerPrinter对象,但是当前的banner为null
    SpringApplicationBannerPrinter bannerPrinter = new SpringApplicationBannerPrinter(
        resourceLoader, this.banner);
    //判断逻辑为false
    if (this.bannerMode == Mode.LOG) {
        return bannerPrinter.print(environment, this.mainApplicationClass, logger);
    }
    //调用SpringApplicationBannerPrinter类的print方法
    return bannerPrinter.print(environment, this.mainApplicationClass, System.out);
}

//bannerMode定义
private Banner.Mode bannerMode = Banner.Mode.CONSOLE;
核心就在于return bannerPrinter.print(environment, this.mainApplicationClass, System.out),继续跟踪源码
public Banner print(Environment environment, Class<?> sourceClass, PrintStream out) {
    //获取Banner对象
    Banner banner = getBanner(environment, this.fallbackBanner);
    //打印标志
    banner.printBanner(environment, sourceClass, out);
    return new PrintedBanner(banner, sourceClass);
}
先看getBanner(environment, this.fallbackBanner)整个方法,源码如下:
private Banner getBanner(Environment environment, Banner definedBanner) {
    //new了一个Banners对象
    Banners banners = new Banners();
    //向banners中添加图片标志
    banners.addIfNotNull(getImageBanner(environment));
    //向banners中文本图片标志
    banners.addIfNotNull(getTextBanner(environment));
    if (banners.hasAtLeastOneBanner()) {
        return banners;
    }
    if (this.fallbackBanner != null) {
        return this.fallbackBanner;
    }
    //如果没有imageBanner、textBanner,就返回springBoot默认的SpringBootBanner对象
    return DEFAULT_BANNER;
}

//获取图片标志
private Banner getImageBanner(Environment environment) {
    //读取配置中的图片banner配置
    //BANNER_IMAGE_LOCATION_PROPERTY = banner.image.location,也就是在
    //applicaiton.properties或者applicaiton.yml配置的路径
    String location = environment.getProperty(BANNER_IMAGE_LOCATION_PROPERTY);
    //获取的路径是有长度
    if (StringUtils.hasLength(location)) {
        //根据路径获取资源
        Resource resource = this.resourceLoader.getResource(location);
        //
        return (resource.exists() ? new ImageBanner(resource) : null);
    }
    //IMAGE_EXTENSION = { "gif", "jpg", "png" }
    for (String ext : IMAGE_EXTENSION) {
        //获取classpath下的banner.gif/jpg/png
        Resource resource = this.resourceLoader.getResource("banner." + ext);
        if (resource.exists()) {
            return new ImageBanner(resource);
        }
    }
    return null;
}

//BANNER_IMAGE_LOCATION_PROPERTY定义
static final String BANNER_IMAGE_LOCATION_PROPERTY = "banner.image.location";

//获取textBanner
private Banner getTextBanner(Environment environment) {
    //BANNER_LOCATION_PROPERTY = "banner.location";
    //DEFAULT_BANNER_LOCATION = "banner.txt";
//如果没有有配置spring.banner.location,那么就默认是classPath下的banner.txt文件,有的话就取属性值
    String location = environment.getProperty(BANNER_LOCATION_PROPERTY,
		DEFAULT_BANNER_LOCATION);
    Resource resource = this.resourceLoader.getResource(location);
    if (resource.exists()) {
        return new ResourceBanner(resource);
    }
    return null;
}
接着看 banner.printBanner(environment, sourceClass, out),这个方法就会打印banner,实现如下:
void printBanner(Environment environment, Class<?> sourceClass, PrintStream out);
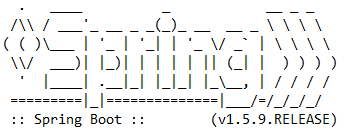
这是Banner接口中的方法,具体实现banner有关,这里我们以springBoot默认的SpringBootBanner为例进行说明,这里给出整个SpringBootBanner的代码
package org.springframework.boot;

import java.io.PrintStream;

import org.springframework.boot.ansi.AnsiColor;
import org.springframework.boot.ansi.AnsiOutput;
import org.springframework.boot.ansi.AnsiStyle;
import org.springframework.core.env.Environment;

class SpringBootBanner implements Banner {

    //BANNER数组就是要打印在控制台的内容
	private static final String[] BANNER = { "",
			"  .   ____          _            __ _ _",
			" /\\\\ / ___'_ __ _ _(_)_ __  __ _ \\ \\ \\ \\",
			"( ( )\\___ | '_ | '_| | '_ \\/ _` | \\ \\ \\ \\",
			" \\\\/  ___)| |_)| | | | | || (_| |  ) ) ) )",
			"  '  |____| .__|_| |_|_| |_\\__, | / / / /",
			" =========|_|==============|___/=/_/_/_/" };

	private static final String SPRING_BOOT = " :: Spring Boot :: ";

	private static final int STRAP_LINE_SIZE = 42;

	@Override
	public void printBanner(Environment environment, Class<?> sourceClass,
			PrintStream printStream) {
        //打印banner数组,一行一行的打印,看起来就是我们熟知的那个标志
		for (String line : BANNER) {
			printStream.println(line);
		}
        //获取springBoot的版本
		String version = SpringBootVersion.getVersion();
		version = (version == null ? "" : " (v" + version + ")");
		String padding = "";
		while (padding.length() < STRAP_LINE_SIZE
				- (version.length() + SPRING_BOOT.length())) {
			padding += " ";
		}
		//打印springBoot版本  :: Spring Boot ::        (v1.5.9.RELEASE)
		printStream.println(AnsiOutput.toString(AnsiColor.GREEN, SPRING_BOOT,
				AnsiColor.DEFAULT, padding, AnsiStyle.FAINT, version));
		printStream.println();
	}

}
还有return new PrintedBanner(banner, sourceClass)这个方法就是创建一个PrintedBanner对象,没什么好介绍的。
到这里整个printBanner(environment)方法就介绍完了,下面进行一下总结:
-
如果在springBoot启动的时候不需要打印banner,可以从设置
bannerMode = Banner.Mode.OFF -
在打印banner的前提下,springBoot支持3种banner:
- SpringBootBanner
- ImageBanner
- TextBanner
SpringBootBanner:在不配置ImageBanner、TextBanner时,springBoot默认使用SpringBootBanner。
ImageBanner:有2种配置方式
1) 在springBoot配置文件中配置,配置的key是banner.image.location
2) 直接在classpath类路径下放置banner.gif、banner.jpg、banner.png其中一个文件,如 果添加多个,只会打印一个,优先级:“gif” > “jpg” > “png”。
注意:配置了banner.image.location后,classpath类路径下放置的banner.gif、 banner.jpg、banner.png就不会生效。
TextBanner:有2种配置方式
1) 在springBoot配置文件中配置,配置的key是banner.location。
2) 直接在classpath类路径下放置banner.txt文件。
注意:配置了banner.location后,classpath类路径下放置的banner.txt文件就不会生效。
给读者一点demo:
-
禁用banner
@SpringBootApplication public class SpringBoot04WebRestfulcrudApplication { public static void main(String[] args) { //springBoot启动禁用banner SpringApplication springApplication = new SpringApplication(SpringBoot04WebRestfulcrudApplication.class); springApplication.setBannerMode(Banner.Mode.OFF); springApplication.run(args); } } -
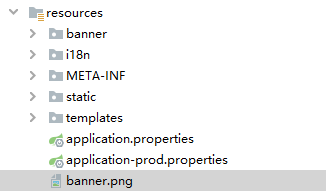
ImageBanner
1 ) 配置banner.image.location
a) **在springBoot配置文件进行如下配置**
banner.image.location=classpath:banner/a.png
b) **在项目resources下新建banner文件夹,将a.png放入其中**

2 ) 在classpath类路径下放置banner.png文件
- TextBanner
-
配置banner.location
a) 在springBoot配置文件进行如下配置
banner.location=classpath:banner/a.txt b) 在项目resources下新建banner文件夹(有就不用新建了),将a.txt放入其中
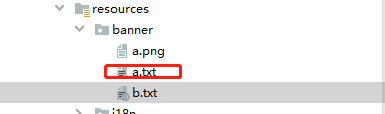
-
在classpath类路径下放置banner.txt文件

到这里的话,printBanner(environment)方法就分析完了。
未完待续,后面有时间会逐步更新


 3141
3141


 被折叠的 条评论
为什么被折叠?
被折叠的 条评论
为什么被折叠?
 到【灌水乐园】发言


