


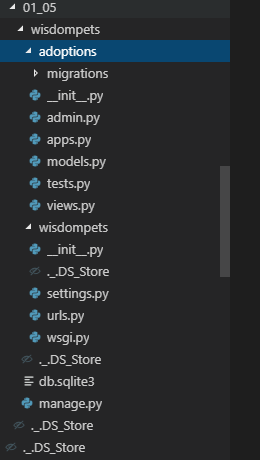
For now, we'll look at the role of each of these as an overview and we'll deepen our understanding as needed later. First, the apps file controls settings specific to this app. The models file provides the data layer which Django uses to construct our database schema and queries. The admin file defines an administrative interface for the app that will allow us to seeand edit the data related to this app. The urls file can be used for URL routing specific to this app. The views file defines the logic and control flow for handling requests and defines the HTP responses that are returned.
The test file can be used for writing unit tests for the functionality of this app. Lastly, the migrations folder holds files which Django uses to migrate the database as we create and change our database schema over time. Now that we've seen what a Django app is, and created our adoptions app, we've finished generating files for our project to create its overall structure and are ready to configure and develop our project.


When a Django application receives a web request, it uses the URL patterns to decide which view to pass the request to for handling. In our project, the URL patterns will be defined in a wisdompets/urls.py. Views provide the logic, or control flow portion of the project. A view is a Python callable such as a function that takes an HTTP request as an argument and returns an HTTP response. Our views will be defined at adoptions/views.py.
To perform queries against the database, each view can leverage Django models as needed.We will define our models for the adoptions app in adoptions/models.py. A Django model is a class with attributes that define the schema or underlying structure of a database table. These classes will provide built in methods for making queries on the associated tables. Each view we define can also leverage templates which help with the presentation layer of what the HTML response will look like. Each template is a separate file that consists of HTML along with some extra template syntax for variables, loops, and other control flow.
Our template files will be placed in a folder called templates that we will create inside of the adoptions folder. Given this overall structure, let's walk through the control flow we'll create in our adoptions app. If a request comes into Django with the root path of just a slash, Django will first look at the URL patterns to find what view it should use. The URL patterns will route the route path to the function in adoptions/views.py called home. This home function will take the request as an argument and it will first make any database calls that are needed using the models defined in adoptions/models.py.
For our homepage, we'll list the pets available for adoption. So, this query will find the name of each pet and some associated information for each one. Next, the home view will pass the request in this data from the database into the template file at adoptions/home.html. At this point, the template will render HTML based on the data it is given and the view will return this HTML as its HTTP response completing the processing for the request. Similarly, if a request comes in with the path /adoptions/1/ the URL patterns will route the request to the pet detail function in our views file.
Unlike, the route path, this path contains a variable which is a one in the example. The URL pattern will parse this variable and pass it along as a second argument to its view. The pet detail view will use the number that's passed in as an ID value for the pet that it will query for details. Lastly, this data for the pet is passed to the template at adoptions/pet_detail.htmlwhich renders the associated HTML. To see how each of these pieces work, we'll implement some pieces in isolation but, we'll sometimes need to stub out related parts until all of them are complete.
Once we've completed each piece, this overall structure and the relationship between the parts will become more concrete. With this in mind, we're ready to implement the major components of our project.


- [Instructor] Models create the data layer of a given Django app. This means that they define the structure of our data and how it will be stored in the database. We will also use our models to leverage Django's ORM when creating data from the database. Typically a Django app contains a models.py file such as our adoptions app, which can contain any number of models. A model is a class that inherits from Django.db.models.Model. Models use class attributes to define their fields.
As a rough analogy, we can conceptualize models as spreadsheets. Each model is a table in a spreadsheet, while each field of the model is a column for that spreadsheet table. Once our database is populated with data, we can think of each record in the database as a row in the spreadsheet. For our adoptions app, our model will support a small set of requirements for an animal shelter adoption system. We'll need to store the pets available for adoption, each with a name, age and some other information like breed or description.
We also want to track the vaccinations that a pet has been given, so we'll create a model with vaccine information and track which pets have been given which vaccines. Ultimately, we will use these models to provide a list of available pets and some details about each of them. As an example implementation of a model, we start by importing the model's module from Django.db. We define our pet model by creating a class called pet that inherits from models.Model. Inside this class, we will define various fields by creating attributes and assigning them to field instances such as the care field.
We've now seen the concepts behind Django models and an overview of how they're defined. Now, we just need to dig in to defining fields.

. There are several Field Attributes you are likely to see. As stated, the max_length attribute is used to define the maximum length of a CharField. If null is set to True, the field can be stored as null meaning that there is no data for that field in a given record.
The blank attribute can be set to true to indicate the field is not required. Lastly, the choices attribute is used to limit the values that can be stored in that field to a set of choices that are provided. For our adoptions app we'll use this on the sex field for pets so that the choices are limited to male and female.
02-04

I'll set null to True in case pets are rescued with an unknown age. I'm opting to use null equals True rather than blank equals True here,because the submission of a blank integer field results in a value of zero, which isn't distinguishable from storing zero to indicate that the pet is less that one year old.


- [Narrator] While the Jengo models define the expected structure of our database, migrations are responsible for creating the necessary scripts to change this structure through time as we update our code and change our models. When a model is adding to a models file, the corresponding database table does not exist yet. For this purpose, we need an initial migration whose role is to create that database table. More broadly, there are several cases in which a migration is needed. When a new model is created, an initial migration creates the database table. Migrations are also needed when a field is added or removed from an existing model, or when attributes of a field have changed.
All of these changes to a models file need a corresponding change to the database and for this purpose, a migration needs to be created and run. The commands for working with migrations are; makemigrations, showmigrations, and migrate. The makemigrations command generates migrations files. It reads the current models file and inspects the current state of the database to determine what changes need to be made to make the database structure match the models file. Those files are placed in the migrations folder of the corresponding app and are automatically numbered starting with one.
The migrate command runs all of the generated migrations that have not yet run. We can also run migrations for a specific app to a specific number of migration by using the migrate command with an app name and a number. Such as, migrate adoptions one. When a migrations file has been created but not yet run, we call this an unapplied migration. This is a common source of errors during development, especially when collaborating with other developers. With this in mind, be sure that when working on a team you coordinate carefully who is changing which model and to look for new migration files when pulling in code changes.
Now, let's take a moment and look at generating and running migrations for our Jengo project. I've opened a terminal, and now I'll navigate to the folder where my manage.py file is.For me, this is inside of the wisdompets folder on the desktop. Using ls or dir on Windows, I can see the manage.py file is here, so I know I'm in the right folder. Now, to make our migrations I'll type python3 manage.py and then makemigrations.
From the output, we can see that for the adoptions app it created a migration for the pet and vaccine models. Because we do not yet have a table for these models, we call this migration an initial migration. At this point we can see the migration was created in the adoptions folder by inspecting that folder with ls or using a text editor. I'll type ls adoptions/migrations to see the files. I can see now that there's a new file and it's called zero, zero, zero, one underscore initial dot py.
To see what migrations exist and which ones have run I can use showmigrations. So now I'll type python three manage.py and showmigrations. There are several migrations listed and they are grouped by the corresponding app name alphabetically. Several of these are default Jengo apps, such as admin off and so on. In the second group, we can see our adoptions app. The default apps come with models and migrations. So those migrations also appear in this list.
The square braces on the left with empty space inside indicate that these migrations have not yet been applied. To apply our migrations, we will now run python three manage.py and migrate. From the output, we can see that all of the migrations were applied successfully. With this in place, let's run showmigrations again to verify our results. I'll type python three manage.py and show migrations. Now, the square brackets on the left have an x insideindicating that each migration has been applied.
Now that we've run all of our migrations, let's see what the structure of our database looks like. I've downloaded a DB Browser tool from sqlitebrowser.org which is an open source project that's available on most platforms. This tool allows us to inspect SQLite databases and see their structure and contents. First, I'll open the DB.SQLite3 file for our project. Since we created models called pet and vaccine inside of our adoptions app, the tables are named adoptions_pet and adoptions_vaccine.
We also have a third table called adoptions_pet_vaccinations. This is used for storing the many to many field for adoptions and vaccines. To look inside the adoptions_pet table, I'll click the unfold button here on the left. Inside this table, we can see that there are severalfields including I.D., name, submitter, and so on. I.D. is an automatically generated field for all tables that Jengo manages. The remaining fields match those that are defined in our model.After creating and running all of the migrations, we've now confirmed that they are applied successfully and we're ready to use our database.
If it's in the same folder (adoptions\admin and adoptions\models): from .models import Pet
If it's Pet in adoptions\models and the script below is in adoptions\management\commands\load_pet_data.py: from adoptions.models import Pet, Vaccine
from csv import DictReader
from datetime import datetime

from django.core.management import BaseCommand

from adoptions.models import Pet, Vaccine
from pytz import UTC


DATETIME_FORMAT = '%m/%d/%Y %H:%M'

VACCINES_NAMES = [
    'Canine Parvo',
    'Canine Distemper',
    'Canine Rabies',
    'Canine Leptospira',
    'Feline Herpes Virus 1',
    'Feline Rabies',
    'Feline Leukemia'
]

ALREADY_LOADED_ERROR_MESSAGE = """
If you need to reload the pet data from the CSV file,
first delete the db.sqlite3 file to destroy the database.
Then, run `python manage.py migrate` for a new empty
database with tables"""


class Command(BaseCommand):
    # Show this when the user types help
    help = "Loads data from pet_data.csv into our Pet model"

    def handle(self, *args, **options):
        if Vaccine.objects.exists() or Pet.objects.exists():
            print('Pet data already loaded...exiting.')
            print(ALREADY_LOADED_ERROR_MESSAGE)
            return
        print("Creating vaccine data")
        for vaccine_name in VACCINES_NAMES:
            vac = Vaccine(name=vaccine_name)
            vac.save()
        print("Loading pet data for pets available for adoption")
        for row in DictReader(open('./pet_data.csv')):
            pet = Pet()
            pet.name = row['Pet']
            pet.submitter = row['Submitter']
            pet.species = row['Species']
            pet.breed = row['Breed']
            pet.description = row['Pet Description']
            pet.sex = row['Sex']
            pet.age = row['Age']
            raw_submission_date = row['submission date']
            submission_date = UTC.localize(
                datetime.strptime(raw_submission_date, DATETIME_FORMAT))
            pet.submission_date = submission_date
            pet.save()
            raw_vaccination_names = row['vaccinations']
            vaccination_names = [name for name in raw_vaccination_names.split('| ') if name]
            for vac_name in vaccination_names:
                vac = Vaccine.objects.get(name=vac_name)
                pet.vaccinations.add(vac)
            pet.save()
from django.db import models

class Pet(models.Model):
    SEX_CHOICES = [('M', 'Male'), ('F', 'Female')]
    name = models.CharField(max_length=100)
    submitter = models.CharField(max_length=100)
    species = models.CharField(max_length=30)
    breed = models.CharField(max_length=30, blank=True)
    description = models.TextField()
    sex = models.CharField(choices=SEX_CHOICES, max_length=1, blank=True)
    submission_date = models.DateTimeField()
    age = models.IntegerField(null=True)
    vaccinations = models.ManyToManyField('Vaccine', blank=True)

class Vaccine(models.Model):
    name = models.CharField(max_length=50)
from django.contrib import admin

from .models import Pet

@admin.register(Pet)
class PetAdmin(admin.ModelAdmin):
    list_display = ['name', 'species', 'breed', 'age', 'sex']


- [Instructor] Now that we have data to work with, I'd like to use the Django admin to create an administrative interface for our project, so that admin users can see and edit that data. First, we'll open our text editor to the admin.py file inside of the adoptions folder. The first line of this file imports the admin module, which we'll need. On line three, we'll remove this comment.Now we need to import our Pet model, which is in the same folder. So we'll use from .models import Pet.
To make an admin interface for our Pet model, we'll create a class and we'll call it PetAdmin.We need to make it inherit from admin.ModelAdmin. This class can take several attributes and method overrides to modify its behavior. For now, we won't override anything just yet. So to make this a valid Python class, we'll use the pass keyword. Next, we need to register this class with the admin to tell it which model it's associated with.
To do that we'll use a decorator that's from the Admin module called register. This decorator takes a model class as an argument, so we'll pass it our Pet model. With this in place, I'll press Command + S to save our file. Now I'd like to take a look at the Django admin to see our results. In order to do that, we need to create a super user for ourselves to log in as. In a terminal, navigate to your working project folder. For me, this is the wisdompets folder that's on the desktop.
From here, type python3 manage.py, and the sub-command createsuperuser, all one word, lower case. Now, you can follow the prompts and enter whatever username and password you'd like to use. I'll hit enter here to accept the default, which for me is the calebsmith username. The email address isn't required, so I'll hit Enter again to skip that. And for my password, I'll type learningdjango, all one word, lower case. Now I'll type that password again.
And with that, I've created my superuser successfully. Now, I'll need to run our project so that we can visit it from the browser. So I'll type python3 manage.py and runserver. With that running, I'll go to a Browser and visit localhost:8000, and /admin to go to the admin interface.Now I'll use the username and password I gave to the create superuser command. So I'll type calebsmith for my username, and for the password I'll type learningdjango.
From here, it lists all the models that are registered in the Django admin. Users and groups are registered by default, and at the top I can see my Pet model. Clicking on the Pet model,I'm now getting a listing of the pets that are in the database. Each one just says Pet object, which isn't very helpful. So we'll circle back and address this in a moment. Let's click on one and look at the detail interface. From here, I can see all the data for this particular pet. If they need to, a superuser can use this screen to edit the data, and at the bottom a Save button is provided.
While most of this screen is acceptable, I'm noticing that from my Vaccinations widget each one is just listed as Vaccine object, which isn't very usable. We'll also make some code changes to address this problem. Before making my code changes, I'll click back in the Browser so that I'm on the listing screen, again. Leaving this open, I'm going to navigate to my text editor to make our changes. First, in this admin file, I'd like to address the problem on the listing page where each pet displays as Pet object. The model admin class has an attribute called list display that allows us to find which fields are displayed on this listing screen.
Now coming to line seven, I'll delete pass and I'll define our list_display attribute. I'll set it to the list with the field's name, species, breed, age and sex. Now I'll save this file with Command + S. Next, I'd like to address the display of vaccines as vaccine object, and make it use each vaccine's name. When Django displays a model instance in the admin or in a Python shell, by default it just uses the model's name, along with the word object.
To tell Django what to display for the vaccine model, we need to override one of its default methods. To do that, let's navigate to the models file, and we'll scroll down to the vaccine model. Here we'll override the double underscore str, double underscore method, also called dunderstr. This method tells Django what the string representation should be for this model.To define the body of this method, I'll simply return the value of the name field that's attached to the self object that the method has passed.
Now I'll press Command + S to save my changes. I'd like to look at the admin interface againto test that my changes work. First, I'll check the terminal quickly to make sure that our program is still running. Django automatically restarts the development server when changes are made, but sometimes it can crash. I see that this is still running, so I'll go back to the Browser and refresh the page. Because I changed the list display attribute, I can see that our pet listing is now usable, and I can see some details about each pet. Now I'll click the pet name Nadalee, and I'll scroll down to look at our vaccinations to check our changes here.
Now I can see the names for each vaccine, and the ones that are highlighted here, are all the canine vaccines. So I know that this pet, Nadalee, has all of her vaccines. With these fixes in place, our project now has a good minimal admin interface to work with.
Note that the object returned by pet.vaccinations has the same ORM methods provided by the object's attribute that we've been using, therefore pet.vaccinations will also have other ORM methods, like .get.
When a foreign key or many to many field is used on a model, its instances will have this type of object attached as the name of the field.So for our case, this is the vaccinations field on the pet object
Using .get, .all and so on in this vaccinations object, we'll query among the vaccinations associated with that given pet.
PS C:\Use\Documents\Web\Ex_Files_Learning_Django\Exercise Files\Ch02\02_08\wisdompets> python manage.py shellsdompets> python manage.py shell                                                     n win32
Python 3.7.0 (v3.7.0:1bf9cc5093, Jun 27 2018, 04:59:51) [MSC v.1914 64 bit (AMD64)] on win32
Type "help", "copyright", "credits" or "license" for more information.
(InteractiveConsole)
>>> from adoptions.models import Pet
>>> pets = Pet.objects.all()
>>> petone = pets[0]
>>> petone.name
'Pepe'
>>> petone.description
'Six-month-old Pepe is very active and is always keeping us on our toes.'
>>> petfirst = Pet.objects.get(id=1)
>>> petfirst.age
0
>>> petfirst.vaccinations.all()
<QuerySet []>
>>> pet7 = Pet.objects.get(id=7)
>>> pet7.vaccinations.all()
<QuerySet [<Vaccine: Canine Parvo>, <Vaccine: Canine Distemper>, <Vaccine: Canine Rabies>, <Vaccine: Canine Leptospira>]>
>>> Pet.objects.get(id=999999)
Traceback (most recent call last):
  File "<console>", line 1, in <module>
  File "C:\Users\Huiti\AppData\Local\Programs\Python\Python37\lib\site-packages\django\db\models\manager.py", line 82, in manager_method
    return getattr(self.get_queryset(), name)(*args, **kwargs)
  File "C:\Users\Huiti\AppData\Local\Programs\Python\Python37\lib\site-packages\django\db\models\query.py", line 408, in get
    self.model._meta.object_name
adoptions.models.Pet.DoesNotExist: Pet matching query does not exist.
>>> Pet.objects.get(age=0)
<Pet: Pet object (1)>
>>> Pet.objects.get(age=1)
Traceback (most recent call last):
  File "<console>", line 1, in <module>
  File "C:\Users\Huiti\AppData\Local\Programs\Python\Python37\lib\site-packages\django\db\models\manager.py", line 82, in manager_method
    return getattr(self.get_queryset(), name)(*args, **kwargs)
  File "C:\Users\Huiti\AppData\Local\Programs\Python\Python37\lib\site-packages\django\db\models\query.py", line 412, in get
    (self.model._meta.object_name, num)
adoptions.models.Pet.MultipleObjectsReturned: get() returned more than one Pet -- it
returned 3!


- [Narrator] Let's dig a bit deeper into URL patterns. At a high level, URL patterns dispatch requests to views based on the path. To begin, let's take a brief look at regular expressions.URL patterns use regular expressions to interpret the URLs for your site. A regular expression is a sequence of characters that defines a search pattern for strings. Here's some examples for some regular expressions that we'll use. With the regular expression ducky, this will match the word ducky anywhere found in the string.
With \d this will match a single digit character. This has nothing to do with the literal character d itself. D here just stands for digit and the backslash means that it will be interpreted to mean any digit character. \d+ means one or more digit characters so this will match any number of characters up to the point where something other than a number is encountered. So if the string is 12 ounces, this will match against the characters 1 and 2. The caret character means beginning of sequence so the regular expression ^admin/ will match any string that begins with admin/ but will not match the word admin anywhere else in the string.
Similarly, the dollar sign means end of sequence. So suffix $ will match any string that endswith the word suffix. The regular expression ^$ will match any empty string because it begins and ends with nothing in between. At this point, we've discussed regular expressions enough to get comfortable with using them in URL patterns. However, to learn more, I'd invite you to check out courses on regular expressions in our course library. Also, as we learn about using regular expressions in Python, I invite you to use the tool pythex.org to play with different regular expressions.
Here, I'll go to the input box labeled your regular expression and I'll type \d+ and then in the input box labeled your test string, I'll type 12 ounces. Now at the bottom of the screen in the results, I can see that the characters 1 and 2 matched because they're highlighted while the rest of the string did not match. Now, let's look at some example URL patterns. The urls.pie file will define a variable called URL patterns which is a list of calls to the URL function.
The URL function has three parameters. The first parameter is a regular expression. This will be used to match against the request. In this example, we're using ^$ so we're matchingagainst the empty string which is a request to our site with no path. Django doesn't consider the final slash in a URL for matching so even though the route path is really a slash, it is treated as an empty string. Also, you might notice that our regular expression is preceded by an r character. This tells Python that we want to interpret this string as being a raw string.
In Python, a raw string doesn't use backslash as an escape character which is the normal behavior for Python strings. Regular expressions often include a backslash so it's easy if by convention we just always make our strings raw rather they have backslashes or not. So, for regular expressions, most Python developers just always make their regular expression use a raw string. The second argument is the view to call if there's a match.

In this example, if someone comes to the root path of our site, it will go to the home view. If we follow the path of a request through our project with this URL pattern defined, a request to the root path will be directed to the home view which, once implemented, will leverage the adoptions/home.html template.
Lastly, the URL patterns take a name parameter at the end. This will be useful inside of templates which we'll look at later. Let's look at the overall procedure used by URL patterns. It begins at the top of the list and determines if the first one matches. If there's a match, it will call the associated view with the request. Otherwise, it will continue into the next pattern. In this case, if the URL is slash, then we'll go to the home view. Otherwise, it will check the next pattern. If there are no matches to any patterns, Django will return a 404 page.

Now that we've seen the concepts behind URL patterns, we're ready to implement them for our project.


At this point, we need to implement our home and pet detail views so that our URL patterns will have something to dispatch to. To do that, I'll navigate inside of the adoptions folder and click on the views file. For now, we'll make the simplest function stubs we can, just to test everything out. We'll expand on these and make them meaningful later on. We won't use the render function just yet, but I'll leave this import on line one here for future use. On line two, I'm going to import from django dot http import the class HttpResponse.
This class builds the response object that views are expected to return. Next, I'll get rid of this comment on line four. Now we're ready to implement our view functions. I'll implement the home function using def home, and since views take a request as an argument, I'll set the parameter as request. For the function body, we need to make this function return a response, so I'll return HttpResponse, and I'll pass it the string that I want it to display. Since I just want to test this out, I'll set it to a p tag with the text home view, and close the p tag.
Now we're ready to define the pet detail view. I'll typ def pet underscore detail, and then I'll use the request as a parameter. However, this view will also be passed an ID parameterbecause of the URL pattern we used, which matches digit characters and passes them in. So as a second argument, I'll use a parameter ID. Later, we'll use this ID to determine which pet to show. For now, I'll return an HttpResponse and put a string with the given ID so we can tellthat the routing is working.
Let's use a p tag with the string pet underscore detail space view with the ID, and then we'll put braces, and we'll close the p tag. The braces here serve as a variable placeholder for the format method, which we'll call here with ID so that it's inserted via string interpolation. So I'll use dot format, and I'll pass it ID. With this in place, this view should now return a string containing the ID so that we can test the routing.
I'll save the changes to the file by pressing Command S. From the terminal, I'll get my run server working again so that we can test our implementation. First, I'll navigate to the project folder, which for me is the wisdompets folder on the desktop. Now that I'm in the right folder, I'll type python3 manage dot py and runserver. I invite you to take a moment to make sure the runserver is running, and you're seeing the expected output. If you aren't, you may need to double check for any typos in the URLs or views files.
Feel free to compare these against those in the exercise files. With the server running, now I'll open a browser and navigate to local host colon 8000. Since we navigated to the root URL,we're seeing the output home view, which is what we expect. Now I'd like to double check that our pet detail view is also working, so in the URL bar, I'll navigate to slash adoptions slash one slash. From the output, it reports that one is the ID, and we're in the pet detail view, so I can see that everything is working here as well.
Now to test it out, I'd like to change the URL to something bogus, let's say slash vaccines slash one, which is not a URL pattern that we've defined. Since my Django settings have debug set to true, which is the default, Django gives us an error page that shows us our URL patterns in case we need to troubleshoot this. If instead we change our debug setting to false,we'll see a 404 page without this debug information, which is what we would expect users to see. We've now implemented our URL patterns and are ready to flesh out the rest of our project.


- [Instructor] With URL routing in place, we can now flush out our views. First, we'll open the adoptions folder and click on the views file. Let's start by flushing out our home view. For this view, we want the page to display a list of pets with a few basic details about each one. For each pet entry we'll provide a link to the pet detail view for more information. To accomplish this, the body of the home view needs to fetch all of the pets. First, we'll need to import our pet model so that we can use it to query for pets. After our existing imports I'll add a few linesand then on line four I'll add from .models import Pet.
Now we can use the pet model to make queries. Now, on line six I'll press Enter to add a empty line before our function return. Now we can make a query for all of our pets, so let's assign a variable pets to Pet.objects.all. The HTTP response we're using here is a bit unwieldy for HTML bodies that are larger than just a couple lines of text. So let's get rid of this in favorof using the render function. The render function will pass the responsibility of rendering HTML on to the templates, so that our view only has to be concerned with making the necessary database queries and passing that data into a template.
Once we use the render function our views will need template files in order to work, so we'll stub out some basic ones in a moment. Since we are currently focusing on defining our views,we'll finish those first. For the home function we'll return from this view with a call to render which takes the request as its first argument. For the second argument we pass the name of the template we want to use. For this template we'll make a template called home.html. Next, the render function takes a dictionary with the data we want to make available inside of the template.
The keys in this dictionary need to be strings and are used inside the template as variable names. To pass our pets query set onto the template we'll use a dictionary with the key petsand for the value we'll use that pets variable. Our pet detail view is a little bit more interesting.We'll start by just clearing away the body that we have. Next, we need to add a query for the specific pet associated with the id that'd passed into the view. We can do that using pet equals Pet.objects.get and id equals id.
As we saw when using the Django ORM in the shell, this can result in a does not exist exception, if the id can't be found. This could happen for example, if someone typed in the path slash adoptions slash 999, since we don't have that many pets. To account for this I'm going to wrap this line in a try block and for the except we'll catch on Pet.DoesNotExist. When this exception is thrown, we want to return a 404. So, in order to return a 404 we need to make a new import.
After our existing imports from Django, I'll add a new import. From django.http import Http404.To use Http404 I'll go to the except block on line 15 and at the end of line 14 I've pressed Enter and now I'll raise Http404 and I'll pass in the string pet not found. Now, if someone navigates to a path with an id that doesn't exist they will get a 404.
With this logic in place we're ready to finish this view by calling render, much like the home function. So next we'll return a call to render and we'll pass it the request as the first argument.For the second argument we'll use the pet_detail.html file. You may notice that we've made the names of both template files one to one with their respective views. This is a common convention, but for clarification this is not a hard requirement. Lastly, we need to pass this views data into it's template so we'll create a dictionary and we'll use the key pet, and for the value we'll use the pet instance that we've queried.
Now, our views implement the necessary logic for querying our data, handling any exceptions, and passing that data onto templates for HTML rendering. So, we need to stub out some template files so that our calls to render will work. To complete the overall picturewe'll flush these templates out later. To create our templates we'll first create a templates folder inside the adoptions folder. Next, inside of this folder we'll create files for each of our templates: home.html and pet_detail.html.
We're just stubbing this out for now. So, let's open the home.html file and we'll just put the string home. Inside of the pet_detail.html file we'll just put pet detail. Now, I'll go to each of these files and press Command S to ensure they're all saved. With our template files in place,we're ready to test that our views work. In a terminal I'm navigating to where my project folder is. For me, this is in the wisdom pets folder on the desktop.
Once I'm in this folder I'll run our server using python3 manage.py and runserver. Now, I'll open a browser and navigate to localhost:8000. Since the resulting page says home I can see that our home view works and is calling the correct template. In the URL bar I'll type /adoptions/1 and the page that loads has pet detail. So, this view works as well. I also want to ensure that our 404 logic works so I'll navigate to /adoptions/999 which I know is an id that doesn't exist.
I'm now seeing a 404 page, so the logic in our pet detail view is correct. At the moment we aren't really doing anything very interesting with our query results just yet. However, with these views in place, we're now in a great position to build on our templates and use these query results within our HTML as needed.
"""wisdompets URL Configuration

The `urlpatterns` list routes URLs to views. For more information please see:
    https://docs.djangoproject.com/en/1.11/topics/http/urls/
Examples:
Function views
    1. Add an import:  from my_app import views
    2. Add a URL to urlpatterns:  url(r'^$', views.home, name='home')
Class-based views
    1. Add an import:  from other_app.views import Home
    2. Add a URL to urlpatterns:  url(r'^$', Home.as_view(), name='home')
Including another URLconf
    1. Import the include() function: from django.conf.urls import url, include
    2. Add a URL to urlpatterns:  url(r'^blog/', include('blog.urls'))
"""
from django.conf.urls import url
from django.contrib import admin
from adoptions import views

urlpatterns = [
    url(r'^admin/', admin.site.urls),
    url(r'^$', views.home, name='home'),
    url(r'^adoptions/(\d+)/', views.pet_detail, name='pet_detail')
]
from django.shortcuts import render
from django.http import HttpResponse
from django.http import Http404
from .models import Pet

def home(request):
    pets = Pet.objects.all()
    return render(request, 'home.html', {'pets': pets})

def pet_detail(request, id):
    try:
        pet = Pet.objects.get(id=id)
    except Pet.DoesNotExist:
        raise Http404('Page not found ~')
    return render(request, 'pet_detail.html', {'pet':pet})

- [Instructor] Django templates are HTML files that have extra syntax. When a view calls render, it passes data into the template and the template generates the HTML to show to the user. The syntax for Django templates have three pieces. A variables value is shown when the variable name is used inside of double curly braces. A template tag is enclosed in curly braces with percent signs and are used for for loops, ifs, structural elements, as well as some control logic. Lastly, a variable can have a pipe character after it to use a template filter.
Template filters take a string as input and return a string as output and can be thought of much like the pipe in shell scripting. These are mostly used to take a string and change some formatting, such as datetime output formatting or forcing text into title or uppercase. As an example of using variables in a template, let's assume we were editing the pet_detail HTML template. So, a specific pet has been passed into the template. Here, we have an h3 tag and we use the double braces to render the pet's name attribute. The result is the string Scooter inside of an h3 tag.
Now, let's see how templates use for loops. For this part, we'll assume we're in the home template. For loops are often used to show a list of things. In this example, we have a query set of pet instances in the variable pets that the home view is passing into the template. We use the for template tag to loop over each pet instance. Note that the endfor tag at the end of this snippet is necessary to mark the end of the loop. Inside the loop, we can used the pet variable, and here, we are rendering the pet's name in an li tag.
The result is an li tag for each pet that's available for adoption, each showing their name.Some template tags don't have a corresponding end tag and just render a string instead. Let's look at the url tag as an example. This tag takes the name of the url-pattern as a required argument and returns the path to that pattern. This is where the name argument of a url-pattern becomes useful. In this example, the url tag with the argument home will generate the path to the home view which is just a slash. Now, let's take as look at our pattern for the pet detail view.
Since this url-pattern has a group and passes the id to its view, the url tag requires this id as an additional parameter. This url tag renders the path to the pet detail view for whatever id is given. The example show the result for a pet with an id of 1. So, it generates /adoptions/1/. You might be asking why the url tag is used instead of just hard-coding slash for the home viewand for the pet detail links, using /adoptions/ and using the pet id variable.
What the url tag accomplishes is a bit of future-proofing. By using this tag instead, we can decide to change a url-pattern later on. And links we use in our templates will still be correct.As an example, I've changed the url-pattern here for the pet detail view to begin with pets instead of adoptions. Anywhere I've used the url tag, the link that is generated for the pet detail view will be begin with pets instead of adoptions without any manual changes.However, if we made the links manually, we'd have to update the templates everywhere the link is made.
The template filters allow for some simple output formatting. Here, I'm taking the previous example of using the pet.name variable, but, I'm assuming someone messed up and entered the name in lowercase. However, we always want to show pet names as proper nouns, even if they were saved in lowercase. So, in this example, after the variable name, but before closing the braces, I've added |capfirst. This uses the built-in capfirst filter so that the output will be in title case. The result is Scooter with a capital S.
Now, let's see a more-involved example to sort of put everything together. Here, we render a ul tag with a list of inner li tags, each with the name of a pet and a link to its detail page. To accomplish this, we use the for tag to loop over the pet's query set we're given. Inside the anchor tag, we use pet.name in double braces to render that variable and show the pet name.After this pet name variable, we use |capfirst to ensure it is in title case. I'm also using the url tag in order to generate a link to the pet detail page for every pet.
Here, we can see the resulting HTML for the first two pets. For our final templating feature,let's take a quick look at template inheritance with the extends and block tags. To reduce repetition, Django projects implement a base template with the elements that every template will use, such as meta tags, any global CSS or JavaScript and structural elements, such as a navigation bar. In this example, we're defining some HTML boilerplate in the template file called base. In its body tag, we have a block template tag to provide a place for child templates to define their unique content.
Moving to the home template, we use the extends tag with base.html as its parameter. This establishes that the home template will use the base.html template as its parent. Note that this has to be the first line of the template. After this, any block tags in this template will be used to indicate an area of content that will override and fill-in sections of the parent. In the example, we're overriding the block called content. When rendered, the home template will have the HTML from the base template, and its body tag will be filled with whatever's placed in the content block, such as the h3 tag and the comment we have here.
With this overview of template concepts in place, we're ready to implement some templates.


Let's look at the url tag as an example. This tag takes the name of the url-pattern as a required argument and returns the path to that pattern. This is where the name argument of a url-pattern becomes useful. In this example, the url tag with the argument home will generate the path to the home view which is just a slash. Now, let's take as look at our pattern for the pet detail view.

Since this url-pattern has a route and passes the id to its view, the url tag requires this id as an additional parameter. This url tag renders the path to the pet detail view for whatever id is given. The example show the result for a pet with an id of 1. So, it generates /adoptions/1/.

template and inheritance


settings.py
"""
Django settings for wisdompets project.

Generated by 'django-admin startproject' using Django 1.11.7.

For more information on this file, see
https://docs.djangoproject.com/en/1.11/topics/settings/

For the full list of settings and their values, see
https://docs.djangoproject.com/en/1.11/ref/settings/
"""

import os

# Build paths inside the project like this: os.path.join(BASE_DIR, ...)
BASE_DIR = os.path.dirname(os.path.dirname(os.path.abspath(__file__)))


# Quick-start development settings - unsuitable for production
# See https://docs.djangoproject.com/en/1.11/howto/deployment/checklist/

# SECURITY WARNING: keep the secret key used in production secret!
SECRET_KEY = 'xigekntf99wnyz5(tuqxo)jm!za=*^6z3^9lwh_%c8ndxa^^-_'

# SECURITY WARNING: don't run with debug turned on in production!
DEBUG = True

ALLOWED_HOSTS = []


# Application definition

INSTALLED_APPS = [
    'django.contrib.admin',
    'django.contrib.auth',
    'django.contrib.contenttypes',
    'django.contrib.sessions',
    'django.contrib.messages',
    'django.contrib.staticfiles',
    'adoptions',
]

MIDDLEWARE = [
    'django.middleware.security.SecurityMiddleware',
    'django.contrib.sessions.middleware.SessionMiddleware',
    'django.middleware.common.CommonMiddleware',
    'django.middleware.csrf.CsrfViewMiddleware',
    'django.contrib.auth.middleware.AuthenticationMiddleware',
    'django.contrib.messages.middleware.MessageMiddleware',
    'django.middleware.clickjacking.XFrameOptionsMiddleware',
]

ROOT_URLCONF = 'wisdompets.urls'

TEMPLATES = [
    {
        'BACKEND': 'django.template.backends.django.DjangoTemplates',
        'DIRS': [],
        'APP_DIRS': True,
        'OPTIONS': {
            'context_processors': [
                'django.template.context_processors.debug',
                'django.template.context_processors.request',
                'django.contrib.auth.context_processors.auth',
                'django.contrib.messages.context_processors.messages',
            ],
        },
    },
]

WSGI_APPLICATION = 'wisdompets.wsgi.application'


# Database
# https://docs.djangoproject.com/en/1.11/ref/settings/#databases

DATABASES = {
    'default': {
        'ENGINE': 'django.db.backends.sqlite3',
        'NAME': os.path.join(BASE_DIR, 'db.sqlite3'),
    }
}


# Password validation
# https://docs.djangoproject.com/en/1.11/ref/settings/#auth-password-validators

AUTH_PASSWORD_VALIDATORS = [
    {
        'NAME': 'django.contrib.auth.password_validation.UserAttributeSimilarityValidator',
    },
    {
        'NAME': 'django.contrib.auth.password_validation.MinimumLengthValidator',
    },
    {
        'NAME': 'django.contrib.auth.password_validation.CommonPasswordValidator',
    },
    {
        'NAME': 'django.contrib.auth.password_validation.NumericPasswordValidator',
    },
]


# Internationalization
# https://docs.djangoproject.com/en/1.11/topics/i18n/

LANGUAGE_CODE = 'en-us'

TIME_ZONE = 'UTC'

USE_I18N = True

USE_L10N = True

USE_TZ = True


# Static files (CSS, JavaScript, Images)
# https://docs.djangoproject.com/en/1.11/howto/static-files/

STATIC_URL = '/static/'
STATICFILES_DIRS = [
    os.path.join(BASE_DIR, 'static')
]
templates/
base.html
{% load static %}
<html lang="en-US">
    <head>
        <meta charset="UTF-8">
        <title>Home - Wisdom Pet Medicine</title>
        <link rel="stylesheet" id="ample-style-css" href="{% static 'style.css' %}" type="text/css" media="all">
    </head>
    <body class="wide">
        <div id="page" class="hfeed site">
            <header>
                <div class="header">
                    <div class="main-head-wrap inner-wrap clearfix">
                        <div id="header-logo-image">
                            <a href="/">
                                <img src="{% static 'images/logo.png' %}" alt="Wisdom Pet Medicine">
                            </a>
                        </div>
                        <div id="header-text" class="">
                            <h1 id="site-title">
                                <a href="/" title="Wisdom Pet Medicine" rel="home">Wisdom Pet Medicine</a>
                            </h1>
                            <p>We treat your pets like we treat our own.</p>
                        </div>
                    </div>
                    <img src="{% static 'images/header.jpg' %}" alt="Wisdom Pet Medicine">
                </div>
            </header>
            <div class="main-wrapper">
                <div class="single-page clearfix">
                    <div class="inner-wrap">
                        <p>Wisdom Pet Medicine strives to blend the best in traditional and alternative medicine in the diagnosis and treatment of health conditions in companion animals, including dogs, cats, birds, reptiles, rodents, and fish. We apply the latest healthcare technology, along with the wisdom garnered in the centuries old tradition of veterinary medicine, to find the safest and most effective treatments and cures, while maintaining a caring relationship with our patients and their guardians.</p>
                        <hr>
                        <div>
                        {% block content %}
                        {% endblock %}
                        </div>
                    </div>
                </div>
            </div>
            <footer id="colophon">
                <div class="inner-wrap">
                    Wisdom Pet Medicine is a fictitious brand created by Lynda.com, solely for the purpose of training. All products and people associated with Wisdom Pet Medicine are also fictitious. Any resemblance to real brands, products, or people is purely coincidental. Please see your veterinarian for all matters related to your pet's health.
                </div>
            </footer>
        </div>
        <script src="{% static 'main.js' %}"></script>
    </body>
</html>
home.html
{% extends "base.html" %}

{% block content %}
<div>
{% for pet in pets %}
    <div class="petname">
        <a href="{% url 'pet_detail' pet.id %}">
            <h3>{{pet.name}}</h3>
        </a>
        <p>{{pet.species}}</p>
        {% if pet.breed %}
        <p>Breed: {{pet.breed}}</p>
        {% endif %}
        <p class="hidden">{{pet.description}}</p>
    </div>
{% endfor %}
</div>
{% endblock %}
pet_detail.html
{% extends "base.html" %}

{% block content %}
<div>
<h3>{{pet.name|capfirst}}</h3>
<p>{{pet.species}}</p>
{% if pet.breed %}
    <p>Breed: {{pet.breed}}</p>
{% endif %}
{% if pet.age %}
    <p>Age: {{pet.age}}</p>
{% endif %}
{% if pet.sex %}
    <p>Sex: {{pet.sex}}</p>
{% endif %}
{% if pet.vaccinations.all %}
    <p>Vaccinations for:</p>
    <ul>
        {% for vaccination in pet.vaccinations.all %}
            <li>{{vaccination.name}}</li>
        {% endfor %}
    </ul>
{% endif %}
</div>
{% endblock %}
main.js
var hiddenClass = 'hidden';
var shownClass = 'toggled-from-hidden';

function petSectionHover() {
    var children = this.children;
    for(var i = 0; i < children.length; i++) {
        var child = children[i];
        if (child.className === hiddenClass) {
            child.className = shownClass;
        }
    }
}

function petSectionEndHover() {
    var children = this.children;
    for(var i = 0; i < children.length; i++) {
        var child = children[i];
        if (child.className === shownClass) {
            child.className = hiddenClass;
        }
    }
}

(function() {
    var petSections = document.getElementsByClassName('petname');
    for(var i = 0; i < petSections.length; i++) {
        petSections[i].addEventListener('mouseover', petSectionHover);
        petSections[i].addEventListener('mouseout', petSectionEndHover);
    }
}());
urls.py
from django.conf.urls import url
from django.contrib import admin

from adoptions import views

urlpatterns = [
    url(r'^admin/', admin.site.urls),
    url(r'^$', views.home, name='home'),
    url(r'^adoptions/(\d+)/', views.pet_detail, name='pet_detail'),
]


 530
530


 被折叠的 条评论
为什么被折叠?
被折叠的 条评论
为什么被折叠?
 到【灌水乐园】发言


