


Spring装配bean是DI的重要步骤
装配bean的三种方式
- 隐式的bean发现机制和自动装配
- 在Java中进行显式配置。
- 在XML中进行显式配置。
创建实体类User.java
    package com.htxeian.model;

    public class User {
        private Long userId;

        private String userName;

        public Long getUserId() {
            return userId;
        }
        public void setUserId(Long userId) {
            this.userId = userId;
        }
        public String getUserName() {
            return userName;
        }
        public void setUserName(String userName) {
            this.userName = userName;
        }
    }
隐式的bean发现机制和自动装配
自动化装配bean从两个方面进行实现
1. 组件的扫描,通过设置扫描路径发现被标记的bean
2. 自动装配,满足bean之间的依赖
要进行扫描首先进行创建可以被扫描的bean,这里使用的是@Component注解来标识bean。
在Spring2.5之后加入了新的注解@Repository、@Service、@Controller,效果是一样的只是为了层次结构更加清晰。

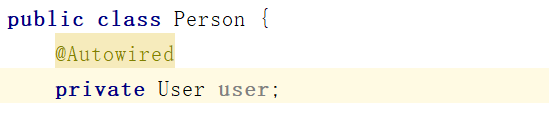
注入bean使用@Autowired注解
在Person类中注入对象bean使用
在Java中进行显示配置
使用场景:对于某个类的注入,在运行期间不知道具体初始化那个实现类(Spring推荐使用接口注入),或者对于一个第三方的类(例如Date类属于第三方类),不能进行添加@Component注解
使用Java显示注入使用到的注解@bean注解,一般使用在JavaConfig配置文件中(Javaconfig配置文件就是一个特殊类,Spring回去读取并加载bean对象)
新建配置类ConfigTest.java
@Configuration
@ComponentScan
public class ConfigTest {

    @Bean
    public Date rdate() {
        return new Date();
    }
    @Bean
    public User user() {
        return  new User();
    }

}
@Configuration 标识这个类是一个配置类
@Bean 会告诉Spring返回的对象装配到Spring容器里面
写测试类:
@RunWith(SpringJUnit4ClassRunner.class)
@ContextConfiguration(classes = ConfigTest.class)
public class test {
    @Autowired
    private User user;
    @Autowired
    private Date date;

    @Test
    public void displayBeans() {
        System.out.println(user.toString());
        System.out.println(date);
    }
}
@RunWith(SpringJUnit4ClassRunner.class) 加载测试的Spring的上下文
@ContextConfiguration(classes = ConfigTest.class) 加载配置文件的位置
结果:
com.htxeian.model.User@72a7c7e0
Wed Apr 24 19:54:40 CST 2019
结果显示两个对象都已经进行了实例化。再试用哪个@Bean注解的时候,bean的ID与带有@Bean注解的方法名是一样的。
在XML中显示配置
首先进行装配简单的类,使用元素和元素去指定bean对象
    <?xml version="1.0" encoding="UTF-8"?>
    <beans xmlns="http://www.springframework.org/schema/beans"
        xmlns:xsi="http://www.w3.org/2001/XMLSchema-instance"
        xsi:schemaLocation="http://www.springframework.org/schema/beans
        http://www.springframework.org/schema/beans/spring-beans.xsd">

            <bean id="xmlUser" class="com.htxeian.model.xmlUser"></bean>
    </beans>
在Xml中注入初始化bean
在Person类注入第三方类时候(Date也相当于第三方)
public class Person {
    public Date getDate() {
        return date;
    }
    public void setDate(Date date) {
        this.date = date;
    }
    private Date date;
    Person(Date date){
        this.date = date;
    }
}
对于装配Date时候需要把内部的对象进行初始化,有两种方式进行初始化
构造器注入bean引用
首先呢对于bean必须要有有参数的构造方法:
Person类
public class Person {
    private User user;
    Person(User user){
        this.user = user;
    }
}
beans.xml文件
<?xml version="1.0" encoding="UTF-8"?>
<beans xmlns="http://www.springframework.org/schema/beans"
       xmlns:xsi="http://www.w3.org/2001/XMLSchema-instance"
       xmlns:context="http://www.springframework.org/schema/context"
       xsi:schemaLocation="http://www.springframework.org/schema/beans http://www.springframework.org/schema/beans/spring-beans.xsd http://www.springframework.org/schema/context http://www.springframework.org/schema/context/spring-context.xsd">

    <bean id="xmlUser" class="com.htxeian.model.xmlUser"></bean>

    <context:component-scan base-package="com.htxeian.*"></context:component-scan>
    <bean id="person" class="com.htxeian.model.Person">
        <constructor-arg ref="user"/>
    </bean>
</beans>
扫描bean并且通过标签注入bean
属性的setter方法的注入属性的set方法注入和上述相当
值得注意的是对于构造器注入不能存在和set方法一样的构造器
<bean id="person" class="com.htxeian.model.Person">
      <!--  <constructor-arg ref="user"/>-->
      <property name="user" ref="user"></property>
</bean>
Spring的配置装配规则
-
Java代码描述Spring的装配规则
@Configuration
注解声明这个类是一个配置类
@ComponentScan
注解对应的组件的扫描路径
如果没有其他配置的话,@ComponentScan默认会扫描与配置类相 同的包。因为CDPlayerConfig类位于soundsystem包中,因此
Spring将会扫描这个包以及这个包下的所有子包,查找带 有@Component注解的类。这样的话,就能发现CompactDisc,并且会在Spring中自动为其创建一个bean。 -
xml文件描述Spring的装配规则
context:component-scan元素进行组件位置的扫描
导入和混合配置(JavaConfig和Xml)
//JavaConfig 导入 JavaConfig使用
@import(JavaConfig.class)

//JavaConfig 导入xml使用
@ImportResource("classpath:bean.xml")
	<!--在XML配置中引用JavaConfig使用<bean>元素 -->
	<bean class="com.www.JavaConfig">
    <!--在XML配置中引用XML使用<import>元素 -->
    <import resource="bean.xml">
不管使用JavaConfig还是使用XML进行装配,我通常都会创建一个根 配置(root configuration),也就是这里展现的这样,这个配置会将两 个或更多的装配类和/或XML文件组合起来。


 567
567


 被折叠的 条评论
为什么被折叠?
被折叠的 条评论
为什么被折叠?
 到【灌水乐园】发言


