


kotlin协程
什么是协程
协程是Coroutine的中文简称,co表示协同、协作,routine表示程序,因此可以理解为多个互相协作的程序。
协程是一种并发设计模式,它最大的特点就是我们可以使用同步的代码去编写异步执行的代码,协程依赖于线程,但是它挂起时并不阻塞线程,所以协程像是一种用户态的线程,非常轻量级,一个线程中可以创建N个协程,相当于一个线程中可以执行多个任务(更加细分了线程的粒度,提升线程的利用率)
协程的魅力
实现以下能力:查询用户信息 --> 查找该用户的好友列表 -->拿到好友列表后,查找该好友的动态
getUserInfo(new CallBack() {
    @Override
    public void onSuccess(String user) {
        if (user != null) {
            System.out.println(user);
            getFriendList(user, new CallBack() {
                @Override
                public void onSuccess(String friendList) {
                    if (friendList != null) {
                        System.out.println(friendList);
                        getFeedList(friendList, new CallBack() {
                            @Override
                            public void onSuccess(String feed) {
                                if (feed != null) {
                                    System.out.println(feed);
                                }
                            }
                        });
                    }
                }
            });
        }
    }
});
有点恶心了,是不是?这还是仅包含 onSuccess 的情况,实际情况会更复杂,因为我们还要处理异常,处理重试,处理线程调度,甚至还可能涉及多线程同步。
而换成协程,代码就会变成这样
val user = getUserInfo()
val friendList = getFriendList(user)
val feedList = getFeedList(friendList)
协程的几个重要概念
协程上下文CoroutineContext
从概念上讲,CoroutineContext 只是个上下文而已,但其背后的代码设计其实比较复杂,Kotlin 协程中比较重要的概念,都或多或少跟 CoroutineContext 有关系。
接口定义:
public interface CoroutineContext {
    public operator fun <E : Element> get(key: Key<E>): E?
    public fun <R> fold(initial: R, operation: (R, Element) -> R): R
    public operator fun plus(context: CoroutineContext): CoroutineContext = {}
    public fun minusKey(key: Key<*>): CoroutineContext
    public interface Key<E : Element>

    public interface Element : CoroutineContext {
        public val key: Key<*>
        public override operator fun <E : Element> get(key: Key<E>): E? =
            if (this.key == key) this as E else null
        ...
    }
}
增删存取,是不是看起来有点像Map,其实CoroutineContext就是一个异构的map,它存取的对象是自己或者说自己的子类Element。也就是说它既是元素本身又是元素的集合。
存取元素
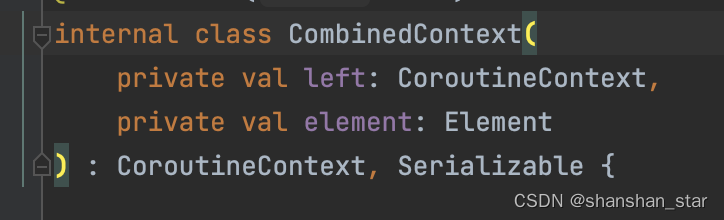
通过CoroutineContext对plus方法的重载,CoroutineContext元素在相加构建为新的CoroutineContext后实际上是返回了一个CombinedContext。通过CombinedContext的两个构造方法成员变量,我们很容易就能联想到一个数据结构——链表:一个指针指向元素,一个指针指向下一个节点。没错,CoroutineContext实际上是链表存储,我们拿到的CoroutineContext是链表头节点。
存元素:SupervisorJob() + Dispatchers.Main
当我们用+也就是plus方法合并context时会发生什么呢?
public interface CoroutineContext {
    public operator fun plus(context: CoroutineContext): CoroutineContext =
    //如果被加的context是EmptyCoroutineContext则直接返回当前对象
    if (context === EmptyCoroutineContext) this else
        //这里可以把acc理解为+号左边的context,element理解为右边的context中的一个element
        context.fold(this) { acc, element ->
            //首先从acc的context中减去右边的element
            val removed = acc.minusKey(element.key)
            //如果被减后removed是空则直接返回element
            if (removed === EmptyCoroutineContext) element else {
                //如果被减后context中还有别的元素,则将interceptor提出
                val interceptor = removed[ContinuationInterceptor]
                //如果没有interceptor,直接将element变为左边context的头结点
                if (interceptor == null) CombinedContext(removed, element) else {
                    //如果有interceptor,将其删去后将element插入变为头结点后,再将其插入,确保永远在队首,以便需要时最快的速度取到
                    val left = removed.minusKey(ContinuationInterceptor)
                    //如果左边删去interceptor后已经为空,就不用再把element插入了
                    if (left === EmptyCoroutineContext) CombinedContext(element, interceptor) else
                        CombinedContext(CombinedContext(left, element), interceptor)
                }
            }
        }
}
internal class CombinedContext(
    private val left: CoroutineContext,
    private val element: Element
) : CoroutineContext, Serializable {

    override fun <E : Element> get(key: Key<E>): E? {
        var cur = this
        while (true) {
            cur.element[key]?.let { return it }
            val next = cur.left
            if (next is CombinedContext) {
                cur = next
            } else {
                return next[key]
            }
        }
    }

    //递归遍历+号右边的context,不断取出element和左边的context做operation操作
    public override fun <R> fold(initial: R, operation: (R, Element) -> R): R =
        operation(left.fold(initial, operation), element)

    //返回链表删除目标节点后的头结点
    public override fun minusKey(key: Key<*>): CoroutineContext {
        //如果当前节点是所找节点,返回上一个节点
        element[key]?.let { return left }
        //left为链表头结点得到的结果
        val newLeft = left.minusKey(key)
        return when {
            //左边已经删除了目标节点,直接返回当前对象
            newLeft === left -> this
            //左边目标节点是left,删除后只剩下EmptyCoroutineContext,以当前节点为头结点的链表头结点是当前节点
            newLeft === EmptyCoroutineContext -> element
            //左边目标节点同样是left,删除后还有元素,将其和当前节点拼接在一起返回给上层
            else -> CombinedContext(newLeft, element)
        }
    }
}
取元素:context[ContinuationInterceptor]
当我们通过[key]也就是get方法去通过key获取value时会发生什么呢?
首先来看key,Element中声明了public val key: Key<*> 变量,然后我们再看Element的直接子类AbstractCoroutineContextElement,它在构造方法中重写了key,然后再下面的子类比如CoroutineName就把key定义为了自己对Key接口的实现,同时因为带有companion object前缀,整个类型相当于只有一份实现,其他子类也类似
![[图片]](https://img-blog.csdnimg.cn/35e89802d9a443989658028aacdb3c04.png)
![[图片]](https://img-blog.csdnimg.cn/f0a99cd467434ef3b0f54b348727b2ce.png)
![[图片]](https://img-blog.csdnimg.cn/d10eeeb249984244b6443bce5b9a4a00.png)
![[图片]](https://img-blog.csdnimg.cn/dd7ab12350e248338ff29b8263e6ba03.png)
再回过头看上面Element的get方法,当我们使用context[CoroutineName]遍历到有相同实现的key,也就是我们传入的任意CoroutineName对象时,this.key == key将为true,它会把自己转化为自己的类型返回。
public interface Element : CoroutineContext {
    public val key: Key<*>
    public override operator fun <E : Element> get(key: Key<E>): E? =
        if (this.key == key) this as E else null
    ...
}
存取优点
现有的存储方法有两个优点:
- 构造方便。在CoroutineContext内部进行了plus和get操作符重载后,可以直接将多个Element用“+”构造一个CoroutineContext也就是Element的集合,例如val coroutineContext = Dispatchers.IO + CoroutineName(“myCoroutine”)
- 类型安全。如果我们使用Map对Element进行存储Map<CoroutineContext.Key<*>, CoroutineContext.Element>,那我们从中get到的只是CoroutineContext.Element也就是元素的基类,使用前要进行类型转换,而因为拿不到具体类型信息这种类型强转是不安全的。现在Element中重载了get方法,当我们取元素时,元素会将自己转换为自身的类型。
万物皆为Context
当我们了解了CoroutineContext之后,我们会发现平常使用到的很多类都是它的间接子类,比如Job, ContinuationInterceptor, CoroutineName,CoroutineExceptionHandler等等,下面我们会挨个分析
Job
![[图片]](https://img-blog.csdnimg.cn/483b4a6ff07843e49eba1959ac0bb378.png)
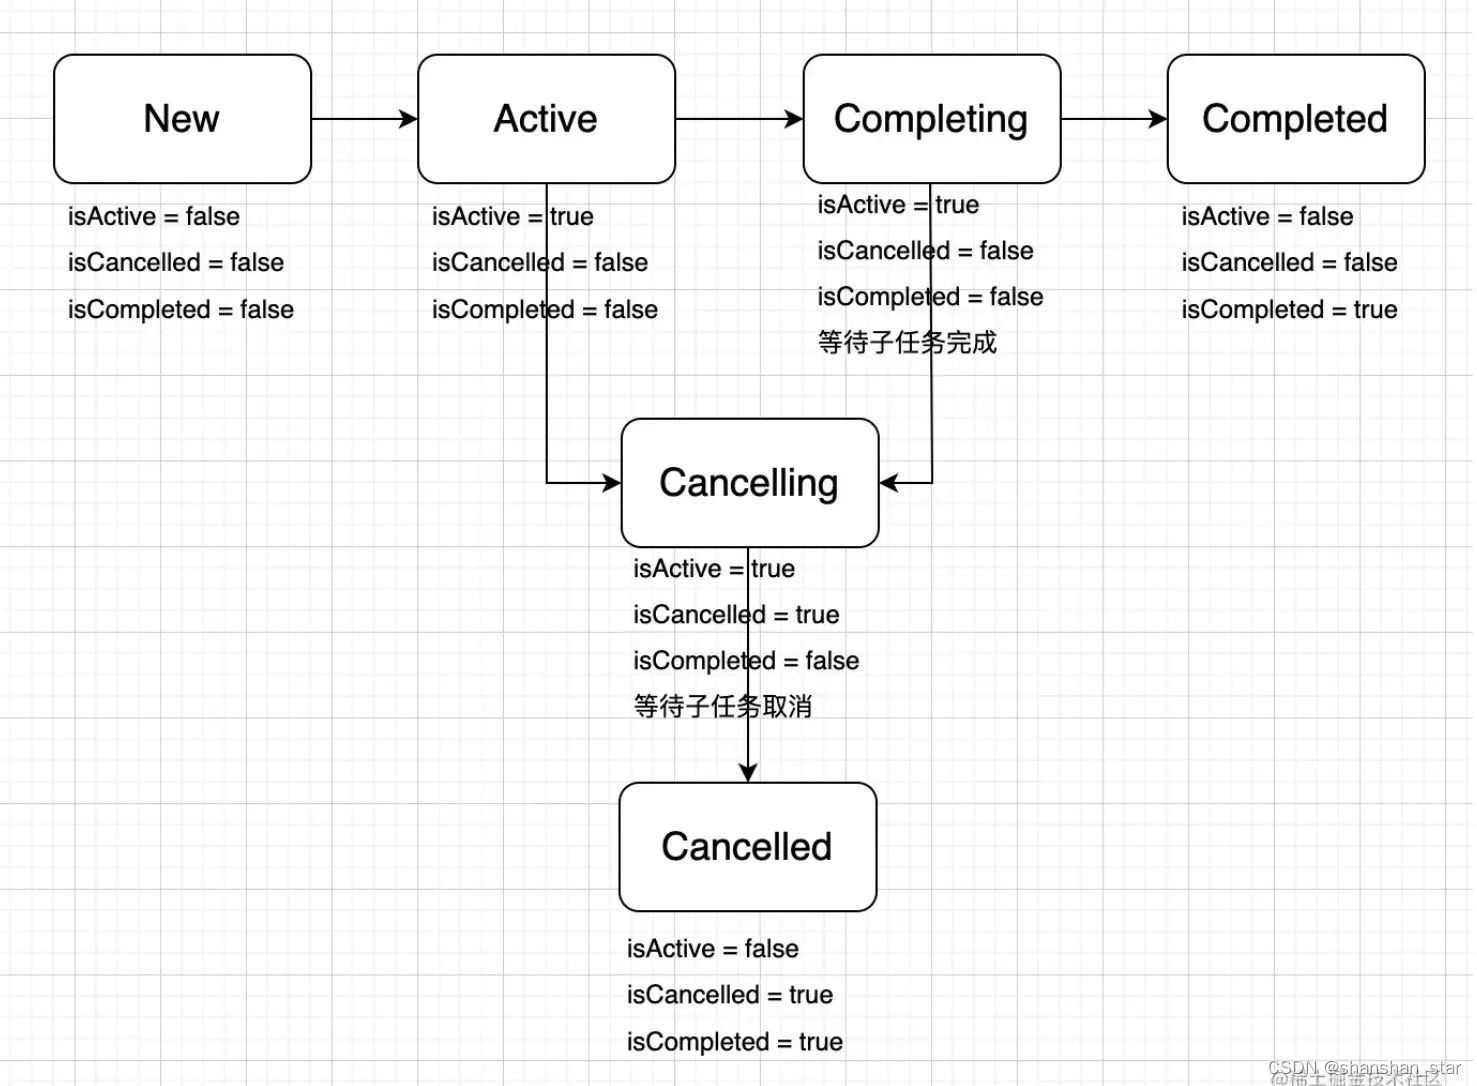
Job是我们要了解的第一个CoroutineContext元素,从某种意义上来讲它其实是协程的句柄,主要的作用有以下两个:
- 监控协程的生命周期状态
- 操控协程,控制结构化并发
当我们用 launch 和 async 创建一个协程以后,同时也会创建一个对应的 Job 对象并返回(async的返回值Deferred也是一个Job)。
![[图片]](https://img-blog.csdnimg.cn/c2b6b095a2c342908ed4ccac5aa30b4e.png)
![[图片]](https://img-blog.csdnimg.cn/7463aad8e10a4a94a772f4876d756247.png)
![[图片]](https://img-blog.csdnimg.cn/ddb37aeeeefe4260ab9bd4f2df56f90f.png)
通过isActive、isCompleted、 isCancelled成员变量,我们可以知道协程处于什么状态。
通过start()和cancel()方法,我们可以启动和关闭协程。(使用CoroutineStart.LAZY作为启动模式的协程,在launch和async后不会立即启动,可以用Job.start()启动)
协程调度器
协程调度器 (参见 CoroutineDispatcher)它确定了相关的协程在哪个线程或哪些线程上执行。协程调度器可以将协程限制在一个特定的线程执行,或将它分派到一个线程池,亦或是让它不受限地运行。
Kotlin协程库中有四种调度器,它们都是 CoroutineDispatcher 的子类,而 CoroutineDispatcher 又实现了ContinuationInterceptor
所以协程的调度器其实是通过续体拦截器来实现的,每个调度器对象是协程上下文对象,同时又是一个续体拦截器。
//Dispatchers 单例对象,包含了4种调度器类型
public actual object Dispatchers {
    //actual 关键字,表示与平台相关

    @JvmStatic
    public actual val Default: CoroutineDispatcher = createDefaultDispatcher()

    @JvmStatic
    public actual val Main: MainCoroutineDispatcher get() = MainDispatcherLoader.dispatcher

    @JvmStatic
    public actual val Unconfined: CoroutineDispatcher = kotlinx.coroutines.Unconfined

    @JvmStatic
    public val IO: CoroutineDispatcher = DefaultScheduler.IO
}

//协程调度器抽象类
public abstract class CoroutineDispatcher :
        AbstractCoroutineContextElement(ContinuationInterceptor),
        ContinuationInterceptor {


     //注意是final修饰的:所有的调度器(续体拦截器)都将原续体包装为DispatchedContinuation类型
     public final override fun <T> interceptContinuation(continuation: Continuation<T>): Continuation<T> =
                DispatchedContinuation(this, continuation)

     //👇两个方法,是调度器实现的核心方法

     //判断是否需要切换线程,默认为true,表示需要切换线程
     public open fun isDispatchNeeded(context: CoroutineContext): Boolean = true

     //调度:执行block
     public abstract fun dispatch(context: CoroutineContext, block: Runnable)

}

public interface ContinuationInterceptor : CoroutineContext.Element {
    /**
     * The key that defines *the* context interceptor.
     */
    companion object Key : CoroutineContext.Key<ContinuationInterceptor>

    ...

}
Dispatchers.Default
默认调度器。它使用JVM的共享线程池,该调度器的最大并发度是CPU的核心数,默认为2
public actual val Default: CoroutineDispatcher = createDefaultDispatcher()

internal actual fun createDefaultDispatcher(): CoroutineDispatcher =
    if (useCoroutinesScheduler) DefaultScheduler else CommonPool

//systemProp()调用System.getProperty(propertyName)
//获取当前系统平台的某个属性,属性值可通过System.setProperty(key, value)设置
internal val useCoroutinesScheduler = systemProp(COROUTINES_SCHEDULER_PROPERTY_NAME).let { value ->
    when (value) {
        null, "", "on" -> true  //jvm 平台默认为null
        "off" -> false
        else -> error("System property '$COROUTINES_SCHEDULER_PROPERTY_NAME' has unrecognized value '$value'")
    }
}
因此,在jvm平台上,DefaultScheduler是更常用的默认调度器
DefaultScheduler 继承于ExecutorCoroutineDispatcher
internal object DefaultScheduler : ExperimentalCoroutineDispatcher()

public open class ExperimentalCoroutineDispatcher(
    private val corePoolSize: Int,
    private val maxPoolSize: Int,
    private val idleWorkerKeepAliveNs: Long,
    private val schedulerName: String = "CoroutineScheduler"
) : ExecutorCoroutineDispatcher() {
    public constructor(
    corePoolSize: Int = CORE_POOL_SIZE, //线程并发数,最低2
    maxPoolSize: Int = MAX_POOL_SIZE, //线程池最大线程数,CPU核心数*128
    schedulerName: String = DEFAULT_SCHEDULER_NAME
) : this(corePoolSize, maxPoolSize, IDLE_WORKER_KEEP_ALIVE_NS, schedulerName)

    //根据设置的线程数,创建CoroutineScheduler线程池
    private var coroutineScheduler = createScheduler()

    private fun createScheduler()
        = CoroutineScheduler(corePoolSize, maxPoolSize, idleWorkerKeepAliveNs, schedulerName)

    //这里没有重写isDispatchNeeded,因此默认需要切换线程

    override fun dispatch(context: CoroutineContext, block: Runnable): Unit =
        try {
        //将block扔到线程池中处理
            coroutineScheduler.dispatch(block)
        } catch (e: RejectedExecutionException) {
            // CoroutineScheduler only rejects execution when it is being closed and this behavior is reserved
            // for testing purposes, so we don't have to worry about cancelling the affected Job here.
            DefaultExecutor.dispatch(context, block)
        }

}
Dispatchers.IO
IO调度器,他将阻塞的IO任务分流到一个共享的线程池中,使得不阻塞当前线程。该线程池大小为环境变量kotlinx.coroutines.io.parallelism的值,默认是64或核心数的较大者。
该调度器和Dispatchers.Default共享线程,因此使用withContext(Dispatchers.IO)创建新的协程不一定会导致线程的切换。
val IO: CoroutineDispatcher = LimitingDispatcher(
    this,
    //从系统配置属性中获取IO密集型任务适用的最大线程数,默认值是 64 和 jvm虚拟机可用的处理器数 中的较大值
    systemProp(IO_PARALLELISM_PROPERTY_NAME, 64.coerceAtLeast(AVAILABLE_PROCESSORS)),
    "Dispatchers.IO",
    TASK_PROBABLY_BLOCKING
)

// 和Defalut调度器不同的是,IO调度器中通过parallelism来控制了往线程池同时扔任务的最大数量,
// 如果超过了这个阈值,则先放入到队列中

private class LimitingDispatcher(
    private val dispatcher: ExperimentalCoroutineDispatcher,
    private val parallelism: Int,
    private val name: String?,
    override val taskMode: Int
) : ExecutorCoroutineDispatcher(), TaskContext, Executor {

override fun dispatch(context: CoroutineContext, block: Runnable) = dispatch(block, false)

private fun dispatch(block: Runnable, tailDispatch: Boolean) {
    var taskToSchedule = block
    while (true) {
        // Commit in-flight tasks slot
        val inFlight = inFlightTasks.incrementAndGet()
        // Fast path, if parallelism limit is not reached, dispatch task and return
        if (inFlight <= parallelism) {
            dispatcher.dispatchWithContext(taskToSchedule, this, tailDispatch)
            return
        }
        // Parallelism limit is reached, add task to the queue
        queue.add(taskToSchedule)

        /*
         * We're not actually scheduled anything, so rollback committed in-flight task slot:
         * If the amount of in-flight tasks is still above the limit, do nothing
         * If the amount of in-flight tasks is lesser than parallelism, then
         * it's a race with a thread which finished the task from the current context, we should resubmit the first task from the queue
         * to avoid starvation.
         *
         * Race example #1 (TN is N-th thread, R is current in-flight tasks number), execution is sequential:
         *
         * T1: submit task, start execution, R == 1
         * T2: commit slot for next task, R == 2
         * T1: finish T1, R == 1
         * T2: submit next task to local queue, decrement R, R == 0
         * Without retries, task from T2 will be stuck in the local queue
         */
        if (inFlightTasks.decrementAndGet() >= parallelism) {
            return
        }

        taskToSchedule = queue.poll() ?: return
    }
}
}
Dispatchers.Main
该调度器限制所有执行都在UI主线程,它是专门用于UI的,并且会随着平台的不同而不同
@JvmStatic
public actual val Main: MainCoroutineDispatcher get()
    = MainDispatcherLoader.dispatcher

MainDispatcherLoader.dispatcher = loadMainDispatcher()

private fun loadMainDispatcher(): MainCoroutineDispatcher {
    return try {
        val factories = if (FAST_SERVICE_LOADER_ENABLED) {
            FastServiceLoader.loadMainDispatcherFactory()
        } else {
            // We are explicitly using the
            // `ServiceLoader.load(MyClass::class.java, MyClass::class.java.classLoader).iterator()`
            // form of the ServiceLoader call to enable R8 optimization when compiled on Android.
            ServiceLoader.load(
                    MainDispatcherFactory::class.java,
                    MainDispatcherFactory::class.java.classLoader
            ).iterator().asSequence().toList()
        }
        @Suppress("ConstantConditionIf")
        factories.maxByOrNull { it.loadPriority }?.tryCreateDispatcher(factories)
            ?: createMissingDispatcher()
    } catch (e: Throwable) {
        // Service loader can throw an exception as well
        createMissingDispatcher(e)
    }
}

internal class AndroidDispatcherFactory : MainDispatcherFactory {

    override fun createDispatcher(allFactories: List<MainDispatcherFactory>) =
        HandlerContext(Looper.getMainLooper().asHandler(async = true))

    override fun hintOnError(): String = "For tests Dispatchers.setMain from kotlinx-coroutines-test module can be used"

    override val loadPriority: Int
        get() = Int.MAX_VALUE / 2
}

internal class HandlerContext private constructor(
    private val handler: Handler, //主线程Handler
    private val name: String?,
    private val invokeImmediately: Boolean
) : HandlerDispatcher(), Delay {

    //当前线程不是主线程,就需要切换线程
     override fun isDispatchNeeded(context: CoroutineContext): Boolean {
        return !invokeImmediately || Looper.myLooper() != handler.looper
     }

    //通过handler post 执行block
    override fun dispatch(context: CoroutineContext, block: Runnable) {
        if (!handler.post(block)) {
            cancelOnRejection(context, block)
        }
    }
}
Dispatchers.Unconfined
非受限调度器,在任何情况下都不需要切换线程,直接在当前线程执行
internal object Unconfined : CoroutineDispatcher() {
    // 表示任何情况 都不会切换线程
    override fun isDispatchNeeded(context: CoroutineContext): Boolean = false

    override fun dispatch(context: CoroutineContext, block: Runnable) {
        // It can only be called by the "yield" function. See also code of "yield" function.
        val yieldContext = context[YieldContext]
        if (yieldContext != null) {
            // report to "yield" that it is an unconfined dispatcher and don't call "block.run()"
            yieldContext.dispatcherWasUnconfined = true
            return
        }
        throw UnsupportedOperationException("Dispatchers.Unconfined.dispatch function can only be used by the yield function. " +
            "If you wrap Unconfined dispatcher in your code, make sure you properly delegate " +
            "isDispatchNeeded and dispatch calls.")
    }

    override fun toString(): String = "Dispatchers.Unconfined"
}
协程作用域
协程的作用域也是为了更好的管理协程。它描述了一个范围,主要用来明确协程之间的父子关系,以及对于取消或者异常处理等方面的传播行为。
什么叫传播行为:比如:父协程取消子协程也要取消。子协程发生异常是否抛给父协程处理。
想要启动协程,必须先有协程作用域
接口定义:
![[图片]](https://img-blog.csdnimg.cn/497a924972144fcebde9b16df138066d.png)
这个接口只有一个成员叫 coroutineContext,也就是说要实现协程作用域,只需要实现这个叫做协程上下文的成员。所以,我们可以大胆的总结出这个结论:在协程作用域里真正起作用的是协程上下文,而我们的协程代码最终也就运行在协程上下文中。
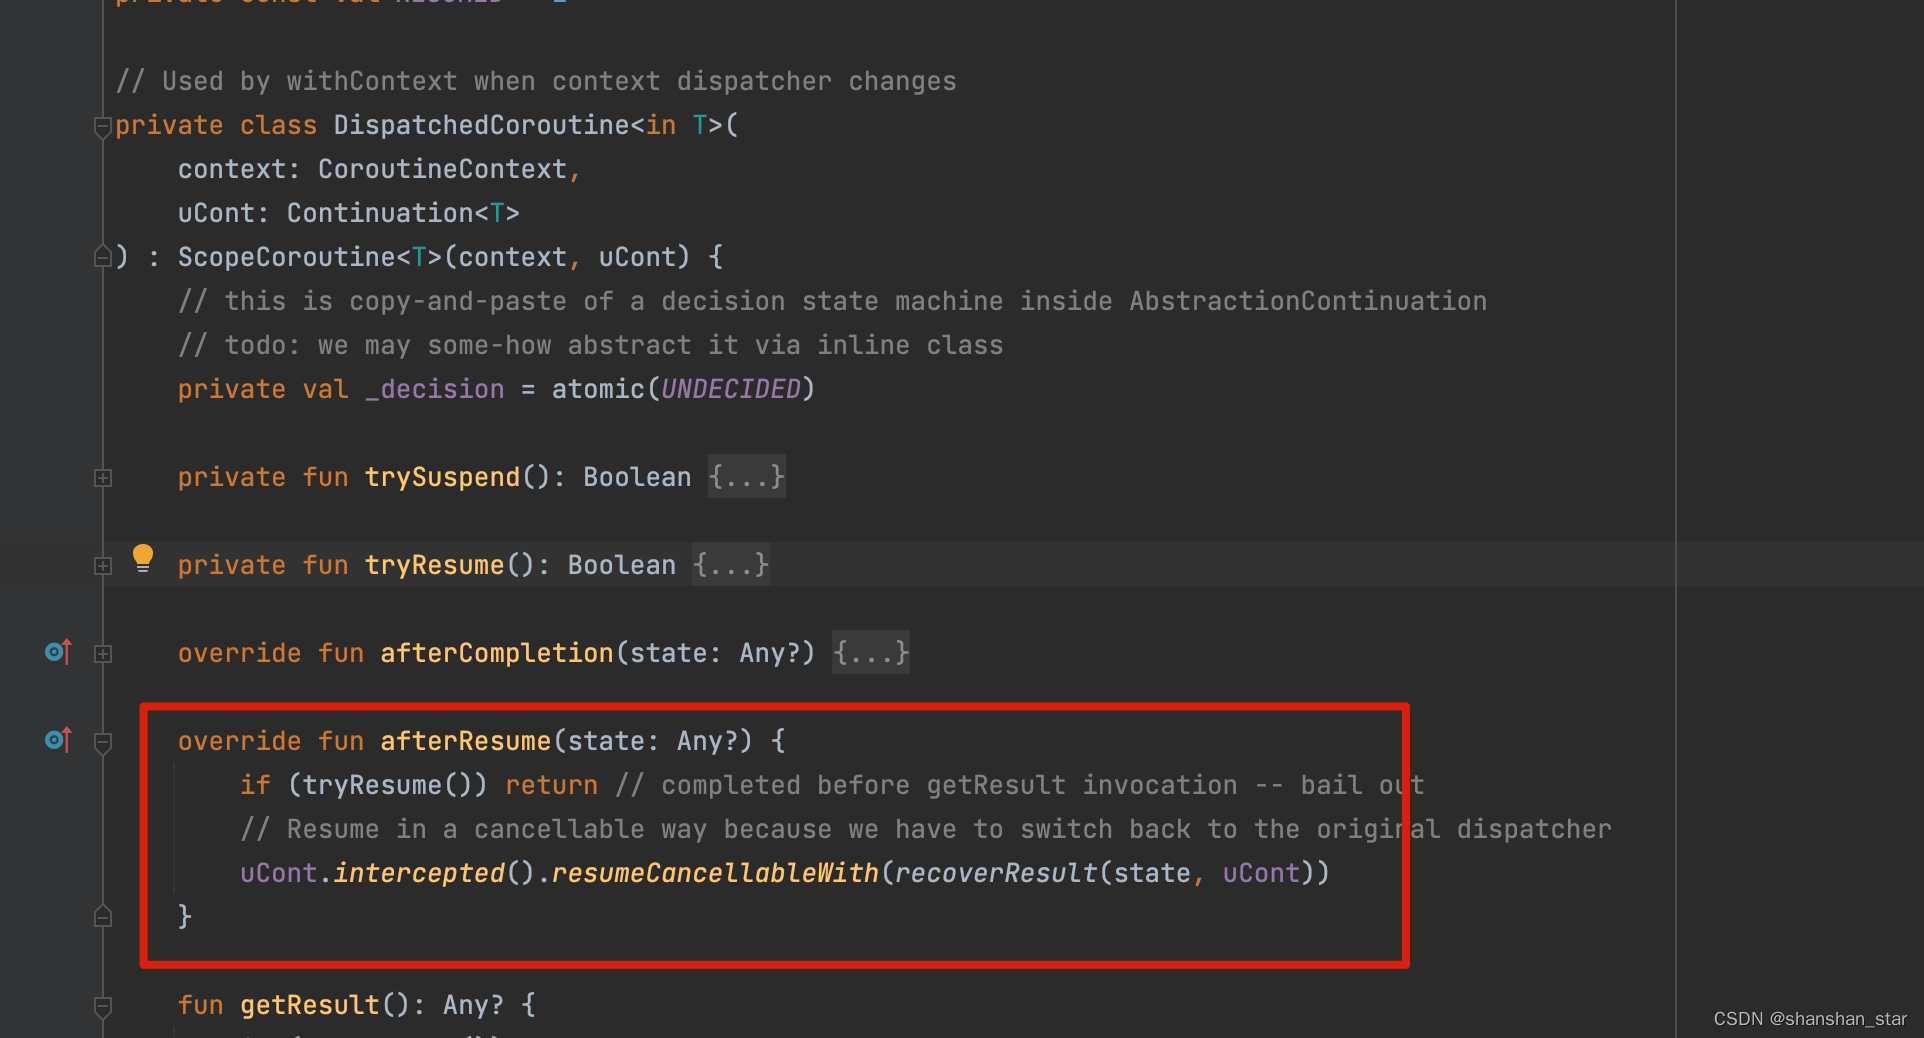
launch和withContext都是基于CoroutineScope的方法且接受CoroutineContext类型的参数,区别是launch会创建新的协程,withContext是在协程内创建suspend代码块来达到切换线程的目的。
![[图片]](https://img-blog.csdnimg.cn/a7f3556fe58245b39bf035a444d32310.png)
![[图片]](https://img-blog.csdnimg.cn/90ef111f57c14d8c95da41c1b140d090.png)
协程挂起函数
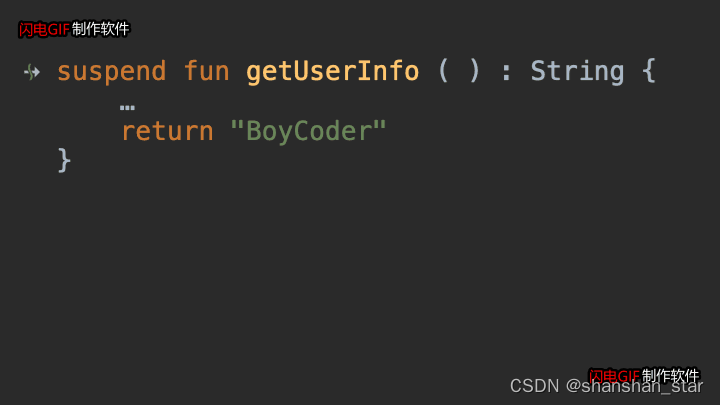
suspend,是 Kotlin 当中的一个关键字,它主要的作用是用于定义“挂起函数”。
- 在 AS中,挂起函数会有一个特殊的箭头标记,这样就便于我们分辨出当前调用的函数是否是普通函数。调用挂起函数的位置,我们叫做是挂起点。
![[图片]](https://img-blog.csdnimg.cn/a2be7a1ad3c54569bbe71a1289a0bb09.png)
suspend 的本质,其实就是 CallBack
 //挂起函数
// ↓
    suspend fun getUserInfo(): String {
        withContext(Dispatchers.IO) {
            delay(1000L)
        }
        return "BoyCoder"
    }

//反编译

//                              Continuation 等价于 CallBack
//                                         ↓
public static final Object getUserInfo(Continuation $completion) {
  ...
  return "BoyCoder";
}
从反编译的结果来看,挂起函数确实变成了一个带有 CallBack 的函数,只是这个 CallBack 换了个名字,叫做 Continuation。我们来看看 Continuation 在 Kotlin 中的定义:
![[图片]](https://img-blog.csdnimg.cn/f4a7242c19514da1a4d9a208a913f844.png)
根据以上定义我们其实能发现,当一个函数有了这个 suspend 关键字以后,Kotlin 编译器就会特殊对待这个函数,将其转换成一个带有 Callback 的函数,这里的 Callback 就是 Continuation 接口。
Continuation的主要作用,就是回到某个任务被挂起时(也就是提交到协程调度器的线程池中)的下一行代码处
而Continuation 本质上也就是一个带有泛型参数的 CallBack。这个“从挂起函数转换成 CallBack 函数”的过程,被叫做是 CPS 转换(Continuation-Passing-Style Transformation)
挂起函数经过CPS转换后,增加了一个以Continuation为Callback的参数,返回值由原来的单一的类型T变成了Any?
那返回值为什么变成了Any?呢,是因为这个返回值有个重要的作用,可以用来标记挂起函数有没有挂起,挂起时返回CoroutineSingletons.COROUTINE_SUSPENDED,另外特别的挂起函数也可以不被挂起
- 挂起点如果出现异步调用,那么当前协程就被挂起,直到协程恢复函数的调用(对应Continuation 的 resumeWith 函数),如果没有异步调用则不会被挂起
例如
![[图片]](https://img-blog.csdnimg.cn/b08a880911f74cf399b125a52ebed7f8.png)
如果你单纯的返回一个字符串,那编译器会提示你suspend是多余的,当我们调用这个挂起函数的时候,它不会真正挂起,而是会直接返回 String 类型
这也就是为什么返回值是Any?的原因:由于 suspend 修饰的函数,在挂起时会返回 CoroutineSingletons.COROUTINE_SUSPENDED,也可能返回实际结果 ,甚至可能返回 null,为了适配所有的可能性,CPS 转换后的函数返回值类型就只能是 Any? 了。
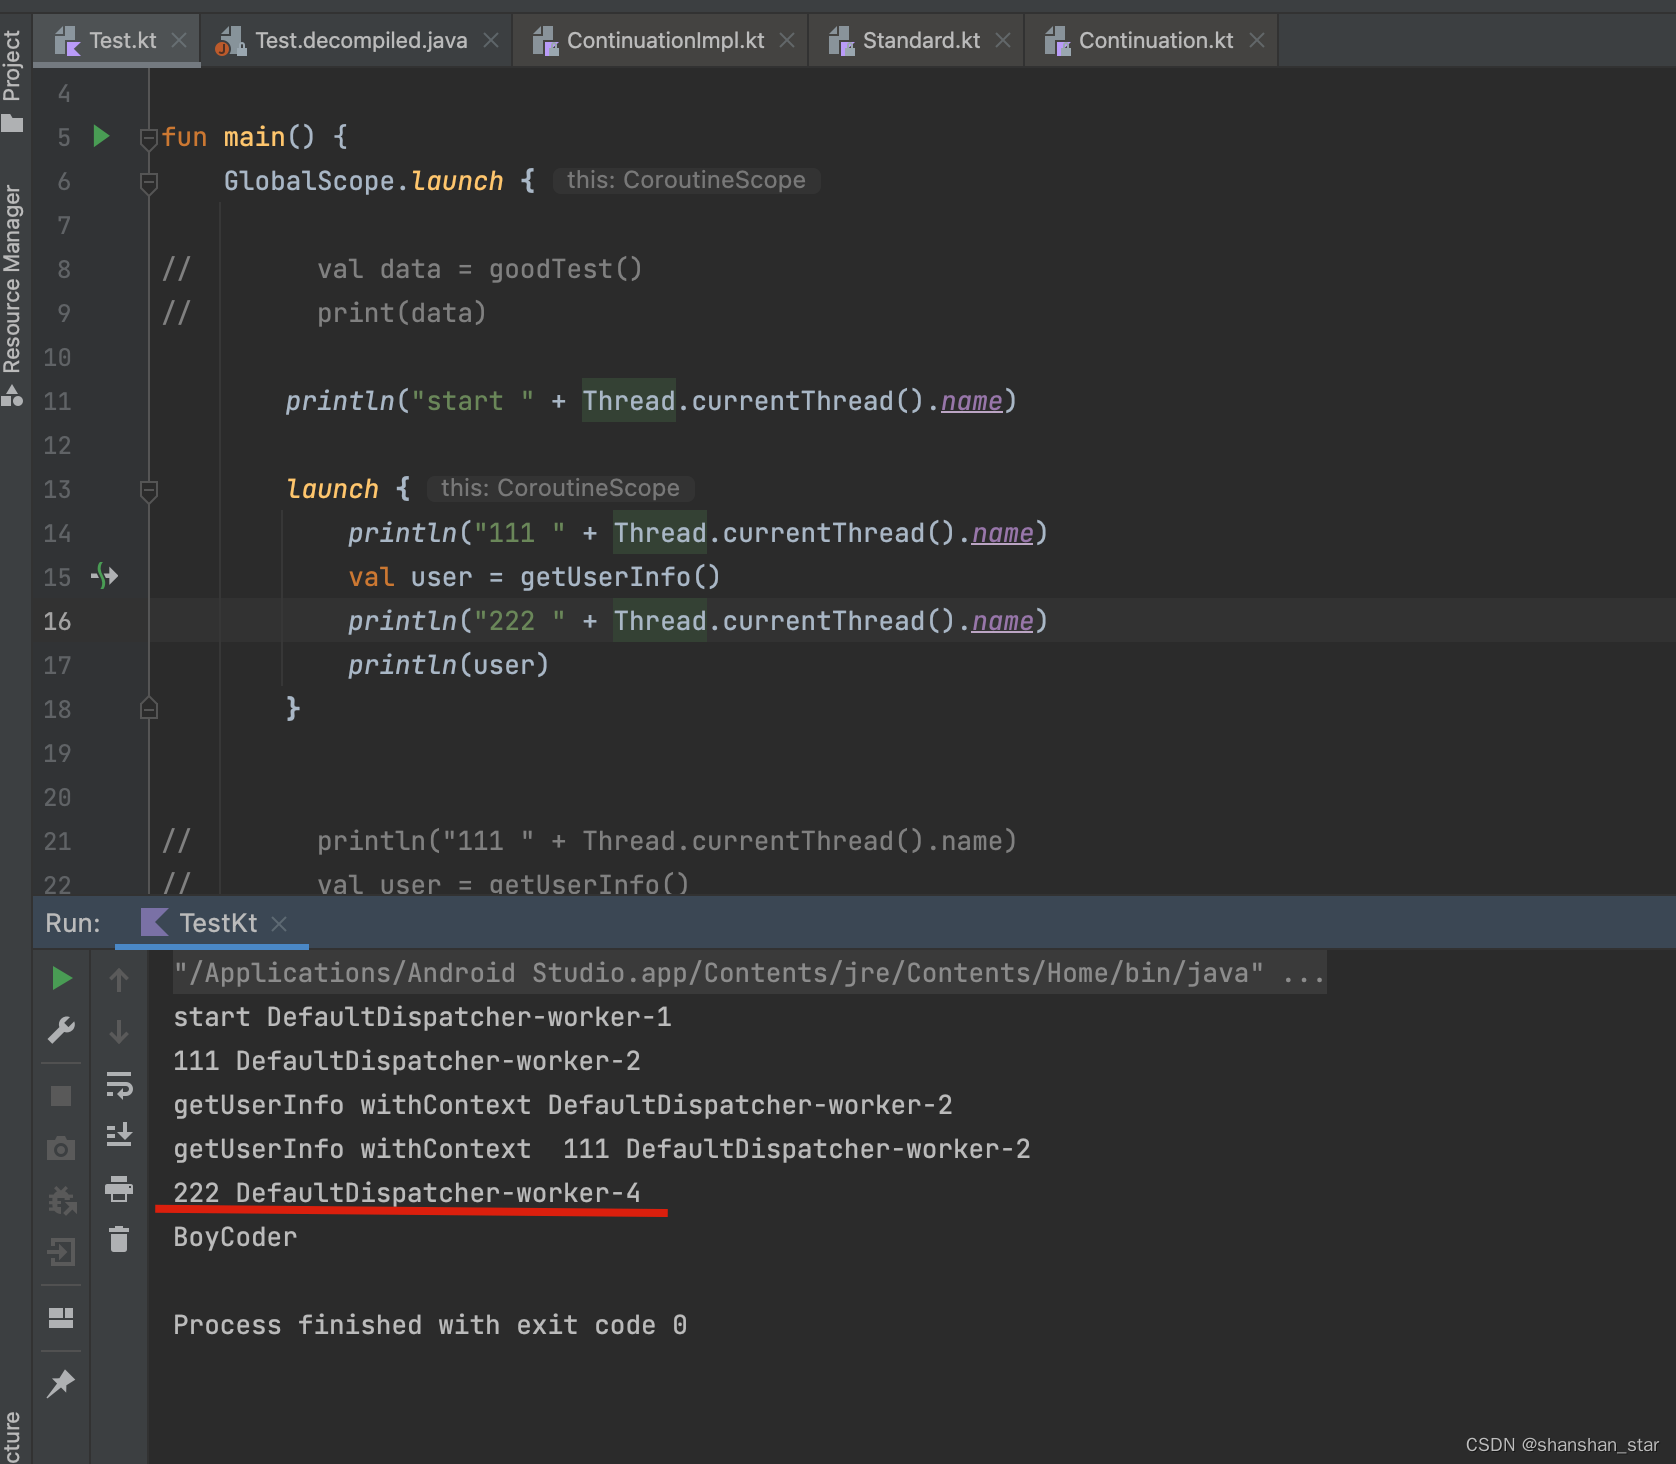
协程实现原理分析
执行流程
示例代码
fun main() {
    GlobalScope.launch {
        println("start")
        val user = getUserInfo()
        println(user)
    }
    Thread.sleep(3000)
}

//挂起函数
// ↓
suspend fun getUserInfo(): String {
    delay(1000L)
    return "BoyCoder"
}
首先是通过GloabalScope.launch启动了一个协程,我们看一下内部的源码执行流程:
// 协程作用域的launch方法,创建一个协程
public fun CoroutineScope.launch(
    context: CoroutineContext = EmptyCoroutineContext,
    // CoroutineStart才是真正启动协程的类
    start: CoroutineStart = CoroutineStart.DEFAULT,
    block: suspend CoroutineScope.() -> Unit
): Job {
    // 为新创建的协程建立上下文环境
    val newContext = newCoroutineContext(context)
    // 如果是懒启动,需要程序员手动调用Job的start方法
    val coroutine = if (start.isLazy)
        LazyStandaloneCoroutine(newContext, block) else
        StandaloneCoroutine(newContext, active = true)
    // 协程执行我们传入的block
    coroutine.start(start, coroutine, block)
    return coroutine
}


public object GlobalScope : CoroutineScope {
    /**
     * Returns [EmptyCoroutineContext].
     */
    override val coroutineContext: CoroutineContext
        get() = EmptyCoroutineContext
}

// newCoroutineContext()是一个传入CoroutineContext,返回CoroutineContext的方法
public actual fun CoroutineScope.newCoroutineContext(context: CoroutineContext): CoroutineContext {
    // 这个方法中有三处用到了CoroutineContext的plus运算符重载
    // 首先计算出和父coroutineContext结合后的context
    val combined = coroutineContext + context
    // 如果是Debug模式下,添加debug标签
    val debug = if (DEBUG) {
        combined + CoroutineId(COROUTINE_ID.incrementAndGet())
    } else {
        combined
    }
    // 然后添加调度器
    if (combined !== Dispatchers.Default &&
        // 这个判断条件用到了get重载运算符
        // ContinuationInterceptor的作用就是 可被唤起继续执行的代码块/方法 将要由哪个调度器进行调度和执行分发
        //  注:协程调度器 CoroutineDispatchers 实现了 ontinuationInterceptor
        combined[ContinuationInterceptor] == null) {
        // 如果当前的Interceptor为空(没有添加过调度器),并且还不是默认的调度器
        // 添加Default调度器
        return debug + Dispatchers.Default
    } else {
        return debug
    }
}
我们再来看一下StandaloneCoroutine创建了一个什么样的协程?
private open class StandaloneCoroutine(
    parentContext: CoroutineContext,
    // active为true表示提交后即执行
    active: Boolean
    // 继承自AbstractCoroutine,重写了处理异常的方法
) : AbstractCoroutine<Unit>(parentContext, active) {
    override fun handleJobException(exception: Throwable): Boolean {
        handleCoroutineException(context, exception)
        return true
    }
}

// AbstractCoroutine类的定义
public abstract class AbstractCoroutine<in T>(
    // 父协程的上下文
    protected val parentContext: CoroutineContext,
    active: Boolean = true    // 默认提交后执行
) : JobSupport(active), Job, Continuation<T>, CoroutineScope {
    // 重写上下文,为父上下文和自己的结合
    public final override val context: CoroutineContext = parentContext + this
}
可以看到,AbstractCoroutine实现了Continuation和CoroutineScope接口
接下来是coroutine.start(),它启动了需要在协程中执行的block块,我们跟进coroutine.start方法进去看一下:
public fun <R> start(
    start: CoroutineStart,
    // receiver是我们的协程实例
    receiver: R,
    // block是我们协程将要执行的代码
    block: suspend R.() -> T
) {
    // 初始化父协程工作,保证父协程在子协程启动前已经是启动的状态
    initParentJob()
    // 调用CoroutineStart的invoke方法,那么CoroutineStart的invoke方法一定重写了
    start(block, receiver, this)
}
可以看到,协程的启动是由CoroutineStart类启动的,所以我们看一下CoroutineStart类的invoke方法:
// 枚举类定义了协程启动的四种方式,并且重写了invoke操作符,用于启动协程
public enum class CoroutineStart {

    // 默认启动方式,立即执行一个协程,在协程提交后,协程启动前是可取消的
    DEFAULT,

    // 懒启动方式,不会立即执行一个协程,需要程序员手动调用start方法
    LAZY,

    // 原子启动方式,和Default的启动方式类似,不过在协程提交后,启动前无法取消
    ATOMIC,

    // 不使用调度器的方式进行启动,执行在同一个线程中,并且协程在提交后,启动前也是无法取消的,
    UNDISPATCHED;

    // 重载的invoke操作符,用于启动协程前,指定协程启动的方式
    public operator fun <R, T> inovke(block: suspend R.() -> T, receiver: R, completion: Continuation<T>): Unit =
        when (this) {
            // 默认启动方式,可取消
            DEFAULT -> block.startCoroutineCancellable(receiver, completion)
            // 原子启动方式,提交后执行前不可取消
            ATOMIC -> block.startCoroutine(receiver, completion)
            // 不指定调度器的方式
            UNDISPATCHED -> block.startCoroutineUndispatched(receiver, completion)
            LAZY -> Unit    // 程序员手动启动
        }
}
原来CoroutineStart仅仅是指定了block的启动方式,协程最终的启动还是依靠的是startCoroutineCancellable方法,我们继续跟进:
internal fun <R, T> (suspend (R) -> T).startCoroutineCancellable(receiver: R, completion: Continuation<T>) =
    runSafely(completion) {
        createCoroutineUnintercepted(receiver, completion).intercepted().
        resumeCancellableWith(Result.success(Unit))
    }
createCoroutineUnintercepted是一个kotlin的jvm实现方法,拿到kotlin的源码后,我们最终可以发现,createCoroutineUnintercepted创建了一个BaseContinuationImpl类,该类继承自Continuation,实现了resumeWith的方法:
internal abstract class BaseContinuationImpl(
    val completion: Continuation
) : Continuation<Any?>, .. {

    final override fun resumeWith(result: Result<Any?>) {
        ...
        // 协程会不断地查询block执行的状态
        while (true) {
            ...
            try {
                // 真正地执行在invokeSuspend方法中
                val outcome = invokeSuspend(param)
                // 被挂起,返回,等待下一次resume的调用
                if (outcome == COROUTINE_SUSPENDED) return
                Result.success(outcome)
            } catch (...) { ... }
            ...
        }

    }

}
resumeWith利用循环,查询block执行的状态,而真正执行的是invokeSuspend方法
object : ContinuationImpl(...) {

    private val label = 0

    override fun invokeSuspend(result: Result<Any?>): Any? =
        when (label) {
            // 0号表示初次执行block
            0 -> {
                lebel = 1
                result.getOrThrow()
                // 执行block体,可能return或者suspend
                block(this)
            }
            1 -> {
                label = 2
                result.getOrThrow()
            }
            else -> error("...")
        }

}
但是问题来了,这一系列的操作感觉还是在当前线程发生的呀,好像没有做到在后台线程池执行呢,那提交到线程池是怎么做到的呢?又是怎么调用到resumeWith的呢?诶,看到后面的intercepted()方法了吗?
intercepted的作用就是将某个Continuation拦截起来,进行调度分发,看一下具体的实现(去掉了不必要的代码):
internal abstract class ContinuationImpl(...) : BaseContinuationImpl(...) {

    fun intercepted(): Continuation<Any?> =
        // 从当前的上下文中找到Interceptor元素,并调用interceptContinuation方法
        // 拦截continuation
        context[ContinuationInterceptor]?.interceptContinuation(this)
}
那么context[ContinuationInterceptor]就是从当前的协程上下文中找到拦截器,那我们什么时候设置过拦截器呢?会想一下,在launch的时候,是不是需要传入一个CoroutineContext?如果不传入,默认也会给我们加上Dispatcher.Default,CoroutineDispatcher又实现了ContinuationInterceptor
所以,我们指定调度器,最后是通过intercepted()找到上下文中结合的Interceptor,然后再调用interceptContinuation保证该Continuation执行resume的时候,能够提交到线程池中执行:
// CoroutineDispatchers中的interceptContinuation创建了一个新的DispatchedContinuation类
public final override fun <T> interceptContinuation(continuation: Continuation<T>): Continuation<T> =
    DispatchedContinuation(this, continuation)
最终是创建了DispatchedContinuation类,我们看一下这个类的定义:
internal class DispatchedContinuation<in T>(
    val dispatcher: CoroutineDispatcher,
    val continuation: Continuation<T>
    // 同样实现了Continuation接口,那么下次resume方法调用时,会执行到该类的resumeWith中
) : DispatchedTask<T>(...), Continuation<T> by continuation {

    override fun resumeCancellableWith(result: Reuslt<T>) {
        // 如果需要使用调度器,那么调用dispatch方法
        if (dispatcher.isDispatchNeeded(context)) {
            dispatcher.dispatch(context, this)
        } else {
            executeUnconfined(...) {
                withCoroutineContext(this.context, ...) {
                    continuation.resumeWith(result)
                }
            }
        }
    }

}

public abstract fun dispatch(context: CoroutineContext, block: Runnable)
然后,接着调用了resumeCancellableWith方法,接着走到了dispatch方法,上面讲调度器的时候我们已经说过了,但是这里参数传入了this, 而这个this就是当前DispatchedContinuation这个类,这个类继承了DispatchedTask,而它最终实现了Runnable
internal actual typealias SchedulerTask = Task

internal abstract class Task(
    @JvmField var submissionTime: Long,
    @JvmField var taskContext: TaskContext
) : Runnable {
    constructor() : this(0, NonBlockingContext)
    inline val mode: Int get() = taskContext.taskMode // TASK_XXX
}

internal abstract class DispatchedTask<in T>(
    @JvmField public var resumeMode: Int
) : SchedulerTask() {

    public final override fun run() {
    val taskContext = this.taskContext
    var fatalException: Throwable? = null
    try {
        val delegate = delegate as DispatchedContinuation<T>
        val continuation = delegate.continuation
        val context = continuation.context
        val state = takeState() // NOTE: Must take state in any case, even if cancelled
        withCoroutineContext(context, delegate.countOrElement) {
            val exception = getExceptionalResult(state)
            val job = if (resumeMode.isCancellableMode) context[Job] else null
            /*
             * Check whether continuation was originally resumed with an exception.
             * If so, it dominates cancellation, otherwise the original exception
             * will be silently lost.
             */
            if (exception == null && job != null && !job.isActive) {
                val cause = job.getCancellationException()
                cancelResult(state, cause)
                continuation.resumeWithStackTrace(cause)
            } else {
                if (exception != null) continuation.resumeWithException(exception)
                else continuation.resume(getSuccessfulResult(state))
            }
        }
    } catch (e: Throwable) {
        // This instead of runCatching to have nicer stacktrace and debug experience
        fatalException = e
    } finally {
        val result = runCatching { taskContext.afterTask() }
        handleFatalException(fatalException, result.exceptionOrNull())
    }
}

}

public inline fun <T> Continuation<T>.resume(value: T): Unit =
    resumeWith(Result.success(value))
最终调用了resumeWith,即回到了BaseContinuationImpl的resumeWith方法,然后就可以执行invokeSuspend了
如果执行过程中有挂起函数,那么resumeWith会执行多次
到这里,协程的执行流程就分析完毕了,小结一下:
- 首先根据我们写在block中的代码创建CoutinationImpl类,该类实现了Continuation接口,该类通过实现resumeWith,调用invokeSuspend()方法,得到outcome,也就是我们的block执行结果
- 然后使用intercepted()方法,在当前的CoroutineContext中找到调度器,创建一个新的类DispatchedContinuation,该类实现Continuation接口,通过实现resumeCancellableWith,在协程执行的时候,通过dispatch,将执行的代码块分发到对应的Worker中执行
- 最后通过回调给CoutinationImpl的resumWith方法,开始执行协程,调用invokeSuspend()方法,得到执行结果
状态机实现挂起和恢复
上面我们讲到了invokeSuspend()方法,该方法中就是通过状态机的机制来完成挂起和恢复的
协程的挂起实际就是在协程返回结果时返回一个COROUTINE_SUSPENDED对象,在收到COROUTINE_SUSPENDED结果后直接返回,等待被再次调用resumeWith恢复。
而协程的恢复实际就是在挂起方法执行完成后,通过调用协程执行时传入的续体的resumeWith方法,恢复后续代码的执行。
我们可以来看下反编译后的代码:
//挂起函数
// ↓
suspend fun getUserInfo(): String {
    delay(1000L)
    return "BoyCoder"
}

@Nullable
public static final Object getUserInfo(@NotNull Continuation var0) {
   Object $continuation;
   label20: {
      if (var0 instanceof <undefinedtype>) {
         $continuation = (<undefinedtype>)var0;
         if ((((<undefinedtype>)$continuation).label & Integer.MIN_VALUE) != 0) {
            ((<undefinedtype>)$continuation).label -= Integer.MIN_VALUE;
            break label20;
         }
      }

       //将要执行的Continuation逻辑传入ContinuationImpl中
      $continuation = new ContinuationImpl(var0) {
         // $FF: synthetic field
         Object result;
         int label;

          //invokeSuspend()会在恢复协程挂起点时调用
         @Nullable
         public final Object invokeSuspend(@NotNull Object $result) {
            this.result = $result;
            this.label |= Integer.MIN_VALUE;
            return TestKt.getUserInfo(this);
         }
      };
   }

   Object $result = ((<undefinedtype>)$continuation).result;
   //返回此状态意味着函数要被挂起
   Object var3 = IntrinsicsKt.getCOROUTINE_SUSPENDED();

   // 状态机逻辑,通过label进行分块执行
   switch(((<undefinedtype>)$continuation).label) {
   case 0:
      ResultKt.throwOnFailure($result);
      ((<undefinedtype>)$continuation).label = 1;
      if (DelayKt.delay(1000L, (Continuation)$continuation) == var3) {
         return var3;
      }
      break;
   case 1:
      ResultKt.throwOnFailure($result);
      break;
   default:
      throw new IllegalStateException("call to 'resume' before 'invoke' with coroutine");
   }

   return "BoyCoder";
}
suspend挂起函数经过Kotlin编译器编译之后会进行CPS变换,并且函数里的逻辑会进行分块执行:分块逻辑数量 = 挂起函数数量 + 1,上述函数逻辑中,通过switch(label){} 状态机将逻辑分块执行,首先label = 0,此时会先将label置为1,接着调用了delay挂起函数,返回Intrinsics.COROUTINE_SUSPENDED意味着函数要被挂起;
当函数从协程挂起点恢复执行时,会调用$continuation#invokeSuspend(Object r e s u l t ) 方法恢复执行, result) 方法恢复执行, result)方法恢复执行,result是上一次函数执行的结果,以参数形式带入之后,就可以从挂起点继续执行了。
此时label变为1,ResultKt.throwOnFailure($result)中通过 if (value is Result.Failure) throw value.exception判断上面的分块结果是否有异常,如果有直接抛异常;否则直接break,执行到最后的return “value” 逻辑,这样整个方法的流程就运行完毕了。
总结:suspend挂起函数的执行流程就是通过CPS变换 + Continuation + 状态机来运转的。
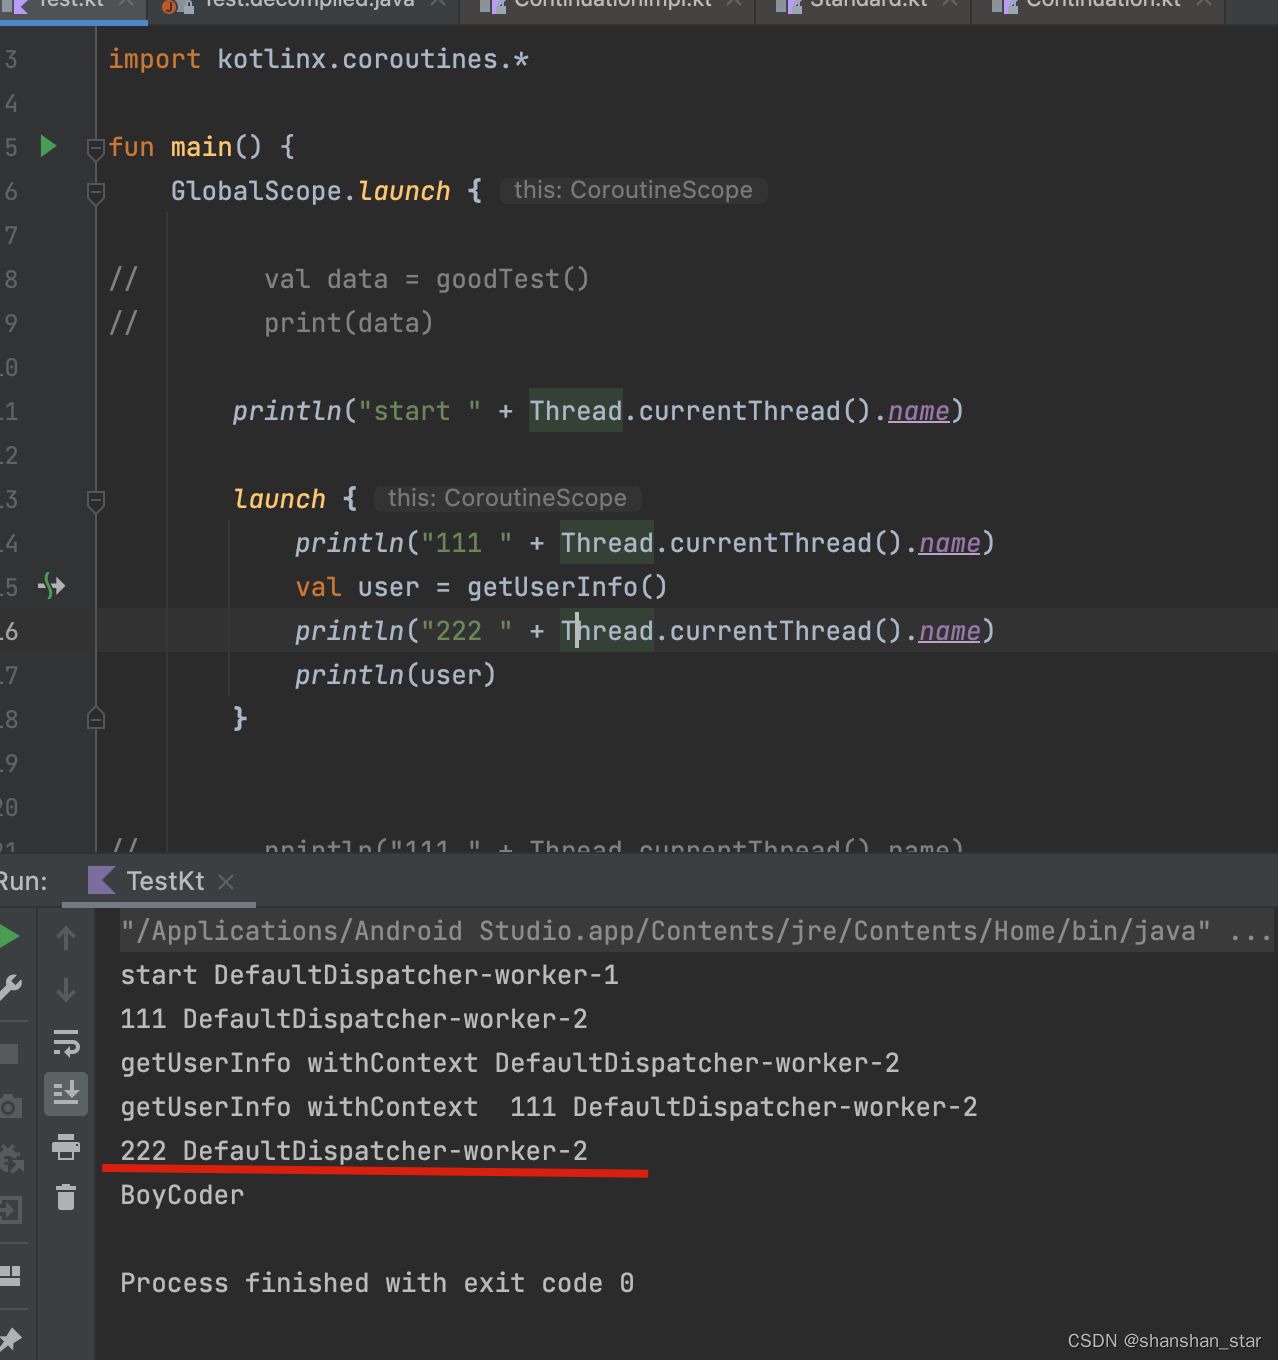
QA
- 挂起函数执行完,线程有没有切回来
线程切回的操作跟最开始启动协程切现成操作一样,最终都是通过线程池调度来切的,所以不保证能切回原线程
- resumeWith中的while循环是干什么的?为什么要用循环
为了递归调用回到最初调用方,因为Continuation是持有上一个Continuation的
https://blog.csdn.net/m0_64420071/article/details/127055506


 2288
2288


 被折叠的 条评论
为什么被折叠?
被折叠的 条评论
为什么被折叠?
 到【灌水乐园】发言


