


前言:
MFC中没有提供供对话框使用的工具条类,而我们时常需要开发以对话框为框架的程序。那么我们就来讲讲如何实现
MFC Dialog加入toolbar
1.0 新建MFC项目,然后在资源视图中邮右键add resource,选择toolbar,new

2.0 编辑状态栏,需要注意的是右边属性栏给ID,自定义,最终会在Resource里面体现

3.0 复制下面代码,将CPP代码部分放在Dialog的OnInitDialog部分(注意替换掉IDR_TOOLBAR1为自己的TOOLBAR)
头文件
//Toolbar
private:
	CToolBar m_wndToolBar;
CPP文件
	// 创建工具条并调入资源
	if (!m_wndToolBar.Create(this) || !m_wndToolBar.LoadToolBar(IDR_TOOLBAR1))
	{
		TRACE0("Failed to Create Dialog Toolbar\n");
		EndDialog(IDCANCEL);
	}
	CRect rcClientOld; // 久客户区RECT
	CRect rcClientNew; // 加入TOOLBAR后的CLIENT RECT
	GetClientRect(rcClientOld); //
	// Called to reposition and resize control bars in the client area of a window
	// The reposQuery FLAG does not really draw the Toolbar. It only does the calculations.
	// And puts the new ClientRect values in rcClientNew so we can do the rest of the Math.
	//重新计算RECT大小
	RepositionBars(AFX_IDW_CONTROLBAR_FIRST, AFX_IDW_CONTROLBAR_LAST, 0, reposQuery, rcClientNew);
	// All of the Child Windows (Controls) now need to be moved so the Tollbar does not cover them up.
	//所有的子窗口将被移动,以免被TOOLBAR覆盖
	// Offest to move all child controls after adding Tollbar
	//计算移动的距离
	CPoint ptOffset(rcClientNew.left - rcClientOld.left,rcClientNew.top - rcClientOld.top);
	CRect rcChild;
	CWnd* pwndChild = GetWindow(GW_CHILD); //得到子窗口
	while (pwndChild) // 处理所有子窗口
	{//移动所有子窗口
		pwndChild->GetWindowRect(rcChild);
		ScreenToClient(rcChild);
		rcChild.OffsetRect(ptOffset);
		pwndChild->MoveWindow(rcChild, FALSE);
		pwndChild = pwndChild->GetNextWindow();
	}
	CRect rcWindow;
	GetWindowRect(rcWindow); // 得到对话框RECT
	rcWindow.right += rcClientOld.Width() - rcClientNew.Width(); // 修改对话框尺寸
	rcWindow.bottom += rcClientOld.Height() - rcClientNew.Height();
	MoveWindow(rcWindow, FALSE); // Redraw Window
	RepositionBars(AFX_IDW_CONTROLBAR_FIRST, AFX_IDW_CONTROLBAR_LAST, 0);
4.0 给toolbar按钮添加事件,通过类向导alt+shift+x

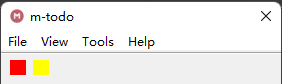
5.0 剩下就是添加自己的代码部分了,放下最后效果吧
MFC Dialog 加入Toolbar tips
在基于单文档和基于多文档的MFC中,工具栏是自动添加的,但是在基于对话框的MFC中则需要编者用代码添加,而且工具栏的提示信息的添加也较SDI和MDI要复杂的多,下面讲的是:如何在基于对话框的MFC中添加工具栏,以及工具栏的提示信息,以及改变工具栏的图标,使其支持256色。
1.在ResourceView里加入Toolbar资源,命名IDR_TOOLBAR1
2.在主程序的.h文件中加入变量:
#ifdef DEBUG_TOOLBAR_CREATE
private:
	CToolBar m_wndToolBar;
	CImageList m_imagelist;
	afx_msg BOOL OnToolTipText(UINT NID, NMHDR* pNMHDR, LRESULT* pResult);//使工具栏显示提示信息
#endif
3.在主程序的.cpp文件中的加入
BEGIN_MESSAGE_MAP(CBLToolsDlg, CDialogEx)
	ON_NOTIFY_EX(TTN_NEEDTEXT, 0, OnToolTipText)//使工具栏显示提示信息
END_MESSAGE_MAP()
4.在主程序的.cpp文件中,在初始化的地方(OnCreate或者OnInitDialog)加入:
#ifdef DEBUG_TOOLBAR_CREATEEX
	/*
	* 创建工具条并调入资源
	* m_wndToolBar 按照自己的定义替换
	* IDR_TOOLBAR1 按照自己的定义替换
	* https://docs.microsoft.com/zh-cn/cpp/mfc/reference/ctoolbar-class?view=msvc-170
	*/
	if (!m_wndToolBar.CreateEx(this, TBSTYLE_FLAT, WS_CHILD | WS_VISIBLE | CBRS_ALIGN_TOP | CBRS_GRIPPER | CBRS_TOOLTIPS,
		CRect(4, 4, 0, 0)) || !m_wndToolBar.LoadToolBar(IDR_TOOLBAR1))
	{
		TRACE0("failed to create toolbar\n");
		return FALSE;
	}
	m_wndToolBar.ShowWindow(SW_SHOW);
	RepositionBars(AFX_IDW_CONTROLBAR_FIRST, AFX_IDW_CONTROLBAR_LAST, 0);

	//使工具栏图标显示256色,
	//下面这段代码不加也是一个效果,具体什么作用不太清楚,也可以省略以追求代码整洁
	HBITMAP hbm = (HBITMAP)::LoadImage(AfxGetInstanceHandle(),
		MAKEINTRESOURCE(IDR_TOOLBAR1), //加载IDB_TOOLBAR
		IMAGE_BITMAP, //按位图格式
		0, 0, // cx,cy
		LR_CREATEDIBSECTION | LR_LOADMAP3DCOLORS);
	CBitmap bm;
	bm.Attach(hbm);
	//16是根据IDR_TOOLBAR1中每个按钮所占的尺寸设置的
	m_imagelist.Create(16, 16, ILC_COLOR8, 2, 2);
	m_imagelist.Add(&bm, (CBitmap*)NULL);
	m_wndToolBar.GetToolBarCtrl().SetImageList(&m_imagelist);
#endif // DEBUG_TOOLBAR_METHOD2
或者下述代码
#ifdef DEBUG_TOOLBAR_CREATE
	/*
	* 创建工具条并调入资源
	* m_wndToolBar 按照自己的定义替换
	* IDR_TOOLBAR1 按照自己的定义替换
	* https://docs.microsoft.com/zh-cn/cpp/mfc/reference/ctoolbar-class?view=msvc-170
	*/
	if (!m_wndToolBar.Create(this) || !m_wndToolBar.LoadToolBar(IDR_TOOLBAR1))
	{
		TRACE0("Failed to Create Dialog Toolbar\n");
		EndDialog(IDCANCEL);
	}
	//打开Toolbar Tips ,否则无法开启Tips提示
	m_wndToolBar.EnableToolTips(TRUE);

	CRect rcClientOld; // 久客户区RECT
	CRect rcClientNew; // 加入TOOLBAR后的CLIENT RECT
	GetClientRect(rcClientOld); //
	// Called to reposition and resize control bars in the client area of a window
	// The reposQuery FLAG does not really draw the Toolbar. It only does the calculations.
	// And puts the new ClientRect values in rcClientNew so we can do the rest of the Math.
	//重新计算RECT大小
	RepositionBars(AFX_IDW_CONTROLBAR_FIRST, AFX_IDW_CONTROLBAR_LAST, 0, reposQuery, rcClientNew);
	// All of the Child Windows (Controls) now need to be moved so the Tollbar does not cover them up.
	//所有的子窗口将被移动,以免被TOOLBAR覆盖
	// Offest to move all child controls after adding Tollbar
	//计算移动的距离
	CPoint ptOffset(rcClientNew.left - rcClientOld.left, rcClientNew.top - rcClientOld.top);
	CRect rcChild;
	CWnd* pwndChild = GetWindow(GW_CHILD); //得到子窗口
	while (pwndChild) // 处理所有子窗口
	{//移动所有子窗口
		pwndChild->GetWindowRect(rcChild);
		ScreenToClient(rcChild);
		rcChild.OffsetRect(ptOffset);
		pwndChild->MoveWindow(rcChild, FALSE);
		pwndChild = pwndChild->GetNextWindow();
	}
	CRect rcWindow;
	GetWindowRect(rcWindow); // 得到对话框RECT
	rcWindow.right += rcClientOld.Width() - rcClientNew.Width(); // 修改对话框尺寸
	rcWindow.bottom += rcClientOld.Height() - rcClientNew.Height();
	MoveWindow(rcWindow, FALSE); // Redraw Window
	RepositionBars(AFX_IDW_CONTROLBAR_FIRST, AFX_IDW_CONTROLBAR_LAST, 0);
	/*设置toolbar大小,注释掉代码会按照默认设置,下述代码可实现更多定制
	void SetSizes(
		SIZE sizeButton,
		SIZE sizeImage
	);
	sizeButton	在每個按鈕的大小 (以像素為單位)
	sizeImage	在每個像素的影像大小
	*/
	CRect temp;
	m_wndToolBar.GetItemRect(0, &temp);
	m_wndToolBar.SetSizes(CSize(temp.Width(), temp.Height()), CSize(16, 16));
#endif // DEBUG_TOOLBAR_CREATE
5.在主程序的.cpp文件中编译函数OnToolTipText
BOOL CBLToolsDlg::OnToolTipText(UINT, NMHDR* pNMHDR, LRESULT* pResult)
{
	ASSERT(pNMHDR->code == TTN_NEEDTEXTA || pNMHDR->code == TTN_NEEDTEXTW);
	// UNICODE消息
	TOOLTIPTEXTA* pTTTA = (TOOLTIPTEXTA*)pNMHDR;
	TOOLTIPTEXTW* pTTTW = (TOOLTIPTEXTW*)pNMHDR;
	//TCHAR szFullText[512];
	CString strTipText;
	UINT nID = pNMHDR->idFrom;
	if (pNMHDR->code == TTN_NEEDTEXTA && (pTTTA->uFlags & TTF_IDISHWND) ||
		pNMHDR->code == TTN_NEEDTEXTW && (pTTTW->uFlags & TTF_IDISHWND))
	{
		// idFrom为工具条的HWND
		nID = ::GetDlgCtrlID((HWND)nID);
	}

	if (nID != 0) //不为分隔符
	{
		strTipText.LoadString(nID);
		strTipText = strTipText.Mid(strTipText.Find('\n', 0) + 1);
#ifndef _UNICODE
		if (pNMHDR->code == TTN_NEEDTEXTA)
		{
			lstrcpyn(pTTTA->szText, strTipText, sizeof(pTTTA->szText));
		}
		else
		{
			_mbstowcsz(pTTTW->szText, strTipText, sizeof(pTTTW->szText));
		}
#else
		if (pNMHDR->code == TTN_NEEDTEXTA)
		{
			_wcstombsz(pTTTA->szText, strTipText, sizeof(pTTTA->szText));
		}
		else
		{
			lstrcpyn(pTTTW->szText, strTipText, sizeof(pTTTW->szText));
		}
#endif
		* pResult = 0;
		// 使工具条提示窗口在最上面
		::SetWindowPos(pNMHDR->hwndFrom, HWND_TOP, 0, 0, 0, 0, SWP_NOACTIVATE |
			SWP_NOSIZE | SWP_NOMOVE | SWP_NOOWNERZORDER);
		return TRUE;
	}
	return TRUE;
}
6.在ResourceView的String资源里,将工具栏中每个按钮的ID都对应上希望显示的提示信息即可,例如:
很关键的一步,很多教程中都没写这一段,以至于关于这个功能耗费了我很久的功夫
toolbar中有一按钮的ID是IDC_OPENFILE,希望显示的提示信息为“打开文件”
那么,你需要做的就是在string资源中加入一条ID同样是IDC_OPENFILE, 内容是: 打开文件在运行的时候,将鼠标放在按钮上面就会提示 "打开文件"了
这样就完成了所有的步骤。


最终效果:


 1285
1285


 被折叠的 条评论
为什么被折叠?
被折叠的 条评论
为什么被折叠?
 到【灌水乐园】发言


