


看这篇文章前要清楚vue,element,axios,api的使用方式
1、sql语句
#创建mywebsite数据库
create database mywebsite;
#进入mywebsite数据库
use mywebsite;
#创建userdata表
create table userdata
(
    username varchar(30) not null comment '用户名',
    userpwd varchar (30) not null comment '密码'
);
#向userdata表添加数据
insert into userdata values ('zzj','admin');
2、创建基本的查询功能(不含前端)
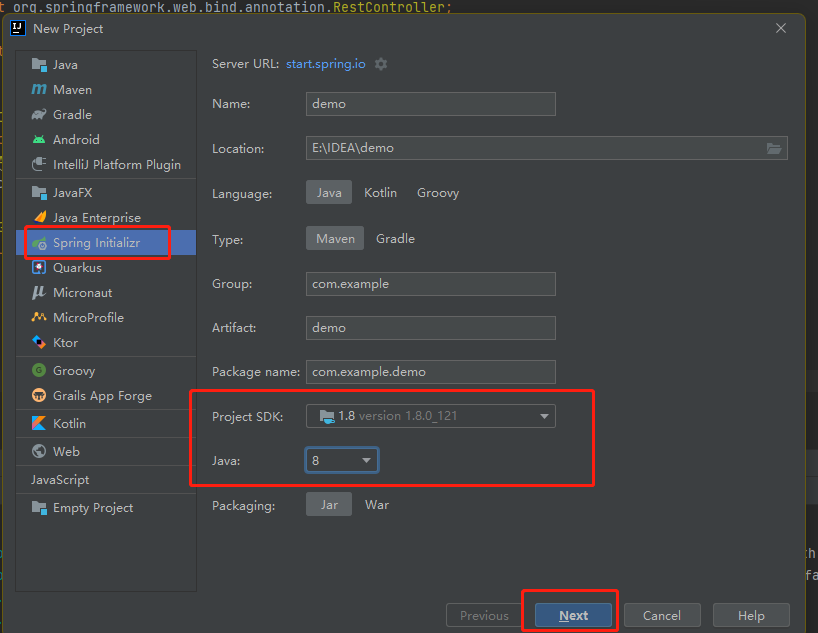
2.1、创建springboot项目
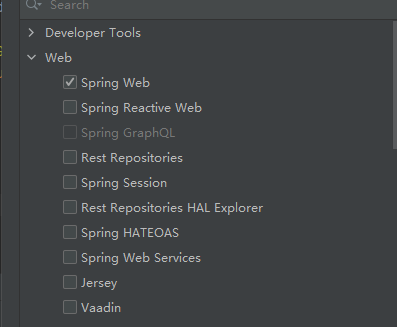
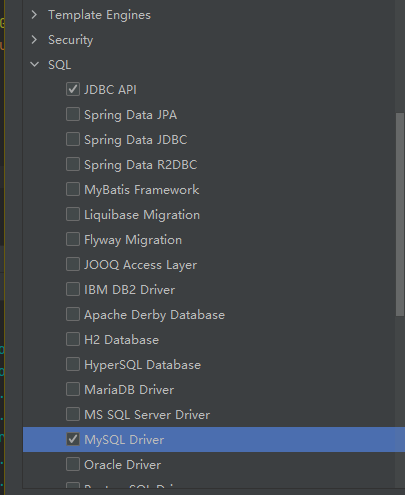
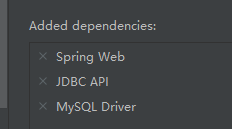
2.2、选择所需要的插件
spring web、JDBC API、MySQL Driver、
2.3、编写application.properties配置文件
application.properties主要用于配置数据库连接信息

application.properties
#springboot执行端口
server.port=8080
#JDBC驱动
#低于mysql8.0版本,不包含8.0
#spring.datasource.driver-class-name=com.mysql.jdbc.Driver
#高于mysql8.0版本,包含8.0
spring.datasource.driver-class-name=com.mysql.cj.jdbc.Driver
#数据库路径
spring.datasource.url=jdbc:mysql://localhost:3306/mywebsite?serverTimezone=UTC&useUnicode=true&characterEncoding=utf-8
#数据库用户名
spring.datasource.username=root
#数据库密码
spring.datasource.password=admin
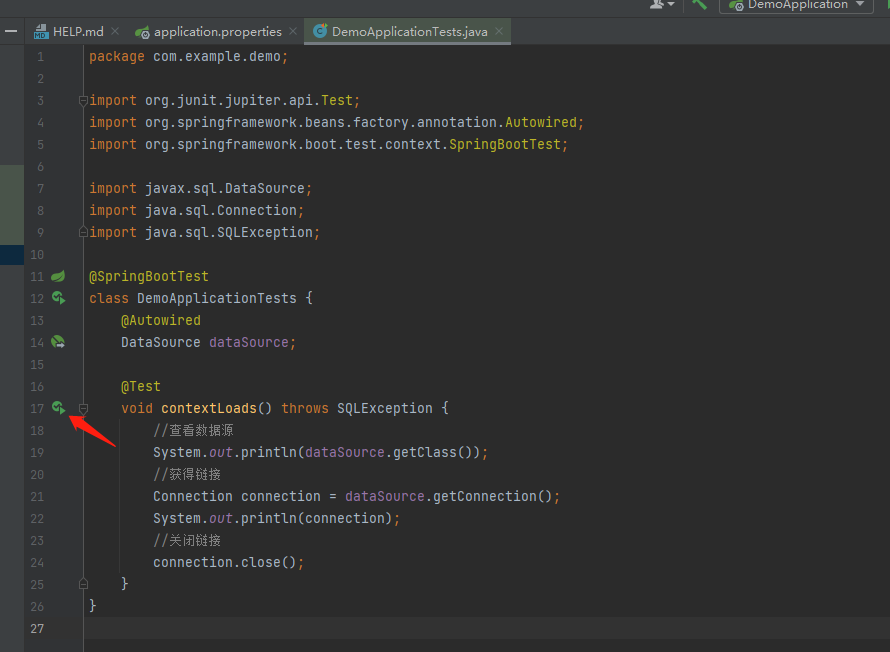
2.4、编写测试类
编写测试类,便于判断数据库连接是否正确
DemoApplicationTests
package com.example.demo;

import org.junit.jupiter.api.Test;
import org.springframework.beans.factory.annotation.Autowired;
import org.springframework.boot.test.context.SpringBootTest;

import javax.sql.DataSource;
import java.sql.Connection;
import java.sql.SQLException;

@SpringBootTest
class DemoApplicationTests {
    @Autowired
    DataSource dataSource;

    @Test
    void contextLoads() throws SQLException {
        //查看数据源
        System.out.println(dataSource.getClass());
        //获得链接
        Connection connection = dataSource.getConnection();
        System.out.println(connection);
        //关闭链接
        connection.close();
    }
}
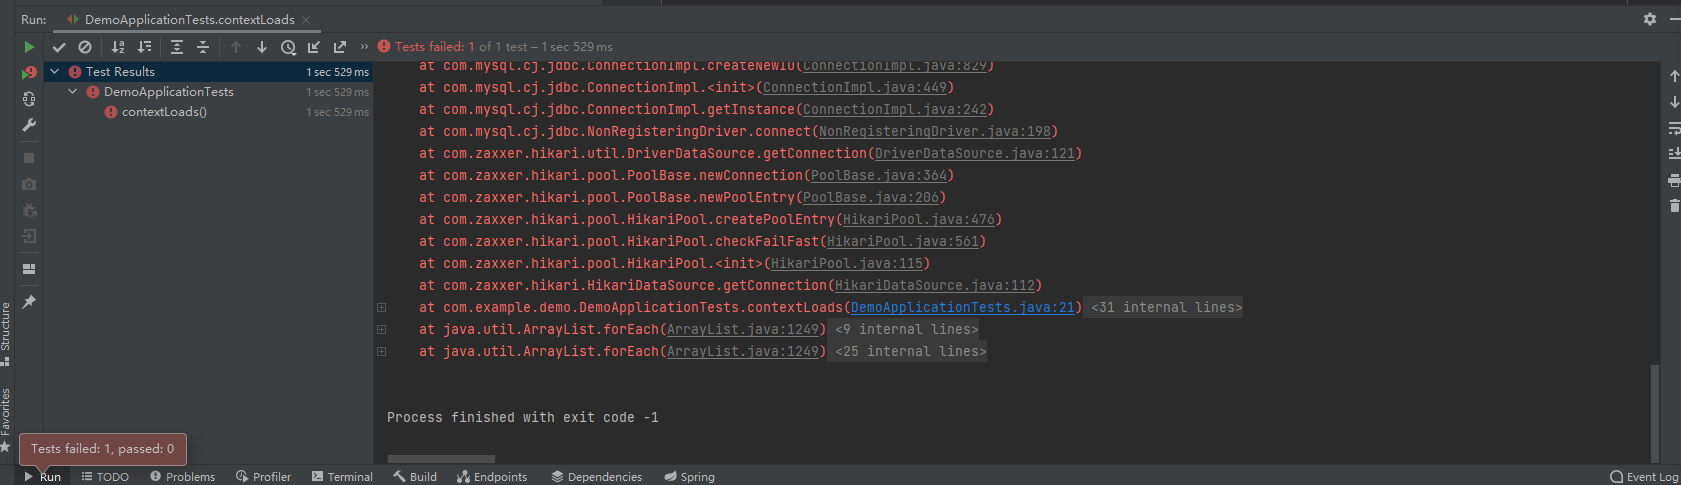
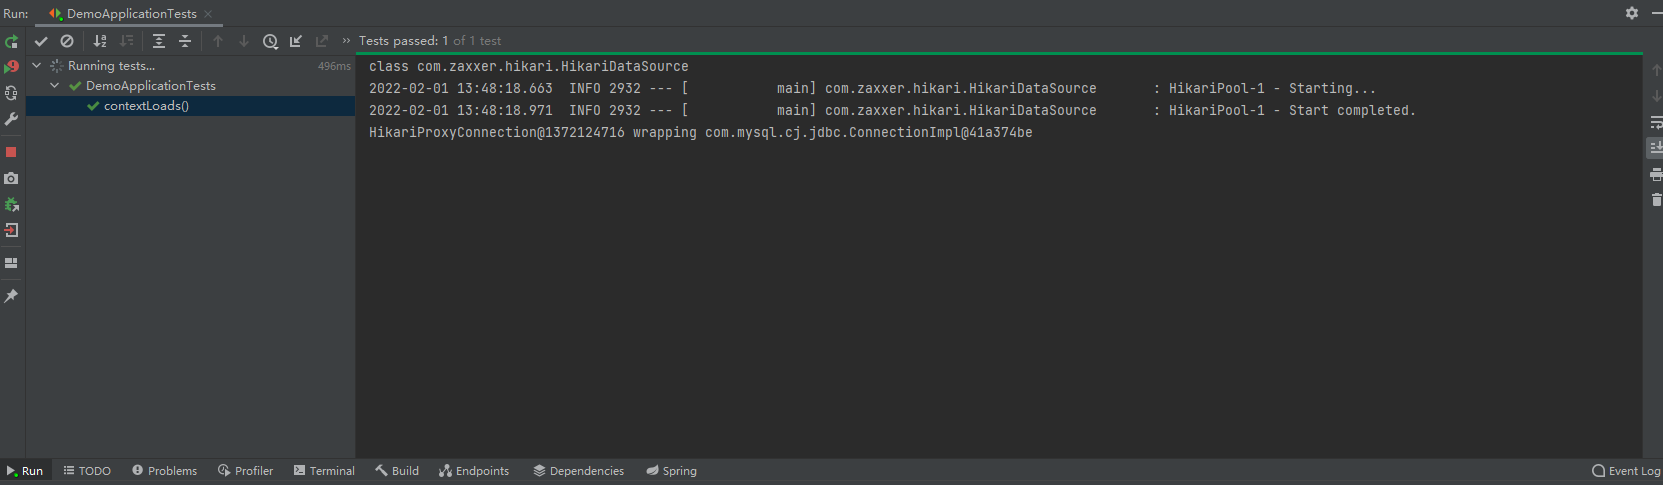
2.4.1运行
如果控制台报错,这代表配置文件错误。数据库连接失败。需检查并重新配置。
如果控制台通过,且有绿条。这表示配置文件正常,数据库连接正常
2.5、编写执行sql语句的主方法
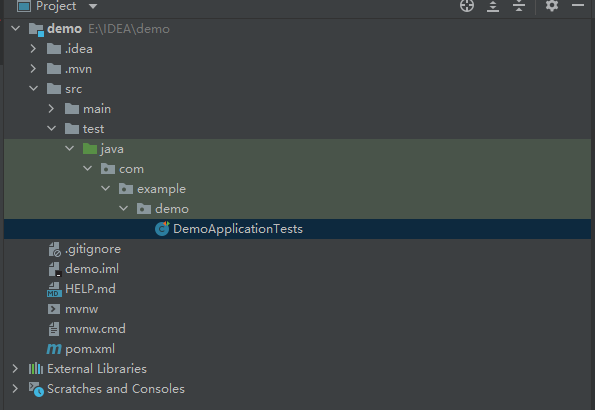
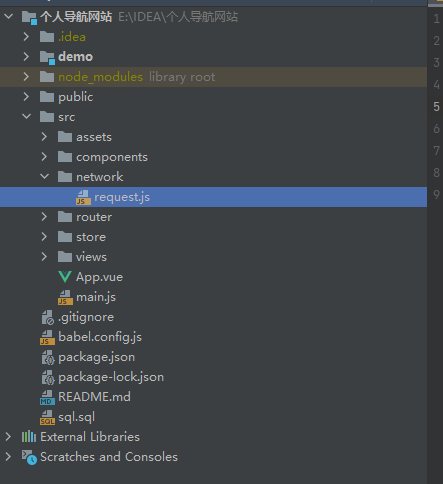
2.5.1、创建java文件
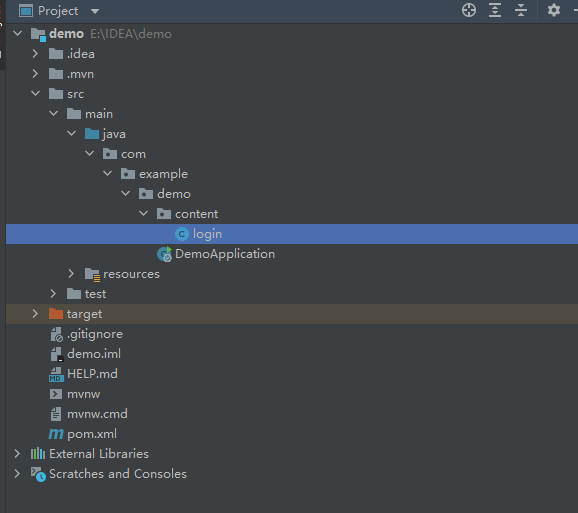
在demo下创建一个content文件夹(package),并在content文件夹内创建个login.java文件
2.5.2、查询所有语句
select* from userdata
打开刚才创建的login.java文件并编写代码
login.java
package com.example.demo.content;

import org.springframework.beans.factory.annotation.Autowired;
import org.springframework.jdbc.core.JdbcTemplate;
import org.springframework.web.bind.annotation.GetMapping;
import org.springframework.web.bind.annotation.RestController;

import java.util.Map;

@RestController
public class login {
    @Autowired
    JdbcTemplate jdbcTemplate;

    @GetMapping("/login")
    public Object login() {
//        设置sql语句
        String sql = "select * from userdata";
//        执行sql语句并返回map
        Map<String, Object> map = jdbcTemplate.queryForMap(sql);
//        返回
        return map;
    }
}
2.5.3、运行springboot
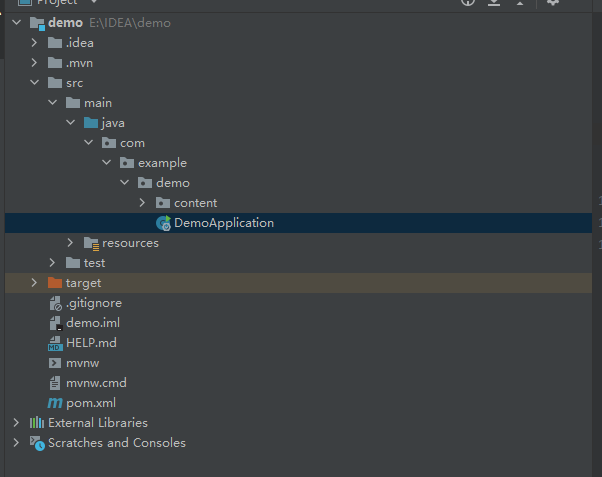
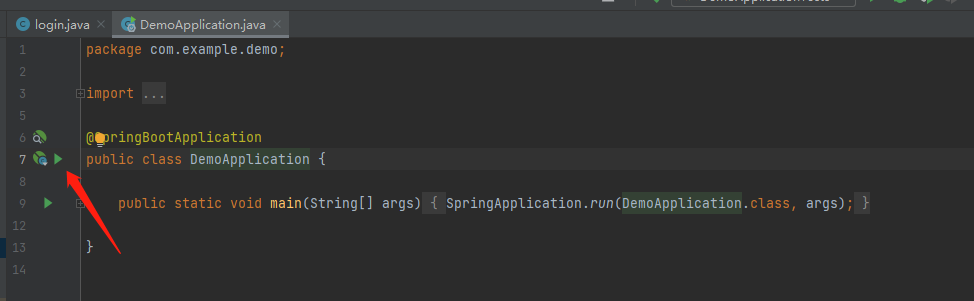
5.3.1打开DemoApplication文件
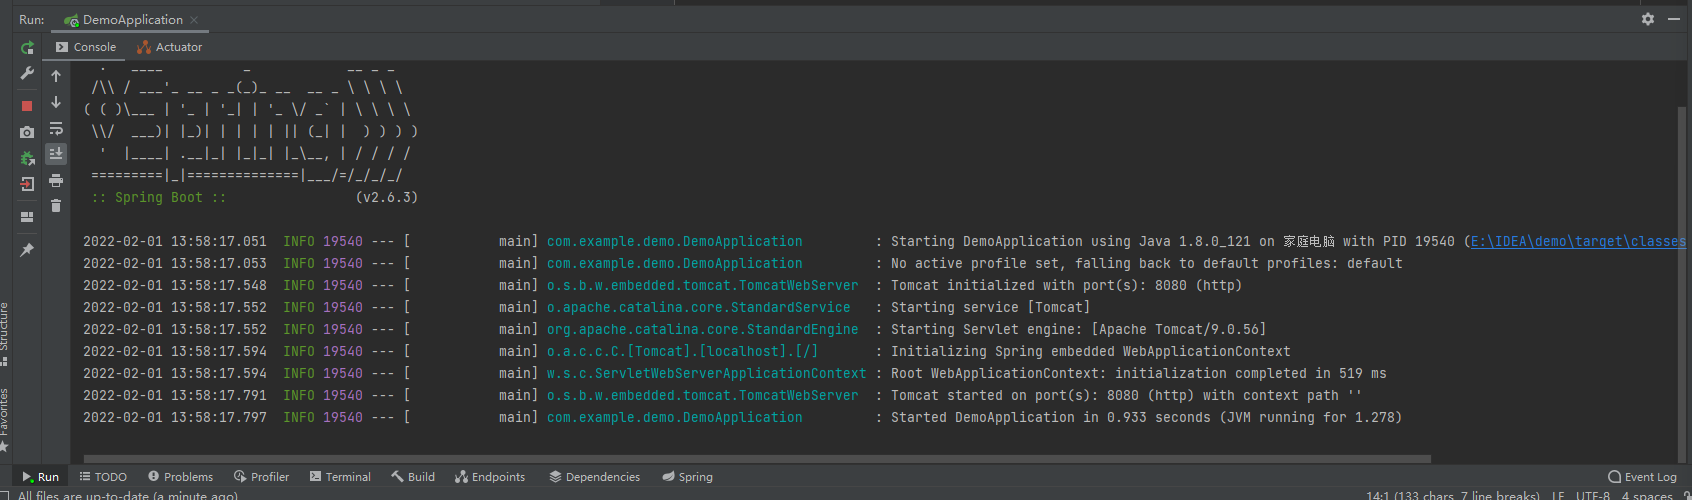
2.5.3.2运行springboot
2.5.3.3这样这表示运行成功了
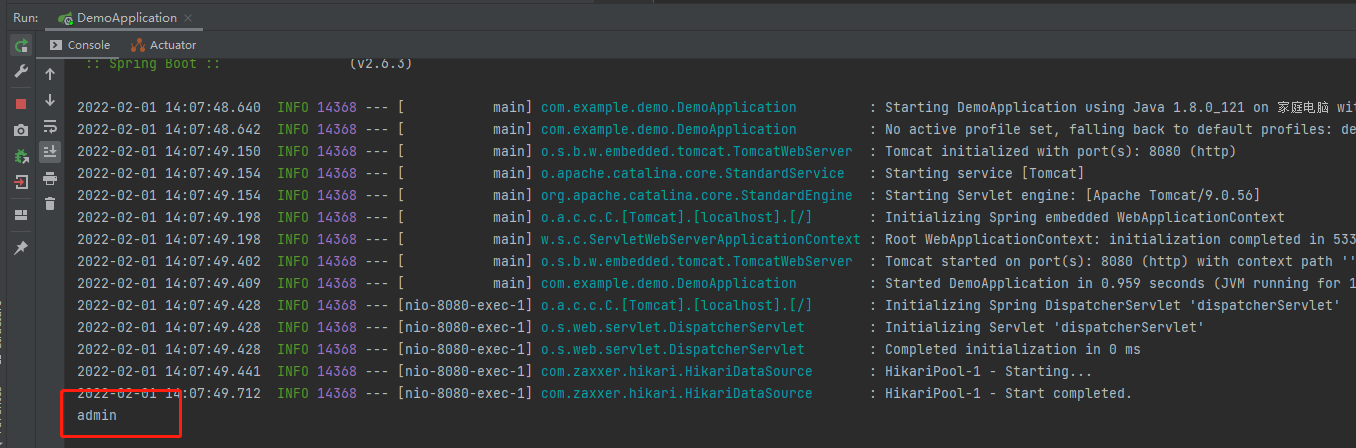
2.6、查看效果
打开浏览器,并在地址栏输入http://localhost:8080/login

以上最基本的springboot查询sql数据库的方法。但是可以看到,得到的数据是一串json格式。这样我们无法使用。其实这个只需要get我们想要的值就可以了。
2.7、获得json类指定数据
2.7.1、假如是我只想获得userpwd里面的admin数据
login.java
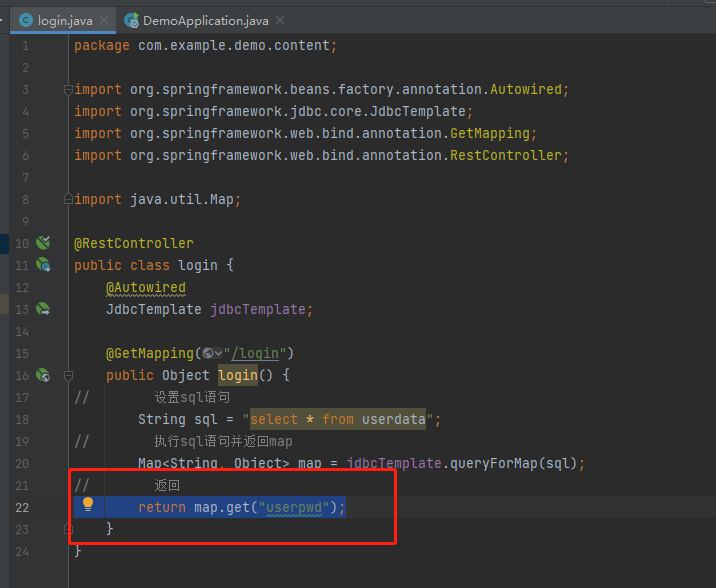

是吧!
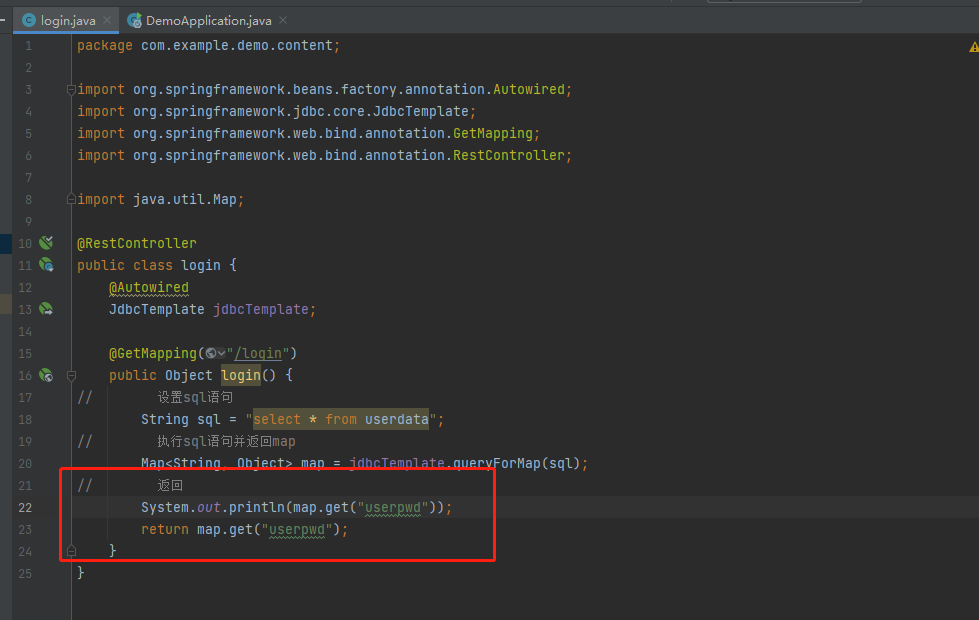
2.7.2、同样在控制台输出也是如此
3、结合前端axios调用api来只想springboot语句
下列我用登录来做实列。登录要前端利用axios来向springboot后端传递数据。并且后端去抓取SQL的数据,并进行判断。根据条件返回布尔值
3.1、配置后端
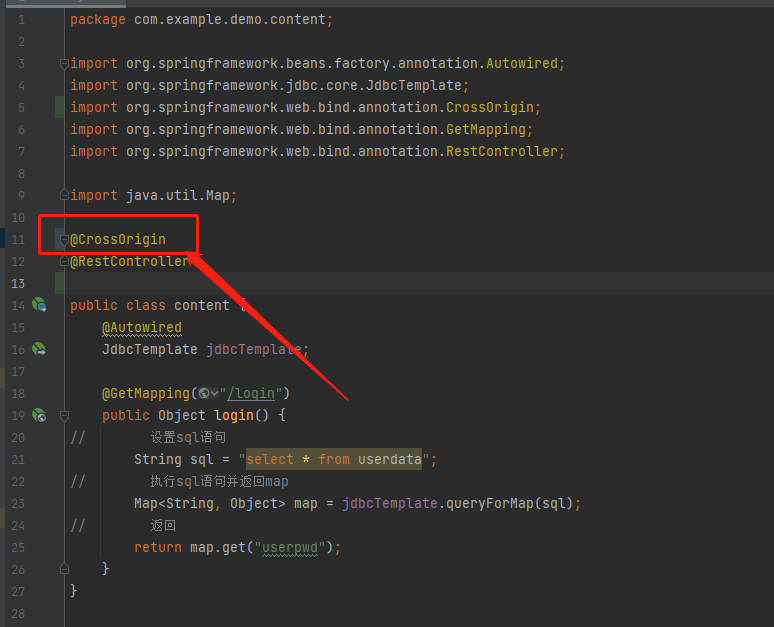
3.1.1、第一步最重要的跨域问题。别看在浏览器可以正常运行,但是一到axios就要出毛病。

添加一个@CrossOrigin注解即可
3.1.2、登录验证,后端要接受两条数据。用户名和密码,并作出判断
//required=true代表如果没有数据就会报错
@RequestParam(value = "username" ,required = true) String username,
@RequestParam(value = "userpwd" ,required = true) String userpwd
package com.example.demo.content;

import org.springframework.beans.factory.annotation.Autowired;
import org.springframework.jdbc.core.JdbcTemplate;
import org.springframework.web.bind.annotation.CrossOrigin;
import org.springframework.web.bind.annotation.GetMapping;
import org.springframework.web.bind.annotation.RequestParam;
import org.springframework.web.bind.annotation.RestController;

import java.util.Map;


@RestController
//跨域问题
@CrossOrigin

public class content {
    @Autowired
    JdbcTemplate jdbcTemplate;

    @GetMapping("/login")
//    传递两个参数
    public Object login(@RequestParam(value = "username", required = true) String username, @RequestParam(value = "userpwd", required = true) String userpwd) {
//        设置sql语句
        String sql = "select * from userdata where username = " + "'" + username + "'";
//        执行sql语句并返回map
        Map<String, Object> map = jdbcTemplate.queryForMap(sql);
//        判断密码是否正确
        if (userpwd.equals(map.get("userpwd"))) {
            return true;
        } else {
            return false;
        }
    }
}
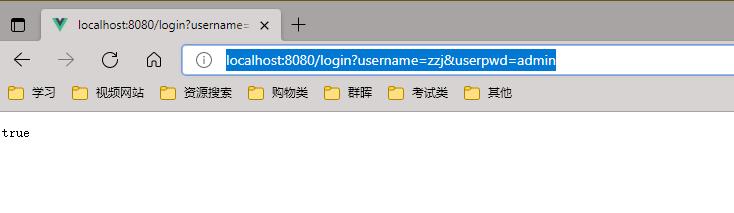
3.1.3、在网页中测试
假如是我的用户名和密码分别的root和admin
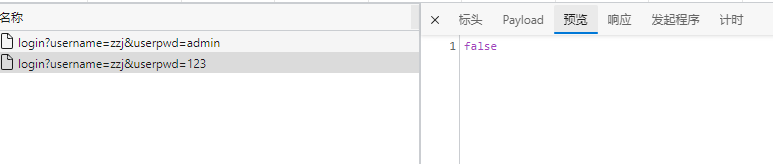
打开浏览器,并在地址栏输入http://localhost:8080/login?username=zzj&userpwd=admin
如果密码错误

3.2结合前端axios发送api请求
我这里有个登录页面
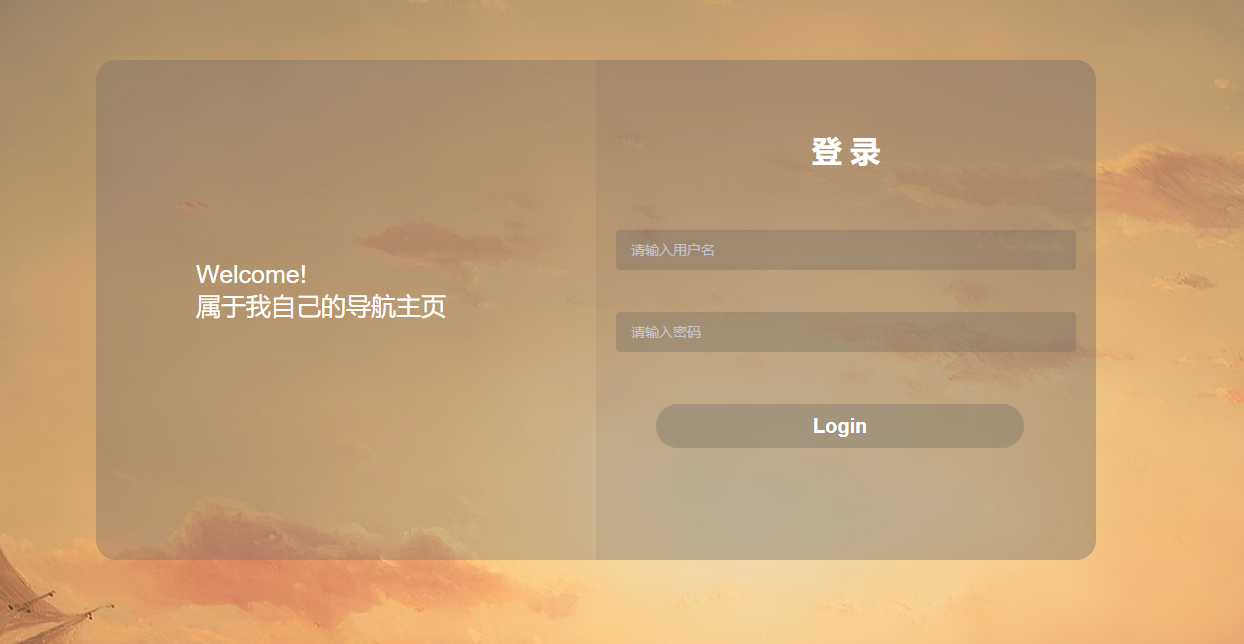
当点击Login后前端向后端发送api请求并接受返回,根据返回的布尔值执行下面的操作
具体如何配置看,axios基本使用。
3.2.1、配置network定向后端地址及端口
import axios from 'axios'

export function request(config) {
    let newVar = axios.create({
        baseURL: 'http://localhost:8080',
        timeout:5000
    });
    return newVar(config);
}
3.2.2、配置登录界面(基于vue+elemenet)
  methods: {
    click() {
      this.$refs["form"].validate((valid) => {
        if (valid) {
          request({
            // 配置GetMapping
            url: 'login',
            params: {
              // 传入两个参数
              username: this.$data.user.name,
              userpwd: this.$data.user.password
            }
          }).then(res => {
            if (res.data) {
              // 返回如果为true
              this.$message({
                type: 'success',
                message: '登录成功'
              });
            } else {
              // 返回如果为false
              this.$message({
                type: 'warning',
                message: '密码错误'
              });
            }
          }).catch(err => {
            // 如果后端报错
            this.$message({
              type: 'warning',
              message: 'API错误'
            });
          })
        } else {
          this.$message({
            type: 'warning',
            message: '校验错误'
          });
        }
      });
    }
  }

以上是基于vue+elemenet+springboot的基本的api配置及使用。


 1314
1314


 被折叠的 条评论
为什么被折叠?
被折叠的 条评论
为什么被折叠?
 到【灌水乐园】发言


