


前言
最近小编做了一个需求,根据商品的尺寸信息,生成尺寸表图,可是小编之前没做过这样的需求,第一次做这种需求,好有新鲜感,然后小编请教了度娘,学会了两种生成图片的实现方式。特记录下,以免以后忘记,也供大家参考。
生成图片实现方式
方式一:Graphics
上代码:
import javax.imageio.ImageIO;
import java.awt.Color;
import java.awt.Font;
import java.awt.FontMetrics;
import java.awt.Graphics;
import java.awt.image.BufferedImage;
import java.io.File;
/**
* 图片生成工具
*
* @author 哈哈
* @date 2022/9/1
*/
public class GenerateImageUtil {
public static String FONT = "宋体";
public void generateSizeImage(String cellsValue[][], String path, String desc) {
// 字体大小
int fontTitileSize = 15;
// 横线的行数
int totalrow = cellsValue.length + 1;
// 竖线的行数
int totalcol = 0;
if (cellsValue[0] != null) {
totalcol = cellsValue[0].length;
}
// 图片宽度
int imageWidth = 1000;
// 图片高度
int imageHeight = 1000;
// 行高
int rowHeight = 40;
// 单元格宽度
int colWidth = 140;
// 起始宽度
int startWidth = (imageWidth - (totalcol * colWidth)) / 2;
// 起始高度
int startHeight = (imageHeight - totalrow * rowHeight) / 2;
BufferedImage image = new BufferedImage(imageWidth, imageHeight, BufferedImage.TYPE_INT_RGB);
Graphics graphics = image.getGraphics();
graphics.setColor(Color.WHITE);
graphics.fillRect(0, 0, imageWidth, imageHeight);
graphics.setColor(new Color(220, 240, 240));
//画横线
for (int j = 0; j < totalrow; j++) {
graphics.setColor(Color.lightGray);
int x1 = startWidth;
int x2 = (imageWidth + (totalcol * colWidth)) / 2;
graphics.drawLine(x1, startHeight + j * rowHeight, x2, startHeight + j * rowHeight);
}
//画竖线
for (int k = 0; k < totalcol + 1; k++) {
graphics.setColor(Color.lightGray);
int x = startWidth + k * colWidth;
graphics.drawLine(x, startHeight, x, startHeight + rowHeight * (totalrow - 1));
}
//设置字体
Font font;
//写入内容
for (int n = 0; n < cellsValue.length; n++) {
for (int l = 0; l < cellsValue[n].length; l++) {
if (n == 0) {
font = new Font(FONT, Font.BOLD, fontTitileSize);
graphics.setFont(font);
graphics.setColor(Color.BLACK);
} else if (n > 0 && l > 0) {
font = new Font(FONT, Font.PLAIN, fontTitileSize);
graphics.setFont(font);
graphics.setColor(Color.gray);
} else {
font = new Font(FONT, Font.PLAIN, fontTitileSize);
graphics.setFont(font);
graphics.setColor(Color.BLACK);
}
//向单元格里写内容,水平居中&垂直居中
FontMetrics fontMetrics = graphics.getFontMetrics(font);
String content = cellsValue[n][l];
//获取写入内容的宽度
int contentWidth = fontMetrics.stringWidth(content);
//获取字体的高度
int contentHeight = fontMetrics.getHeight();
//获取字体的下降值
int contentDescent = fontMetrics.getDescent();
//计算x、y坐标
graphics.drawString(content, startWidth + colWidth * l + (colWidth - contentWidth) / 2, startHeight + rowHeight * (n + 1) - contentHeight / 2 - contentDescent);
}
}
//设置备注
font = new Font(FONT, Font.BOLD, fontTitileSize);
graphics.setFont(font);
graphics.drawString(desc, startWidth, startHeight + (totalrow * rowHeight) - 10);
// 保存图片
createImage(image, path);
}
/**
* 将图片保存到指定位置
*
* @param image 缓冲文件类
* @param fileLocation 文件位置
*/
private void createImage(BufferedImage image, String fileLocation) {
try {
ImageIO.write(image, "png", new File(fileLocation));
} catch (Exception e) {
e.printStackTrace();
}
}
public static void main(String[] args) {
GenerateImageUtil cg = new GenerateImageUtil();
try {
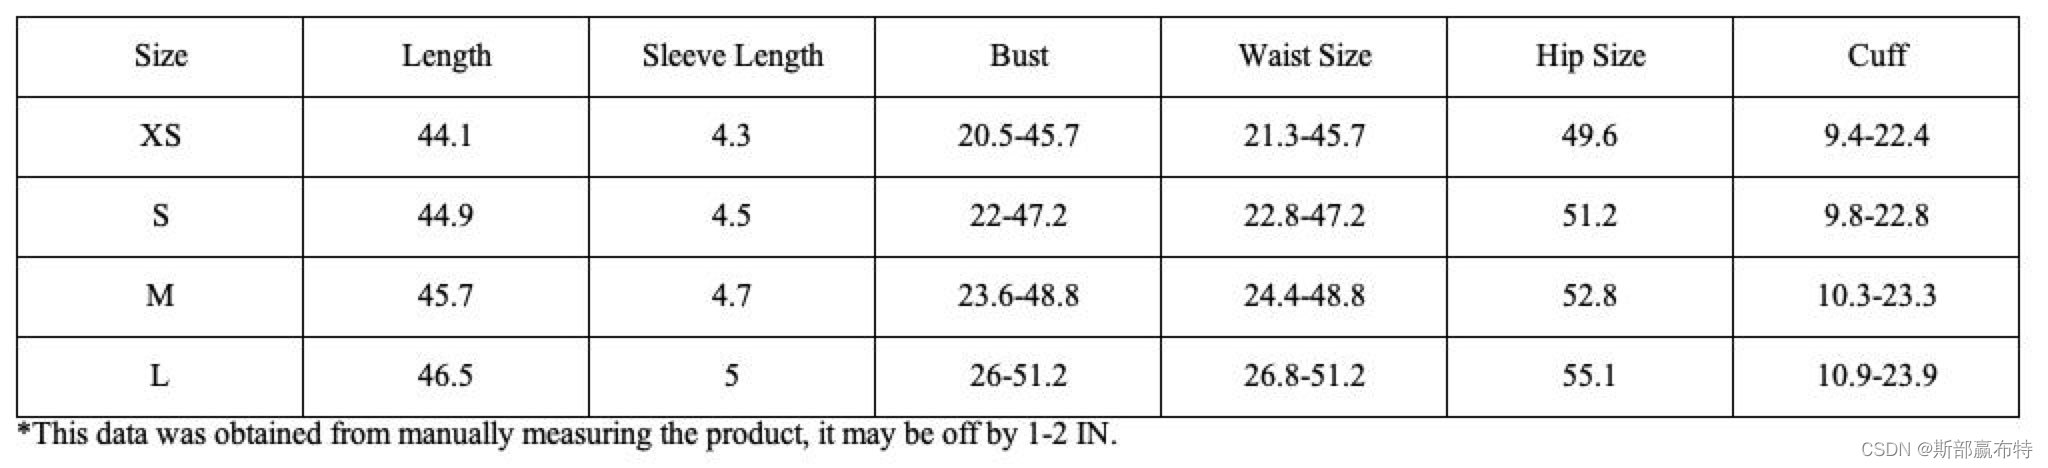
String[][] tableData2 =
{{"Size", "Length", "Sleeve Length", "Bust", "Waist Size", "Hip Size", "Cuff"},
{"XS", "44.1", "4.3", "20.5-45.7", "21.3-45.7", "49.6", "9.4-22.4"},
{"S", "44.9", "4.5", "22-47.2", "22.8-47.2", "51.2", "9.8-22.8"},
{"M", "45.7", "4.7", "23.6-48.8", "24.4-48.8", "52.8", "10.3-23.3"},
{"L", "46.5", "5", "26-51.2", "26.8-51.2", "55.1", "10.9-23.9"}};
cg.generateSizeImage(tableData2, "/Users/Downloads/test.jpg", "*This data was obtained from manually measuring the product, it may be off by 1-2 IN.");
} catch (Exception e) {
e.printStackTrace();
}
}
}
产品想要的效果是:
- 图片长1000、宽1000
- 表格水平垂直居中
- 表格内容水平垂直居中
- 表格下方加行备注
效果图:

优点:
- 可以灵活的控制图片的大小
- Graphics的drawLine、drawString方法,传参有x、y坐标,控制位置也比较灵活
缺点:
- 虽然传参x、y坐标比较灵活,但是计算x、y坐标比较繁琐,调整起来不是很方便,
- 调整表格的格式没有CSS灵活,如下图,需要一些计算

基于以上问题,我又了解了其他可以生成图片的方法,比如FreeMarker
方式二:FreeMarker
FreeMarker主要是将HTML转成图片,控制表格格式就很灵活了,做过前后端不分离项目的同学就很容易上手,但是小编的页面功底属实是负数,能调整的效果有限T_T,请担待。
话不多说,上代码。
步骤:
一、引包
   <!-- html转img -->
   <dependency>
     <groupId>gui.ava</groupId>
     <artifactId>html2image</artifactId>
     <version>2.0.1</version>
   </dependency>
   <dependency>
     <groupId>org.springframework.boot</groupId>
     <artifactId>spring-boot-starter-freemarker</artifactId>
   </dependency>
二、在resource目录下新建templates目录,新建sizeImageTemplate.ftl文件

sizeImageTemplate.ftl

<!DOCTYPE html>
<html lang="en">
<head>
    <meta charset="UTF-8">
</head>
<body>
<table style="border: 1px solid black;text-align:center;border-collapse: collapse;">
    <#list contentMap?keys as key>
        <tr>
            <#list (contentMap[key]) as field>
                <td style="border:1px solid black;height:40px;width: 140px">${field}</td>
            </#list>
        </tr>
    </#list>
</table>
<#list desc?keys as key>
    <#list (desc[key]) as field>
        ${field}
    </#list>
</#list>
</body>
</html>
三、转换类
import freemarker.template.Configuration;
import freemarker.template.TemplateException;
import gui.ava.html.Html2Image;
import gui.ava.html.renderer.ImageRenderer;
import org.springframework.ui.freemarker.FreeMarkerTemplateUtils;

import javax.imageio.ImageIO;
import java.awt.image.BufferedImage;
import java.io.ByteArrayOutputStream;
import java.io.IOException;

/**
 * Html转换图片
 *
 * @author :哈哈
 * @date :2022-09-01
 */
public class HtmlConvertImgHelper {

    Configuration configuration;

    /**
     * 初始化
     */
    public HtmlConvertImgHelper() {
        if (configuration == null) {
            configuration = SpringContextHolder.getBean(Configuration.class);
        }
    }

    /**
     * freemarker转Image
     *
     * @param fileName   ftl文件名称,需要在resources/templates目录下
     * @param formatType
     * @return
     * @throws IOException
     */
    public byte[] htmlConvertImg(String fileName, Object map, String formatType) throws IOException, TemplateException {
        String htmlText = FreeMarkerTemplateUtils.processTemplateIntoString(configuration.getTemplate(fileName), map);
        return htmlConvertImg(htmlText, formatType);
    }

    /**
     * 根据HTML内容转Image
     *
     * @param htmText    HTML文本字符串
     * @param formatType 图片类型
     */
    public byte[] htmlConvertImg(String htmText, String formatType) throws IOException {
        //最终返回的byte流
        ByteArrayOutputStream byteArrayOutputStream = new ByteArrayOutputStream();
        Html2Image html2Image = Html2Image.fromHtml(htmText);
        ImageRenderer imageRenderer = html2Image.getImageRenderer();
        BufferedImage grayPicture = imageRenderer.getBufferedImage(BufferedImage.TYPE_INT_RGB);

        ImageIO.write(grayPicture, formatType, byteArrayOutputStream);
        return byteArrayOutputStream.toByteArray();
    }
}
四、工具类
import com.google.common.collect.Lists;
import freemarker.template.TemplateException;

import java.io.FileOutputStream;
import java.io.IOException;
import java.io.OutputStream;
import java.util.HashMap;
import java.util.List;
import java.util.Map;

/**
 * 图片生成工具
 *
 * @author 哈哈
 * @date 2022/9/1
 */
public class GenerateImageUtil {

    /**
     * 生成表格
     *
     * @param contentMap 表格内容
     * @param desc 备注
     * @param path 保存路径
     * @throws TemplateException
     * @throws IOException
     */
    public static void createSizeTableImage(Map<String, List<String>> contentMap, String desc, String path) throws TemplateException, IOException {
        Map<String, List<String>> descMap = new HashMap<>();
        List<String> descList = Lists.newArrayList(desc);
        descMap.put("desc", descList);
        Map<String, Map<String, List<String>>> map = new HashMap<>();
        map.put("contentMap", contentMap);
        map.put("desc", descMap);
        byte[] bytes = new HtmlConvertImgHelper().htmlConvertImg("sizeImageTemplate.ftl", map, "jpg");
        OutputStream os = new FileOutputStream(path);
        os.write(bytes, 0, bytes.length);
        os.flush();
        os.close();
    }
}
五、测试类
import freemarker.template.TemplateException;
import lombok.extern.slf4j.Slf4j;
import org.assertj.core.util.Lists;
import org.junit.runner.RunWith;
import org.springframework.boot.test.context.SpringBootTest;
import org.springframework.test.context.junit4.SpringRunner;

import java.io.IOException;
import java.util.HashMap;
import java.util.List;
import java.util.Map;

@SpringBootTest(webEnvironment = SpringBootTest.WebEnvironment.RANDOM_PORT)
@RunWith(SpringRunner.class)
@Slf4j
public class Test {
    @org.junit.Test
    public void ccc() throws IOException, TemplateException {

        Map<String, List<String>> map1 = new HashMap<>();
        List<String> title1 = Lists.newArrayList("Size", "Length", "Sleeve Length", "Bust", "Waist Size", "Hip Size", "Cuff");
        List<String> title2 = Lists.newArrayList("XS", "44.1", "4.3", "20.5-45.7", "21.3-45.7", "49.6", "9.4-22.4");
        List<String> title3 = Lists.newArrayList("S", "44.9", "4.5", "22-47.2", "22.8-47.2", "51.2", "9.8-22.8");
        List<String> title4 = Lists.newArrayList("M", "45.7", "4.7", "23.6-48.8", "24.4-48.8", "52.8", "10.3-23.3");
        List<String> title5 = Lists.newArrayList("L", "46.5", "5", "26-51.2", "26.8-51.2", "55.1", "10.9-23.9");
        map1.put("title1", title1);
        map1.put("title2", title2);
        map1.put("title3", title3);
        map1.put("title4", title4);
        map1.put("title5", title5);

        GenerateImageUtil.createSizeTableImage(map1, "*This data was obtained from manually measuring the product, it may be off by 1-2 IN.", "/Users/Downloads/test1.jpg");
    }
}
效果图:
小编尽力了。。。我相信大佬们比我会调整页面效果
总结
以上分享了两种生成图片的方法,使用上第一种比较方便,代码量比较少,就是实现的效果上如果比较复杂的话,调整起来不太方便;第二种虽然代码量看起来比较多吧, 但是调整页面更灵活,类似于写JSP页面一样,通过值传递,在页面遍历生成行和列,然后使用style调整表格的格式,对于实现比较复杂的效果,更方便些,只需确保值传递没问题。
本次分享到此结束,谢谢大家,麻烦点个赞呗,小编谢谢了


 2084
2084


 被折叠的 条评论
为什么被折叠?
被折叠的 条评论
为什么被折叠?
 到【灌水乐园】发言


