


目录
一、前端配置ueditor
在ueditor官网(http://ueditor.baidu.com/website/download.html)下载

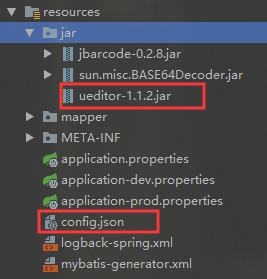
解压后除了下图红框标注外的文件全部复制到你的前端项目的资源文件夹下

复制后如下

在页面中引入ueditor写个demo方便调试(注意js文件的路径,以自己项目的读取方式为准)
<!DOCTYPE html>
<html>
<head>
    <meta charset="utf-8">
    <title>ueditor</title>
</head>
<body>

<!-- 加载编辑器的容器 -->
<script id="container" name="content" type="text/plain">
        这里写你的初始化内容
    </script>
<button onclick="getHtmlContext();" >获取html内容</button>
<button onclick="getContext();">获取内容</button>
<!-- 配置文件 -->
<script type="text/javascript" src="${basePath!}/static/ueditor/ueditor.config.js"></script>
<!-- 编辑器源码文件 -->
<script type="text/javascript" src="${basePath!}/static/ueditor/ueditor.all.js"></script>
<!-- 实例化编辑器 -->
<script type="text/javascript">
    var ue = UE.getEditor('container');

    function getHtmlContext() {
        alert(ue.getAllHtml());
    }

    function getContext() {
        alert(ue.getContent());
        console.log(ue.getContent());
    }
</script>
</body>
</html>
效果如下

二、后端配置
下载源码版本包

解压后将jsp目录下的src下的所有文件复制到项目当中,复制完如下

在pom中引入源码中的jar包
<!--UEditor依赖的jar包 -->
        <dependency>
            <groupId>org.json</groupId>
            <artifactId>json</artifactId>
        </dependency>
        <dependency>
            <groupId>commons-fileupload</groupId>
            <artifactId>commons-fileupload</artifactId>
            <version>1.3.2</version>
        </dependency>
        <dependency>
            <groupId>commons-codec</groupId>
            <artifactId>commons-codec</artifactId>
            <version>1.9</version>
        </dependency>
        <dependency>
            <groupId>commons-io</groupId>
            <artifactId>commons-io</artifactId>
            <version>2.5</version>
        </dependency>
把jsp下lib中的ueditor-1.1.2.jar放到项目中以外部jar包的方式引入
将jsp下的config.json放入到后端项目的resources下
(20200511 更新 该jar可以不用引入,上个步骤中复制的文件就是该jar反编译后的文件,直接在提示找不到类的地方改成引入我们复制的文件即可。避免打包部署后出现找不到类的情况)
在控制器层给ueditor新建一个controller,给前端ueditor读取配置文件
package com.yb.web;


import com.yb.web.baidu.ueditor.ActionEnter;;
import org.json.JSONException;
import org.springframework.web.bind.annotation.CrossOrigin;
import org.springframework.web.bind.annotation.RequestMapping;
import org.springframework.web.bind.annotation.RestController;

import javax.servlet.http.HttpServletRequest;
import javax.servlet.http.HttpServletResponse;
import java.io.IOException;
import java.io.PrintWriter;

/**
 * 富文本ueditor
 */
@RestController
@RequestMapping("/ueditor")
@CrossOrigin(allowCredentials = "true")
public class UeditorController {
    @RequestMapping(value = "/config")
    public void config(HttpServletRequest request, HttpServletResponse response) {
        response.setContentType("application/json");

        String rootPath = request.getSession().getServletContext().getRealPath("/");
        try {
            String exec = new ActionEnter(request, rootPath).exec();
            PrintWriter writer = response.getWriter();
            writer.write(exec);
            writer.flush();
            writer.close();
        } catch (IOException e) {
            e.printStackTrace();
        } catch (JSONException e) {
            e.printStackTrace();
        }
    }
}
修改ueditor下的ConfigManager的getConfigPath()方法,大约在175line
	private String getConfigPath () {
//		return this.parentPath + File.separator + ConfigManager.configFileName;
		/*此部分为手动修改*/
		try {
			// 需要先转为URI再getPath(),否则项目路径带空格或者带中文则无法读取到文件
			return this.getClass().getClassLoader().getResource("config.json").toURI().getPath();
		} catch (URISyntaxException e) {
			return null;
		}
	}
回到前端,修改ueditor.config.js
var URL = window.UEDITOR_HOME_URL || getUEBasePath();

	/**
	 * 配置项主体。注意,此处所有涉及到路径的配置别遗漏URL变量。
	 */
	window.UEDITOR_CONFIG = {

		//为编辑器实例添加一个路径,这个不能被注释
		UEDITOR_HOME_URL: URL

		// 服务器统一请求接口路径
		// , serverUrl: URL + "jsp/controller.jsp"
		, serverUrl: "http://localhost/family/ueditor/config"
回到后端,修改ueditor的BinaryUploader的save方法
	/**
	 * 修改BinaryUploader类,解决其无法获得带字节流的request的问题
	 */
	public static final State save(HttpServletRequest request,
								   Map<String, Object> conf) {

//		FileItemStream fileStream = null;
//		boolean isAjaxUpload = request.getHeader( "X_Requested_With" ) != null;

		if (!ServletFileUpload.isMultipartContent(request)) {
			return new BaseState(false, AppInfo.NOT_MULTIPART_CONTENT);
		}

//		ServletFileUpload upload = new ServletFileUpload(
//				new DiskFileItemFactory());
//
//        if ( isAjaxUpload ) {
//            upload.setHeaderEncoding( "UTF-8" );
//        }

		try {
//			FileItemIterator iterator = upload.getItemIterator(request);
//
//			while (iterator.hasNext()) {
//				fileStream = iterator.next();
//
//				if (!fileStream.isFormField())
//					break;
//				fileStream = null;
//			}
//
//			if (fileStream == null) {
//				return new BaseState(false, AppInfo.NOTFOUND_UPLOAD_DATA);
//			}

			/*========== 添加的内容 ==========*/
			MultipartHttpServletRequest multipartRequest = (MultipartHttpServletRequest) request;
			MultipartFile multipartFile = multipartRequest.getFile(conf.get("fieldName").toString());
			if (multipartFile == null) {
				return new BaseState(false, AppInfo.NOTFOUND_UPLOAD_DATA);
			}
			// 添加结束

			String savePath = (String) conf.get("savePath");
//			String originFileName = fileStream.getName();
			String originFileName = multipartFile.getOriginalFilename(); // 修改的
			String suffix = FileType.getSuffixByFilename(originFileName);

			originFileName = originFileName.substring(0,
					originFileName.length() - suffix.length());
			savePath = savePath + suffix;

			long maxSize = ((Long) conf.get("maxSize")).longValue();

			if (!validType(suffix, (String[]) conf.get("allowFiles"))) {
				return new BaseState(false, AppInfo.NOT_ALLOW_FILE_TYPE);
			}

			savePath = PathFormat.parse(savePath, originFileName);

			String path = PropertyUtil.getProperty("picPath");//配置文件图片保存路径
			String niuFloder = PropertyUtil.getProperty("niuFloder");//七牛保存文件根目录
//			String physicalPath = (String) conf.get("rootPath") + savePath;//保存文件
			savePath = niuFloder + savePath;
			String physicalPath = path + savePath;//最后保存文件的地址

//			InputStream is = fileStream.openStream();
			InputStream is = multipartFile.getInputStream();
			State storageState = StorageManager.saveFileByInputStream(is,
					physicalPath, maxSize);
			is.close();

			if (storageState.isSuccess()) {
				//将保存在本地的文件上传到七牛
				NiuCloudUtil niuCloudUtil = new NiuCloudUtil();
				String cloudFilePath = niuCloudUtil.uploadPic(physicalPath, savePath);
				File localFile = new File(physicalPath);
				if (cloudFilePath != null && !cloudFilePath.isEmpty()) {
					localFile.delete();//删除本地图片
				} else {
					cloudFilePath = new NiuCloudUtil().uploadPic(path, cloudFilePath);//上传失败,尝试重新上传
					if (localFile.exists()) {
						localFile.delete();
					}
				}
				storageState.putInfo("url", PathFormat.format(cloudFilePath));

//				storageState.putInfo("url", PathFormat.format(savePath));
				storageState.putInfo("type", suffix);
				storageState.putInfo("original", originFileName + suffix);
			}

			return storageState;
//		} catch (FileUploadException e) {
//			return new BaseState(false, AppInfo.PARSE_REQUEST_ERROR);
		} catch (IOException e) {
		}
		return new BaseState(false, AppInfo.IO_ERROR);
	}
这里需要注意的是, 默认的physicalPath读取的文件保存路径是你项目webapp路径,我把它改成了我配置文件中指定的路径(如:D:\\),而且我在文件保存在本地后将文件传到了七牛云再删除本地文件,大家可以根据需要取舍七牛云部分代码


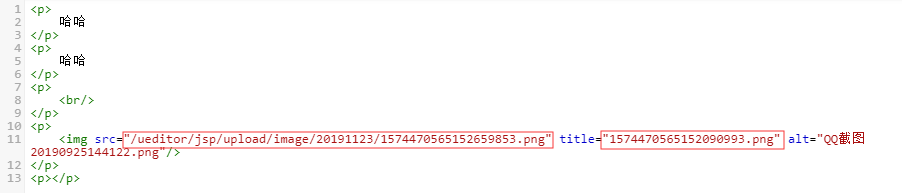
以上步骤已经可以将图片保存到服务器,但是不能在编辑器中显示,F12或者查看html发现src是文件夹路径,所以需要在后端ueditor的配置文件config.json中配置访问前缀(具体以图片在浏览器正常访问地址和src缺少前缀为准)

现在已经可以多图上传,但是单图上传依然不行。回到前端修改ueditor.all.js文件
/**
             * 改掉了ueditor源码,将本身的单文件上传的方法改为ajax上传,主要目的是为了解决跨域的问题
             */
            domUtils.on(input, 'change', function() {
                if(!input.value) return;
                var loadingId = 'loading_' + (+new Date()).toString(36);
                var imageActionUrl = me.getActionUrl(me.getOpt('imageActionName'));
                var allowFiles = me.getOpt('imageAllowFiles');

                me.focus();
                me.execCommand('inserthtml', '<img class="loadingclass" id="' + loadingId + '" src="' + me.options.themePath + me.options.theme +'/images/spacer.gif" title="' + (me.getLang('simpleupload.loading') || '') + '" >');

                /!* 判断后端配置是否没有加载成功 *!/
                if (!me.getOpt('imageActionName')) {
                    errorHandler(me.getLang('autoupload.errorLoadConfig'));
                    return;
                }
                // 判断文件格式是否错误
                var filename = input.value,
                    fileext = filename ? filename.substr(filename.lastIndexOf('.')):'';
                if (!fileext || (allowFiles && (allowFiles.join('') + '.').indexOf(fileext.toLowerCase() + '.') == -1)) {
                    showErrorLoader(me.getLang('simpleupload.exceedTypeError'));
                    return;
                }

                var params = utils.serializeParam(me.queryCommandValue('serverparam')) || '';
                var action = utils.formatUrl(imageActionUrl + (imageActionUrl.indexOf('?') == -1 ? '?' : '&') + params);
                var formData = new FormData();
                formData.append("upfile", form[0].files[0] );
                $.ajax({
                    url: action,
                    type: 'POST',
                    cache: false,
                    data: formData,
                    processData: false,
                    contentType: false,
                    success: function (data) {
                        // data = JSON.parse(data);
                        var link, loader,
                            body = (iframe.contentDocument || iframe.contentWindow.document).body,
                            result = body.innerText || body.textContent || '';
                        link = me.options.imageUrlPrefix + data.url;

                        if(data.state == 'SUCCESS' && data.url) {
                            loader = me.document.getElementById(loadingId);
                            loader.setAttribute('src', link);
                            loader.setAttribute('_src', link);
                            loader.setAttribute('title', data.title || '');
                            loader.setAttribute('alt', data.original || '');
                            loader.removeAttribute('id');
                            domUtils.removeClasses(loader, 'loadingclass');
                        } else {
                            showErrorLoader && showErrorLoader(data.state);
                        }
                        form.reset();
                    }
                });
                function showErrorLoader(title){
                    if(loadingId) {
                        var loader = me.document.getElementById(loadingId);
                        loader && domUtils.remove(loader);
                        me.fireEvent('showmessage', {
                            'id': loadingId,
                            'content': title,
                            'type': 'error',
                            'timeout': 4000
                        });
                    }
                }
            });
还是该文件,在24464中引入jq文件
/**
 * @description
 * 简单上传:点击按钮,直接选择文件上传
 * @author Jinqn
 * @date 2014-03-31
 */
UE.plugin.register('simpleupload', function (){
    var me = this,
        isLoaded = false,
        containerBtn;

    utils.loadFile(document,
        {
            src: "/familyWeb/static/ueditor/third-party/jquery-1.10.2.min.js",
            tag: "script",
            type: "text/javascript",
            defer: "defer"
        })

    function initUploadBtn(){
        var w = containerBtn.offsetWidth || 20,
此时文件可以正常上传和显示,图片保存在配置的文件路径中。
参考博客:https://blog.csdn.net/qq_38960998/article/details/83038082
三、碰到的问题
视频无法预览,在修改框中显示“插入的视频地址有误”
修改前端ueditor.all.js文件
搜索me.commands["insertvideo"]

把html.push(creatInsertStr( vi.url, vi.width || 420,  vi.height || 280, id + i, null, cl, 'image'));

修改成html.push(creatInsertStr( vi.url, vi.width || 420,  vi.height || 280, id + i, null, cl, 'video'));
修改前端ueditor.config.js文件
搜索whitList
img里面添加"_url"

video后面添加
source: ['src', 'type'],
embed: ['type', 'class', 'pluginspage', 'src', 'width', 'height', 'align', 'style', 'wmode', 'play','autoplay','loop', 'menu', 'allowscriptaccess', 'allowfullscreen', 'controls', 'preload'],
iframe: ['src', 'class', 'height', 'width', 'max-width', 'max-height', 'align', 'frameborder', 'allowfullscreen']
修改dialogs/video/video.js
搜索 function createPreviewVideo(url)

把下面的内容替换 $G("preview").innerHTML = '<video class="previewVideo" controls="controls" src="'+conUrl+'" style="width:420;height:280 "></video>';
ueditor 在上传视频之后,编辑页面,显示空白。查看html有视频,就是显示空白。修改ueditor.all.js
搜索
setContent: function (html, isAppendTo, notFireSelectionchange)
参考博客:https://www.cnblogs.com/liu-bear/p/11720498.html
正常显示的图片,在编辑器添加内容移位后变成图裂找不到
通过富文本的html代码或者F12可以看到,该图片的src已经被替换成了一个文件路径,且文件名已经变了,title标签中是正常能显示的文件名
后端debug发现,图片在移位过程会触发抓取远程图片的操作,在该操作的相关类ImageHunter中可以看到,该类去读取图片文件的地址依然是默认的去读取项目的webapp路径,而我是把图片该存到了七牛,所以这里直接把读取地址改成我的实际存储地址,如果一开始就是默认存储不会出现这个问题。

此时文件不管怎么移位都是正常显示。
多图上传的在线管理不显示图片
引发该问题的原因和上面一直,程序(FileManager)去读了源码默认指定的路径,那个路径是空的所以读不到图片。看具体源码发现它是以File的形式去读取,并适用于我七牛这种网络地址,因为暂无该需求,所以暂时隐藏该功能。
在ueditor代码文件夹下/dialogs/image/image.html,注释或删除如下两行

在layui中多图上传和视频上传的窗口被layer遮盖
修改ueditor.config.js,修改67line,把ueditor的zIndex的级别设置的比layer高就行。

回显html到编辑器上还是更新前的旧内容
问题描述:对内容编辑后,点击详情按钮查看编辑器内容还是编辑前的内容。如:“哈哈哈”改为“哈哈哈呵呵呵”,点击详情查看详情还是“哈哈哈”。
![]()

解决思路:每次弹框时创建ueditor实例,在触发按钮提交或者关闭弹窗时把实例销毁。
弹窗创建实例
![]()
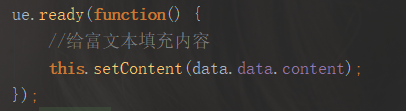
给编辑器赋值数据
提交成功或者关闭弹窗时销毁实例


每次销毁实例创建新的实例赋值即可显示正常。
多次实例ueditor编辑器的位置不一致
问题描述:第一次实例化位置正常,之后每次位置都偏移到了form的最后。
解决方法:把默认的script标签跟换为textarea

关闭自动保存
修改ueditor.config.js

修改ueditor.all.js
搜索 UE.plugin.register('autosave'
在下图位置添加代码

//是否启用自动保存判断
if (!me.getOpt('enableAutoSave')) {
    return;
}参考博客:https://blog.csdn.net/qq_31879707/article/details/54895756
图片过大超出编辑器宽度出现滚动条
在ueditor.all.js添加如下代码
'img{max-width:100%;}' +  如果是使用的ueditor.all.min.js,添加如下代码
img{max-width:100%;}
此时超出的图片是以max-width百分百比例显示
四、在Vue(cli3)中引用(20200511更新)
后端保持不变
前端
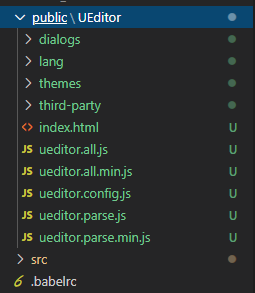
复制ueditor到项目的public下
安装
npm i vue-ueditor-wrap
# 或者
yarn add vue-ueditor-wrap引入VueUeditorWrap组件
import VueUeditorWrap from 'vue-ueditor-wrap' // ES6 Module
// 或者
const VueUeditorWrap = require('vue-ueditor-wrap') // CommonJS
注册组件
components: {
  VueUeditorWrap
}
// 或者在 main.js 里将它注册为全局组件
Vue.component('vue-ueditor-wrap', VueUeditorWrap)v-model绑定数据
<vue-ueditor-wrap ref="ueditor" v-model="msg" :destroy="false" :config="config"></vue-ueditor-wrap>data () {
return {
msg: '<h2><img src="http://img.baidu.com/hi/jx2/j_0003.gif"/>Vue + UEditor + v-model双向绑定</h2>'
}
}此时可以正常显示编辑器
根据项目需求修改配置,完整配置选项查看 ueditor.config.js 源码或 官方文档
data () {
  return {
    msg: '<h2><img src="http://img.baidu.com/hi/jx2/j_0003.gif"/>Vue + UEditor + v-model双向绑定</h2>',
    config: {
                // 编辑器不自动被内容撑高
                autoHeightEnabled: false,
                // 初始容器高度
                initialFrameHeight: 500,
                // 初始容器宽度
                initialFrameWidth: '100%',
                // 上传文件接口(这个地址是我为了方便各位体验文件上传功能搭建的临时接口,请勿在生产环境使用!!!)
                // serverUrl: 'http://35.201.165.105:8000/controller.php'
                serverUrl: this.$http+'/ueditor/config',
                // UEditor 资源文件的存放路径,如果你使用的是 vue-cli 生成的项目,通常不需要设置该选项,vue-ueditor-wrap 会自动处理常见的情况,如果需要特殊配置,参考下方的常见问题2
                UEDITOR_HOME_URL: process.env.BASE_URL + 'UEditor/',
                // 配合最新编译的资源文件,你可以实现添加自定义Request Headers,详情https://github.com/HaoChuan9421/ueditor/commits/dev-1.4.3.3
                // headers: {
                //   access_token: '37e7c9e3fda54cca94b8c88a4b5ddbf3'
                // }
                // 层级 解决编辑器弹出框被遮挡问题
                zIndex: 99999,
                // 自定义菜单栏
                toolbars: [[
                    'fullscreen', 'source'
                ]]
    }
  }
}
至此编辑器可以正常使用
vue整合来源:https://blog.csdn.net/haochuan9421/article/details/81975966


 2287
2287


 被折叠的 条评论
为什么被折叠?
被折叠的 条评论
为什么被折叠?
 到【灌水乐园】发言


