获取SpringBoot项目骨架
使用IDE新建Spring应用选择依赖 或 在http://start.spring.io/ 选择web(thymeleaf会自动包含web)技术下载压缩包,解压,导入即可。换了maven镜像仓库可能找不到依赖。此时就直接用第二种方法简单
SpringBoot中的SpringMVC和Thymeleaf的使用
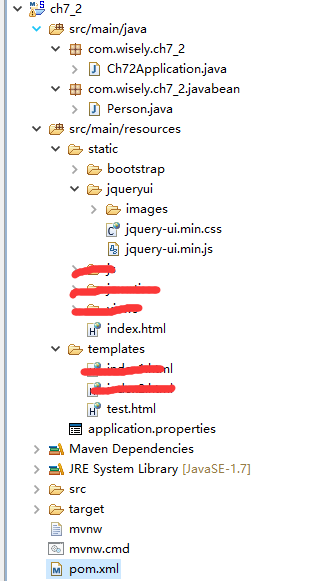
说明:划掉的与本例无关。
注意:
index.html可以被localhost:8080/直接访问 同理还有public META-NF resources下的index
修改名称就不行,这里Springboot默认静态首页index.html,并且该映射不因addViewController被重写而覆盖
把任何页面放入templates需要使用controller跳转。无法直接访问,默认是templates,通过TemplatResolver bean修改
此处使用SpringMVC所以用test.html,通过controller
static文件中的默认不会被拦截,可以直接访问,一般存放js,cs
本项目结构
pom 文件
<?xml version="1.0" encoding="UTF-8"?>
<project xmlns="http://maven.apache.org/POM/4.0.0" xmlns:xsi="http://www.w3.org/2001/XMLSchema-instance"
	xsi:schemaLocation="http://maven.apache.org/POM/4.0.0 http://maven.apache.org/xsd/maven-4.0.0.xsd">
	<modelVersion>4.0.0</modelVersion>

	<groupId>com.wisely</groupId>
	<artifactId>ch7_2</artifactId>
	<version>0.0.1-SNAPSHOT</version>
	<packaging>jar</packaging>

	<name>ch7_2</name>
	<description>Demo project for Spring Boot</description>
	<!-- 父级依赖,识别为SpringBoot项目 -->
	<parent>
		<groupId>org.springframework.boot</groupId>
		<artifactId>spring-boot-starter-parent</artifactId>
		<version>1.5.8.BUILD-SNAPSHOT</version>
		<relativePath /> <!-- lookup parent from repository -->
	</parent>
	<!-- 输出和源文件编码和jdk版本 -->
	<properties>
		<project.build.sourceEncoding>UTF-8</project.build.sourceEncoding>
		<project.reporting.outputEncoding>UTF-8</project.reporting.outputEncoding>
		<java.version>1.7</java.version>
	</properties>

	<dependencies>
		<!-- 会自动包含web -->
		<dependency>
			<groupId>org.springframework.boot</groupId>
			<artifactId>spring-boot-starter-thymeleaf</artifactId>
		</dependency>
		<dependency>
			<groupId>org.springframework.boot</groupId>
			<artifactId>spring-boot-starter-web</artifactId>
		</dependency>

		<!-- 测试环境不被发布 -->
		<dependency>
			<groupId>org.springframework.boot</groupId>
			<artifactId>spring-boot-starter-test</artifactId>
			<scope>test</scope>
		</dependency>
	</dependencies>

	<build>
		<plugins>
			<plugin>
				<groupId>org.springframework.boot</groupId>
				<artifactId>spring-boot-maven-plugin</artifactId>
			</plugin>
		</plugins>
	</build>
	<!-- 正式版无需以下 -->
	<repositories>
		<repository>
			<id>spring-snapshots</id>
			<name>Spring Snapshots</name>
			<url>https://repo.spring.io/snapshot</url>
			<snapshots>
				<enabled>true</enabled>
			</snapshots>
		</repository>
		<repository>
			<id>spring-milestones</id>
			<name>Spring Milestones</name>
			<url>https://repo.spring.io/milestone</url>
			<snapshots>
				<enabled>false</enabled>
			</snapshots>
		</repository>
	</repositories>

	<pluginRepositories>
		<pluginRepository>
			<id>spring-snapshots</id>
			<name>Spring Snapshots</name>
			<url>https://repo.spring.io/snapshot</url>
			<snapshots>
				<enabled>true</enabled>
			</snapshots>
		</pluginRepository>
		<pluginRepository>
			<id>spring-milestones</id>
			<name>Spring Milestones</name>
			<url>https://repo.spring.io/milestone</url>
			<snapshots>
				<enabled>false</enabled>
			</snapshots>
		</pluginRepository>
	</pluginRepositories>


</project>
本项目使用的javabean
package com.wisely.ch7_2.javabean;

/**
 * javabean
 *
 * @author 梦境迷离
 *
 */
public class Person {

	public String getName() {
		return name;
	}

	public void setName(String name) {
		this.name = name;
	}

	public Integer getAge() {
		return age;
	}

	public Person() {
		super();
	}

	public Person(String name, Integer age) {
		super();
		this.name = name;
		this.age = age;
	}

	public void setAge(Integer age) {
		this.age = age;
	}

	private String name;
	private Integer age;

}
页面
<!DOCTYPE html>
<html xmlns:th="http://www.thymeleaf.org">
<head>
<!-- 必须放在前面 -->
	<meta content="text/html;charset=UTF-8" />
	<meta http-equiv="X-UA_Compatible" content="IE=edge" />
	<meta name="viewport" content="width=device-width,initial-scale=1" />

	<title>index.html</title>
	<!-- thymeleaf引用样式 -->
	<link th:href="@{bootstrap/css/bootstrap.min.css}" rel="stylesheet" />
	<link th:href="@{bootstrap/css/bootstrap-theme.min.css}" rel="stylesheet" />

</head>

<body>

	<div class="panel panel-primary">
		<div class="panel-heading">
			<h3 class="panel-title">访问model</h3>
		</div>
		<div class="panel-body">
			<span th:text="${singlePerson.name}"></span>
		</div>
	</div>

	<div th:if="${not #lists.isEmpty(people)}">
		<div class="panel panel-primary">
			<div class="panel-heading">
				<h3 class="panel-title">列表</h3>
			</div>
			<div class="panel-body">
				<ul class="list-group">
					<li class="list-group-item" th:each="person:${people}"><span
						th:text="${person.name}"></span> <span th:text="${person.age}"></span>
						<button class="btn"
							th:οnclick="'getName(\'' + ${person.name} + '\');'">获得名字</button>
					</li>
				</ul>
			</div>
		</div>
	</div>
	<!-- thymeleaf引入js  -->
	<script th:src="@{jquery-2.0.0.min.js}" type="text/javascript"></script>
	<script th:src="@{bootstrap/js/bootstrap.min.js}"></script>
	<script th:inline="javascript">
	var single = [[${singlePerson}]];
	console.log(single.name+"/"+single.age);
	function getName(name) {
		console.log(name);
	}
	</script>
</body>
</html>
控制器和配置
说明:https配置部分可以忽略,因为要生成SSL与springmvc无关,,注释掉即可
package com.wisely.ch7_2;

import java.util.ArrayList;
import java.util.List;
import com.wisely.ch7_2.javabean.Person;
import org.apache.catalina.Context;
import org.apache.catalina.connector.Connector;
import org.apache.tomcat.util.descriptor.web.SecurityCollection;
import org.apache.tomcat.util.descriptor.web.SecurityConstraint;
import org.springframework.boot.SpringApplication;
import org.springframework.boot.autoconfigure.SpringBootApplication;
import org.springframework.boot.context.embedded.EmbeddedServletContainerFactory;
import org.springframework.boot.context.embedded.tomcat.TomcatEmbeddedServletContainerFactory;
import org.springframework.context.annotation.Bean;
import org.springframework.http.MediaType;
import org.springframework.stereotype.Controller;
import org.springframework.ui.Model;
import org.springframework.web.bind.annotation.RequestMapping;
import org.springframework.web.bind.annotation.ResponseBody;
import org.springframework.web.servlet.config.annotation.WebMvcConfigurerAdapter;

// 这里启动类里面放了控制器与配置信息,仅仅是为了方便,希望不要效仿。
@Controller
@SpringBootApplication
public class Ch72Application extends WebMvcConfigurerAdapter {

	public static void main(String[] args) {
		SpringApplication.run(Ch72Application.class, args);
	}

	 @RequestMapping("/")
	 public String inde(Model model) {
	 Person single = new Person("aa",11);

	 List<Person> people = new ArrayList<Person>();

	 Person person1 = new Person("张三",11);
	 Person person2 = new Person("李四",22);
	 Person person3 = new Person("王五",33);
	 people.add(person1);
	 people.add(person2);
	 people.add(person3);

	 model.addAttribute("singlePerson",single);
	 model.addAttribute("people",people);

	 return "test";

	 }
	/**
	 * 特点的服务器配置,tomcat
	 *
	 * @return
	 */
	@Bean
	public EmbeddedServletContainerFactory servletContainer() {
		TomcatEmbeddedServletContainerFactory tomcat = new TomcatEmbeddedServletContainerFactory() {
			/**
			 * 重写postProcessContext方法
			 */
			@Override
			protected void postProcessContext(Context context) {
				SecurityConstraint securityConstraint = new SecurityConstraint();
				securityConstraint.setUserConstraint("CONFINDENTIAL");
				SecurityCollection collection = new SecurityCollection();
				collection.addPattern("/*");
				securityConstraint.addCollection(collection);
				context.addConstraint(securityConstraint);

			}

		};
		// 添加tomcat的connector
		tomcat.addAdditionalTomcatConnectors(httpConnector());
		return tomcat;
	}

	/**
	 * 将http强制重定向至https
	 *
	 * @return
	 */
	@Bean
	public Connector httpConnector() {

		Connector connector = new Connector(
				"org.apache.coyote.http11.Http11NioProtocol");
		connector.setScheme("http");
		connector.setPort(8080);
		connector.setSecure(false);
		connector.setRedirectPort(8443);// 重定向端口 https
		return connector;
	}
}
注意:
如果需要更改默认的视图引擎 服务器,需要继承WebMvcConfigurerAdapter。如果需要完全控制MVC的配置,则在@Configuration注解的类上加@EnableWebMvc。这里thymeleaf是使用默认的自动配置
application.properies配置
说明:主要是SSL配置,还没有学到或者看不懂可以忽略,不影响使用Thyemeleaf。使用https,则无论输入http://localhost:8080还是https://localhost:8443都可以访问,前者被强转定向到https.
集成Thymeleaf3.0
如果报错标签没有闭合可以添加属性配置或者使用thymeleaf3.0【添加pom的红色部分】
  <properties>
<thymeleaf.version>3.0.0.RELEASE</thymeleaf.version>
	<thymeleaf-layout-dialect.version>2.0.0</thymeleaf-layout-dialect.version>
        <project.build.sourceEncoding>UTF-8</project.build.sourceEncoding>
        <project.reporting.outputEncoding>UTF-8</project.reporting.outputEncoding>
        <java.version>1.7</java.version>
</properties>
当然也可以继续使用Thymeleaf2.x,但是需要配置
#解析非严格的html5
spring.thymeleaf.mode=LEGACYHTML5
并增加依赖
   <dependency>
	 <groupId>net.sourceforge.nekohtml</groupId>
	<artifactId>nekohtml</artifactId>
	<version>1.9.22</version>
  </dependency>
#以下都是默认配置
#server.port=80
##单位是秒,默认是30分钟
#server.session-timeout=30*60
#访问路径
#server.context-path=/
#tomcat编码
#server.tomcat.uri-encoding=utf-8
#是否开启tomcat压缩
#server.tomcat.compression=off
server.port = 8443下面都是https配置,上面没有配置,则下面不需要加上
server.ssl.key-store = .keystore https证书的文件 classpath下
server.ssl.key-store-password = https证书密码
server.ssl.keyStoreType = JKS 密钥类型
server.ssl.keyAlias: tomcat 证书别名
调试/启动项目
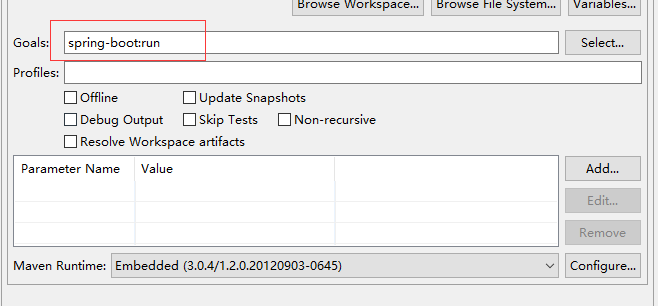
SPringBoot可以使用maven启动 或者以普通java程序启动 【tomcat当然可以】
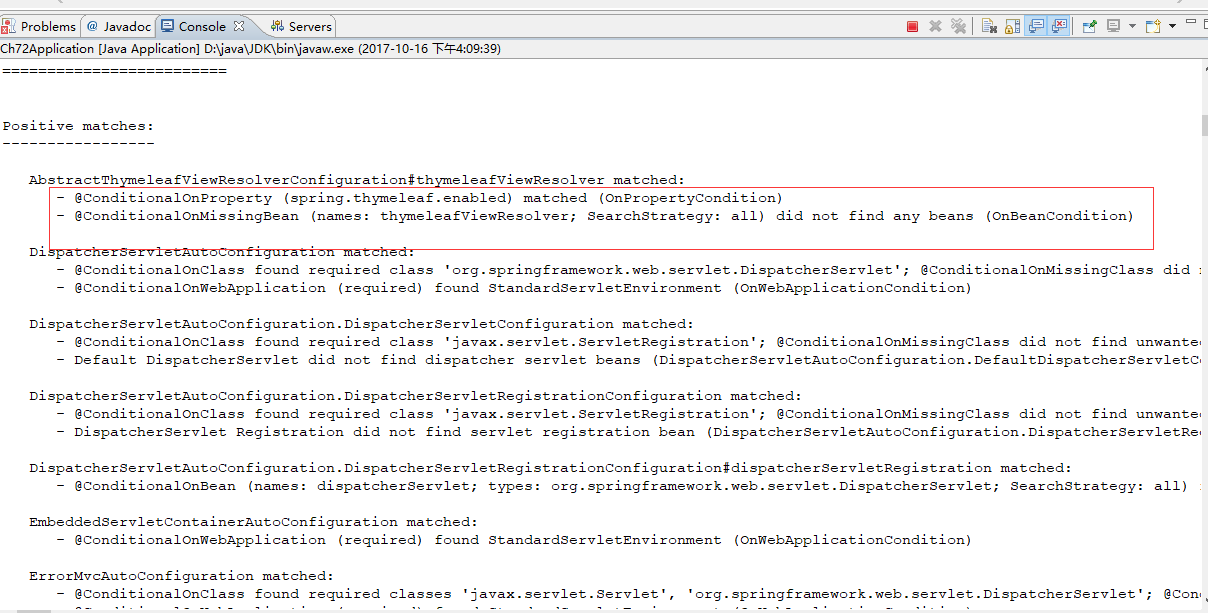
可以添加debug=true 查看自动配置的相信信息。
观察控制台自动配置信息
@SpringBootApplication相当与组合了 自动配置注解与自动扫描注解
即@SpringBootApplication注解等价于以默认属性使用@Configuration,@EnableAutoConfiguration和@ComponentScan:
控制台打印出许多自动配置的信息均是由组合注解@SpringBootApplication来完成 。
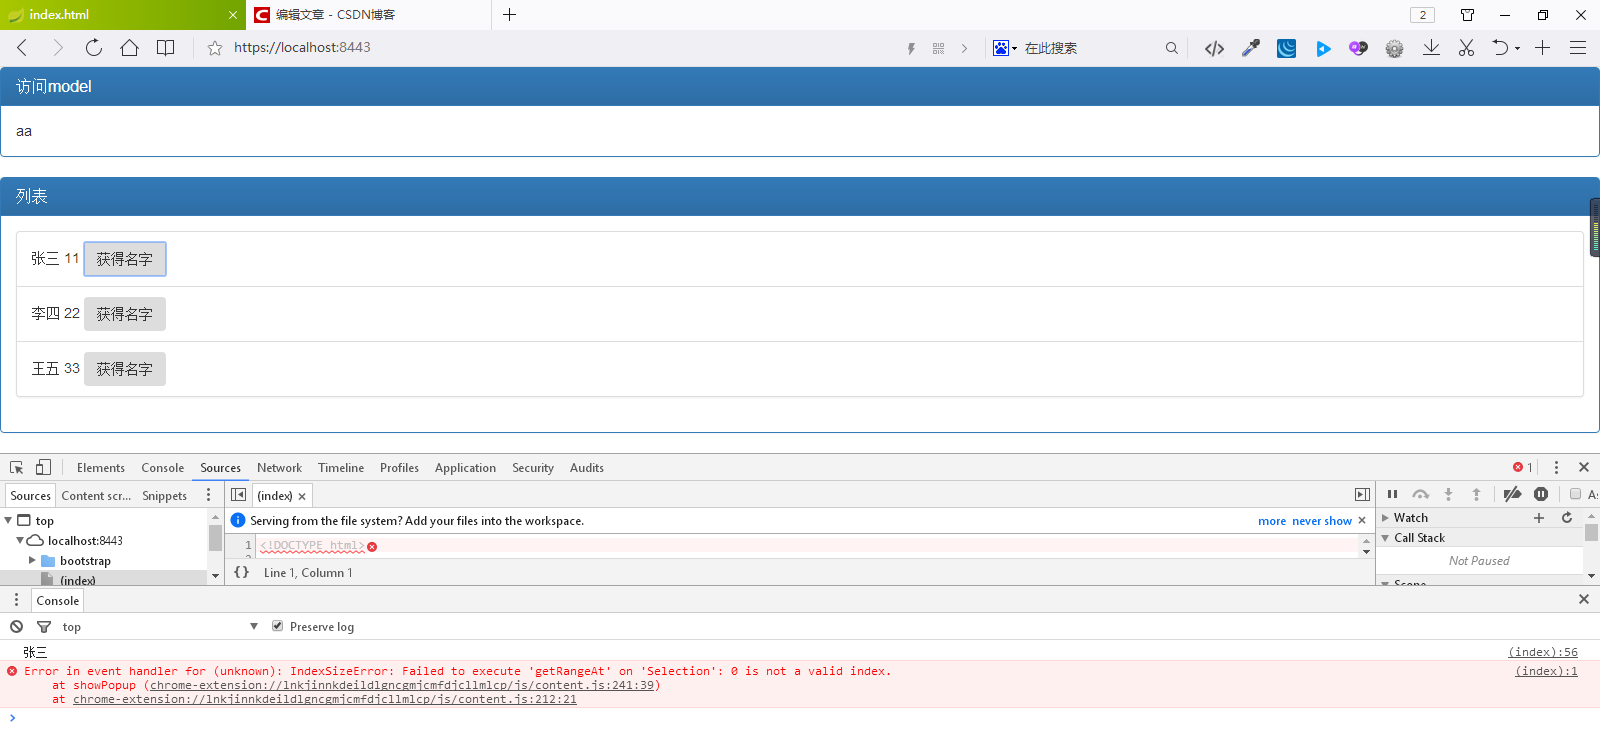
访问https://localhost:8443/ 【没有配置https的8080】
下面这个红色应该是浏览器问题。不影响。
参考 JavaEE开发的颠覆者: Spring Boot实战、SpringBoot文档,Break易站 http://www.breakyizhan.com/springboot/3096.html
改于2018年5月3日


 3571
3571

 被折叠的 条评论
为什么被折叠?


