1、demo.html
<!DOCTYPE html>
<html>
<head>
<meta charset="utf-8">
<title>Create a hover effect</title>
<meta name="viewport" content="initial-scale=1,maximum-scale=1,user-scalable=no">
<link href="https://api.mapbox.com/mapbox-gl-js/v3.1.2/mapbox-gl.css" rel="stylesheet">
<script src="https://api.mapbox.com/mapbox-gl-js/v3.1.2/mapbox-gl.js"></script>
<style>
body { margin: 0; padding: 0; }
#map { position: absolute; top: 0; bottom: 0; width: 100%; }
</style>
</head>
<body>
<div id="map"></div>
<script>
	// TO MAKE THE MAP APPEAR YOU MUST
	// ADD YOUR ACCESS TOKEN FROM
	// https://account.mapbox.com
	mapboxgl.accessToken = 'YOUR_MAPBOX_ACCESS_TOKEN';
    const map = new mapboxgl.Map({
        container: 'map',
        // Choose from Mapbox's core styles, or make your own style with Mapbox Studio
        style: 'mapbox://styles/mapbox/streets-v12',
        center: [-100.486052, 37.830348],
        zoom: 2
    });
    let hoveredPolygonId = null;

    map.on('load', () => {
        map.addSource('states', {
            'type': 'geojson',
            'data': 'https://docs.mapbox.com/mapbox-gl-js/assets/us_states.geojson'
        });

        // The feature-state dependent fill-opacity expression will render the hover effect
        // when a feature's hover state is set to true.
        map.addLayer({
            'id': 'state-fills',
            'type': 'fill',
            'source': 'states',
            'layout': {},
            'paint': {
                'fill-color': '#627BC1',
                'fill-opacity': [
                    'case',
                    ['boolean', ['feature-state', 'hover'], false],
                    1,
                    0.5
                ]
            }
        });

        map.addLayer({
            'id': 'state-borders',
            'type': 'line',
            'source': 'states',
            'layout': {},
            'paint': {
                'line-color': '#627BC1',
                'line-width': 2
            }
        });

        // When the user moves their mouse over the state-fill layer, we'll update the
        // feature state for the feature under the mouse.
        map.on('mousemove', 'state-fills', (e) => {
            if (e.features.length > 0) {
                if (hoveredPolygonId !== null) {
                    map.setFeatureState(
                        { source: 'states', id: hoveredPolygonId },
                        { hover: false }
                    );
                }
                hoveredPolygonId = e.features[0].id;
                map.setFeatureState(
                    { source: 'states', id: hoveredPolygonId },
                    { hover: true }
                );
            }
        });

        // When the mouse leaves the state-fill layer, update the feature state of the
        // previously hovered feature.
        map.on('mouseleave', 'state-fills', () => {
            if (hoveredPolygonId !== null) {
                map.setFeatureState(
                    { source: 'states', id: hoveredPolygonId },
                    { hover: false }
                );
            }
            hoveredPolygonId = null;
        });
    });
</script>

</body>
</html>
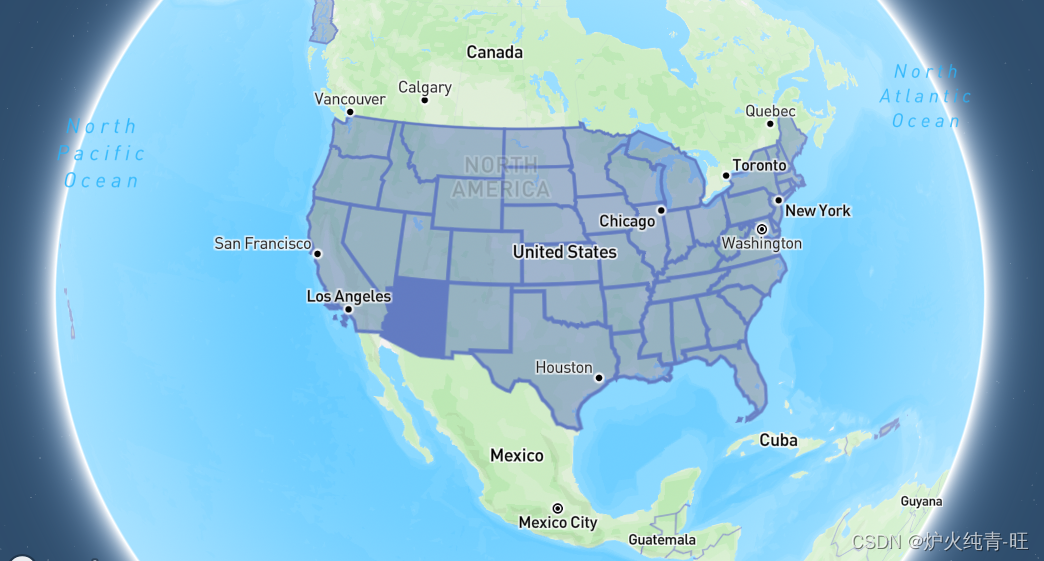
2、效果截图
3、代码解析
-
添加图层数据源
map.addSource('states', {
    'type': 'geojson',
    'data': 'https://docs.mapbox.com/mapbox-gl-js/assets/us_states.geojson'
});
-
添加面图层
map.addLayer({
    'id': 'state-fills',
    'type': 'fill',
    'source': 'states',
    'layout': {},
    'paint': {
    'fill-color': '#627BC1',
    'fill-opacity': [
        'case',
        ['boolean', ['feature-state', 'hover'], false],
            1,
            0.5
        ]
    }
});
-
添加线图层
map.addLayer({
    'id': 'state-borders',
    'type': 'line',
    'source': 'states',
    'layout': {},
    'paint': {
        'line-color': '#627BC1',
        'line-width': 2
    }
});
-
注册鼠标移入事件
map.on('mousemove', 'state-fills', (e) => {
    if (e.features.length > 0) {
        if (hoveredPolygonId !== null) {
            map.setFeatureState(
                { source: 'states', id: hoveredPolygonId },
                { hover: false }
            );
        }
        hoveredPolygonId = e.features[0].id;
        map.setFeatureState(
            { source: 'states', id: hoveredPolygonId },
            { hover: true }
        );
    }
});
-
注册鼠标移出事件
map.on('mouseleave', 'state-fills', () => {
    if (hoveredPolygonId !== null) {
        map.setFeatureState(
            { source: 'states', id: hoveredPolygonId },
            { hover: false }
        );
    }
    hoveredPolygonId = null;
});


 1359
1359


 被折叠的 条评论
为什么被折叠?
被折叠的 条评论
为什么被折叠?
 到【灌水乐园】发言


