


一,koa 操作数据库学习
koa 操作MySQL数据库
在学习了一段时间nodejs后,想通过nodejs连接数据库。期间遇到很多比较麻烦的问题,在这里简单记录一下
在koa中安装MYSQL数据库
1,windows下安装MySQL数据库
首先在MYSQL官方网站选择版本进行下载安装。这里在学习阶段我选择安装的是社区版。安装配置过程参考网上教程,安装成功后测试是否能正常连接。如图所示输入用户名密码后登录即成功。

2,Sequelize 介绍
关系型数据库需要通过SQL语言来存取数据,但是书写SQL需要一定的技术能力,并且不恰当的SQL语句会带来SQL注入漏洞。在node.js 中,一般采用Sequelize这个ORM类库来操作数据库。
首先通过NPM来安装Sequelize库,命令如下:
npm install sequelize --save
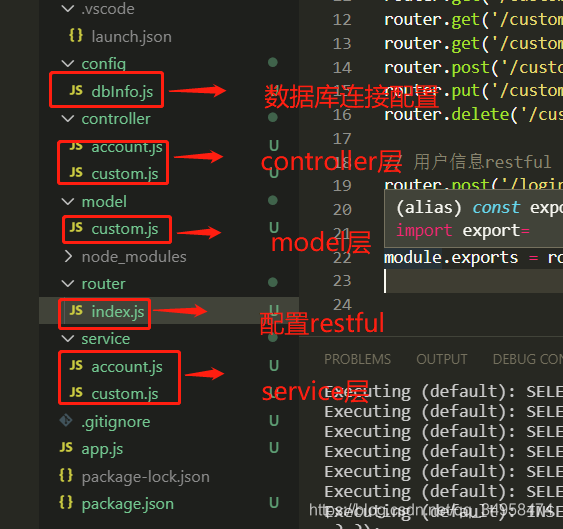
这里以一个简单的登录系统为例,我们首先需要维护账户信息,访客的信息。如图所示最终的文件目录结构
Sequelize 使用
本次学习示例 git 地址
- 在进行增删改查操作前我们先在数据库中创建一个数据库连接进行测试。
const Sequelize = require('sequelize');
const sequelize = new Sequelize('database', 'username','password',{
	host: 'localhost',  // 数据库服务器地址
	port: '3306', // 端口默认3306,可以不配置
	dialect: 'mysql',  // SQL 语言类型
	pool: {   //连接池设置
    	max: 5, //最大连接数
    	min: 0, //最小连接数
    	idle: 10000
    },
});
sequelize.authenticate().then(() => {
	console.log('conntected');
}).catch(err => {
	console.error(err);
});
- 通过Sequelize 我们可直接定义数据模型来创建数据库表,而不需要通过SQL来进行创建。通过define 方法来进行创建。如下
// 用户信息表
const Account = sequelize.define('account', {
  id: {
	type: Sequelize.UUID,
	allowNull: false,
  },
  username: {
    type: Sequelize.STRING,
    unique: true, // 这里通过unique 设置用户名必须唯一,不允许重复。
    allowNull: false, // 不允许为空
    primaryKey: true, // 设置主键
  },
  password: {
    type: Sequelize.STRING,
    allowNull: false,
  },
  role: {
    type: Sequelize.STRING,
    allowNull: false,
  },
},{
	tableName: 'my_table',  // 修改表名
	timestamps: true,  // 默认为true, false禁止创建createAt,updateAt 字段
	updateAt: 'updateTimestamp', // 创建updateTimestamp字段来代替updateAt 字段。
});
// 这里可以不定义id, 则表在创建时默认会为我们创建id字段。
Sequelize默认创建的表为上边define 定义的模型的复数,即原来创建出来的表名是 accounts , 可在上方通过define方法的第三个参数中tableName 中进行自定义。
Sequelize 默认会为创建的表自动创建createdAt, updateAt 字段。
- 在定义模型时,也可以为字段定义Getter,Setter,这样即可定义计算字段,也可以定义写入数据的规则。
// 顾客信息表
const Customer = sequelize.define('customer', {
  name: {
    type: Sequelize.STRING,
    allowNull: false,
  },
  enName: {
	type: Sequelize.STRING,
	set(val){		// 这里定义Setter,可在写入数据库前处理数据。
		this.setDataValue('enName', val.toUpperCase());
	}
  },
  sex: {
    type: Sequelize.ENUM(['男', '女']),
    allowNull: false,
  },
  address: {
    type: Sequelize.STRING,
  },
  fullAddress: {
    type: Sequelize.STRING,
    get() {  // 定义Getter,可自定义获取数据
      return `${this.getDataValue('country')}${this.getDataValue('city')}${this.getDataValue('address')}`;
    },
  },
  email: {
    type: Sequelize.STRING,
    allowNull: false,
  },
  phone: {
    type: Sequelize.STRING,
  },
  country: {
    type: Sequelize.STRING,
  },
  city: {
    type: Sequelize.STRING,
  },
});
通过sync方法将定义的模型同步到数据库中。既可同步单个表,也可全部同步。
// 全部同步
sequelize.sync().then(() => {
	console.log('the tables have been created');
}).catch(err => {
	throw new Error(err);
});
// 单表同步
Account.sync();
Account.sync({force: true}); // 强制同步,当数据库中已存在表时,先删除表后创建。
如图所示创建成功


查询数据:
Sequelize 提供findAll 方法来查询数据。
await Account.findAll();
上述代码将查出所有的字段,可以通过attributes进行指定我们想展示的字段,通过order 来设置输出的排序规则
await Customer.find({ // 查询name, sex 字段.
	attributes:['name', 'sex'],
	order: [
        ['updatedAt', 'DESC'],
    ],
});
通过where 参数来配置查询条件。如下所示模糊查询name
const { Op } = require('sequelize');
where: {
   name: {
     [Op.like]: `${name}%`
   }
 }
除此之外还有 findById, findOne, find, findAndCountAll 等方法。
新增,删除,修改数据:
create 方法。
Account.create(account); // account 为传入的用户对象,可通过设置name 的unique 属性来使用户名唯一。
Account.update(account); // 更新操作
account.destroy();  // 要删除的数据实体
完整示例代码
以account 为例
dbInfo.js
const config = {
  database: 'cauth', // 使用哪个数据库
  username: 'root', // 用户名
  password: '', // 口令
  host: 'localhost', // 主机名
  port: '3306',
  dialect: 'mysql',
};

module.exports = config;
model 层:
const Sequelize = require('sequelize');
const config = require('../config/dbInfo');

const sequelize = new Sequelize(config.database, config.username, config.password, {
  host: config.host,
  port: config.port,
  dialect: config.dialect,
  pool: {   //连接池设置
    max: 5, //最大连接数
    min: 0, //最小连接数
    idle: 10000
  },
});
// 用户信息表
const Account = sequelize.define('account', {
  username: {
    type: Sequelize.STRING,
    allowNull: false,
  },
  password: {
    type: Sequelize.STRING,
    allowNull: false,
  },
  role: {
    type: Sequelize.STRING,
    allowNull: false,
  },
});
Account.sync({ force: false });
module.exports = {
  Account,
};
service 层
const { Account } = require('../model/custom');

class AccountService {
 // 通过id获取当前查询的实例
  async getAccountById(id) {
    return Account.findAll({
      where: {
        id: id,
      },
    });
  };
  // 通过username 来查询
  async getAccountByUserName(name) {
    return Account.findAll({
      where: {
        username: name,
      },
    });
  };
  // 新增账户
  async createAccount(account) {
    return Account.create(account);
  };
  // 更新账户
  async updateAccount(id, account) {
    const item = await getAccountById(id);
    if (item) {
      return item.update(account);
    } else {
      throw new Error('the account with id is not exist!');
    }
  };
};
module.exports = new AccountService();
controller 层
const AccountService = require('../service/account');

module.exports = {
  login: async (ctx, next) => {
    const { username, password } = ctx.request.body;
    const account = AccountService.getAccountByUserName(username);
    if (account) {
      if (password === account.password) {
        ctx.body = {
          status: 0,
          msg: 'success',
          data: account,
        };
      } else {
        ctx.body = {
          status: 1,
          msg: '密码错误!',
        }
      }
    } else {
      ctx.body = {
        status: 1,
        msg: '用户信息不存在!',
      }
    }
  },
  addAccount: async (ctx, next) => {
    const account = ctx.request.body;
    const count = AccountService.getAccountByUserName(account.username);
    ctx.type = 'json';
    if (count > 0) {
      ctx.body = {
        status: 1,
        msg: '当前用户名已存在!',
      };
    } else {
      await AccountService.createAccount(account);
      ctx.type = 'json';
      ctx.body = {
        status: 0,
      };
    }
  },
  updateAccount: async (ctx, next) => {
    const id = ctx.params.id;
    const account = ctx.request.body;
    await AccountService.updateAccount(id, account);
    ctx.type = 'json';
    ctx.body = {
      status: 0,
    };
  },
}
router路由:
const router = require('koa-router')();
const customController = require('../controller/custom');
const accountController = require('../controller/account');

// router.get('/', homeController.index);
router.get('/', async ctx => {
  ctx.body = '<h2>测试</h2>';
});

// 顾客信息restful
router.get('/customer/list', customController.getAllCustomers);
router.get('/customerById/:id', customController.getCustomerById);
router.get('/customerByName/:name', customController.getCustomerByName);
router.post('/customer', customController.addCustomer);
router.put('/customer/:id', customController.updateCustomer);
router.delete('/customer/:id', customController.deleteCustomer);

// 用户信息restful
router.post('/login', accountController.login);
router.post('/account', accountController.addAccount);
router.put('/account', accountController.updateAccount);
module.exports = router;
app.js
const Koa = require('koa');
const bodyParser = require('koa-bodyparser');
const router = require('./router');
const app = new Koa();
app.use(bodyParser());

app.use(router.routes());
app.listen(3004, () => {
  console.log('Server is running!');
});
新增操作:通过postman模拟调用接口如下所示。

查询结果:fullAddress 没在数据库中存储,而是通过get方法取出

koa 操作mongoDB
。。。


 2105
2105


 被折叠的 条评论
为什么被折叠?
被折叠的 条评论
为什么被折叠?
 到【灌水乐园】发言


