


勿以浮沙筑高台
什么是SpringBoot?
SpringBoot基于Spring,是基于web开发框架做了很多很多的衍生,做了很多很多的插件的集成,比如我们去链接rebbitmq,redis,elasticsearch,在SpringBoot里面只要引用一个jar包就可以搞定,并且搭建SSM框架以前需要一小时二小时去写框架,可能还并不完善,但是在SpringBoot中只需要3-5分钟就可以搞定,内部还提供了许多的注解和集群的插件,我直接开箱即用,上手起来非常的容易。
Spring官网:https://spring.io/
SpringBoot
搭建SpringBoot项目
环境准备
文档准备
进入官网,点开文档,发现是html将html改为pdf既可以下载。
文档地址:https://docs.spring.io/spring-boot/docs/current/reference/pdf/
进入官网,点开文档,html页面下,点击Getting Started
环境要求地址:
https://docs.spring.io/spring-boot/docs/current/reference/html/getting-started.html#getting-started
创建项目
- file->newproject->Spring Initializr

- 建立分组和选择JavaJDK版本

- 选择构建的骨架,这里我选择maven。

- 继续下一步选择项目地址

5.这个时候我们就创建了一个springboot项目
项目运行
本地运行
默认生成一个启动类文件DemoApplication,直接运行就可以了
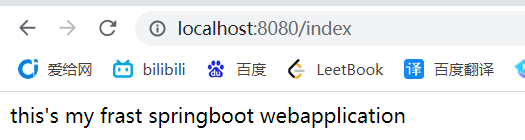
- 编写代码
@RestController public class User { @GetMapping("/index") public String index(){ String context = "this's my first springboot webapplication"; System.out.println(context); return context; } } - 运行DemoApplication方法
- 成功
Linux运行
- 在pom.xml中直接设置入口类
<build> <plugins> <plugin> <!--自带的插件--> <groupId>org.springframework.boot</groupId> <artifactId>spring-boot-maven-plugin</artifactId> <configuration> <mainClass>com.springboot.demo.user.controller.User</mainClass> </configuration> </plugin> </plugins> </build> - 点击maven的package

3.将生的Jar包上传到linux中直接启动就可以访问
配置文件
在SpringBoot有2种配置文件一种是application.yml另一种是application.properties
在项目中我们yml配置文件较多。
配置端口
server:
 port: 8080
YAML语法:
k:(空格)v:表示一对键值对(空格必须有);
以空格的缩进来控制层级关系;只要是左对齐的一列数据,都是同一个层级的
一般都是空格或者tab进行缩进
 ```java
 server:
  #端口号
  port: 8080
  #根目录
  servlet:
  	context-path:/mr-fu
属性注入
普通注入
    ##属性注入
  name1: "你好\n啊"   #会发生转义
  name2: '你好\n啊'	#不会发生转义
调用的时候需要在方法标注@Value注解
@RestController
public class User {
   @Value("${name1:default}")
   public String name1;
   @Value("${name2:default}")
   public String name2;

   @GetMapping("/index")
   public String index(){
       String context = "this's my first springboot webapplication";
       System.out.println(context);
       System.out.println(name1);
       System.out.println(name2);
       return  context;
   }
}
结果

对象注入
定义对象,@configuration是为了让其扫描,@ConfigurationProperties是定义属性前缀和配置文件里的前缀一样。
@Configuration
@ConfigurationProperties(prefix = "friends")
public class UserPojo {
    private String lastName;
    private int age;
    private List<String> pets;
    private Map<String, Object> conditional;

    public String getLastName() {
        return lastName;
    }

    public void setLastName(String lastName) {
        this.lastName = lastName;
    }

    public int getAge() {
        return age;
    }

    public void setAge(int age) {
        this.age = age;
    }

    public List<String> getPets() {
        return pets;
    }

    public void setPets(List<String> pets) {
        this.pets = pets;
    }

    public Map<String, Object> getConditional() {
        return conditional;
    }

    public void setConditional(Map<String, Object> conditional) {
        this.conditional = conditional;
    }

  @Override
    public String toString() {
        return "UserPojo{" +
                "lastName='" + lastName + '\'' +
                ", age=" + age +
                ", pets=" + pets +
                ", conditional=" + conditional +
                '}';
    }
}
配置文件定义
##对象注入
friends:
  lastName: zhangsan
  age: 20
  pets:
    - cat
    - dog
    - pig
  conditional:
    k1: v1
    k2: v2
    k3: v3
成功

注解注入
@PropertySource
PropertySource:加载指定的配置文件,将配置文件中配置的每一个属性的值,映射到这个组件中
pojo实体
@PropertySource(value = {"classpath:student.properties"})
@Component
@ConfigurationProperties(prefix = "student")
public class StudentPojo {
    private Integer id;
    private String name;
    private int age;

    @Override
    public String toString() {
        return "StudentPojo{" +
                "id=" + id +
                ", name='" + name + '\'' +
                ", age=" + age +
                ", address='" + address + '\'' +
                '}';
    }

    public Integer getId() {
        return id;
    }

    public void setId(Integer id) {
        this.id = id;
    }

    public String getName() {
        return name;
    }

    public void setName(String name) {
        this.name = name;
    }

    public int getAge() {
        return age;
    }

    public void setAge(int age) {
        this.age = age;
    }

    public String getAddress() {
        return address;
    }

    public void setAddress(String address) {
        this.address = address;
    }

    private String address;

}
新建配置文件student.properties

@ImportResource
定义pojo类
public class UserService {
    public UserService() {
        System.out.println("ImportResource->UserService");
    }
}
定义配置类
@Configuration
@ImportResource(value="classpath:bean.xml")
public class SpringConfig {

}
定义xml文件
<?xml version="1.0" encoding="UTF-8"?>
<beans xmlns="http://www.springframework.org/schema/beans"
       xmlns:xsi="http://www.w3.org/2001/XMLSchema-instance"
       xsi:schemaLocation="http://www.springframework.org/schema/beans http://www.springframework.org/schema/beans/spring-beans.xsd">
    <bean id="userService" class="com.springboot.demo.user.services.UserService" />
</beans>
yuml多文档模式
### 配置多环境
spring:
  profiles:
    active: custome   #指定环境名
---
env:
  name: customeA 		#环境名customeA
server:
  port: 9999
 ---
env:
  name: customeB			#指定环境名customeB
server:
  port: 1000


 174
174


 被折叠的 条评论
为什么被折叠?
被折叠的 条评论
为什么被折叠?
 到【灌水乐园】发言


